
1. Įvadas
This manual provides detailed instructions for the assembly, operation, and maintenance of your Benass 13x25 Heavy Duty Carport Canopy. Please read all instructions carefully before beginning assembly and retain this manual for future reference.
The Benass 13x25 Carport Canopy is designed to provide reliable shelter for vehicles and other equipment, featuring a robust galvanized steel frame and a durable PE canopy. Its dimensions are approximately 25 feet (Length) x 13 feet (Width) x 10.3 feet (Height).

Image 1.1: Benass 13x25 Carport Canopy with key dimensions.
2. Saugos informacija
Adherence to these safety guidelines is crucial for safe assembly and use of the carport canopy.
- Visada surinkite ir pritvirtinkite pastogę prie stabilaus pagrindo.
- Exercise caution when handling ropes, straps, and sandbags to prevent injury.
- Do not use the shelter in high winds or during severe weather conditions. Disassemble or secure the canopy appropriately during such events.
- Keep the shelter clean and free of debris to prevent fire hazards and maintain structural integrity.
3. Pakuotės turinys
Prieš pradėdami surinkimą, patikrinkite, ar yra visi komponentai ir ar jie nepažeisti. Pakuotėje yra:
- Galvanized Steel Frame (1.5" diameter tubing)
- 170gms PE Canopy Top
- 2 vėjo virvės
- 2 Binding Straps
- 4 Portable Sandbags
- 2 Šoninės sienelės
- 1 Saulės šviesa
- 1 Šviesos juostelė
- Ground Nails (Ø9 alloy ground nail with hook)
- Screwed Base Nails (Ø6 alloy screwed base nail)
- Highly Extensible Buckles
- Reinforced Support Bars

Image 3.1: Key components for stable installation.
4. Sąranka ir surinkimas
Assembly of the Benass Carport Canopy typically requires two people for optimal ease and safety. Follow the included step-by-step instructions provided in the separate assembly guide for detailed diagrams and procedures.
4.1 Rėmo surinkimas
- Unpack all frame components and lay them out on a clear, flat surface.
- Connect the galvanized steel tubes according to the assembly guide, ensuring all connections are secure. The frame utilizes 1.5-inch diameter tubing for enhanced durability.
- Install the reinforced support bars to improve the overall stability of the structure.
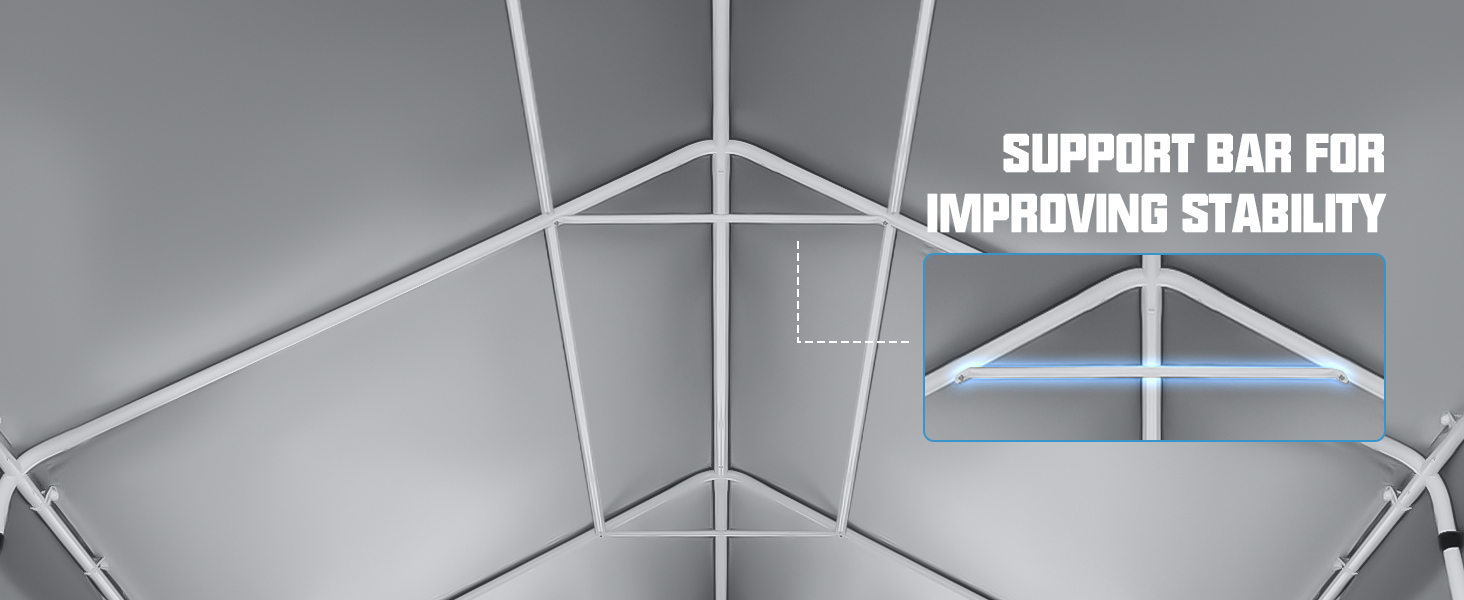
Image 4.1: Internal frame structure with support bars.
4.2 Stoginės ir šoninės sienelės montavimas
- Atsargiai uždenkite 170 g PE stogelio viršų ant surinkto rėmo. Įsitikinkite, kad jis yra centre ir tolygiai paskirstytas.
- Secure the canopy to the frame using the provided binding straps and buckles.
- Attach the two sidewalls, ensuring they are properly aligned with the frame and canopy.
4.3 Anchoring the Carport
- Use the alloy ground nails with hooks and alloy screwed base nails to firmly anchor the carport to the ground.
- Fill the four portable sandbags and place them at the base of the carport for additional stability.
- Attach and tension the two wind ropes to further secure the structure against wind.
Pastaba: Some users have reported that the provided M screws may be shorter than ideal. If you encounter difficulty securing connections, consider using 1-inch self-driving roof screws for improved stability.
5. Naudojimo instrukcijos
The Benass Carport Canopy is designed for ease of use and adaptability to various weather conditions.
5.1 Roll-Up Zipper Door
The carport features a roll-up zipper door at the front. This door can be opened and rolled up to allow vehicle access or to enhance ventilation. When closed, it provides full enclosure and protection.

Image 5.1: Roll-up zipper door for shading and ventilation.
5.2 Roll-Up Mesh Windows
The sidewalls are equipped with four mesh roll-up windows. These windows can be opened to ensure air circulation within the carport, preventing heat buildup and improving airflow, especially during prolonged parking.

Image 5.2: Roll-up and down mesh windows.
5.3 Solar Light and Light Strip
The included solar light and light strip provide illumination for night indication and convenience. Position the solar light to maximize sun exposure for charging. The light strip can be arranged as desired for additional visibility.

Image 5.3: Carport with solar lights and light strip for night use.
6. Priežiūra
Regular maintenance will extend the lifespan and performance of your carport canopy.
- Valymas: Periodically clean the PE canopy with mild soap and water. Avoid harsh chemicals or abrasive cleaners that could damage the material. Rinse thoroughly.
- Šiukšlių pašalinimas: Keep the canopy free of accumulated leaves, snow, or other debris, especially during winter months, to prevent sagging or structural strain.
- Rėmo apžiūra: Regularly check all frame connections, bolts, and anchoring points for tightness and signs of wear or corrosion. Tighten as necessary.
- Baldakimo apžiūra: Inspect the canopy for any tears, punctures, or signs of UV degradation. Promptly repair any damage to prevent further deterioration.
- Pasirengimas orams: In anticipation of severe weather (high winds, heavy snow), consider temporarily disassembling the canopy or reinforcing its anchoring to prevent damage.
7. Problemų sprendimas
This section addresses common issues you might encounter with your carport canopy.
- Baldakimo nukritimas: Ensure the frame is correctly assembled and all support bars are in place. Check for excessive snow or water accumulation on the canopy and remove it.
- Vėjo nestabilumas: Verify that all ground anchors, sandbags, and wind ropes are properly installed and tensioned. Ensure the carport is on a stable, level surface.
- Vandens nuotėkis: Inspect the canopy for tears or loose seams. Ensure the canopy is taut and properly secured to allow water runoff. The 3-layer PE tarp with coating is designed to be waterproof.
- Surinkimo sunkumai: Refer to the detailed assembly guide. Ensure all parts are correctly identified and oriented. An extra pair of hands can significantly ease the process.

Image 7.1: Waterproof and UV protective features of the canopy.
8. Specifikacijos
| Prekės ženklas | Benass |
| Modelis | 13x25 |
| Gaminio matmenys (I x P x A) | 25 ft x 13 ft x 10.3 ft (762cm x 396cm x 315cm) |
| Rėmo medžiaga | 1.5 colio cinkuoto legiruotojo plieno |
| Baldakimo medžiaga | 170gms PE (Polyethylene) |
| Spalva | Baltas |
| Prekės svoris | 167 svaro |
| Atsparumo vandeniui lygis | Atsparus vandeniui |
| UV apsauga | Yes (UV protection level 80+) |
| Reikalingas surinkimas | Taip |
9. Garantija ir palaikymas
Benass offers a one-year warranty for this product, ensuring satisfactory after-sales service. If you encounter any problems upon receiving the carport or during its use, please contact Benass customer support for assistance. We are committed to serving you promptly.
For support, please refer to the contact information provided with your purchase documentation or visit the official Benass websvetainę.