1. Įvadas
Thank you for choosing the Zeadio Gimbal Sling Handgrip Handle. This accessory is designed to enhance the versatility and comfort of your DJI RS series gimbal, particularly for achieving stable low-angle shots. This manual provides essential information for the proper setup, operation, and maintenance of your handgrip.
2. Produktas baigtasview ir komponentai
The Zeadio Gimbal Sling Handgrip Handle is constructed from a durable combination of silicone and aluminum alloy, offering both strength and a comfortable, non-slip grip. It features multiple mounting points for accessories and a robust attachment mechanism for your gimbal.

Vaizdas: Viršview of the Zeadio Gimbal Sling Handgrip Handle, highlighting key components such as the NATO clamp, locking knob, silicone-coated handgrip, 1/4" threaded holes, and 3/8" threaded holes with ARRI locating holes.
- NATO klamp: Securely attaches the handgrip to your gimbal. Features a locking knob and an anti-removal stud for quick and safe operation.
- Rosette Joint: A built-in stainless steel rosette joint allows for 360-degree fine-tuning of the handgrip angle, providing flexibility for various shot angles.
- Tvirtinimo taškai: Equipped with multiple 1/4" and 3/8" threaded holes, ARRI locating holes, and two cold shoe mounts for attaching accessories like LED lights, sound receivers, or monitors.
- Silicone Grip: The non-slip soft silicone grip ensures a comfortable and secure hold during operation.
3. Suderinamumas
This Zeadio Gimbal Sling Handgrip Handle is ONLY compatible with DJI RS 2, DJI RSC 2, DJI RS 3, and DJI RS 3 Pro stabilizers.

Image: The Zeadio handgrip shown attached to different DJI RS series gimbals, including RS 2, RSC 2, RS 3, and RS 3 Pro, illustrating its compatibility.
4. Sąrankos instrukcijos
- Nustatykite tvirtinimo tašką: Locate a NATO rail on your compatible DJI RS series gimbal.
- Pritvirtinkite rankenėlę: Align the NATO clamp of the Zeadio handgrip with the NATO rail on your gimbal. Slide the clamp ant bėgio.
- Secure Handgrip: Tighten the locking knob on the NATO clamp until the handgrip is firmly secured to the gimbal. Ensure the anti-removal stud is engaged for added safety.
- Patikrinkite stabilumą: Gently test the attachment to ensure there is no wobble or looseness before operating your equipment.
5. Naudojimo instrukcijos
5.1. Kampo reguliavimas
The integrated rosette joint allows for quick and precise angle adjustments to achieve desired shooting positions, especially for low-angle shots.
- Atlaisvinkite reguliavimo rankenėlę: Locate the adjustment knob on the rosette joint. Loosen it counter-clockwise.
- Sureguliuoti kampą: Rotate the handgrip to your desired angle. The rosette joint allows for 360-degree adjustment.
- Saugus kampas: Tighten the adjustment knob clockwise until the handgrip is securely fixed in the new position.

Image: The handgrip shown adjusting its angle by 180 degrees, illustrating the flexibility provided by the rosette joint for quick angle changes.
5.2. Priedų pritvirtinimas
Utilize the various mounting points to expand your setup with additional accessories.
- 1/4" and 3/8" Threaded Holes: Use these standard threads to attach monitors, microphones, or other compatible accessories.
- ARRI skylių vietos nustatymas: For accessories with ARRI-style anti-twist pins, ensuring a secure, rotation-free attachment.
- Šaltojo bato tvirtinimai: Ideal for attaching LED lights, wireless receivers, or other cold shoe compatible devices.
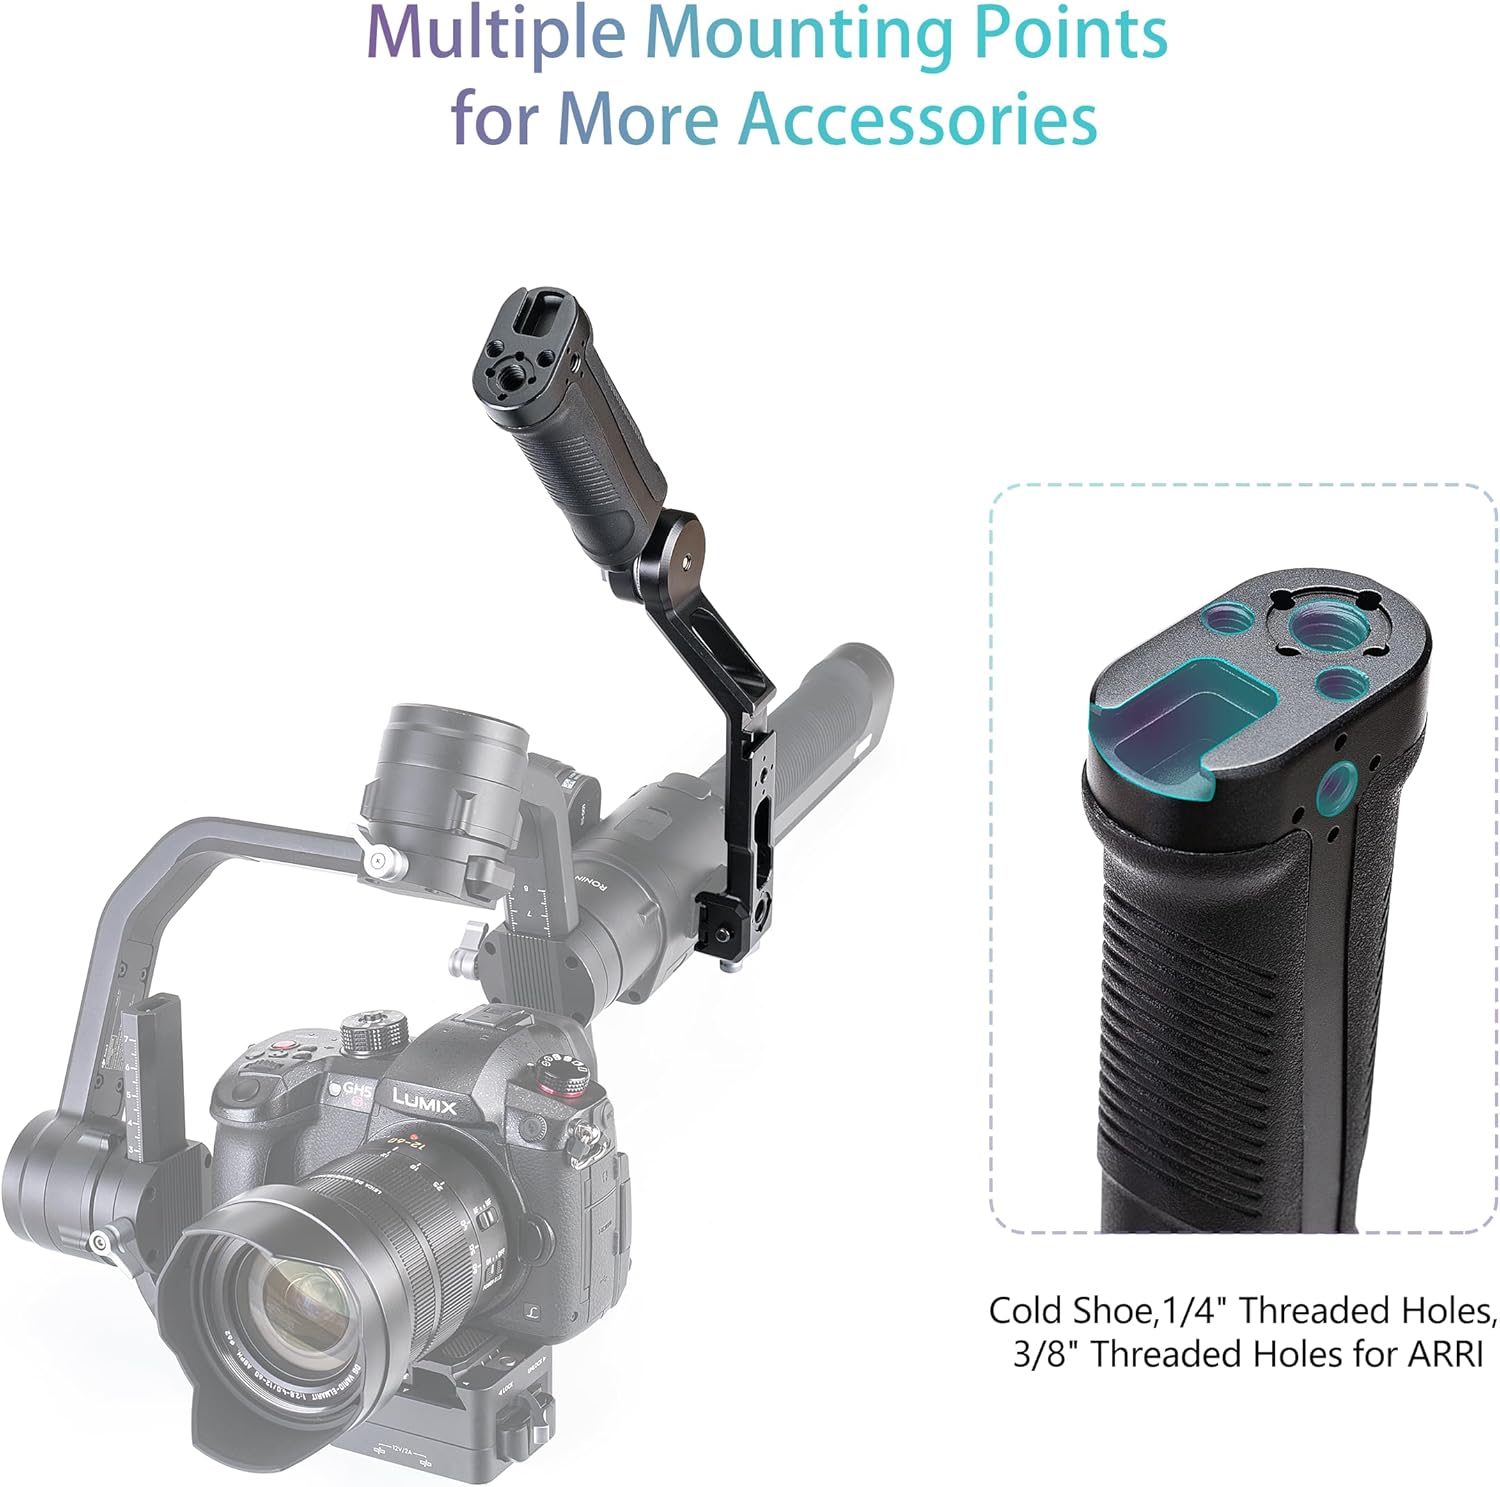
Image: The handgrip demonstrating its multiple mounting points, including cold shoe, 1/4" threaded holes, and 3/8" threaded holes for ARRI pins, with an example of an attached accessory.
6. Priežiūra
- Valymas: Wipe the handgrip with a soft, dry cloth to remove dust and debris. For stubborn dirt, a slightly damp Galima naudoti šluostę, po kurios nedelsiant nusausinkite. Venkite stiprių cheminių medžiagų ar abrazyvinių valiklių.
- Saugykla: Store the handgrip in a cool, dry place away from direct sunlight and extreme temperatures.
- Patikra: Periodiškai patikrinkite visus varžtus ir jungtis, kad įsitikintumėte, jog jie yra tvirtai priveržti ir saugūs.
7. Problemų sprendimas
- Handgrip feels loose after attachment: Užtikrinti NATO klasęamp's locking knob is fully tightened. Check that the NATO rail on your gimbal is clean and free of obstructions.
- Angle adjustment is difficult or slips: Loosen the rosette joint adjustment knob slightly, reposition, and then tighten firmly. Ensure no debris is caught in the joint mechanism.
- Accessories not attaching securely: Verify that the accessory's screw or mount type matches the handgrip's mounting points (e.g., 1/4" screw for 1/4" hole, cold shoe for cold shoe mount). Ensure screws are tightened appropriately.
8. Specifikacijos

Image: Diagram illustrating the dimensions of the Zeadio Gimbal Sling Handgrip Handle, showing its length, width, and height.
| Funkcija | Detalė |
|---|---|
| Suderinamumas | DJI RS 2, RSC 2, RS 3, RS 3 Pro |
| Apkrova | Iki 8 kg |
| Medžiaga | Aliuminio lydinys, silikonas |
| Svoris | 300 gramų |
| Spalva | Juoda |
| Matmenys | 6.89 x 2.36 x 1.89 colio (175 mm x 60 mm x 48 mm) |
| Montavimo taškai | 1/4" threaded holes, 3/8" threaded holes with ARRI locating holes, Cold Shoe mounts |
9. Garantija ir palaikymas
For warranty information and customer support, please refer to the Zeadio official websvetainėje arba susisiekite su pardavėju. Išsaugokite pirkimo kvitą garantiniams reikalavimams.