
Įvadas
This manual provides essential instructions for the safe and effective use of your Sony H400 Digital Camera. Please read this manual thoroughly before operating the camera and retain it for future reference.
Kas yra dėžutėje
Patikrinkite, ar pakuotėje yra visi reikalingi daiktai:
- Sony Cyber-shot DSC-H400 Digital Camera
- Sony NP-BX1 Rechargeable Lithium Ion Battery
- Kintamosios srovės adapteris AC-UB10C
- Daugiafunkcis USB laidas
- Pečių dirželis
- Objektyvo dangtelis
- Instrukcijų vadovas (šis dokumentas)
- Informacija apie garantiją
Sąranka
1. Pečių dirželio pritvirtinimas
Attach the provided shoulder strap to the camera's strap lugs. Ensure it is securely fastened to prevent accidental drops.
2. Baterijos įdėjimas
- Open the battery/memory card cover located on the bottom of the camera.
- Insert the NP-BX1 rechargeable battery with the correct orientation, ensuring the terminal matches the camera's battery compartment. Push until it clicks into place.
- Tvirtai uždarykite akumuliatoriaus / atminties kortelės dangtelį.
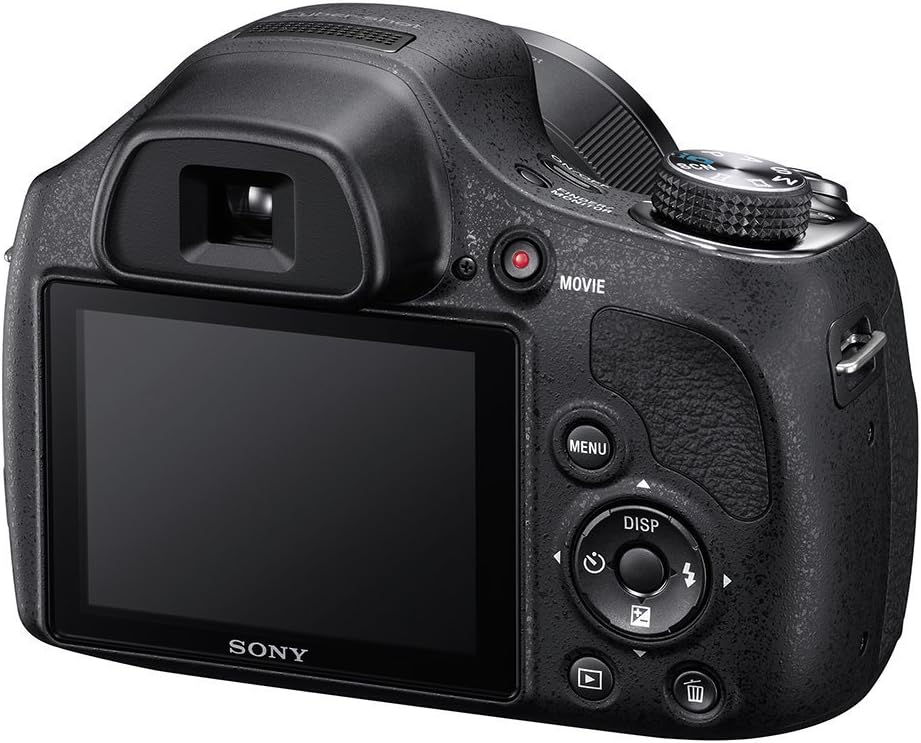
Vaizdas: Galinis view of the camera, illustrating the battery/memory card compartment location (bottom, not visible in this specific image but implied by general camera design) and main controls.
3. Atminties kortelės įdėjimas
The camera supports SD, SDHC, SDXC, Memory Stick PRO Duo, and Memory Stick PRO-HG Duo cards.
- Atidarykite akumuliatoriaus / atminties kortelės dangtelį.
- Įkiškite atminties kortelę į lizdą tinkama kryptimi, kol pasigirs spragtelėjimas.
- Tvirtai uždarykite akumuliatoriaus / atminties kortelės dangtelį.
4. Akumuliatoriaus įkrovimas
Use the supplied AC Adaptor AC-UB10C and Multi USB Cable to charge the NP-BX1 battery while it is in the camera.
- Connect the Multi USB Cable to the camera's USB port.
- Connect the other end of the USB cable to the AC Adaptor.
- Plug the AC Adaptor into a wall outlet. The charge lamp užsidegs.
- Įkrovimas baigtas, kai įkrovimo lamp išsijungia.
Fotoaparato valdymas
Maitinimo įjungimas/išjungimas
Paspauskite ĮJUNGTA/IŠJUNGTA mygtuką, kad įjungtumėte arba išjungtumėte kamerą.
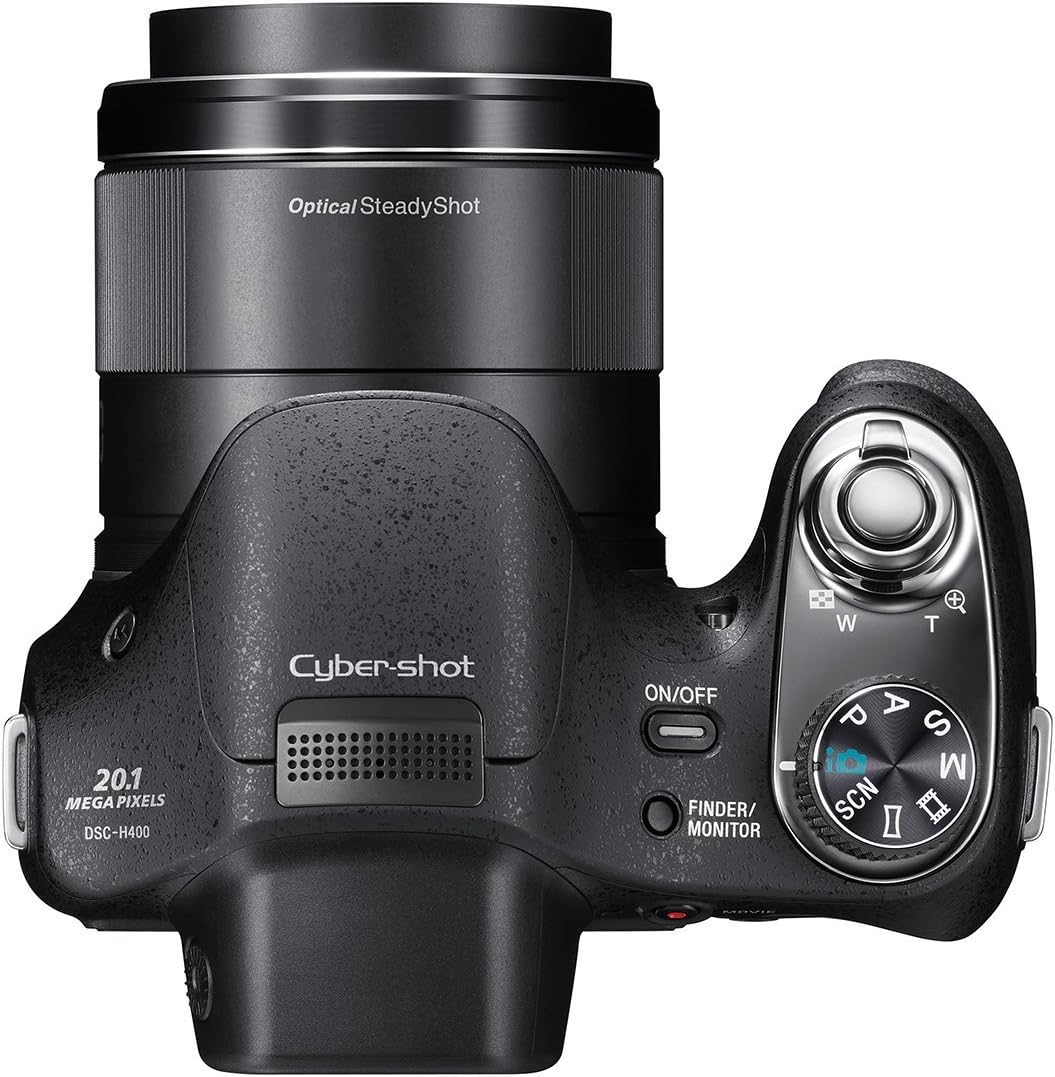
Vaizdas: Viršus view of the camera, highlighting the ON/OFF button, shutter button with zoom lever, and mode dial.
Nejudančių vaizdų fotografavimas
- Pasirinkite fotografavimo režimą: Rotate the mode dial to select your desired shooting mode (e.g., Intelligent Auto, Program Auto, Manual, Scene Selection).
- Įrėmink savo kadrą: Use the LCD monitor or electronic viewieškiklis, kad sukomponuotumėte vaizdą.
- Mastelio keitimas: Norėdami reguliuoti 63 kartų optinį priartinimą, naudokite priartinimo svirtelę aplink užrakto mygtuką.
- Fokusas: Press the shutter button halfway down to autofocus. The camera will confirm focus.
- Užfiksuoti: Norėdami nufotografuoti, iki galo paspauskite užrakto mygtuką.

Vaizdas: priekis view of the camera, showcasing the lens with "63x Optical Zoom" text.
Filmų įrašymas
The camera can record movies in HD 720p resolution.
- Paspauskite FILMAS mygtuką, kad pradėtumėte įrašymą.
- Paspauskite FILMAS mygtuką dar kartą, kad sustabdytumėte įrašymą.
Vaizdas: Galinis view of the camera, indicating the location of the dedicated MOVIE record button.
„Flash“ naudojimas
The built-in flash operates in automatic mode. The camera will determine if flash is needed based on lighting conditions.
Atkūrimas
Paspauskite Atkūrimas button (usually indicated by a triangle icon) to view jūsų užfiksuotus vaizdus ir vaizdo įrašus.
Prisijungimas prie kompiuterio
Use the Multi USB Cable to connect the camera to your computer for transferring photos and videos.
- Prijunkite fotoaparatą prie kompiuterio naudodami USB kabelį.
- Kamera kompiuteryje bus rodoma kaip išimamas diskas.
- Vilkite ir numeskite files juos perkelti.
Priežiūra
Fotoaparato valymas
- Kameros korpusas: Nuvalykite minkšta, sausa šluoste. Įsisenėjusiam purvui lengvai nuvalykite šluoste.ampperplaukite vandeniu ir tada nusausinkite.
- Objektyvas: Dulkėms pašalinti naudokite objektyvo šepetėlį, tada švelniai nuvalykite objektyvo valymo šluoste. Nelieskite objektyvo paviršiaus pirštais.
- LCD ekranas: Švelniai nuvalykite minkštu, sausu skudurėliu.
Akumuliatoriaus priežiūra
- Nenaudojamą akumuliatorių laikykite vėsioje, sausoje vietoje.
- Saugokite, kad akumuliatorius nepatektų į ekstremalias temperatūras.
- Charge the battery fully before extended storage and periodically during storage to maintain its life.
Sandėliavimas
When storing the camera for an extended period, remove the battery and memory card. Store the camera in a dry, dust-free environment, preferably in a camera bag or case.
Trikčių šalinimas
Kamera neįsijungia
- Įsitikinkite, kad baterija tinkamai įdėta ir visiškai įkrauta.
- Patikrinkite, ar akumuliatoriaus gnybtai švarūs.
Vaizdai yra neryškūs
- Įsitikinkite, kad objektyvas yra švarus ir be dėmių.
- Prieš paspausdami užrakto mygtuką iki galo, iki pusės nuspauskite jį, kad fotoaparatas galėtų sufokusuoti.
- Use Optical SteadyShot image stabilization, especially when zooming or in low light.
- Check your shooting mode; some modes may have different focusing characteristics.
Shutter Lag
- In some shooting conditions, there might be a slight delay. Try anticipating the moment you want to capture.
- Ensure sufficient lighting for faster autofocus.
LCD Screen Too Bright/Dim
- Adjust the brightness settings in the camera's menu.
- Naudokite elektroninį viewfinder in bright outdoor conditions if the LCD is difficult to see.
Negalima perkelti Files prie kompiuterio
- Įsitikinkite, kad USB kabelis yra tvirtai prijungtas tiek prie fotoaparato, tiek prie kompiuterio.
- Išbandykite kitą kompiuterio USB prievadą.
- Restart both the camera and the computer.
Specifikacijos
| Prekės ženklas | Sony |
| Modelio pavadinimas | Sony H400 |
| Modelio numeris | DSCH400/B |
| Nuotraukų jutiklio skiriamoji geba | 20 MP |
| Optinis priartinimas | 63x |
| Vaizdo stabilizavimas | Optinis |
| Ekrano dydis | 3 colių |
| Vaizdo raiška | HD 720p |
| Ryšio technologija | USB |
| Palaikoma File Formatas | JPEG (Stills), MPEG-4, H.264 (Video) |
| Compatible Flash Memory Type | SD/SDHC/SDXC/Memory Stick PRO Duo/Pro-HG Duo |
| Prekės svoris | 1.4 svaro |
| Viewieškiklis | Elektroninė |
| Maksimalus židinio nuotolis | 1550 milimetrų |
| Minimalus židinio nuotolis | 25 milimetrų |
| Didžiausia diafragma | 3.4 f |
Informacija apie garantiją
Šiam gaminiui taikomas a 90 dienų ribota aparatinės įrangos garantija. Please refer to the provided warranty document for full terms and conditions.
Palaikymas
For further assistance, please visit the official Sony support website or contact their customer service. Keep your model number (DSCH400/B) and serial number ready when seeking support.