POSITAL Absolute Encoder With Profinet Interface

Product Information
Specifications
- Product: Absolute Encoder with Profinet Interface
- Interface: Profinet
- Compatibility: PLCs
Product Usage Instructions
Configuring Parameters
Multiple parameters can be configured in the Module Access Point such as Measuring units per revolution, Total measuring range, etc.
Preset Value Settings
- In a free row, add the address %QD10 for preset position value.
- Add the desired value and configure preset control.
- Save the Preset value.
Monitoring Velocity
- Add the Address for Velocity monitoring.
- Monitor velocity while moving the shaft.
Instructions for use
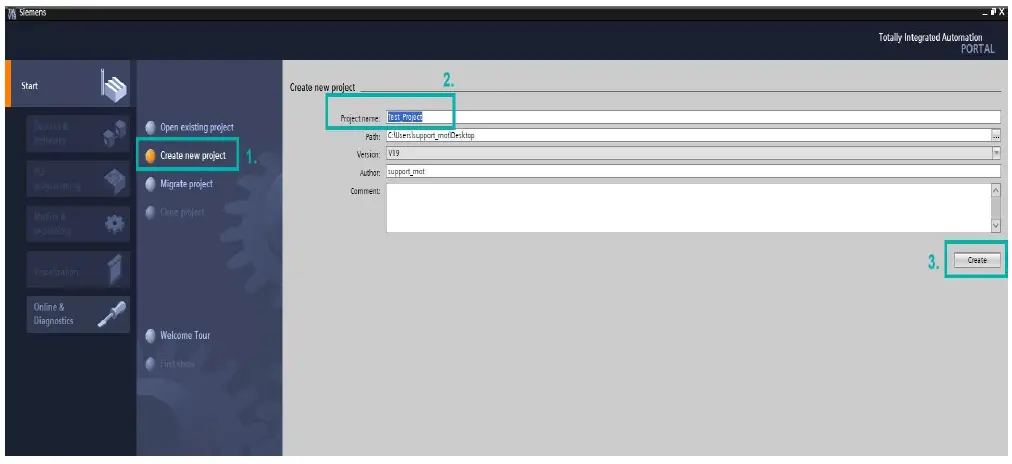
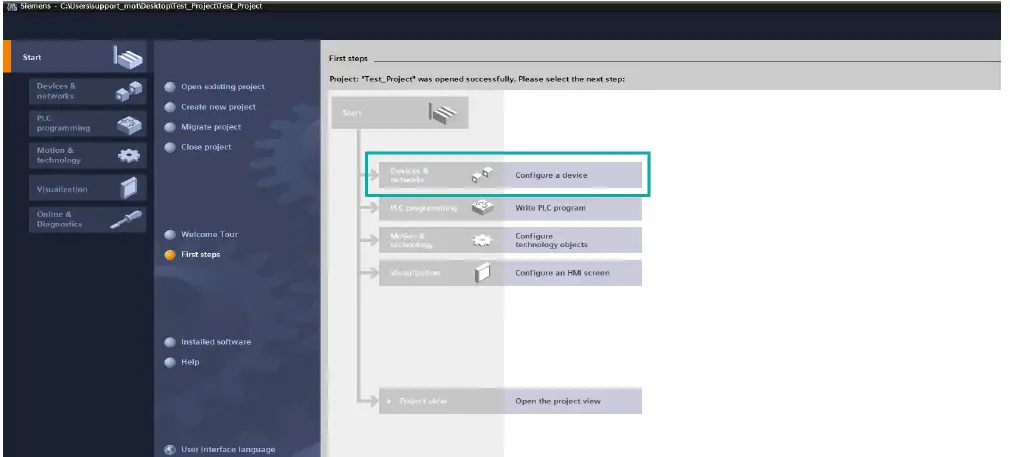
Create a New Project
- Configure a Device.
- Add a PLC.
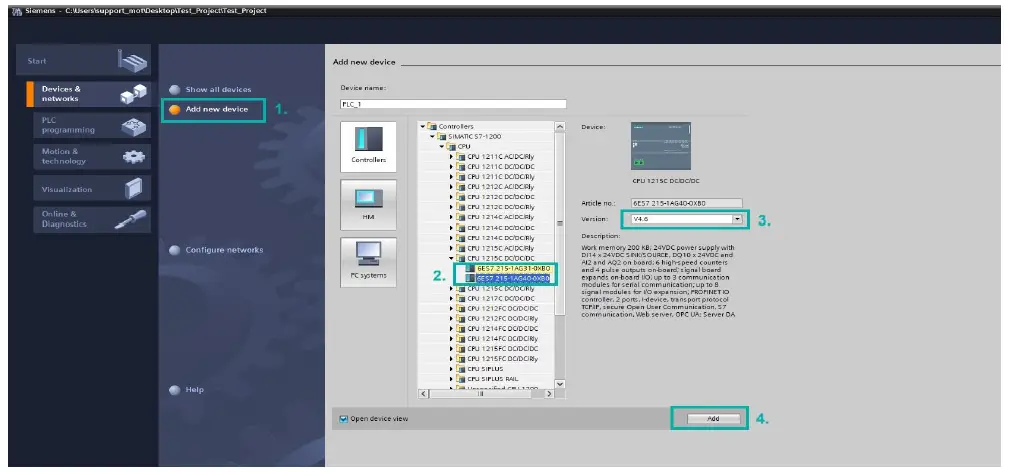
Configure a Device
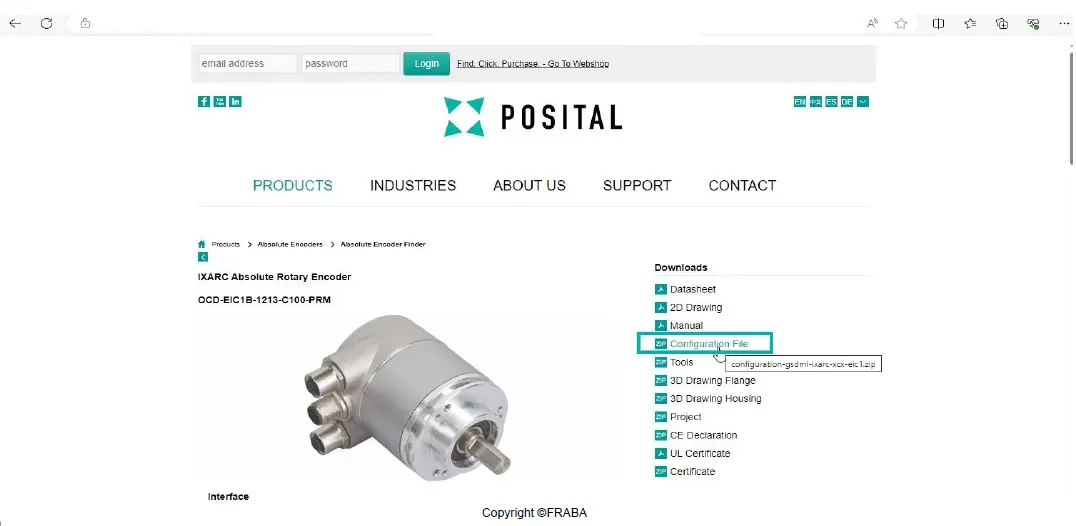
- Download the correct GSDML File from the product website.
- Add the GSDML File to your system.
- Install the GSDML file.
- Add the Encoder to your project.
 Add a PLC
- Assign the Encoder to the corresponding PLC.
- Establish a connection ensuring it corresponds with the onsite cable connection.
- Choose the Telegram and assign a device name.
- Select the encoder to be assigned and set its IP address.
 Download the correct GSDML File from our Website
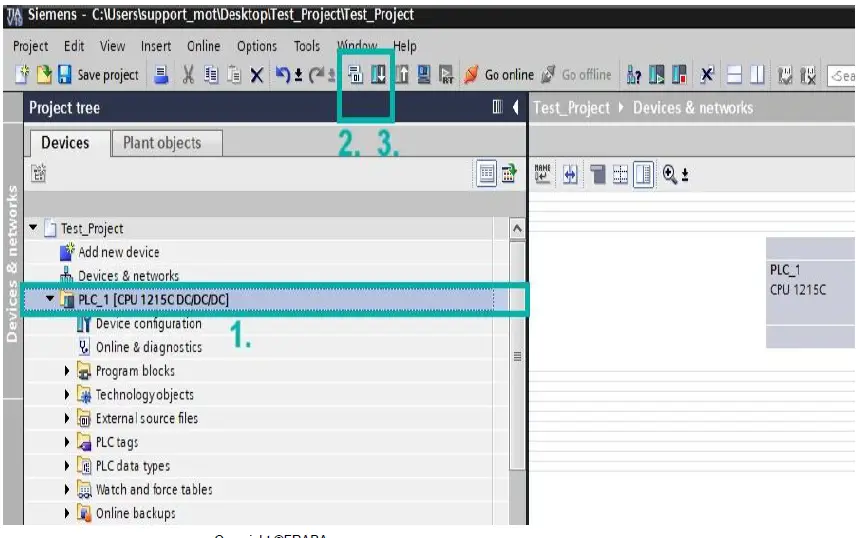
- Compile and download the project.
- Go online to check IO addresses in the Telegram for monitoring values.
- Monitor values using Watch and force tables.
 Add the GSDML File
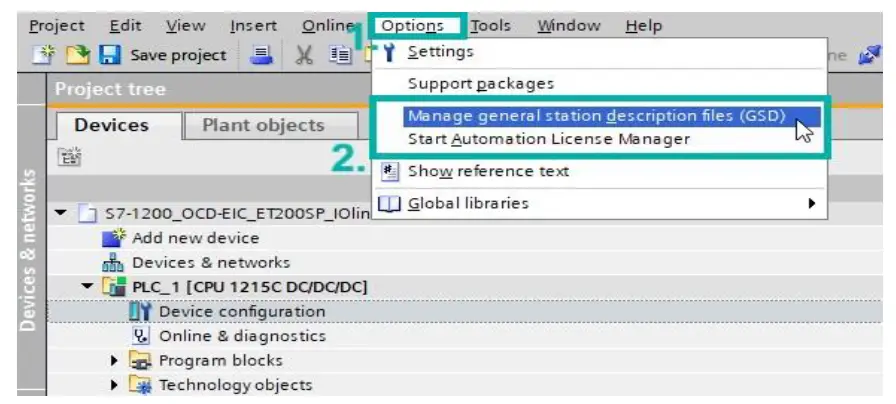
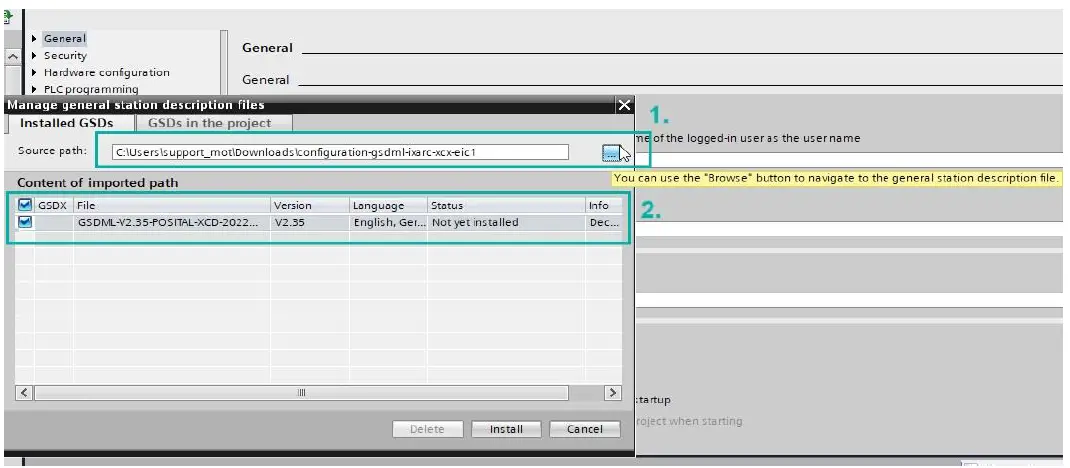
Installation
Install the GSDML file
 Add the Encoder
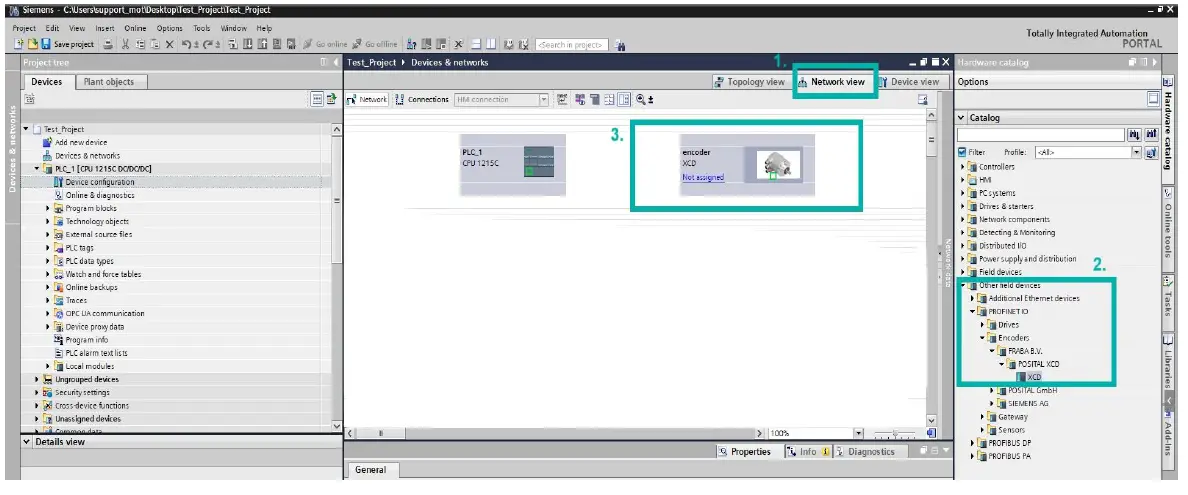 Assign the Encoder
- Click on Not Assigned in the encoder frame
- Assign it to the corresponding PLC
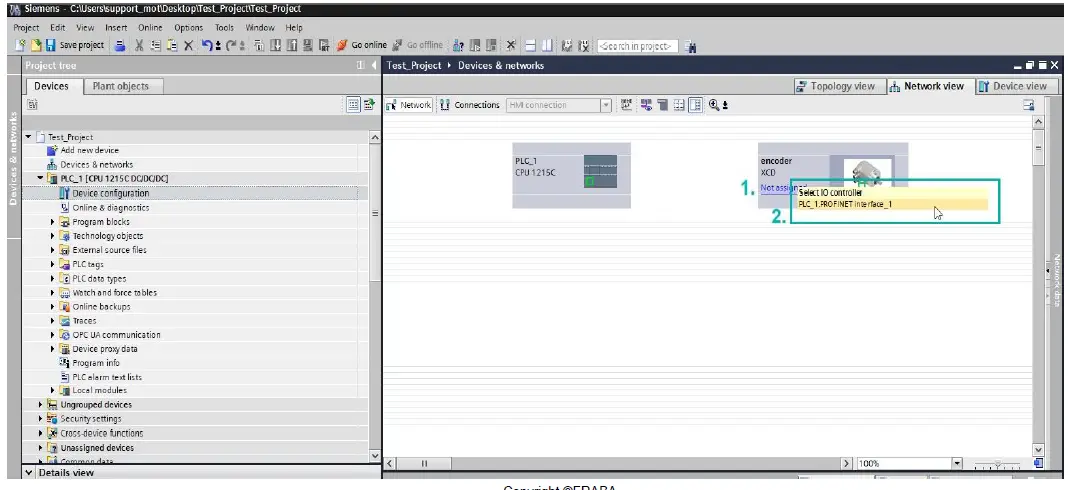 Establish the Connection
Important: The connection must correspond with the onsite cable connection of your system.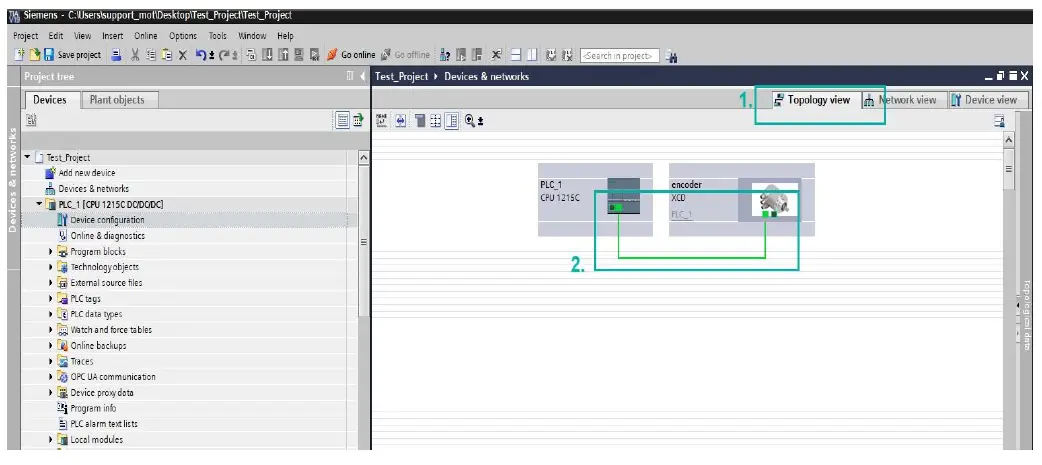 Choose the Telegram
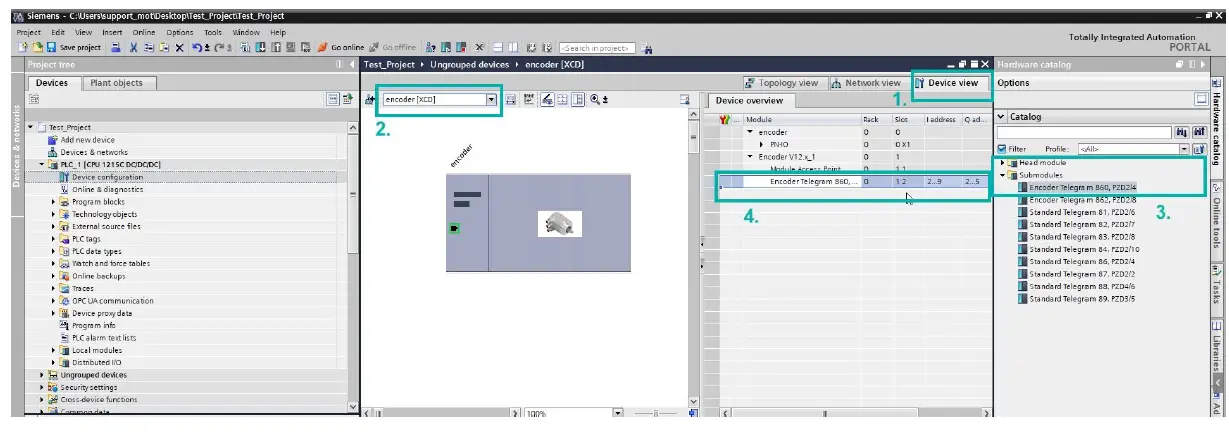 Assign Device Name
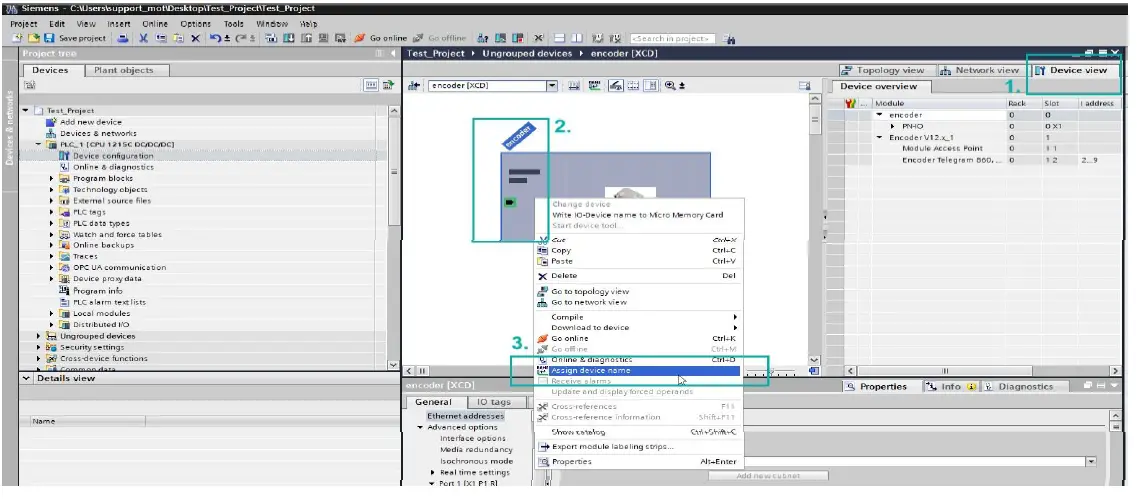 Select the encoder to be assigned
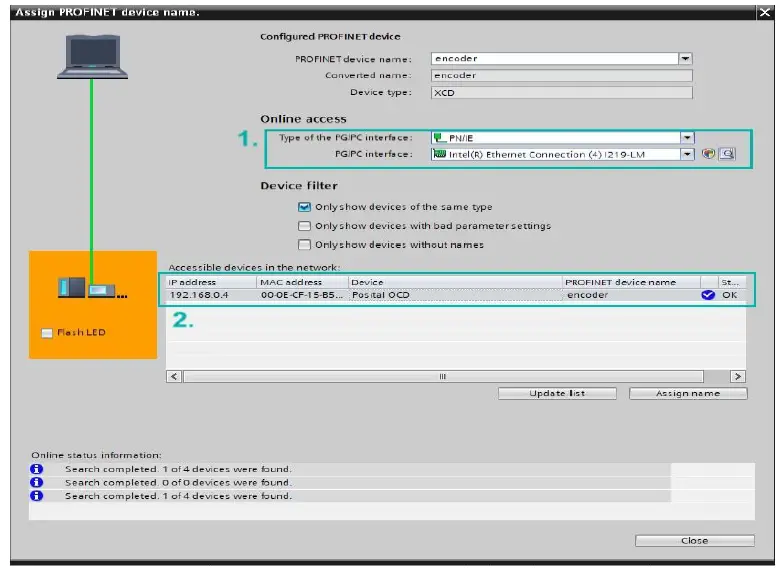
Set the IP address of the Encoder 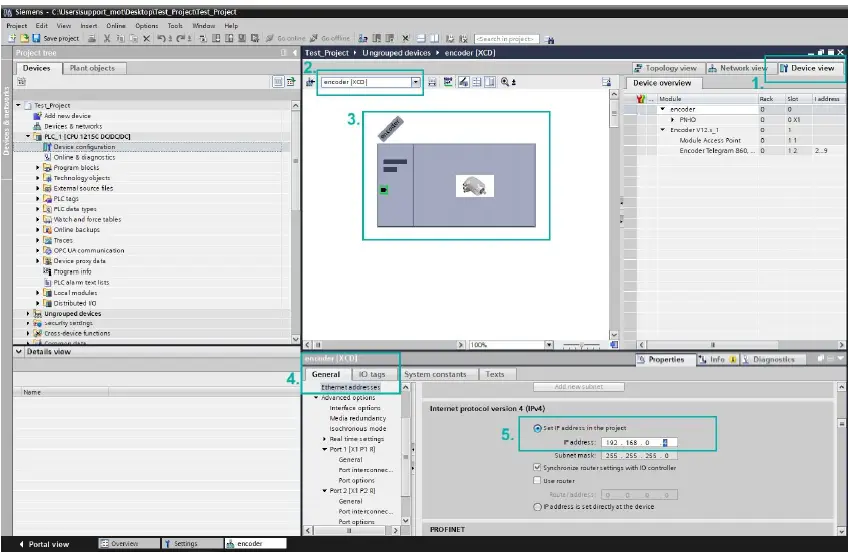
Multiple parameters can be configured in Module Access Point
You can configure several parameters you need: Measuring units per revolution, Total measuring range, etc. 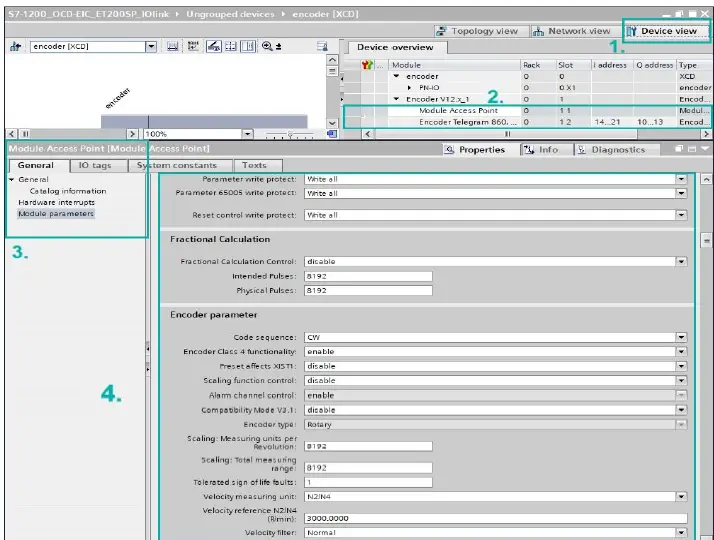
Compile and Download the Project
 Go Online
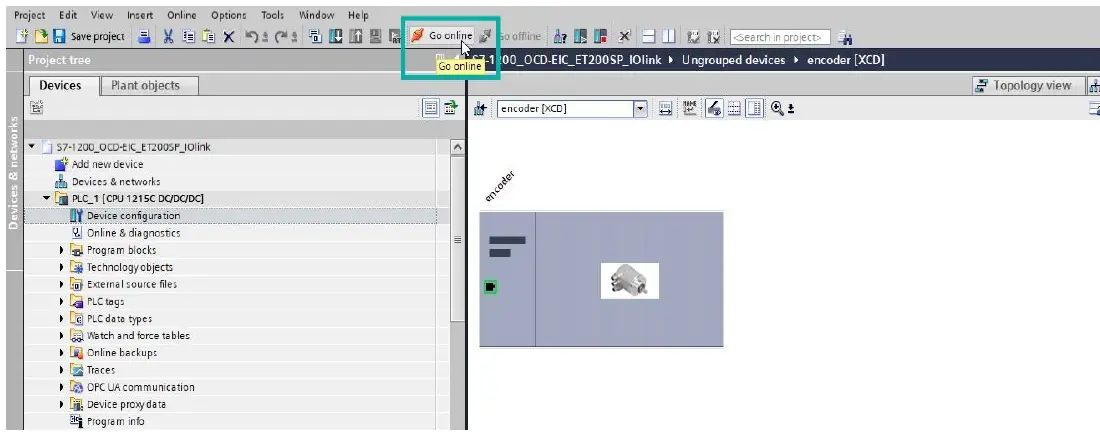 Check the IO Addresses in the Telegram
Important: Pay attention to the I/O addresses. You need them later when the position values are monitored.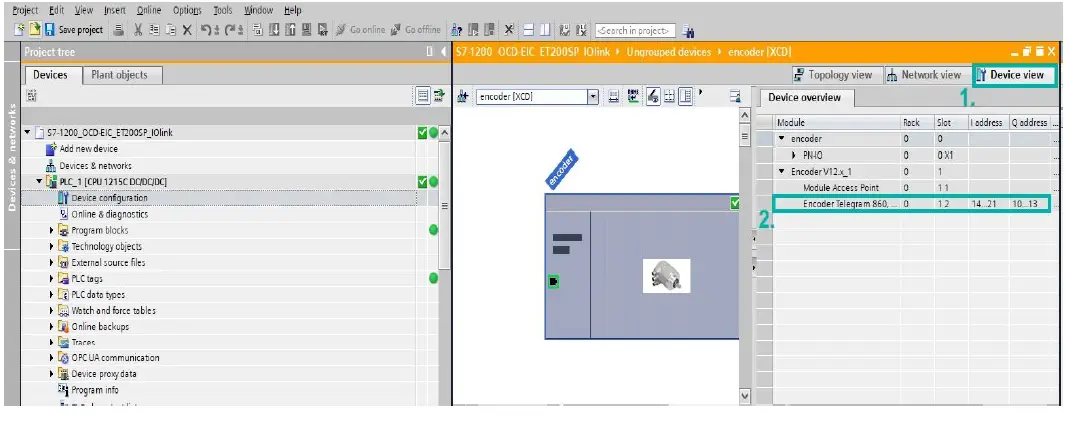 Monitors Values
- Use the Watch and force tables to monitor values
- Go to Force table
- Click on Monitor Values
- In a free row add the address: “%ID14“ to monitor position value
Important: The value in blue depends on the chosen Telegram (here Telegram 860). Check the manual for more information.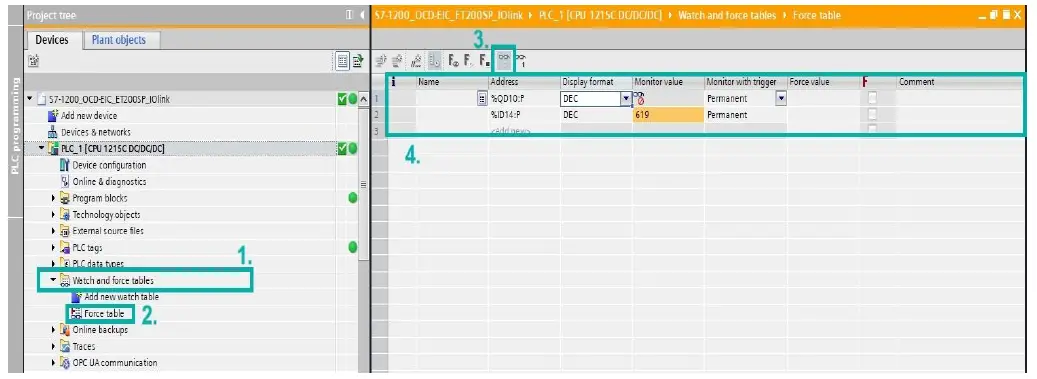
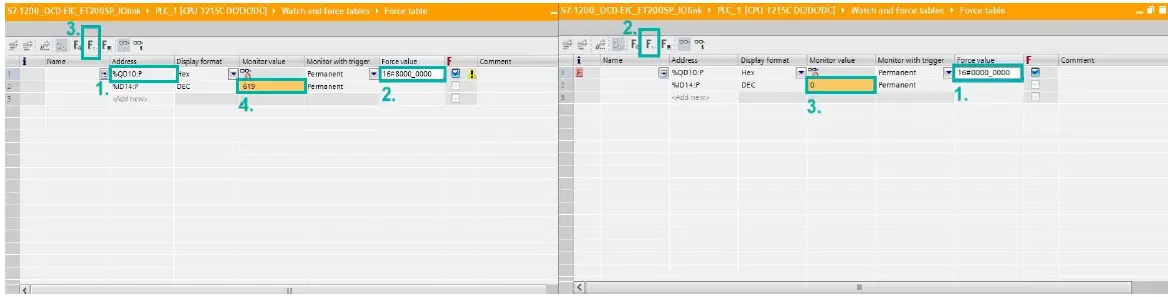
Preset Value
- In a free row add the address: “%QD10” for preset position value
- Add the desired value(Bit 31 is set to “1” for Preset Control)
- Click on Force
Important: The value in blue depends on the chosen Telegram (here given for Telegram 860).
- Save the Preset: Bit 31 is set back to “0” for saving the preset
- Click on Force
- Now the Preset is set to “0”
Now Values in cell 1 and cell 3 are equal. Value from cell 1 was “forced” in cell 3
Preset Value – Explanation
The way of defining the preset value: Preset Control: Bit 31 must be set the to “1”
- In HEX it is: 16#8000_0000
- In BIN it is: 2#1000_0000_0000_0000_0000_0000_0000_0000
We recommend to use the Hexadecimal values. As it is shorter, it is less likely to lead to mistakes.
Important: For more information check “Preset Value” chapter in the manual
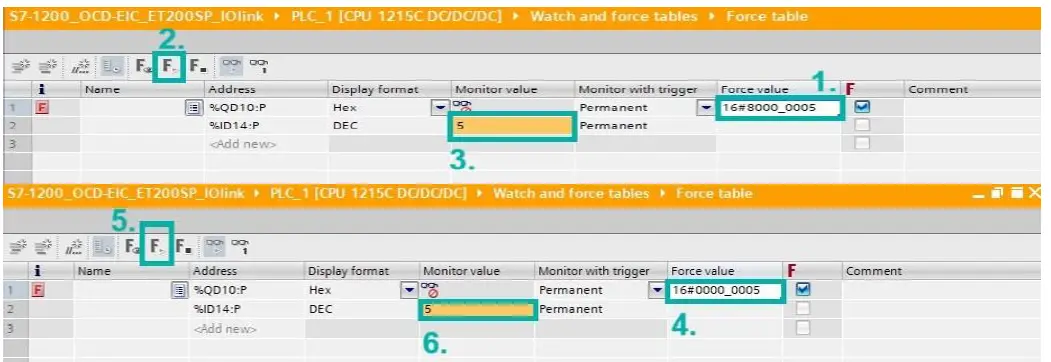
Example: Set the Preset to “5”
- In cell 1 preset control is active (31 bit is set to “1” HEX: 16#8000_0000) and the desired value is set: “5”
- Click on Force
- The value is set to 5
- Save the Preset: 31 bit back to “0”
- Click on Force
- The value is set and saved to 5
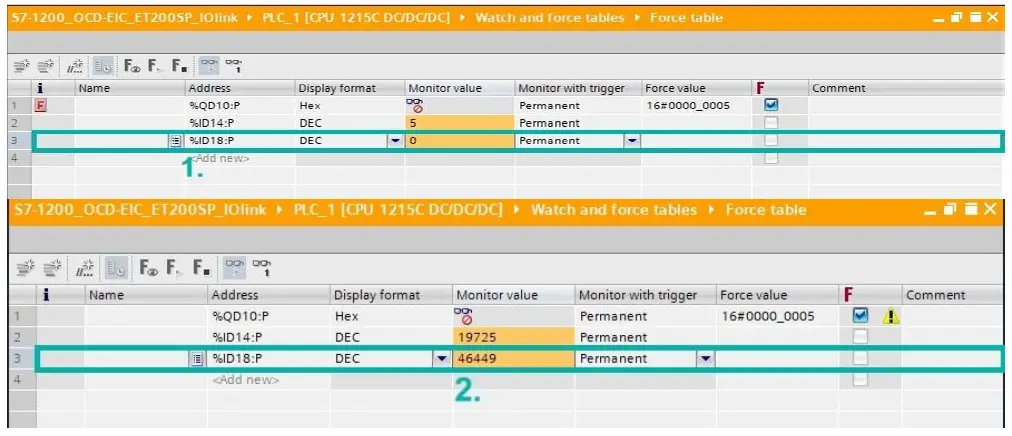
Monitor the Velocity
- Add the Address for the Velocity : ID18 (ID14 +4) in that case
- When moving the shaft, the velocity is monitored
Frequently Asked Questions
- Q: How do I monitor position values?
- A: Use the Watch and Force tables to monitor values. In a free row, add the address %ID14 to monitor position value. Make sure to pay attention to the I/O addresses.
- Q: How do I set and save a Preset value?
- A: To define and save a Preset value, follow the instructions provided in the manual under the Preset Value chapter. Ensure to set Bit 31 for Preset Control and use Hexadecimal values for accuracy.
Documents / Resources
 | POSITAL Absolute Encoder With Profinet Interface [pdf] User Guide Absolute Encoder With Profinet Interface, Absolute Encoder With Profinet Interface, Encoder With Profinet Interface, Profinet Interface, Interface |


