Ignite rev 1.2 Smart Sensor Installation Guide
WHAT’S IN THE BOX
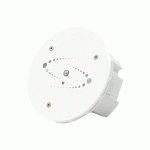
- 1 x Ignite Smart Sensor

- 2 x AAA Batteries

- 1 x Screw Pack

TOOLS REQUIRED
- Drill + 5mm Drill Bit

- Phillips Screwdriver

INTRODUCTION
The Ignite Smart Sensor will detect temperature, motion and humidity to help improve the efficiency of your heating. This will link into an existing Ignite Heating System.
The Smart Sensor should not be installed in areas subject to extended periods of high humidity, e.g. bathrooms
SPECIFICATIONS
Power Supply:
2 x AAA Alkaline Batteries
Temperature Range:
0-40°C
Humidity Range:
0-100% Rh
Motion Sensing Range:
70°@ 5 Metres – Horizontal
20° @ 5 Metres – Vertical
Radio Frequency:
868 MHz
Dimensions:
68 x 68 x 23mm
RADIO SIGNAL
When choosing a location for your Smart Sensor, consider the radio signal path. The signal will travel between units in a straight line and will degrade both with distance and (much more importantly) objects that it has to pass through.
The Smart Sensor needs to connect to the Receiver (Ignite Wireless / LITE) or Thermostat (Ignite Wired) via its internal low power radio.
Every house is different, and this is NOT a guarantee, but as a guide, the units should be able to communicate with each other through two single skin brick or stud walls.
If the above is not possible, consider moving one or more of the system components or ask us about our Ignite Signal Booster.
Also, the radio can be adversely affected by large metal objects such as your boiler, radiators, and mirrors. For best performance, ensure that your units are placed at least 1 metre away from such objects.
Fig 1 shows two possible Sensor locations, and the path that the signal will travel to communicate between the Receiver and Sensor. If the Sensor is located at “B”, the signal will need to go through two external walls.
If the Sensor is located at “A”, it will have a significantly better signal as it will only have to travel through one internal wall.
Fig 1
Fig 2 shows another two possible positions. The Sensor located at “B” will have the signal travelling entirely through a solid wall. This will create a very poor signal, or no signal at all. When moved to position “A” the signal will be considerably stronger.
Fig 2
BATTERY INSTALLATION
We recommend that you pair the Smart Sensor with your Ignite System prior to fixing it to the wall.
- Whilst holding the back plate, rotate the outer cover anticlockwise and remove in direction shown below

Fig 3 - fit supplied batteries.

Fig 4 - Secure outer cover by following Step 1 in reverse.
PAIRING INSTRUCTIONS
Put the Ignite device into pairing mode as detailed below
Ignite Touch / Wireless / LITE (March 2021 onwards)
Long press BOTH buttons on the Receiver until ‘1 and WiFi’ lights flash slowly.
Using the LEFT button, cycle through the menu until ‘CH’ flashes.
Press the RIGHT button, ‘CH’ will rapidly flash.
Ignite 4 channel (Touch / Wireless / LITE) (March 2021 onwards)
Long press BOTH buttons on the Receiver until ‘1 and WiFi’ lights flash slowly.
Using the LEFT button, cycle through the menu until the required heating zone number flashes (1-4).
Press the RIGHT button, this heating zone number will now rapidly flash.
Ignite Wireless (March 2021 and earlier)
Short press the pairing (middle) button on the Relay Module, this will make all three lights flash green.
Then press the CH button, The CH button will now flash green.
Ignite Wired
Press and hold ‘CH MODE’ and ‘BOOST CH’ keys together on the Room Thermostat until C5 is displayed.
Smart Sensor
Ensuring the Inspire leaf logo is at the top, press and hold \/ button for 5 seconds. All 5 LED’s will slowly flash to indicate unit is in pairing mode.
Upon successful pairing, the centre LED on the Smart Sensor will rapidly flash.
If pairing fails, the two outside LED’s will rapidly flash. Please try the pairing procedure again.
TESTING THE SYSTEM
Ideally, the smart Sensor should be positioned at a height of 1.0 – 1.5 meters and in a high traffic area.
Hold the Smart Sensor in your desired location.
Press and hold /\ arrow button for 5 seconds. The Ignite Smart Sensor will enter into a signal strength mode.
A sweeping LED will be displayed whilst the signal detection in in progress.
If a signal is detected, the strength will be measured from 1-5 lighting LEDs accordingly. to work effectively, the signal should be a minimum of two LEDs.
If the unit has not been paired, two outside LEDs will rapidly flash. Please return to pairing instructions on previous page and follow the appropriate steps to pair the Smart Sensor
INSTALLATION INSTRUCTION - Remove outer cover by repeating step 1
- remove batteries, hold the device in the desired position and mark screw mounting positions
- Drill holes and fit supplied wall plugs (if required)

Fig 5 - Mount device using supplied screws
- Fit batteries

Fig 6 - Secure outer cover by following Step 1 in reverse
USING THE SYSTEM

To Activate the Boost, press the /\ button twice
To Cancel the Boost, press the \/ button twice
Login to your account to view and configure your new Smart Sensor.
If you are adding multiple Smart Sensors, you can RENAME them via your online account. Please login and click the unit setup to begin. We would recommend naming them as you pair them to the Ignite system.
www.inspirehomeautomation.co.uk
Documents / Resources
 | Ignite rev 1.2 Smart Sensor [pdf] Installation Guide rev 1.2 Smart Sensor, rev 1.2, Smart Sensor, Sensor |