![]()
![]()
Installation Instructions
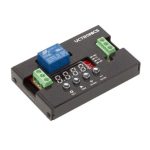
TRM-8 Series Programmable Plug-In Time Delay Relay
DANGER!
| Potentially hazardous voltages are present. Electrical shock can cause death or serious injury. Installation should be done by qualified personnel following all National, State & Local Codes. |  |
BE SURE TO REMOVE ALL POWER SUPPLYING THIS EQUIPMENT BEFORE CONNECTING OR DISCONNECTING WIRING. READ INSTRUCTIONS BEFORE INSTALLING OR OPERATING THIS DEVICE. KEEP FOR FUTURE REFERENCE.
Installation: Mount the 70170-D 11 pin octal socket in a suitable enclosure. Wire the socket per the wiring diagram on the side of the time delay relay. Make sure to match the terminal numbers on the socket to the ones shown on the wiring diagram (the wiring diagram on the relay is the view looking towards the bottom of the relay vs. the top of the socket). Use #12-20 solid or stranded copper or copper-clad aluminum wires with 70170D socket and terminal tightening torque of 12 in-lbs. Plug the time delay relay into the socket, making sure the key on the center post is in the proper orientation before insertion. If the relay must be removed from the socket, do NOT rock the relay back and forth excessively–the center post could be damaged.
NOTE: When the trigger switch is connected to more than one device, whether it be another Automation Direct time delay relay or another brand, please review the compatibility of the combination. The potential exists where different relays have different trigger switch voltages, and combining one trigger switch on multiple voltages could damage one of the units.
The following step applies only to the TRM-8 Series Multi-Function units (Figure 1):
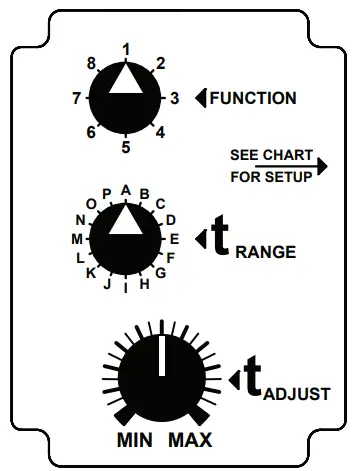 Setting Function: To set the function, first select one of the eight TRM-8 Series functions from the Select Function Chart located on the side of the relay. Position the eight-position rotary switch to the number that corresponds to the desired function.
NOTE: Function cannot be changed with power applied to the unit.
As a guide, a description of how each function operates is shown on the back of this sheet.
TRM-8 Series
| Select Function | |
| 1 | On Delay |
| 2 | Interval On |
| 3 | Flasher – On 1st |
| 4 | Triggered On Delay |
| 5 | Watchdog |
| 6 | Single Shot |
| 7 | Off Delay |
| 8 | One-Shot Falling Edge |
Troubleshooting: If the unit fails to operate properly, check that all connections are correct per the appropriate wiring diagram on the product. Refer to the description of the function that operates on the next page. If problems continue, contact Automation Direct for assistance.
ON DELAY – Single Mode
| INPUT VOLTAGE OUTPUT |  |
INTERVAL ON – Single Mode
| INPUT VOLTAGE OUTPUT |  |
FLASHER (ON 1ST) – Single Mode
| INPUT VOLTAGE OUTPUT |  |
OFF DELAY – Single Mode
| INPUT VOLTAGE TRIGGER OUTPUT |  |
SINGLE SHOT – Single Mode
| INPUT VOLTAGE TRIGGER OUTPUT |  |
WATCHDOG – Single Mode
| INPUT VOLTAGE TRIGGER OUTPUT |  |
ONE (SINGLE) SHOT (FALLING EDGE) – Single Mode
| INPUT VOLTAGE VOLTAGE TRIGGER OUTPUT |  |
TRIGGERED ON DELAY- Single Mode
| INPUT VOLTAGE TRIGGER OUTPUT |  |
Automation Direct Inc.
3505 Hutchinson Road, Cumming, GA 30040
770-844-4200 www.automation direct.co
Documents / Resources
 | AUTOMATIONDIRECT TRM-8 Series Programmable Plug In Time Delay Relay [pdf] Instruction Manual TRM-8 Series, Programmable Plug In Time Delay Relay, TRM-8 Series Programmable Plug In Time Delay Relay |