1. Destpêk
The Nextbase 222 Dash Cam is designed to provide reliable video recording of your journeys, offering enhanced security and peace of mind. This manual provides detailed instructions for setting up, operating, maintaining, and troubleshooting your dash cam.
The 222 Dash Cam records in Full 1080p HD at 30 frames per second, capturing a wide 140-degree view of the road. It features an Intelligent Parking Mode, G-Sensor for incident detection, and a convenient magnetic mount for easy installation and removal.

Wêne: Pêş û paş view of the Nextbase 222 Dash Cam, highlighting its compact design and award recognition.
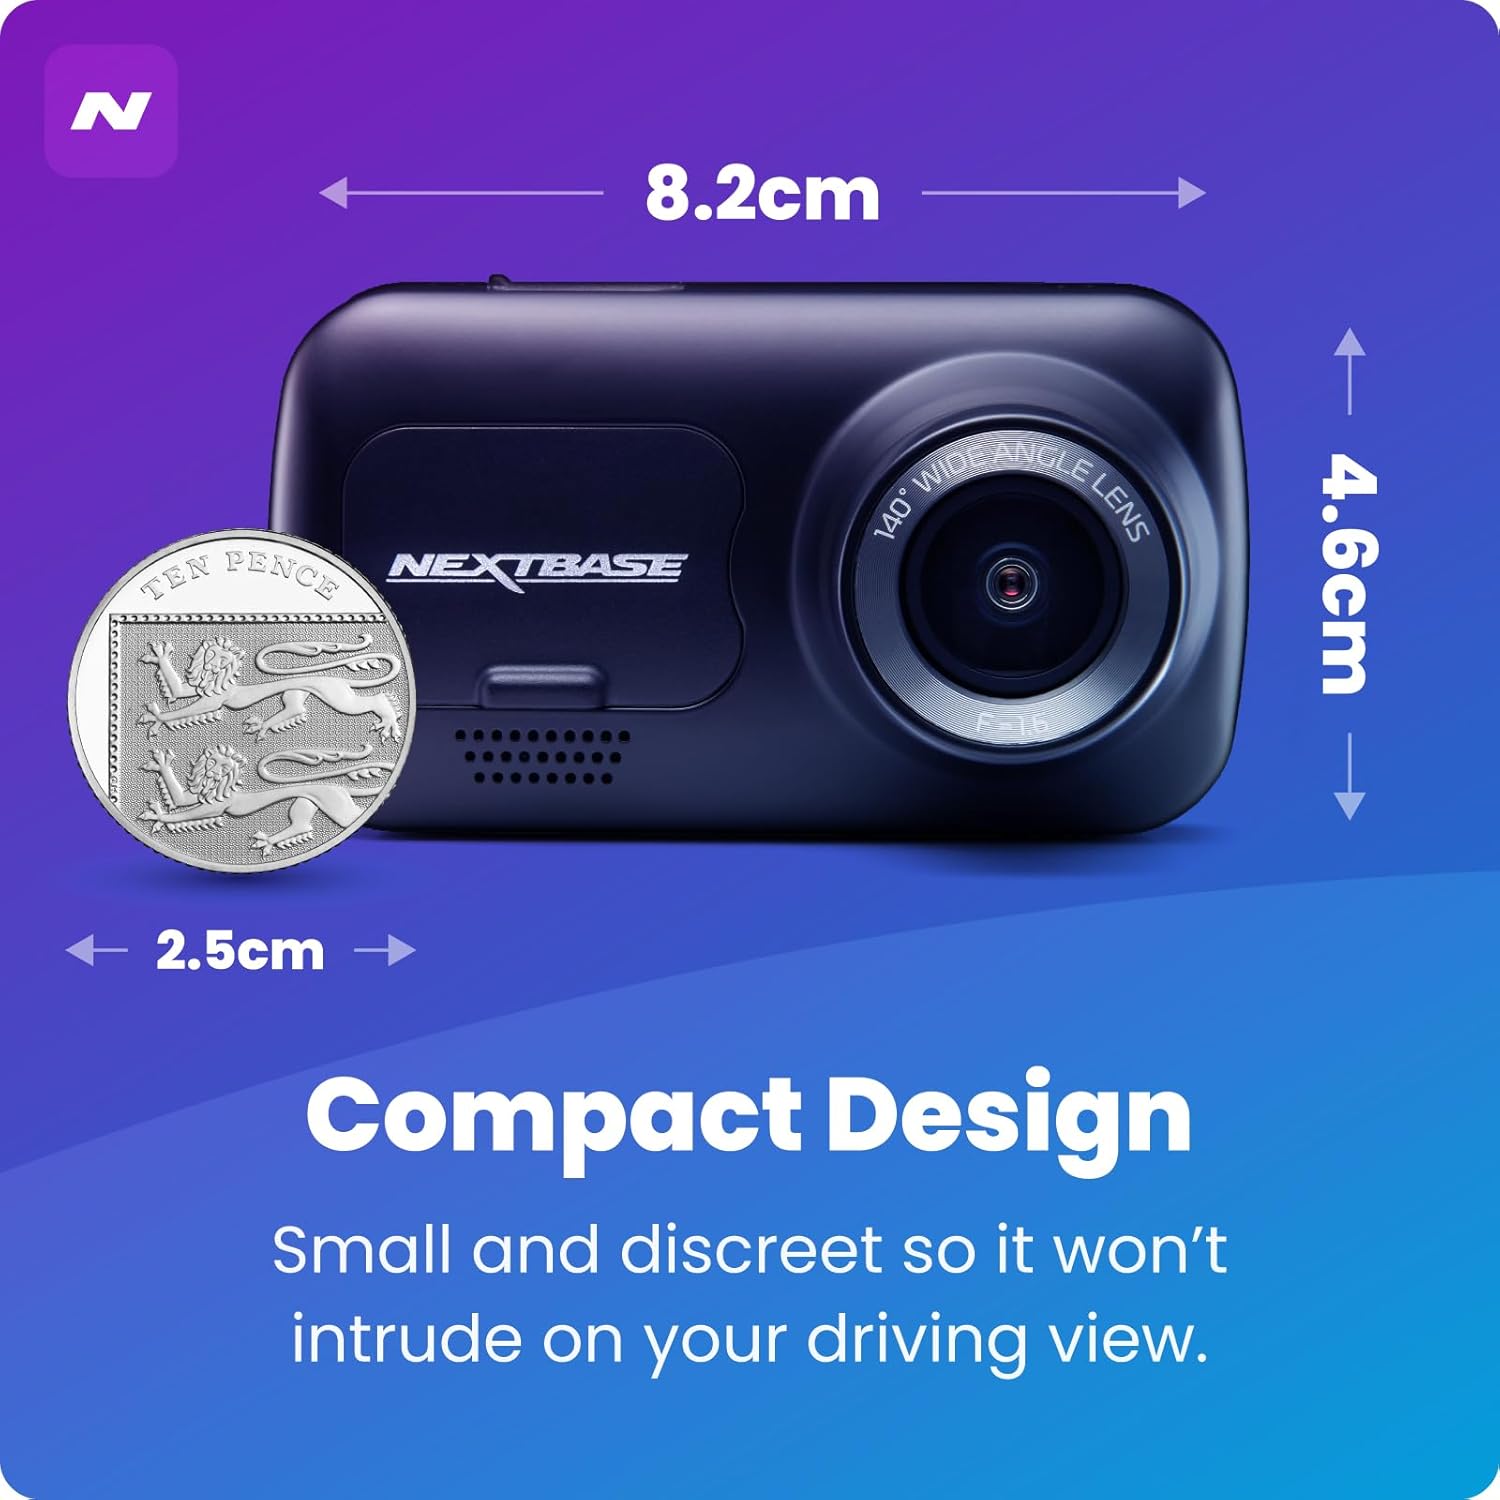
Image: The Nextbase 222 Dash Cam shown with its compact dimensions (8.2cm x 4.6cm) and a coin for size comparison, emphasizing its discreet design.
2. Çi di Qutîkê de ye
Upon opening your Nextbase 222 Dash Cam package, you should find the following components:
- Nextbase 222 Dash Cam unit
- Click&Go PRO Mount
- 4-meter Car Power Cable
- Cable USB
- Amûra Fitting
- 3M Adhesive Mount (additional)

Image: All components included in the Nextbase 222 Dash Cam package, laid out for clear identification.
3. Sazkirin û Sazkirin
3.1 Sazkirina Destpêkê
Before installation, ensure you have a compatible microSD card (Class 10 or U1 recommended, not included) inserted into the dash cam. Format the card using the dash cam's menu settings for optimal performance.
3.2 Sazkirina Kamera Dashboardê
The Nextbase 222 uses a Click&Go PRO magnetic mount for secure attachment to your windshield. This allows for easy removal of the dash cam while leaving the mount in place.
- Clean the area of your windshield where you intend to mount the dash cam using the provided wet and dry wipes. Ensure the surface is completely dry before proceeding.
- Attach the Click&Go PRO mount to the dash cam.
- Position the dash cam on the windshield, ensuring it does not obstruct your view and the lens has a clear line of sight to the road. The ideal position is typically behind the rearview neynik.
- Once the position is confirmed, remove the protective film from the adhesive pad on the mount and firmly press it onto the windshield for 5-10 seconds to ensure maximum contact.

Image: Close-up of the Click&Go PRO mount, showing its magnetic connection point for easy attachment and detachment of the dash cam.
3.3 Girêdana Hêzê
Route the included 4-meter car power cable from the dash cam mount around your windshield and dashboard to your vehicle's 12V power socket. This cable is long enough to be discreetly tucked away along the edges of your car's interior.
Video: Official Nextbase Fitting Video demonstrating the step-by-step process of installing the dash cam and routing the power cable in a vehicle.
Video: A quick guide titled 'Installation in Minutes' showing the efficient setup of the dash cam, including mount attachment and cable management.
4. Operating Your Dash Cam
4.1 Tomarkirina Otomatîkî
Once powered on, the Nextbase 222 Dash Cam will automatically begin recording when your vehicle starts. Recordings are saved in continuous loop segments, with older files being overwritten as the memory card fills up.
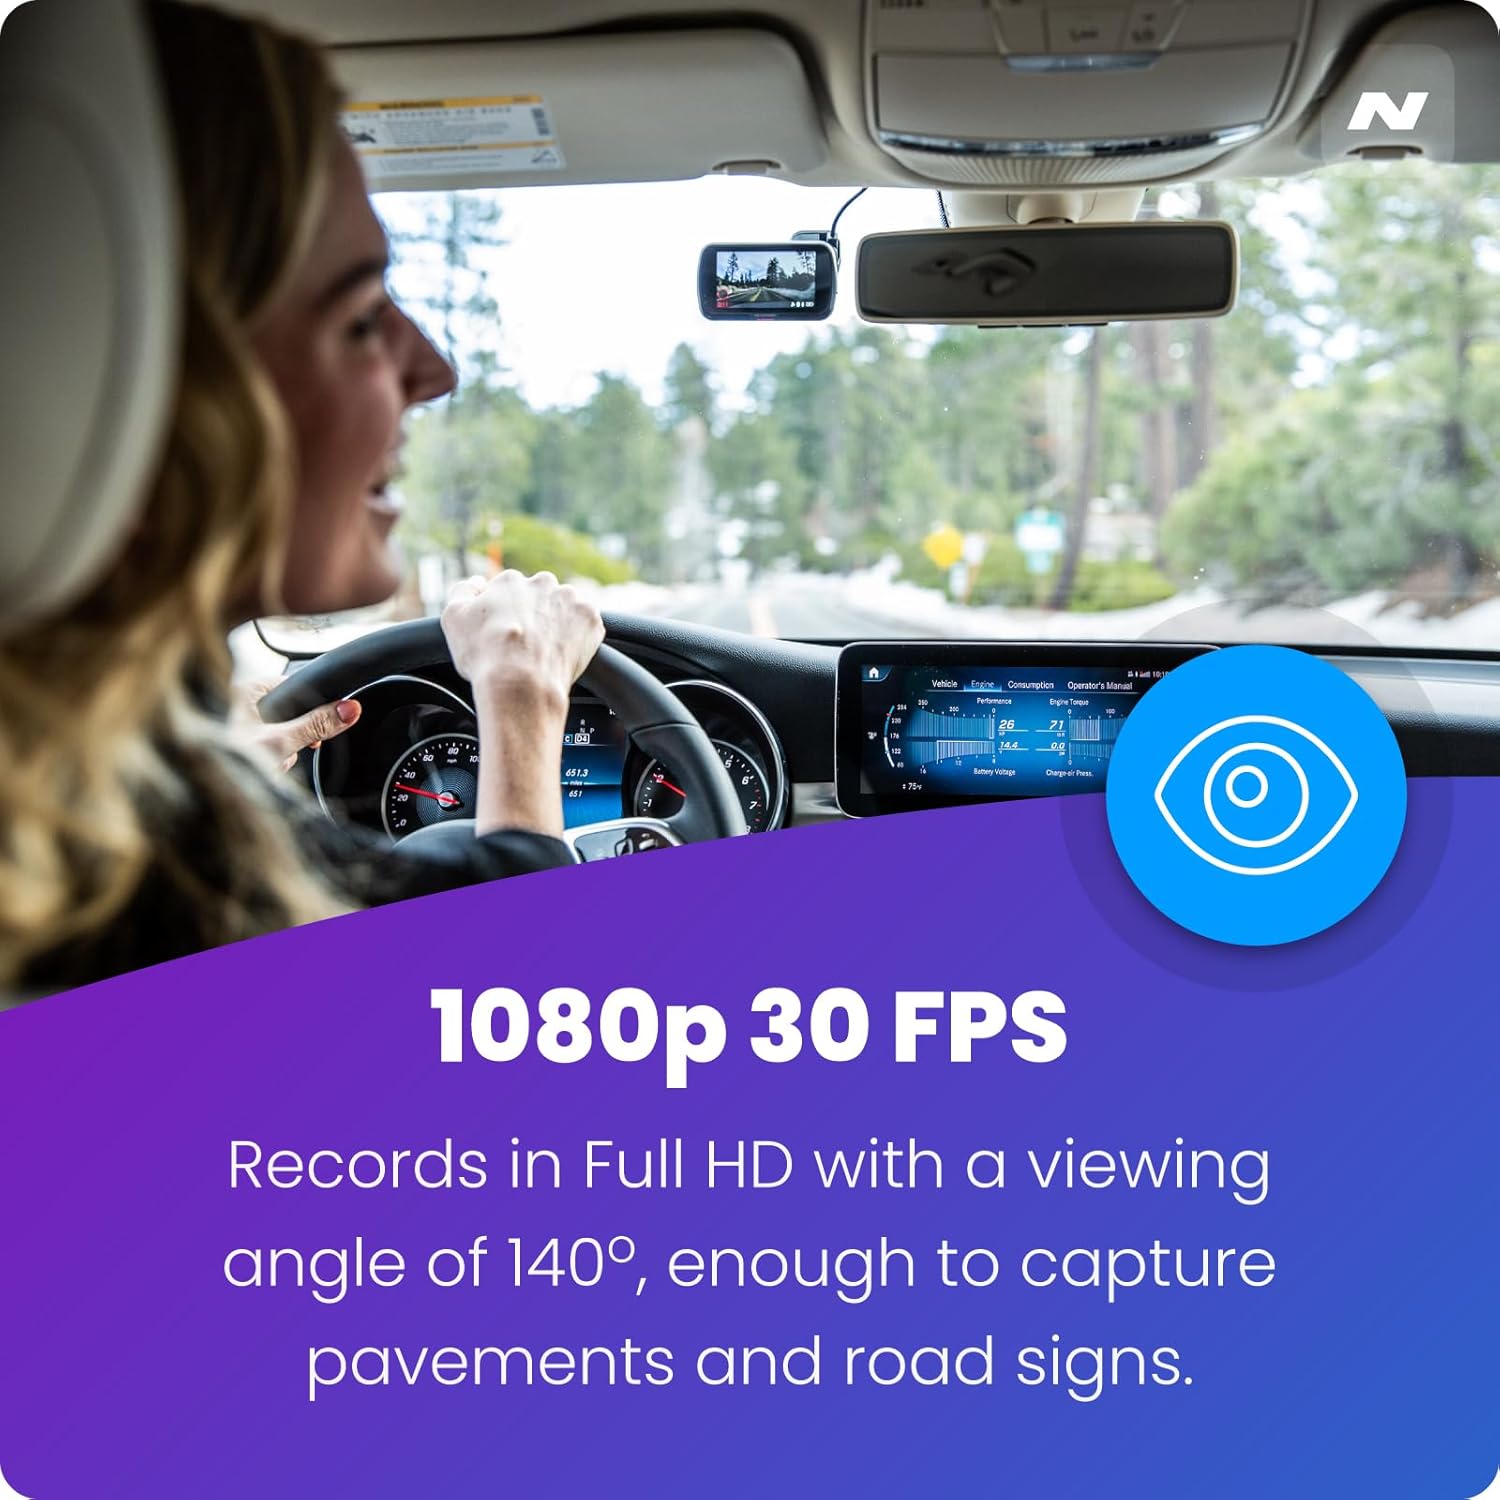
Wêne: View from inside a car showing the Nextbase 222 Dash Cam recording in Full HD 1080p at 30 frames per second, capturing a wide 140-degree angle.
4.2 Intelligent Parking Mode and G-Sensor
The Intelligent Parking Mode automatically records any physical movement or bump to your vehicle when it is parked. The integrated G-Sensor detects sudden impacts and automatically protects the current recording from being overwritten, ensuring critical footage is saved.

Image: The Nextbase 222 Dash Cam in Parking Mode, illustrating its ability to record incidents like a car bump while parked.

Image: The G-Sensor feature highlighted with an image of a car collision, indicating that the dash cam will protect footage in the event of an incident.
4.3 MyNextbase App and Player
Manage your dash cam footage and settings using the MyNextbase app on your smartphone or the MyNextbase Player software on your computer. This allows for easy viewing, editing, and sharing of your recorded videos.

Image: A user interacting with the MyNextbase app on a smartphone, demonstrating connectivity and ease of access to dash cam features.
Video: A tutorial on using the MyNextbase PC / Mobile application to manage and view dash cam footage, including firmware updates and video playback features.
5. Maintenance
5.1 SD Card Care
It is crucial to use a high-quality, branded Class 10 or U1 microSD card with your Nextbase Dash Cam. Regularly format your microSD card (at least once a month) using the dash cam's menu to maintain optimal recording performance and prevent data corruption.
5.2 Paqijkirin
To ensure clear video quality, regularly clean the dash cam lens with a soft, lint-free cloth. Avoid using abrasive cleaners or solvents that could damage the lens or casing.
6. Destpêkirin
6.1 Kamera Dashboardê Vênaxe
- Ensure the car power cable is securely connected to both the dash cam mount and the vehicle's 12V socket.
- Check the vehicle's 12V socket for power by testing it with another device.
- Verify the fuse in the 12V power adapter is intact.
6.2 Recording Issues (Skipping, Freezing, Corrupted Files)
- Ensure you are using a compatible Class 10 or U1 microSD card.
- Format the microSD card regularly (monthly) using the dash cam's format function.
- Try a different, known-good microSD card to rule out card issues.
6.3 Mount Not Sticking to Windshield
- Ensure the windshield surface is clean and dry before applying the adhesive mount.
- Apply firm pressure to the mount for the recommended duration (5-10 seconds) during installation.
- Avoid repositioning the mount frequently, as this can reduce adhesive effectiveness.
7. Specifications
| Taybetî | Specification |
|---|---|
| Navê Model | NBDVR222 |
| Çareserkirina Girtina Vîdyoyê | 1080p |
| Viewing Angle | 140° (approximate, derived from product description) |
| Mezinahiya Hilberê | 2 x 4 x 5 inches |
| Babetê Weight | 12 onsan |
| Batteries | 1 bataryayên lîtium polîmer hewce ne (tevî) |
| Taybetmendiyên Taybet | App, rechargeable battery, hidden discreet, wireless |
| Teknolojiya Girêdanê | Powerline |
| Mounting Type | Wall (referring to windshield mount) |
8. Garantî û Piştgirî
This product is tested and certified to look and work like new. For specific warranty details and technical support, please refer to the documentation included with your product or visit the official Nextbase website. Contact information for customer service is typically provided in the Quick Start Guide or on the manufacturer's support page.