1. 안전 정보
Please read all safety instructions carefully before operating the AWithZ UKF10 Super Capacitor Spot Welder. Failure to follow these instructions may result in electric shock, fire, or serious injury.
- 눈 보호: Always wear appropriate eye protection (safety glasses or goggles) to shield against sparks and molten metal during welding operations.
- 통풍: Ensure adequate ventilation in your workspace to disperse fumes and gases produced during welding.
- 전기 안전: Do not operate the welder in wet conditions. Keep the unit and all accessories dry. Avoid touching live electrical parts.
- 재료 호환성: Only weld materials specified in this manual. Do not attempt to weld copper, gold, silver, aluminum, or jewelry, as this unit is not designed for these materials.
- 배터리 안전: 이 장치는 다음과 같은 특징을 가지고 있습니다. Dynamic Balance Protection for enhanced battery safety and Intelligent Stop-Charging to prevent overcharging. However, always handle batteries with care and avoid short-circuiting.
- 어린이와 애완동물: Keep the spot welder and all accessories out of reach of children and pets.


2. 제품 오버view 및 구성 요소
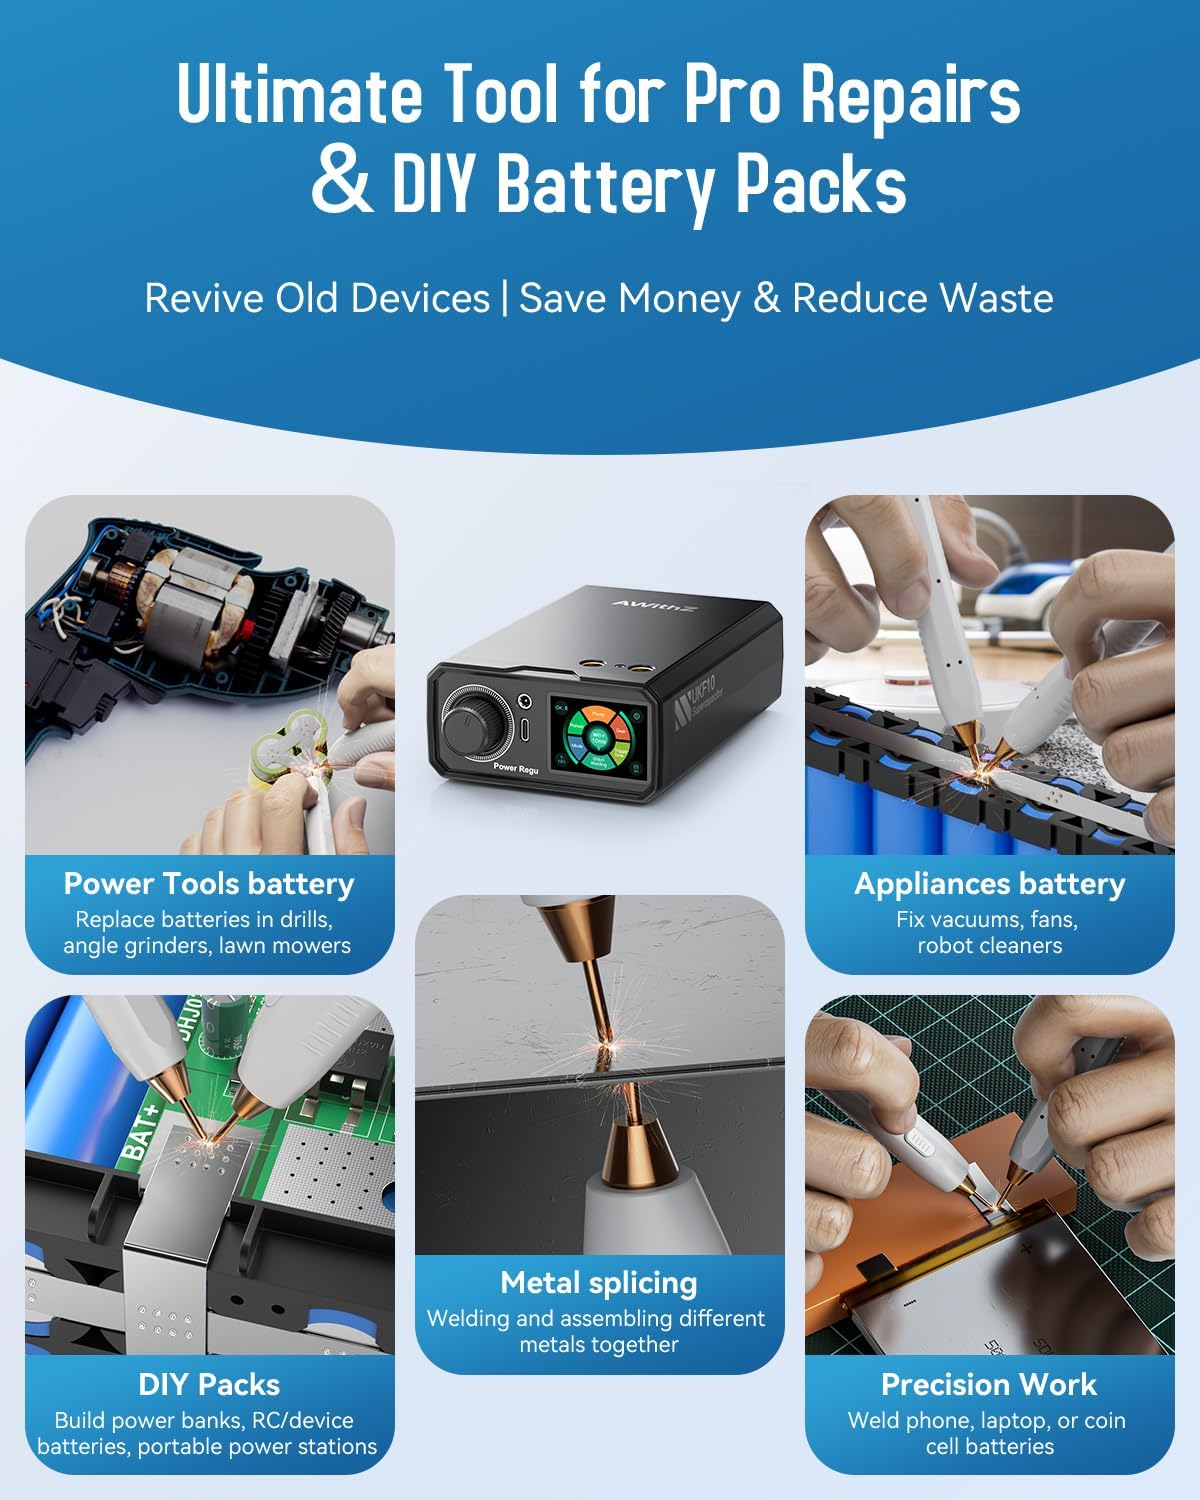
The AWithZ UKF10 is a professional super capacitor spot welder designed for battery pack assembly and repair. It offers powerful and versatile welding performance with advanced safety features.
2.1 패키지 내용
아래 나열된 모든 품목이 패키지에 포함되어 있는지 확인하세요.
- AWithZ UKF10 Spot Welder Unit
- Welding Pens (WP120-6 + WP110-6)
- Replacement Electrode Tips (x2)
- 풋 페달 스위치
- USB-C 충전 케이블
- Nickel Strip Roll
- 사포
- 사용자 설명서


2.2 유닛 특징
- 다기능 제어 손잡이: For adjusting settings and navigating the menu.
- 컬러 디스플레이: Provides clear visual feedback on current settings, mode, and battery status.
- Welding Pen Ports: Connect the welding pens securely.
- 풋 페달 포트: For connecting the external foot pedal for precise control.
- 충전 포트: USB-C for convenient charging.
- 미끄럼 방지 베이스: 작동 중 안정성을 보장합니다.

3. 설정
Follow these steps to prepare your AWithZ UKF10 spot welder for use:
- 장치 충전: Connect the provided USB-C charging cable to the charging port on the unit and to a suitable USB power adapter (not included). The display will indicate charging status. Ensure the unit is fully charged before first use for optimal performance.
- 용접 펜을 연결하세요: Insert the connectors of the welding pens firmly into the designated welding pen ports on the top of the unit. Ensure a secure connection.
- 풋 페달 연결(선택 사항): If using the foot pedal mode, plug the foot pedal cable into the foot pedal port on the front of the unit.
- Prepare Electrodes: Ensure the electrode tips are clean and sharp. Use the included sandpaper to gently clean the tips if necessary. Replace worn tips with the spare ones provided.
- 전원 켜기: Long-press the multi-function control knob to power on the unit. The color display will illuminate.
4. 운영
The AWithZ UKF10 offers three distinct welding modes and adjustable settings for precise control.
4.1 용접 모드
Rotate the multi-function knob to navigate to the 'Mode' setting and press to select. Rotate again to choose your desired mode:
- 자동 모드: The welder automatically triggers a weld when both electrode tips make contact with the material. Ideal for quick, repetitive tasks.
- Smart Pen Mode: Utilizes the button on the smart welding pen to manually trigger a weld. Provides precise control for delicate repairs.
- 풋 페달 모드: The weld is triggered by pressing the external foot pedal. This mode allows for optimal positioning of the welding pens before initiating the weld, suitable for high-efficiency batch assembly.

4.2 설정 조정
Use the multi-function knob to adjust the following parameters:
- 기어(파워 레벨): Adjusts the welding power from 1 to 100. Higher numbers indicate more power. Start with lower settings and gradually increase to find the optimal power for your material thickness.
- Cont Welds (Continuous Welds): Sets the number of welds performed with a single trigger (1 to multiple). Useful for creating stronger bonds with multiple spot welds in quick succession.
- Trigger (Delay Time): In Automatic Mode, this sets the delay before a weld is triggered after contact. Adjust as needed for precise timing.

4.3 Welding Guidelines
The UKF10 is capable of welding:
- 0.2mm Pure Nickel Strips
- 0.35mm Nickel-Plated Steel Strips
절차:
- Place the nickel strip firmly onto the battery terminal or material to be welded.
- Position the welding pen tips onto the nickel strip, ensuring they are parallel and apply even pressure. The distance between the tips affects weld heat; closer tips generally result in hotter welds.
- Initiate the weld according to your selected mode (Automatic, Smart Pen, or Foot Pedal).
- Inspect the weld. A good weld should be strong and secure, without excessive scorching or weak adhesion. Adjust the 'Gear' setting as needed.

4.4 응용 프로그램
The AWithZ UKF10 is suitable for a variety of applications, including:
- 전동공구 배터리 수리
- Home appliance battery maintenance
- Small to medium battery pack assembly
- Button cell welding
- Mobile phone battery repair
5. 유지관리
적절한 유지 관리는 스폿 용접기의 수명과 최적의 성능을 보장합니다.
- Electrode Tips: Regularly inspect the welding electrode tips for wear or oxidation. Clean them with the provided sandpaper or a fine file to maintain good conductivity. Replace tips when they become too short or severely worn.
- 유닛 청소: Keep the main unit clean and free from dust and debris. Use a soft, dry cloth to wipe the exterior. Do not use abrasive cleaners or solvents.
- 충전 중: Charge the unit regularly, especially if it will be stored for an extended period, to maintain battery health.
- 저장: Store the spot welder in a cool, dry place, away from direct sunlight and moisture.
6. 문제 해결
일반적인 문제와 해결 방법은 이 섹션을 참조하세요.
| 문제 | 가능한 원인 | 해결책 |
|---|---|---|
| 용접 부위가 약하거나 고르지 않음 |
|
|
| No spark or weld |
|
|
| 과도한 스파크 발생 |
|
|
| 장치가 충전되지 않음 |
|
|
7. 사양
| 특징 | 사양 |
|---|---|
| 모델 번호 | UKF10 |
| 제조업체 | AWithZ |
| 품목 무게 | 2.55파운드(약 1.16kg) |
| 패키지 크기 | 7.52 x 5 x 4.53인치(약 19.1 x 12.7 x 11.5cm) |
| 전원 | 배터리 구동 |
| 배터리 | 2 리튬 폴리머 배터리(포함) |
| 배터리 셀 유형 | 리튬폴리머 |
| Welding Capability (Pure Nickel) | Up to 0.2mm thickness |
| Welding Capability (Ni-Plated Steel) | Up to 0.35mm thickness |
| 커패시터 수명 | 500,000+ charge/discharge cycles |
8. 보증 및 지원
For warranty information, technical support, or service inquiries, please contact AWithZ customer service through your original point of purchase or visit the official AWithZ website. Please have your product model number (UKF10) and purchase details ready when contacting support.