IK Multimedia ARC Studio
IK Multimedia ARC Studio Room Correction System User Manual
Model: ARC Studio (IK000183)
1. 서론
The IK Multimedia ARC Studio is an advanced room correction system designed to optimize the acoustic performance of your studio or listening environment. This system includes a high-precision measurement microphone, sophisticated ARC 4 software, and a dedicated hardware processor. By analyzing your room's acoustic response, ARC Studio creates a custom correction profile to ensure accurate and balanced audio reproduction, leading to more reliable mixing and mastering decisions.
2. 안전 정보
Please read and follow all safety instructions to prevent damage to the device or personal injury.
- 기기를 물이나 과도한 습기에 노출시키지 마세요.
- 열원 근처나 직사광선에 장치를 두지 마십시오.
- 장치와 함께 제공된 전원 어댑터만 사용하십시오.
- 기기를 직접 열거나 수리하려고 하지 마십시오. 모든 수리는 자격을 갖춘 기술자에게 맡기십시오.
- 과열을 방지하려면 장치 주변에 적절한 환기가 이루어지도록 하십시오.
- 어린이의 손이 닿지 않는 곳에 보관하세요.
3. 패키지 내용
Verify that all items are present in your ARC Studio package:
- ARC Studio Hardware Processor
- ARC Measurement Microphone
- USB 케이블
- 전원 공급 장치
- ARC 4 Software License (downloadable)
- 빠른 시작 가이드
4. 제품 오버view
The ARC Studio system comprises three main components working in conjunction to achieve precise room correction.
4.1 ARC Studio Hardware Processor
This dedicated hardware unit processes the audio signal, applying the room correction profile in real-time. It features balanced XLR inputs and outputs for seamless integration into your studio setup. The processor operates with 24-bit/96 kHz AD/DA converters for transparent signal integrity.

Image: The ARC Studio hardware processor and measurement microphone.

이미지: 후면 view of the ARC Studio processor, highlighting XLR inputs and outputs, USB port, and DC power input.
4.2 ARC Measurement Microphone
The included high-precision omnidirectional measurement microphone is crucial for accurately capturing your room's acoustic characteristics. It connects to your audio interface (not included) during the calibration process.

Image: Close-up of the ARC measurement microphone.
4.3 ARC 4 Software
The ARC 4 software guides you through the room measurement process and generates the correction profiles. It also allows for advanced customization, including target curves and monitor emulations. The software is used to load the generated profiles onto the ARC Studio hardware processor.

Image: ARC 4 software interface shown on a laptop, demonstrating frequency response analysis and correction, with the ARC Studio hardware and microphone in the foreground.
5. 설정
5.1 소프트웨어 설치
- Register your product on the IK Multimedia website to access the ARC 4 software download.
- Download and install the ARC 4 software on your computer (Windows or macOS).
- Follow the on-screen instructions to complete the installation and authorize the software.
5.2 하드웨어 연결
The ARC Studio processor should be placed between your audio interface's outputs and your studio monitors. The measurement microphone is connected to your audio interface during calibration.

Image: Connection diagram for the ARC Studio processor in a typical studio setup.
- Connect the ARC Studio Processor:
- Connect the outputs of your audio interface to the L 그리고 R XLR inputs on the rear of the ARC Studio processor.
- 연결하다 L 그리고 R XLR outputs of the ARC Studio processor to the inputs of your studio monitors.
- Connect the supplied USB cable from the ARC Studio processor to an available USB port on your computer.
- 전원 공급 장치를 직류전원 port on the ARC Studio processor and plug it into a power outlet.
- Connect the Measurement Microphone (for calibration):
- Connect the ARC Measurement Microphone to an XLR input on your audio interface. Ensure phantom power (+48V) is enabled for the microphone input on your audio interface.

Image: A studio environment showing the ARC Studio processor integrated with a laptop, audio interface, and a microphone on a stand for calibration.
5.3 Room Calibration Process
The calibration process uses the ARC 4 software and the measurement microphone to analyze your room and create a correction profile.
- Launch the ARC 4 software on your computer.
- Select your audio interface as the input device for the measurement microphone and ensure the output is routed through the ARC Studio processor.
- Follow the on-screen instructions in the ARC 4 software to perform the room measurements. This typically involves placing the microphone at various positions around your listening area.
- The software will generate a room correction profile based on these measurements.
- 프로가 되면file is generated, you can save it and upload it to the ARC Studio hardware processor via the USB connection.
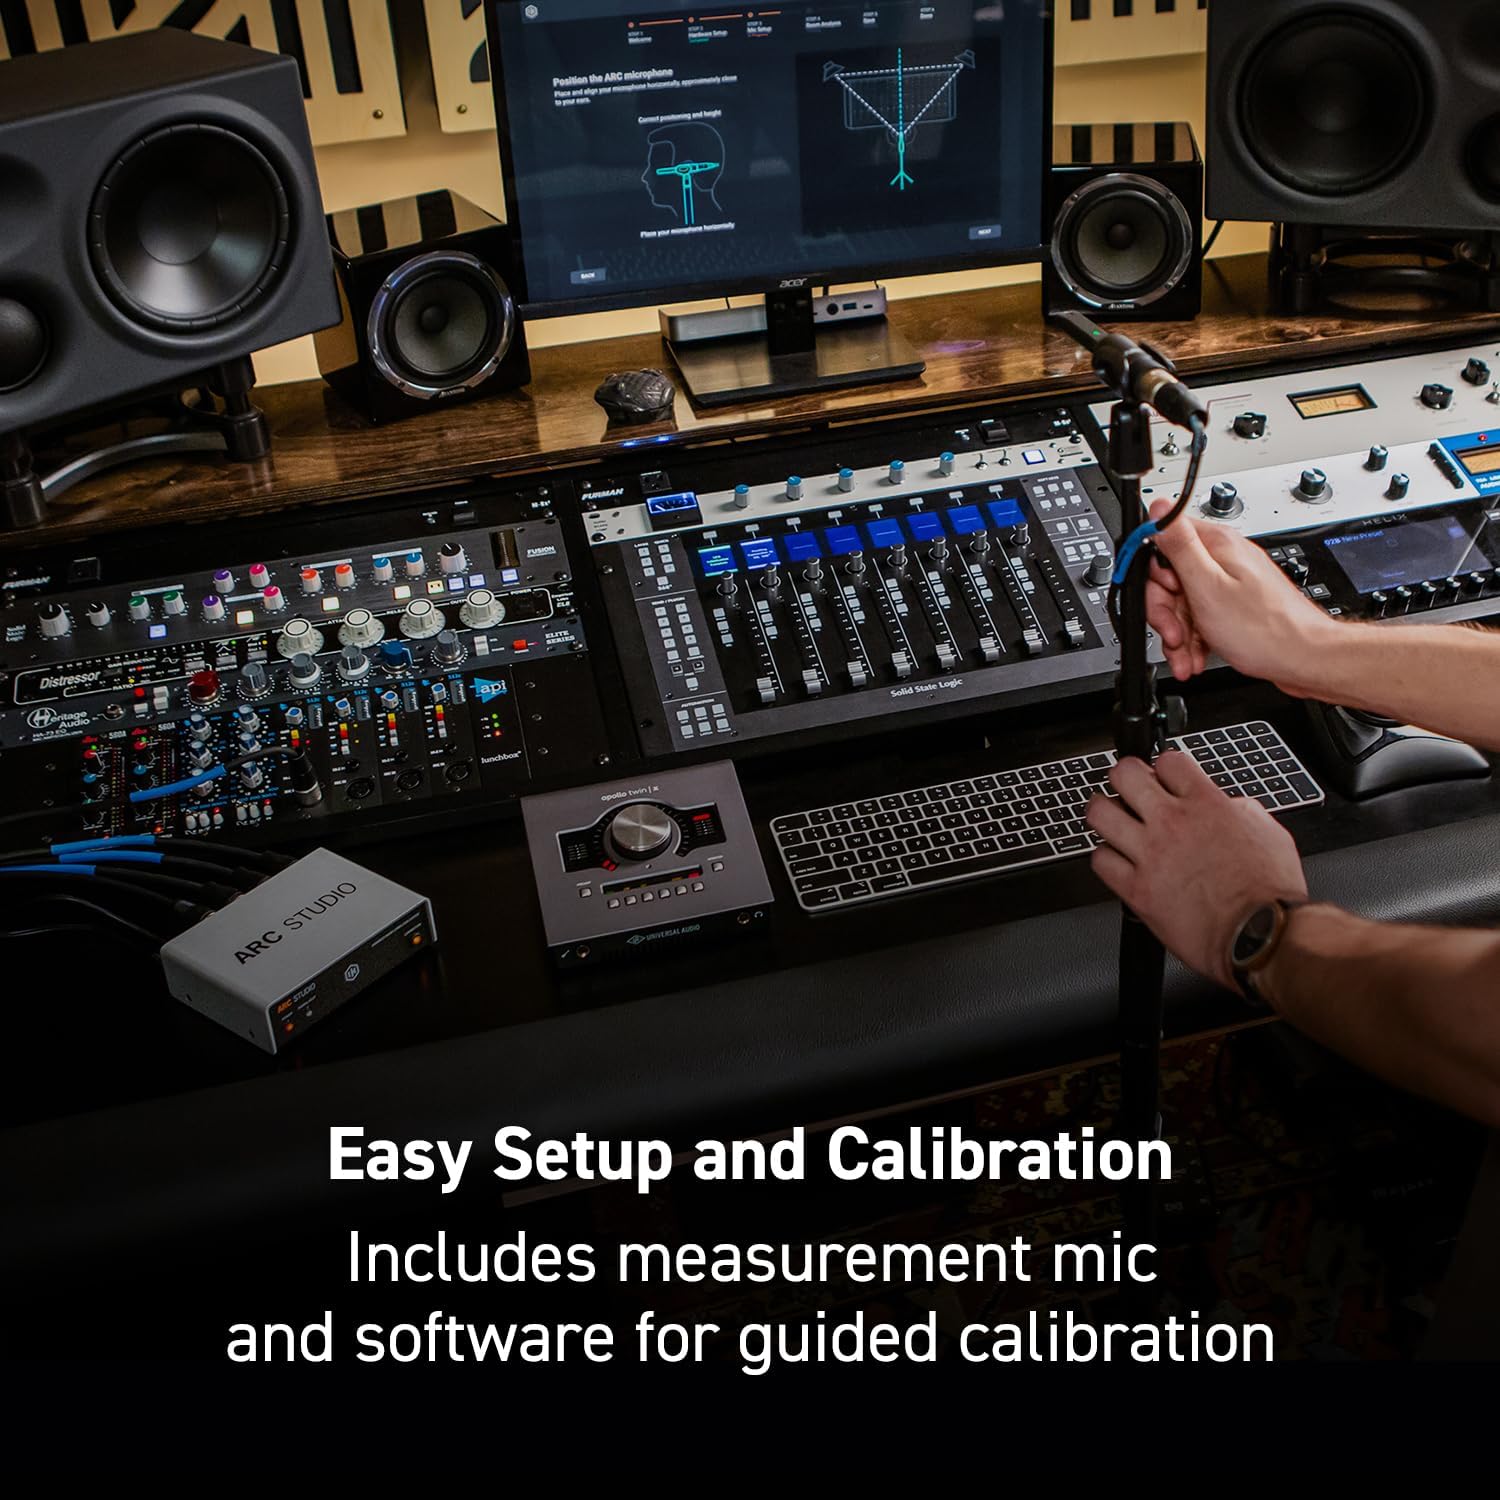
Image: A user positioning the ARC measurement microphone on a stand, preparing for room calibration with the ARC 4 software.
6. Operating the ARC Studio System
6.1 Using the ARC Studio Hardware Processor
Once a correction profile is loaded onto the ARC Studio processor, it operates independently of your computer. The processor applies the correction to all audio passing through it.
- 전원 LED: 장치의 전원 상태를 나타냅니다.
- 신호 / 클립 LED : Shows audio signal presence and clipping. Adjust input levels on your audio interface to avoid clipping.
- Correction Button/LED: Toggles the room correction on or off. The LED indicates whether correction is active.

Image: Front panel of the ARC Studio processor, detailing the Power, Signal/Clip, and Correction indicators.
6.2 ARC 4 Software Features
The ARC 4 software provides advanced control and customization options for your room correction profiles.
- 커스텀 EQ 프로files: Tailor the correction to your specific preferences or room characteristics.
- Monitor Emulations: Simulate the sound of various studio monitors and reference systems, allowing you to cross-check your mixes without needing multiple sets of speakers.
- Correction Types: Choose between different correction algorithms (e.g., Natural, Linear) to suit your workflow.

Image: ARC 4 software interface displaying a frequency response graph and controls for system tuning.

Image: ARC 4 software interface with a dropdown menu illustrating various monitor emulation options.
7. 유지관리
- 청소: Use a soft, dry cloth to clean the exterior of the ARC Studio processor and microphone. Do not use liquid cleaners or solvents.
- 저장: 장기간 사용하지 않을 경우, 직사광선과 극한 온도 변화를 피해 서늘하고 건조한 곳에 보관하십시오.
- 소프트웨어 업데이트: Regularly check the IK Multimedia website for ARC 4 software updates to ensure optimal performance and access to new features.
8. 문제 해결
| 문제 | 가능한 원인 | 해결책 |
|---|---|---|
| No sound output from monitors. | Incorrect cabling, ARC Studio not powered, correction bypassed. | Check all XLR and power connections. Ensure the ARC Studio processor is powered on and the Correction LED is illuminated (or bypassed if desired). Verify audio interface output routing. |
| Microphone not detected during calibration. | Phantom power off, incorrect input selected, faulty cable. | Ensure +48V phantom power is enabled on your audio interface input. Select the correct input in ARC 4 software. Test with a different XLR cable. |
| Audio sounds distorted or clips. | 입력 레벨이 너무 높습니다. | Reduce the output level from your audio interface to the ARC Studio processor. Monitor the Signal/Clip LED on the ARC Studio unit. |
| Correction profile not loading to hardware. | USB connection issue, software error. | Ensure the USB cable is securely connected. Restart ARC 4 software and the ARC Studio processor. Try a different USB port. |
9. 사양
| 특징 | 세부 사항 |
|---|---|
| 모델명 | ARC 스튜디오 |
| 품목 모델 번호 | 아이케이000183 |
| 제조업체 | IK 멀티미디어 |
| 제품 치수 | 4.72 x 5.67 x 1.77 인치 |
| 품목 무게 | 0.037온스(1.05그램) |
| AD/DA 컨버터 | 24 비트 / 96kHz |
| 입력 | 2 x 밸런스드 XLR |
| 출력 | 2 x 밸런스드 XLR |
| 연결성 | USB for software communication |
10. 보증 및 지원
IK Multimedia products are covered by a limited warranty. For detailed warranty information, product registration, and technical support, please visit the official IK Multimedia web대지:
You can also find FAQs, software downloads, and contact information for customer service on their support page.
Ask a question about this manual
Ask about setup, troubleshooting, compatibility, parts, safety, or missing instructions. Manuals+ will review the question and use this page’s manual context to help answer it.