1. 서론
The Gemini GMU-M100 is a handheld UHF wireless microphone system designed for a variety of audio applications. This system provides wireless freedom, allowing users to move without cable restrictions, and is suitable for performances, presentations, karaoke, and more. The system operates within the 512 to 541.7 MHz frequency range (for the US market) and offers a stable signal transmission.
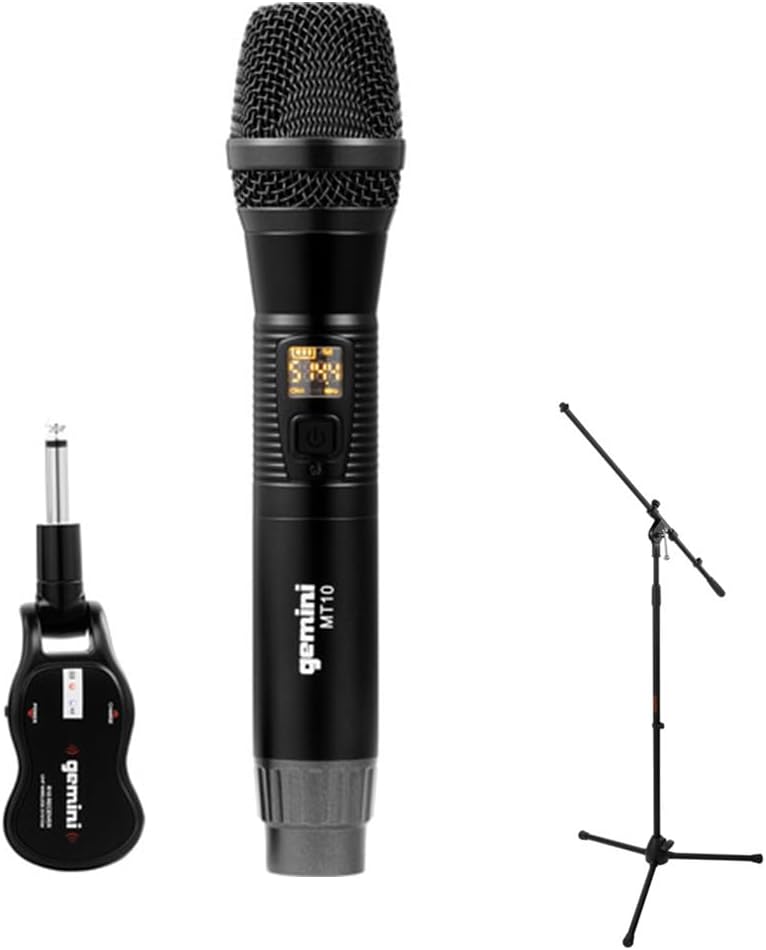
Image 1.1: The Gemini GMU-M100 Handheld UHF Wireless Microphone System, including the handheld microphone, plug-in receiver, and an optional microphone stand.
2. 패키지 내용
포장 내용물을 확인하여 모든 품목이 있는지, 그리고 양호한 상태인지 확인해 주십시오.
- GMU-M100 Handheld Wireless Microphone
- GMU-M100 Plug-in Wireless Receiver
- Rechargeable Lithium Batteries (pre-installed or included for both units)
- 마이크로 USB 충전 케이블
- 사용 설명서 (본 문서)
Note: Additional accessories such as a microphone stand may be included if purchased as part of a bundle.
3. 제품 오버view
3.1 Handheld Microphone (MT10)
The handheld microphone features a dynamic capsule with a cardioid pickup pattern, designed to focus on the sound source while minimizing background noise. It includes an LED screen for displaying battery life and frequency information, and a SET button for frequency adjustment.
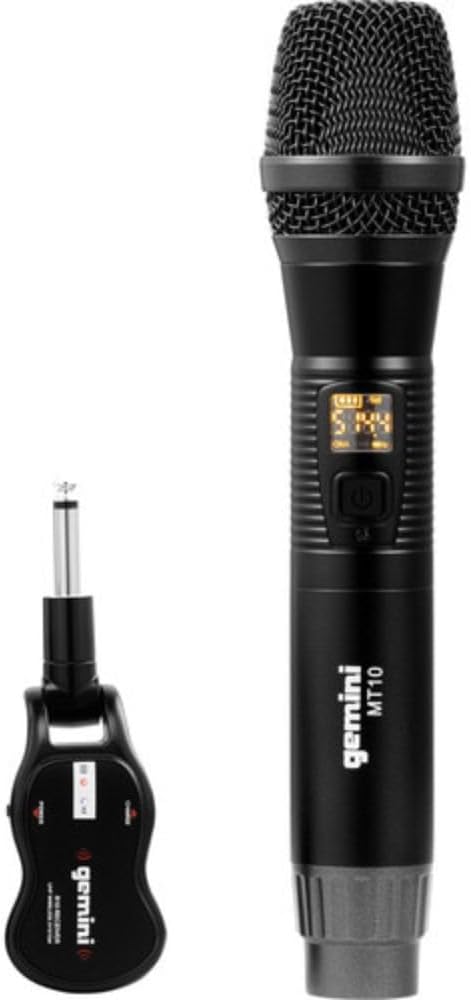
Image 3.1: The GMU-M100 handheld microphone and its compact plug-in receiver.
3.2 Plug-in Receiver (R10)
The compact receiver connects directly to your audio equipment via a standard 1/4" TS plug. It receives the wireless signal from the microphone and outputs it to your PA system, amp증폭기 또는 믹서.

이미지 3.2: 각도 view highlighting the design of the microphone and receiver.
4. 설정
4.1 기기 충전
Both the microphone and receiver are powered by rechargeable lithium batteries. Before first use, ensure both units are fully charged.
- Locate the Micro-USB charging port on the bottom of the microphone and on the side of the receiver.
- Connect the included Micro-USB cable to the charging port of each unit and plug the other end into a USB power source (e.g., computer USB port, USB wall adapter).
- The LED indicator on each unit will show charging status (refer to the unit's specific LED behavior for full charge indication).

Image 4.1: Close-up of the microphone's Micro-USB charging port (DC-5V).

Image 4.2: The Micro-USB charging cable provided for both units.
4.2 Battery Installation (Microphone)
The microphone uses a user-replaceable 18650 1200mAh battery. If the battery needs replacement or initial installation:
- Unscrew the bottom cap of the microphone.
- Insert the 18650 battery, ensuring correct polarity (+/-).
- 바닥 캡을 다시 단단히 조여주세요.

Image 4.3: The microphone with its battery compartment open, revealing the 18650 battery.
4.3 수신기 연결
The receiver connects directly to your audio input device.
- Plug the 1/4" TS connector of the receiver into an available 1/4" input jack on your PA speaker, amp리파이어, 믹서 또는 기타 오디오 장비.
- Ensure the audio equipment is powered off before connecting the receiver.
4.4 전원 켜기 및 페어링
마이크와 수신기는 자동 페어링되도록 설계되었습니다.
- Power on your audio equipment.
- Press and hold the power button on the handheld microphone until the LED screen illuminates.
- Press and hold the power button on the plug-in receiver.
- The units will automatically pair. A successful connection is typically indicated by a stable signal icon on the microphone's LED screen.
5. 사용 설명서
5.1 볼륨 조절
The output volume can be controlled directly from the handheld microphone using the designated volume buttons (if present) or through the connected audio equipment's input gain/volume controls.
5.2 주파수 조정
If you experience interference, you can change the operating frequency of the microphone system:
- With the microphone powered on, press the 세트 단추.
- The microphone will cycle through available UHF frequencies. The receiver will automatically sync to the new frequency.
- Select a clear frequency to ensure optimal performance.
5.3 무선 범위
The GMU-M100 system offers a wireless range of over 164 feet (50 meters) in optimal conditions. Obstacles, other wireless devices, and environmental factors can affect this range.
6. 유지관리
6.1 배터리 관리
- 장기간 보관하기 전에 배터리를 완전히 충전하십시오.
- 배터리를 극한 온도에 노출시키지 마세요.
- If the microphone will not be used for a long period, remove the 18650 battery.
6.2 청소
- 마이크와 수신기를 부드럽고 마른 천으로 닦으십시오.
- 독한 화학 물질이나 연마성 세제를 사용하지 마십시오.
- Avoid moisture contact with electronic components.
7. 문제 해결
| 문제 | 가능한 원인 | 해결책 |
|---|---|---|
| 사운드 출력이 없습니다 | Microphone or receiver not powered on; low battery; incorrect connection; receiver not paired. | Ensure both units are charged and powered on. Check all cable connections. Verify pairing (power cycle both units). Adjust volume on microphone and audio equipment. |
| 간섭 또는 정적 | Operating on a crowded frequency; proximity to other wireless devices; environmental interference. | 를 누르세요 세트 button on the microphone to change to a different frequency. Move away from other wireless devices or sources of electromagnetic interference. |
| 짧은 무선 범위 | Obstacles between microphone and receiver; low battery; environmental factors. | Ensure a clear line of sight between microphone and receiver. Fully charge batteries. Reduce distance between units. |
| 마이크 LED 화면 꺼짐 | Microphone is off; battery is depleted. | Press the power button to turn on. Charge the microphone battery. |
8. 사양
| 특징 | 사양 |
|---|---|
| 모델 | GMU-M100 |
| 마이크 폼 팩터 | 휴대용 마이크 시스템 |
| 주파수 범위(미국) | 512~541.7MHz |
| 무선 범위 | 164피트(50미터) 이상 |
| 전원 | Rechargeable Lithium Battery (USB Powered) |
| 마이크 배터리 | 18650 1200mAh (user-replaceable) |
| 수신기 커넥터 | 1/4" TS Plug |
| 재료 | 금속 |
| 극성 패턴 | 단방향 (카디오이드) |
| 채널 수 | 16 |
| 품목 무게 | 15.7온스(약 445g) |
| 패키지 크기 | 13 x 5.6 x 2.6인치(약 33 x 14.2 x 6.6cm) |
9. 보증 및 지원
For warranty information, technical support, or service inquiries, please refer to the official Gemini web사이트를 방문하거나 고객 지원팀에 직접 문의하세요. 보증 청구를 위해 구매 증빙 자료를 보관하세요.
Gemini Customer Support: 방문해주세요 www.geminisound.com/support 최신 지원 정보 및 연락처는 다음을 참조하십시오.