1. 서론
The Flysky FS-IA10B is a 10-channel 2.4GHz AFHDS 2A (Automatic Frequency Hopping Digital System Second Generation) receiver designed for various remote-controlled models, including airplanes, gliders, and helicopters. This manual provides essential information for the proper setup, operation, and maintenance of your FS-IA10B receiver.
수신기를 안전하고 효율적으로 사용하려면 사용 전에 이 설명서를 꼼꼼히 읽어 주십시오.
2. 패키지 내용
- 1 x Flysky FS-IA10B 10-Channel Receiver
- 1 x Bind Cable
3. 특징
- 2.4GHz 10-Channel: Utilizes the second-generation automatic digital frequency system (AFHDS 2A) for reliable communication.
- 호환 송신기: Works with Flysky FS-i4, FS-i6, FS-i6S, FS-i6X, FS-i10, FS-GT2E, FS-GT2F, FS-GT2G, FS-it4S, FS-GT5, FS-i8, FS-TM10 transmitters.
- 적용 모델: Suitable for RC airplanes, gliders, and helicopters.
- 듀얼 안테나: Features two 26mm antennas for enhanced radio frequency signal reception and reliability.
- LED 표시등: A light indicator displays the receiver's power and operational status in real-time.
- 데이터 인터페이스: Supports PWM, PPM, i.bus, and s.bus data connections.
- RSSI 지원: Provides Received Signal Strength Indication.
4. 사양
| 무게 | 22g |
| 채널 수 | 10 |
| 주파수 범위 | 2.4 - 2.48GHz |
| 전송 전력 | 20dBm 미만 |
| 수신기 감도 | -105dBm (XNUMXdBm) |
| RSSI | 지원됨 |
| 데이터 연결 | PWM / PPM / i.bus / s.bus |
| 부호화 | GFSK |
| 안테나 길이 | 26 mm x 2 (Dual Antenna) |
| 입력 전원 | 4-6.5V DC |
| 인증 | CE0678, FCC |
| i-BUS 인터페이스 | 예 |
| 데이터 수집 인터페이스 | 예 |
| 치수(길이 x 너비 x 높이) | 5 x 3.2 x 1.5cm |
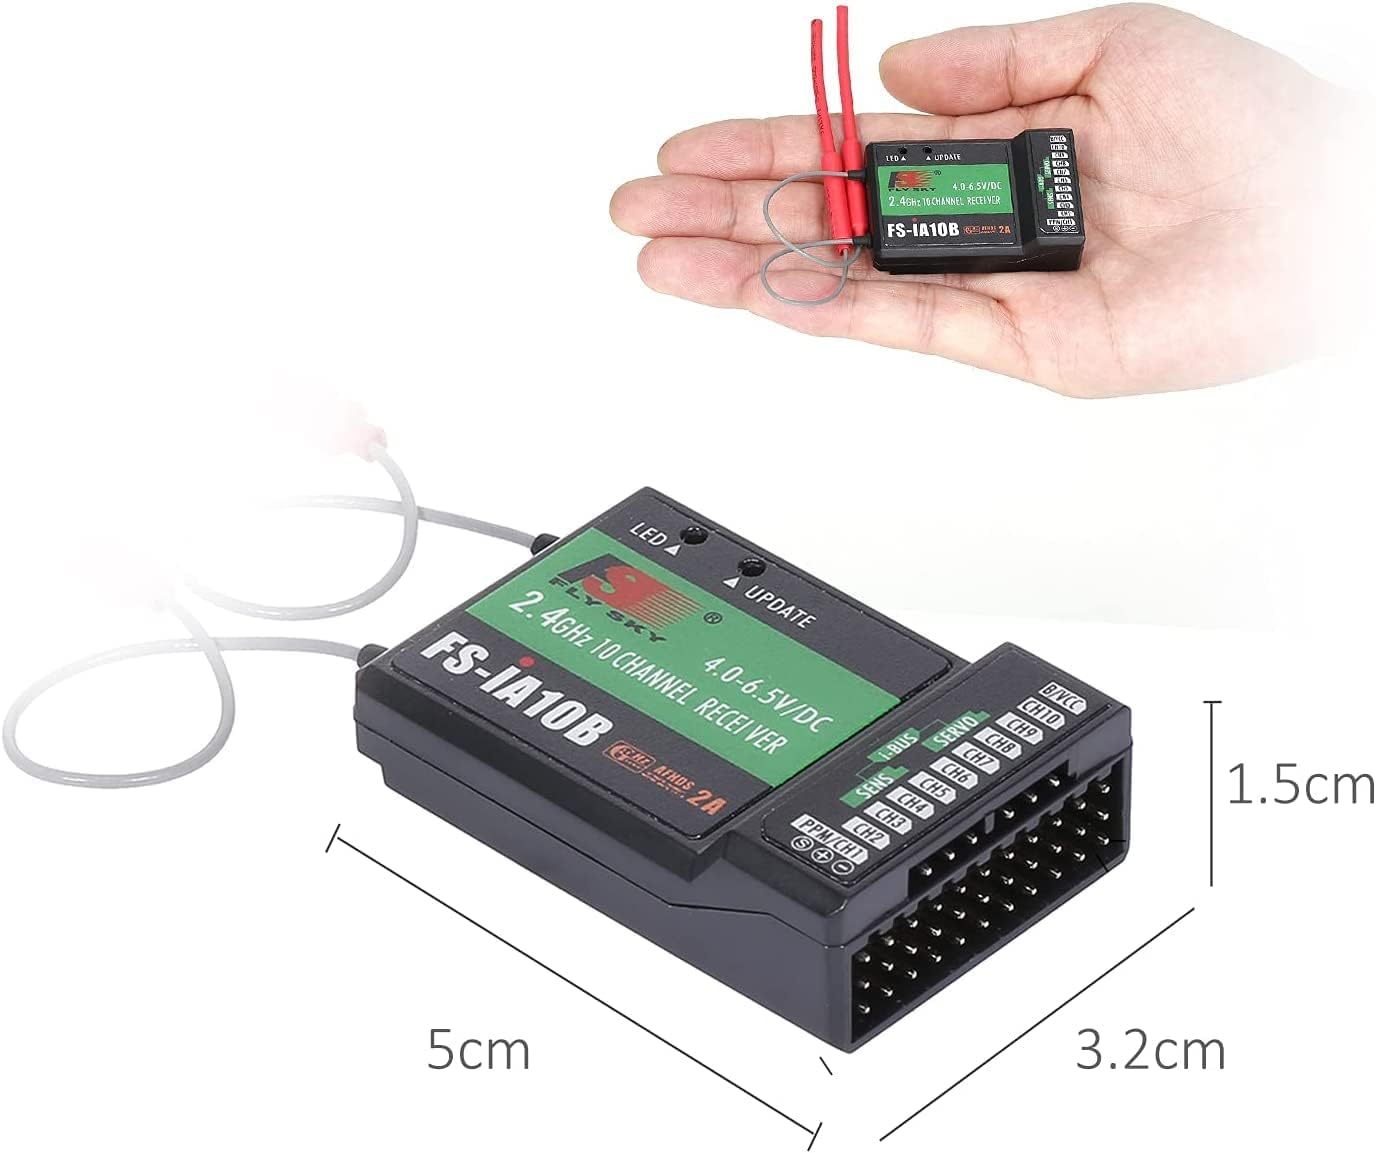
The receiver is shown held in a hand for scale, with dimensions indicated as 5cm (length), 3.2cm (width), and 1.5cm (height).
5. 설정 및 바인딩
The FS-IA10B receiver must be bound to your Flysky transmitter before use. Follow these steps carefully:
- 송신기를 준비하세요: Install the battery in your 2.4G Flysky transmitter and ensure it is turned OFF.
- Connect Bind Cable: Insert the bind cable (included) into the BIND/CH3 channel port of the FS-IA10B receiver.
- Power Receiver: Connect the receiver battery (not included) to the VCC port of the receiver. Both LEDs on the receiver will flash simultaneously, indicating the receiver is in binding mode.
- 송신기에서 바인딩 시작: Press and hold the bind button on your transmitter, then power on the transmitter.
- Observe Receiver LED: Observe the LED on the receiver. When the LED stops flashing and remains solid, it indicates successful binding. This process typically takes about 5 seconds.
- 완전 제본: Release the bind button on the transmitter and remove the bind cable from the receiver.
- 테스트 시스템 : Install the servos and other components, then perform a thorough test of all functions. If testing fails, please repeat the above steps. If testing is successful, binding is complete.
중요 참고 사항: Do not power on the receiver during the setup process to prevent loss of control. The binding procedure described above is only applicable to Flysky 2.4G products.

This diagram provides guidance on proper antenna orientation (90-degree angles) for optimal signal reception and a detailed wiring schematic connecting the receiver to a bind cable, battery, switch, and various servos (Rudder, Throttle, Elevator, Aileron) via i-BUS and PPM/CHT interfaces.

This image visually outlines the seven steps for binding the receiver to a transmitter, including connecting the bind cable, battery, and observing the LED indicator for successful pairing.
6. 사용 설명서
Once the receiver is successfully bound to your transmitter and installed in your model, ensure all connections to servos, flight controllers, or other components are secure. Power on your transmitter first, then power on your model (receiver). Always verify that all control surfaces and functions respond correctly to transmitter inputs before flight or operation.
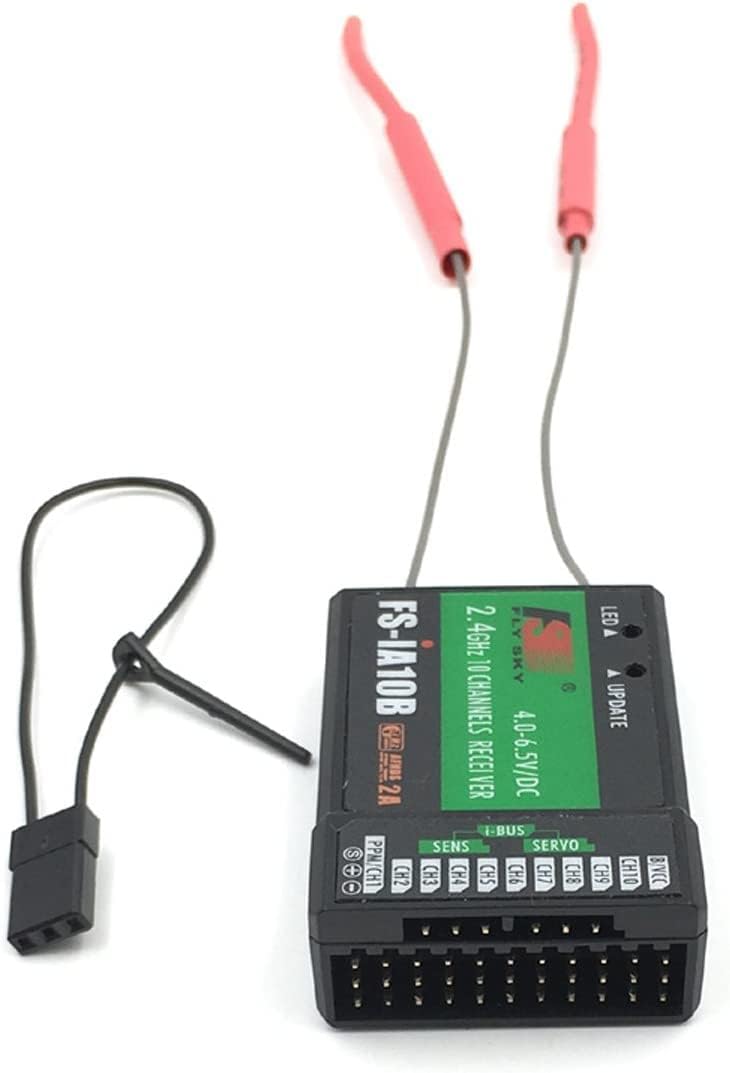
This image shows the Flysky FS-IA10B receiver from a top-down perspective, highlighting its dual antennas and clearly labeled ports for channels (CH1-CH10), PPM/CHT, i-BUS, SENS, SERVO, and B/VCC.

자세한 view of the receiver's port pins, indicating the standard S (Signal), + (Positive), and - (Negative) connections for each channel.
7. 유지관리
- 수신기를 깨끗하고 먼지, 흙, 습기가 없는 상태로 유지하세요.
- 모든 배선과 연결부를 정기적으로 검사하여 마모나 손상의 징후가 있는지 확인하세요.
- Ensure antennas are not bent or damaged and are positioned correctly for optimal signal reception.
- 수신기를 사용하지 않을 때는 건조하고 시원한 환경에 보관하세요.
8. 문제 해결
- 수신자가 구속력이 없음: Ensure the transmitter is a compatible Flysky 2.4G model. Verify that the bind cable is correctly inserted into the BIND/CH3 port and that the receiver battery is providing adequate power. Repeat the binding steps carefully.
- 신호 없음/신호 끊김: Check antenna placement and ensure they are not obstructed or damaged. Verify that the transmitter and receiver are within range and that there are no major sources of interference nearby.
- Incorrect servo response: Confirm that servos are correctly plugged into the appropriate channels on the receiver. Check transmitter settings for channel assignments and servo directions.
- LED가 켜지지 않음: Check the power connection to the receiver. Ensure the battery is charged and connected correctly to the VCC port.
9. 안전 정보
- Always operate RC equipment responsibly and in accordance with local laws and regulations.
- Ensure your model is safe to operate and all components are functioning correctly before each use.
- Keep a safe distance from people, animals, and property when operating RC models.
- Never operate RC equipment near power lines, busy roads, or airports.
- Disconnect the battery from the model when not in use to prevent accidental activation.
10. 보증 및 지원
보증 정보 및 기술 지원에 대한 자세한 내용은 구매 시 제공된 설명서를 참조하거나 판매점에 문의하십시오. 보증 청구를 위해 구매 증빙 자료를 보관하십시오.