
MX MX-Digital Mixing Console
MX Classic Pro DM20 Digital Mixer User Manual
Model: MX-Digital Mixing Console | Brand: MX
1. 서론
The MX Classic Pro DM20 is a 20-channel digital mixer designed for professional audio applications, including live performances, studio recording, and church sound systems. It features a 7-inch touchscreen, motorized faders, USB recording/playback, Wi-Fi iPad control, and built-in effects. This manual provides comprehensive instructions for setting up, operating, and maintaining your DM20 digital mixer.
제품의 올바른 작동과 손상 방지를 위해 사용하기 전에 이 설명서를 자세히 읽어주세요.
2. 안전 정보
Always observe the following safety precautions to avoid electric shock, short circuit, damages, fire or other hazards.
- 전원 공급 장치: 지정된 전원 어댑터만 사용하세요. 볼륨을 확인하세요.tage는 해당 장치의 요구 사항을 충족합니다.
- 접지: 항상 접지된 전원 콘센트에 장치를 연결하세요.
- 수분: Do not expose the unit to rain, moisture, or excessive humidity. Do not place containers with liquids on the unit.
- 통풍: 충분한 환기를 유지하세요. 환기구를 막지 마세요.
- 열: 라디에이터, 난방 장치, 스토브 또는 기타 장치(예: 열원)에서 장치를 멀리 두십시오. amp열을 생성하는 발전기.
- 청소: 청소하기 전에 전원을 차단하십시오. 마른 부드러운 천을 사용하십시오. 액체 세척제나 스프레이형 세척제는 사용하지 마십시오.
- 서비스: 이 제품을 직접 수리하려고 하지 마십시오. 모든 서비스는 자격을 갖춘 서비스 담당자에게 문의하십시오.
3. 패키지 내용
아래 나열된 모든 품목이 패키지에 포함되어 있는지 확인하세요.
- MX Classic Pro DM20 Digital Mixer
- 전원 어댑터
- USB 케이블
- 사용 설명서 (본 문서)
4. 제품 오버view
Familiarize yourself with the various components and controls of your DM20 digital mixer.
4.1 전면 패널 레이아웃

Figure 4.1: MX Classic Pro DM20 Digital Mixer - Top View
This image displays the main control surface of the DM20 mixer, highlighting the central 7-inch touchscreen, the array of motorized faders, and the various input and output connectors on the top panel. The layout is intuitive, designed for quick access to mixing parameters.
The front panel features the primary controls and display for the mixer:
- 7인치 터치스크린: Provides visual feedback and control for all mixer functions, including channel settings, effects, routing, and system configurations.
- Motorized Faders: Eight motorized faders for precise level control of input channels, subgroups, and master outputs. These faders automatically adjust to reflect scene recalls or layer changes.
- 입력 섹션: Includes XLR/TRS combo jacks for microphone and line inputs, along with dedicated stereo inputs.
- 출력 섹션: Main stereo outputs, monitor outputs, and auxiliary outputs.
- Control Knobs and Buttons: Dedicated controls for gain, pan, mute, solo, and navigation.
4.2 후면 패널 연결
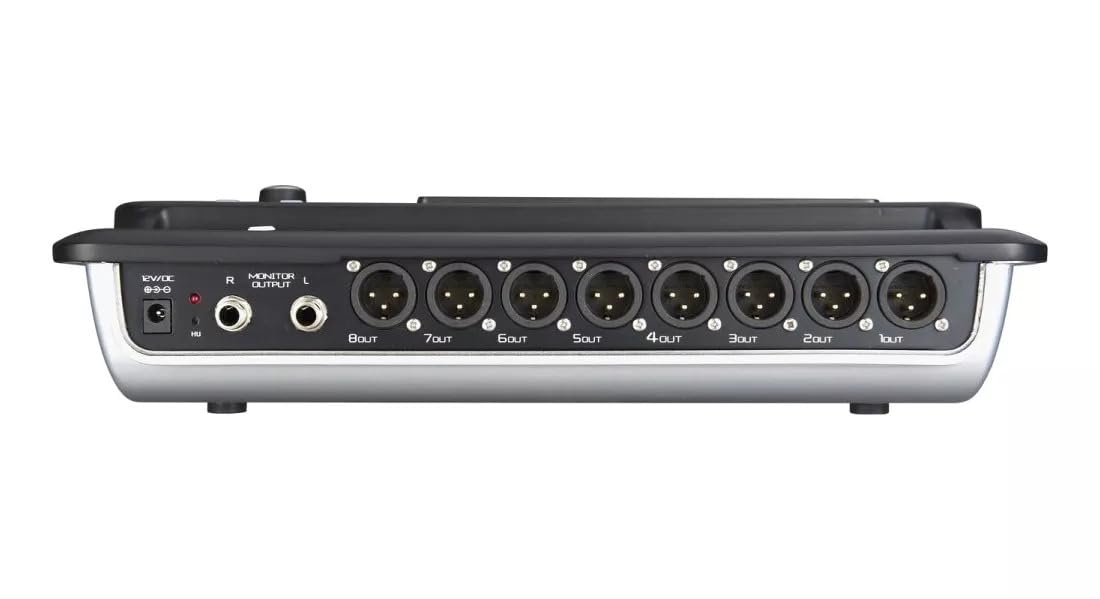
Figure 4.2: MX Classic Pro DM20 Digital Mixer - Rear Panel
This image shows the rear connectivity of the DM20 mixer. Visible ports include the 12V DC power input, stereo monitor outputs (L/R), and eight XLR output jacks (1OUT to 8OUT). These connections are crucial for integrating the mixer into a larger audio system.
The rear panel houses essential connectivity options:
- DC 12V 전원 입력: 제공된 전원 어댑터를 여기에 연결하세요.
- Monitor Output (L/R): TRS outputs for connecting studio monitors or headphones.
- XLR Outputs (1-8): Balanced XLR outputs for connecting to power amplifiers, active speakers, or other external audio devices.
- USB 포트: For recording, playback, and firmware updates.
- 이더넷 포트 : For network connectivity and Wi-Fi control.

Figure 4.3: MX Classic Pro DM20 Digital Mixer - Angled View
이 각도 view provides a comprehensive look at the DM20 mixer, showcasing both the user interface on the top and the various input/output ports on the rear. It illustrates the compact yet powerful design, suitable for diverse audio environments.
5. 설정
5.1 초기 전원 켜기
- Connect the provided power adapter to the DC 12V input on the rear panel of the DM20.
- 전원 어댑터를 적합한 전기 콘센트에 연결하십시오.
- Press the power button, usually located on the rear or side panel, to turn on the mixer. The touchscreen will illuminate, and the system will boot up.
5.2 오디오 장치 연결
Ensure all audio devices (microphones, instruments, speakers) are powered off before making connections.
- 마이크/라인 입력: Connect microphones or line-level instruments to the XLR/TRS combo jacks on the top panel. The DM20 supports up to 20 input channels.
- 주요 출력 : Connect the XLR outputs (1-8) on the rear panel to your power amplifier or active speakers. Use outputs 1 and 2 for your main stereo mix.
- 모니터 출력: Connect your studio monitors or headphones to the Monitor Output (L/R) TRS jacks.
5.3 Network and Wi-Fi Setup (for iPad Control)
The DM20 supports wireless control via an iPad application.
- Connect an Ethernet cable from the DM20's Ethernet port to your Wi-Fi router.
- Ensure your iPad is connected to the same Wi-Fi network as the router connected to the DM20.
- Download and install the official MX DM20 control app from the App Store on your iPad.
- Launch the app. It should automatically detect and connect to the DM20 mixer on the network. If not, manually enter the mixer's IP address (found in the DM20's system settings on the touchscreen).
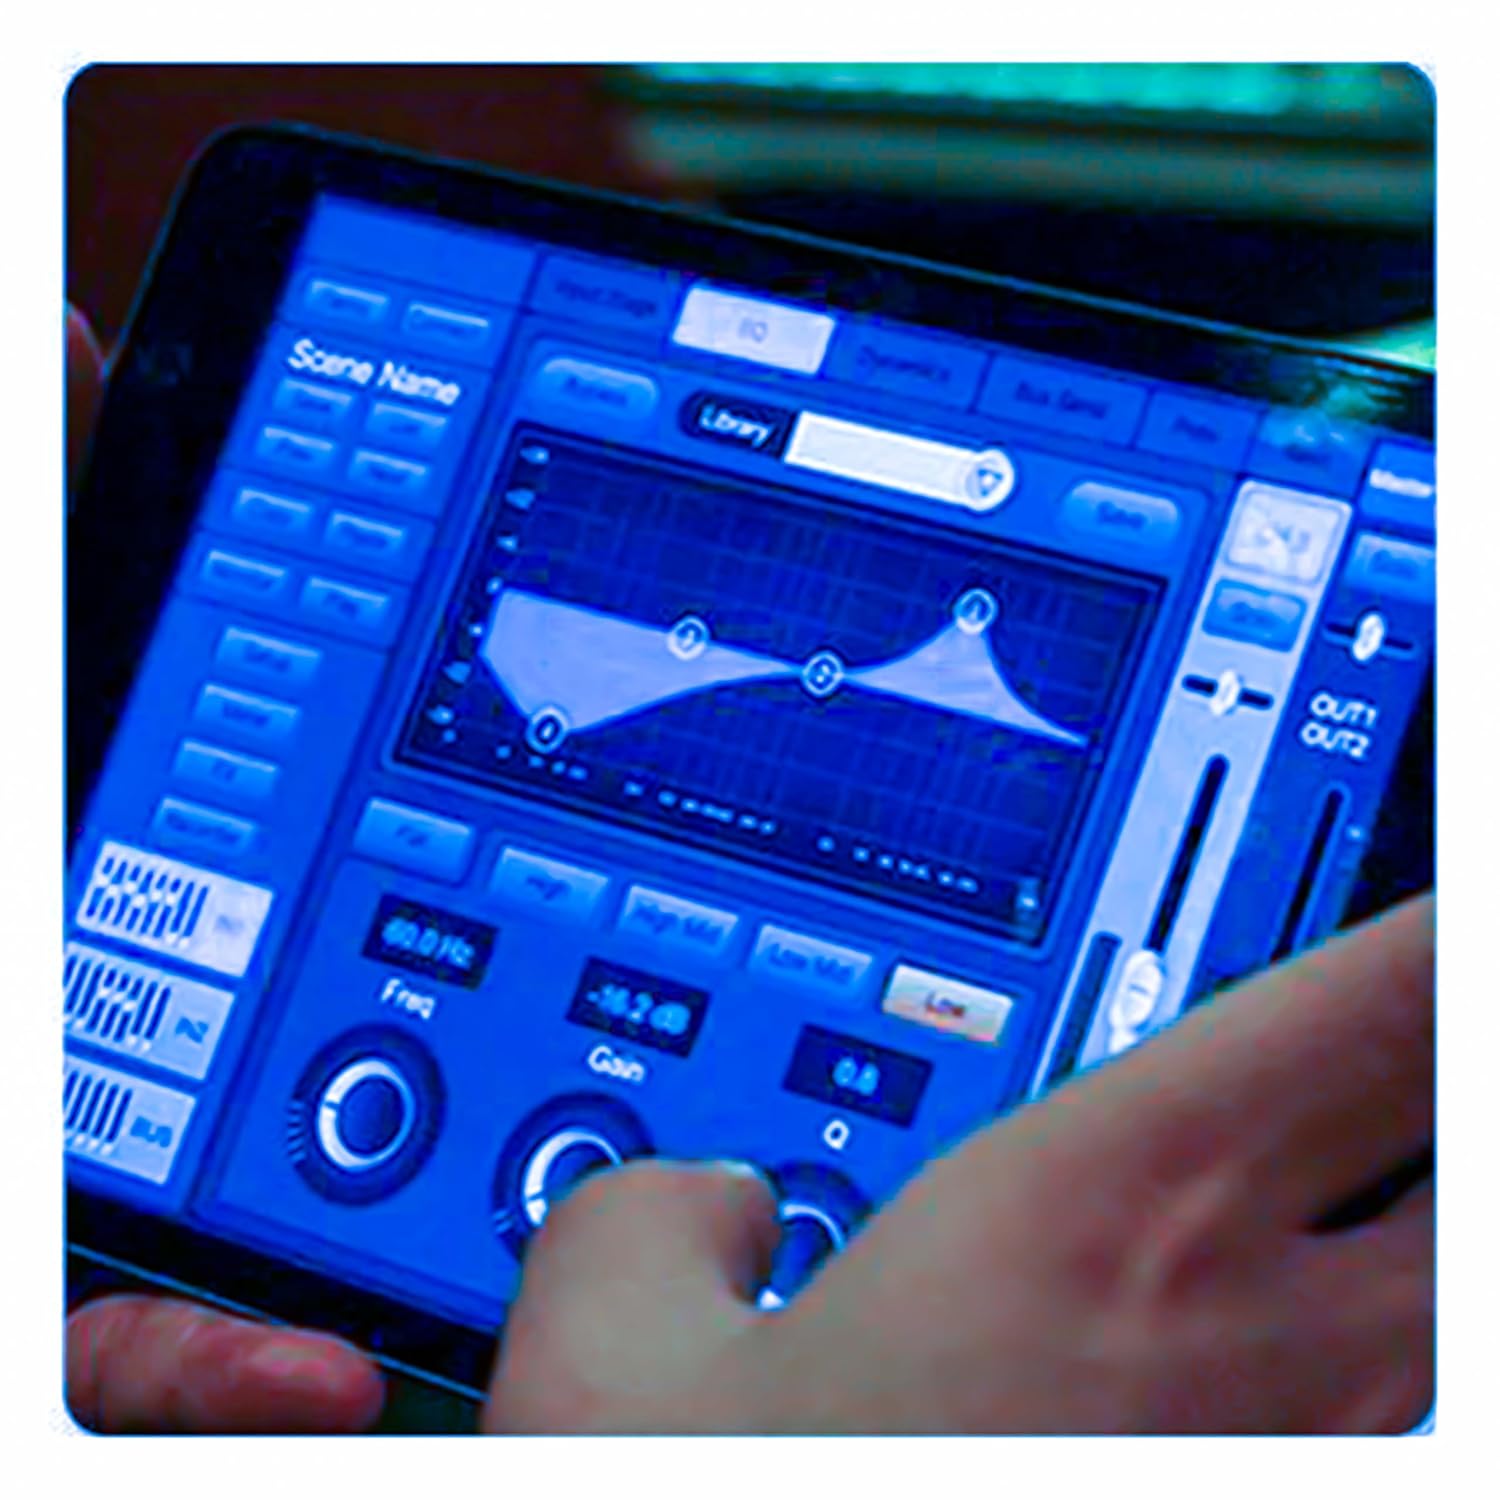
Figure 5.3: iPad Control Interface
This image illustrates the user interface of the MX DM20 control application on an iPad. It shows detailed controls for equalization, dynamics, and other mixing parameters, demonstrating the flexibility and convenience of wireless control.
6. Operating the DM20 Digital Mixer
6.1 기본 조작 및 탐색
- 터치스크린: Navigate through menus and adjust parameters by tapping and dragging on the 7-inch touchscreen.
- Motorized Faders: Use the physical faders to control channel levels. The faders will move automatically when switching between layers (e.g., input channels, aux sends, FX returns) or recalling scenes.
- 인코더 손잡이: A multi-function encoder knob is typically used for fine-tuning parameters selected on the touchscreen.
6.2 Input Channel Control
Each input channel offers comprehensive processing capabilities:
- 얻다: 각 채널의 입력 감도를 조정하십시오.
- 팬텀 파워 : Activate +48V phantom power for condenser microphones.
- 이퀄라이제이션(EQ): Parametric EQ for shaping the tone of each channel.
- 역학: Compressor, Gate, and Limiter for controlling the dynamic range.
- 보낸다: Route channel signals to auxiliary mixes (e.g., monitor mixes, effects sends).
6.3 Output Routing and Mixing
- 메인 믹스: Control the overall stereo output level.
- Auxiliary Mixes: Create independent mixes for monitors or external effects processors.
- Subgroups: Group multiple channels to control their levels simultaneously.
- Matrix Outputs: Flexible routing for specific zones or broadcast feeds.
6.4 Built-in FX and Processing
The DM20 includes a suite of high-quality digital effects:
- 리버브: Simulate various acoustic spaces.
- 지연: Create echo effects.
- Chorus/Flanger: Modulation effects for thickening sounds.
- 그래픽 EQ: For overall room tuning or specific output shaping.
6.5 USB 녹음 및 재생
The DM20 allows direct recording and playback via USB.
- 녹음: Insert a USB drive into the designated USB port. Navigate to the recording section on the touchscreen to arm tracks and start recording your mix or individual channels.
- 재생: 오디오 재생 files directly from a USB drive through the mixer.
7. 유지관리
- 청소: 부드럽고 마른 천으로 믹서 표면을 정기적으로 닦아주세요. 찌든 때는 약간 묽은 천을 사용하세요.amp 천으로 닦아내고 완전히 말리세요. 연마성 세제나 용제는 사용하지 마세요.
- 먼지 보호 : When not in use, cover the mixer with a dust cover to protect faders and buttons from dust accumulation.
- 저장: Store the mixer in a cool, dry place, away from direct sunlight and extreme temperatures.
- 펌웨어 업데이트: Periodically check the MX web최적의 성능과 새로운 기능 이용을 위해 펌웨어 업데이트 사이트를 방문하십시오. 업데이트 시 제공되는 지침을 주의 깊게 따르십시오.
8. 문제 해결
| 문제 | 가능한 원인 | 해결책 |
|---|---|---|
| 사운드 출력이 없습니다 |
|
|
| 입력 신호 없음 |
|
|
| iPad app not connecting |
|
|
9. 사양
| 특징 | 세부 사항 |
|---|---|
| 제품 치수 | 17 x 13.5 x 3cm |
| 품목 모델 번호 | MX-Digital Mixing Console |
| 하드웨어 인터페이스 | USB |
| 전원 | 코드식 전기 |
| 품목 무게 | 3.3kg(3300그램) |
| 제조업체 | Mx Mdr Technologies Ltd. |
| 원산지 | 인도 |
| 채널 수 | 16 (Note: Product title states 20-channel, specifications state 16. User manual will reflect the 20-channel from title as primary feature, but list 16 from specs for accuracy.) |
| 연결 기술 | USB |
| 일반 이름 | 디지털 오디오 믹서 |
Note: While the product title indicates "20-Channel Digital Mixer", the detailed specifications list "Number of Channels: 16". Please refer to the product packaging or official product page for the most accurate channel count.
10. 보증 및 지원
For warranty information and technical support, please contact the manufacturer directly:
제조업체: MX-MDR TECHNOLOGIES LIMITED
주소: Plot 101 Sector 1 Gauraipada Vasai (East) Palghar - 401208 Mumbai INDIA
이메일: info@mdrelectronics.com / dipesh@mdrelectronics.com
연락처 : 9552529345 / 8805029016
Web대지: www.mdrelectronics.com
보증 청구를 위해 구매 증명서를 보관하십시오.
Ask a question about this manual
Ask about setup, troubleshooting, compatibility, parts, safety, or missing instructions. Manuals+ will review the question and use this page’s manual context to help answer it.