1. 서론
This manual provides detailed instructions for the installation, operation, and maintenance of your Edge Audio Xtreme Series EDX5000.1FD-E0 Monoblock Amplifier. The EDX5000.1FD-E0 is a high-performance Class D full-bridge amplifier designed for powerful audio output. Please read this manual thoroughly before attempting installation or operation to ensure proper use and to prevent damage.
1.1 안전 예방 조치
- 전기 연결 작업을 하기 전에 항상 차량 배터리의 음극 단자를 분리하십시오.
- 손상이나 단락을 방지하기 위해 모든 배선이 올바르게 배치되고 고정되었는지 확인하십시오.
- 이 설명서에 명시된 대로 전원 및 접지 연결에 적합한 규격의 배선을 사용하세요.
- 장착을 피하십시오 amp습기나 과도한 열에 노출되는 장소에는 증폭기를 설치하지 마십시오.
- 설치 과정의 어떤 부분이든 확실하지 않은 경우 전문 설치자에게 문의하세요.
2. 패키지 내용
설치를 진행하기 전에 패키지에 모든 품목이 들어 있는지 확인하세요.
- Edge Audio EDX5000.1FD-E0 Monoblock Amp리퍼
- Remote Bass Control Unit
- Wiring for Remote Bass Control
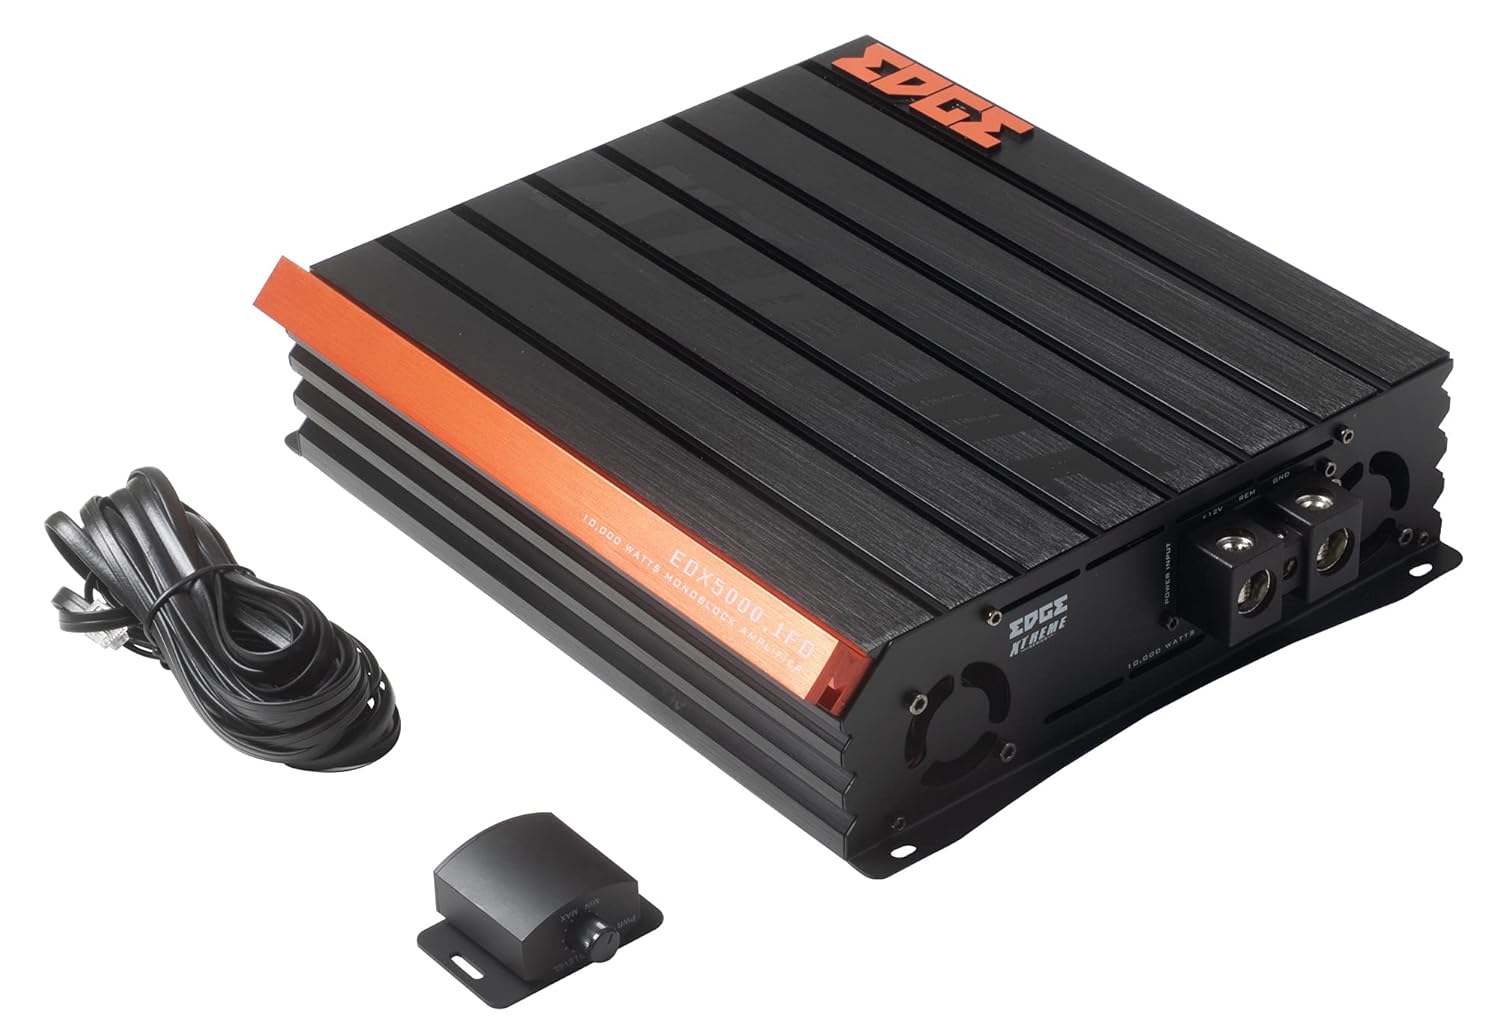
Image 2.1: Contents of the EDX5000.1FD-E0 package, including the amplifier, remote bass control, and connecting cable.

Image 2.2: The retail packaging for the Edge Audio EDX5000.1FD-E0 Monoblock Amp리퍼.
3. 특징
The Edge Audio Xtreme Series EDX5000.1FD-E0 amplifier incorporates advanced features for optimal audio performance:
- Monoblock power amplifier design for dedicated subwoofer applications.
- Max Power: 10,000 watts.
- Built-in active crossovers (High-Pass Filter and Low-Pass Filter) for precise sound shaping.
- Adjustable Bass Boost circuit for enhanced low-frequency response.
- Ultra-efficient Class D topology for high power output with minimal heat generation.
- Wideband frequency response up to 20kHz.
- Full bridge technology for efficient power delivery.
- Compact footprint for versatile installation options.
- Dimensions (H x W x D): 2.5 x 10.4 x 9.1 inches (64 x 264 x 230mm).

이미지 3.1: 상단 view of the EDX5000.1FD-E0 amp리파이어, 쇼크asing its compact design and heatsink fins.
4. 설정 및 설치
적절한 설치는 성능과 수명에 매우 중요합니다. amp증폭기. 다음 지침을 주의 깊게 따르십시오.
4.1 설치 위치
마운트하다 amplifier in a dry, well-ventilated area, away from direct sunlight or heat sources. Ensure sufficient airflow around the amplifier's heatsink. The amp이 증폭기는 표면 장착용으로 설계되었습니다.
4.2 배선 연결
All wiring should be securely connected and insulated to prevent short circuits. Use high-quality, appropriate gauge wiring.
4.2.1 전원 연결
연결하다 amp차량의 전기 시스템에 다음과 같이 증폭기를 연결합니다.
- +12V(전원): Connect a heavy-gauge power cable (e.g., 4 AWG or larger for 10,000W max power) directly from the positive terminal of the vehicle's battery to the +12V terminal on the amp앰프. 배터리에서 45cm(18인치) 이내에 적절한 퓨즈(별도 구매)를 설치하십시오.
- GND(접지): 전원 케이블과 동일한 굵기의 접지 케이블을 GND 단자에 연결하십시오. amplifier to a clean, unpainted metal surface of the vehicle chassis. Ensure a solid electrical connection.
- REM(원격 켜기): Connect a smaller gauge wire (e.g., 18 AWG) from the REM terminal on the amp앰프를 헤드 유닛의 원격 켜짐 출력 단자에 연결하세요. 이 선은 앰프를 헤드 유닛의 원격 켜짐 출력 단자로 전환합니다. amp앰프를 오디오 시스템과 함께 켜고 끌 수 있습니다.

Image 4.1: Power input terminals (+12V, REM, GND) on the EDX5000.1FD-E0 amp리퍼.
4.2.2 오디오 입력 연결
Connect your head unit's RCA outputs to the 'LOW INPUT' RCA jacks on the amp리퍼.
4.2.3 스피커 출력 연결
서브우퍼를 스피커 출력 단자에 연결하세요. amplifier. Ensure correct polarity (+ to + and - to -) for optimal performance. Refer to your subwoofer's specifications for impedance matching.

Image 4.2: Rear panel of the EDX5000.1FD-E0 amplifier, showing low-level inputs, crossover controls, gain, bass boost, and speaker output terminals.
5. 사용 설명서
설치 후 조정하세요 amp최적의 음질을 위한 앰프 설정.
5.1 제어판 이상view
Refer to Image 4.2 for the location of the following controls:
- HPF(하이패스필터): Adjusts the high-pass crossover frequency. For subwoofer applications, this should typically be set to its minimum or off, as a low-pass filter is usually preferred.
- LPF(저역통과필터): Adjusts the low-pass crossover frequency (15Hz - 200Hz). This filters out frequencies above the set point, sending only low frequencies to the subwoofer. Set this according to your subwoofer and system requirements, typically between 60Hz and 100Hz.
- 이득: 일치 amplifier's input sensitivity to the output level of your head unit. Start with the gain at minimum, then slowly increase it until you hear distortion, then back off slightly. Do not use the gain control as a volume knob.
- 베이스 부스트: Adjusts the level of bass enhancement (0dB - 12dB). Use sparingly to avoid distortion.
- FREQ (Bass Boost Frequency): Selects the center frequency for the bass boost (35Hz - 70Hz).
- 먼: Port for connecting the wired remote bass control unit.
5.2 원격 베이스 컨트롤
The included remote bass control allows for convenient adjustment of the subwoofer output level from the driver's seat. Connect it to the 'REMOTE' port on the amp리퍼.
6. 유지관리
정기적인 유지보수는 제품의 수명과 성능을 보장하는 데 도움이 됩니다. amp리퍼.
- 청소: 주기적으로 청소하십시오 amp앰프 외부를 부드럽고 마른 천으로 닦으십시오. 강한 화학 약품이나 연마성 세척제를 사용하지 마십시오. 통풍구에 먼지와 이물질이 없는지 확인하십시오.
- 연결 확인: 전원, 접지, 리모컨 및 스피커 연결부의 조임 상태와 부식 여부를 매년 점검하십시오. 연결이 느슨하면 성능 저하 또는 손상이 발생할 수 있습니다.
- 환경: 확인하십시오 amp증폭기는 극한 온도로부터 보호되는 건조하고 안정적인 환경에 보관됩니다.
7. 문제 해결
문제가 발생하는 경우 amp앰프 관련 문제 발생 시, 지원팀에 문의하기 전에 다음의 일반적인 문제 및 해결 방법을 참조하십시오.
- 전원 없음:
- 배터리 근처에 있는 인라인 퓨즈를 확인하십시오.
- Verify +12V, GND, and REM connections are secure and receiving power.
- Ensure the remote turn-on wire is connected to a switched 12V source.
- 소리 없음:
- Check all RCA input and speaker output connections.
- Verify head unit is powered on and outputting audio.
- Adjust the GAIN control.
- 왜곡된 소리:
- 게인 설정을 낮추세요.
- 스피커 배선에 단락이나 극성 오류가 있는지 확인하십시오.
- 스피커 임피던스가 일치하는지 확인하세요 amp라이저 사양.
- Reduce BASS BOOST if active.
- Amp리파이어 과열:
- 주변에 적절한 환기가 되도록 하십시오. amp리퍼.
- Check speaker impedance; running too low an impedance can cause overheating.
- Verify power and ground wire gauge is sufficient.
8. 사양
Technical specifications for the Edge Audio Xtreme Series EDX5000.1FD-E0 Monoblock Amp정수기:
| 특징 | 사양 |
|---|---|
| 모델 번호 | EDX5000.1FD-E0 |
| 상표 | 가장자리 |
| Amp정수기 유형 | Monoblock, Class D, Full Bridge |
| 최대 전력 | 10,000 와트 |
| 주파수 응답 | 최대 20kHz |
| Built-in Crossovers | Active (HPF, LPF) |
| 베이스 부스트 | Adjustable (0-12dB) |
| 베이스 부스트 주파수 | 조절 가능 (35Hz-70Hz) |
| 권tage | 230볼트(작동 전압)tage Range typically 12-14.4V DC for car audio) |
| 장착 유형 | 표면 실장 |
| 제품 크기(높이 x 너비 x 깊이) | 2.5 x 10.4 x 9.1인치(64 x 264 x 230mm) |
| 제품 무게 | 6.61 파운드 |
9. 보증 및 지원
For warranty information or technical support, please refer to the documentation provided at the time of purchase or contact your authorized Edge Audio dealer. Keep your proof of purchase for warranty claims.