
1. 서론
This manual provides comprehensive instructions for the installation, operation, and maintenance of the JEYI SK4 NVMe PCI-E Adapter with Warship iStorm Cooler. This product is designed to allow M.2 NVMe SSDs (PCIe protocol) to be used in a standard PCI Express X4, X8, or X16 slot, enhancing system performance with its PCIe 3.0 GEN3 full-speed design and integrated high-speed signal amplification technology. It is equipped with a cooling solution to maintain optimal SSD temperatures.
2. 안전 정보
- 내부 부품을 설치하거나 제거하기 전에 항상 컴퓨터의 전원을 차단하십시오.
- 정전기 방지 손목 스트랩을 착용하거나 접지된 금속 물체를 자주 만져 부품의 정전기 방전(ESD) 손상을 방지하십시오.
- Handle the adapter and SSD by their edges to avoid touching sensitive components.
- 과열을 방지하려면 컴퓨터 케이스 내부가 적절히 환기되도록 하세요.
- Do not attempt to modify the product. Unauthorized modifications may void the warranty and pose safety risks.
- 어린이의 손이 닿지 않는 곳에 보관하세요.
3. 패키지 내용
패키지에 모든 품목이 들어 있는지 확인하세요.
- 1x JEYI PCIE 3.0 X4 NVMe Adapter Card
- 1x JEYI Warship iStorm Cooler with Fan
- Mounting screws and accessories (e.g., thermal pads, screwdriver if included)
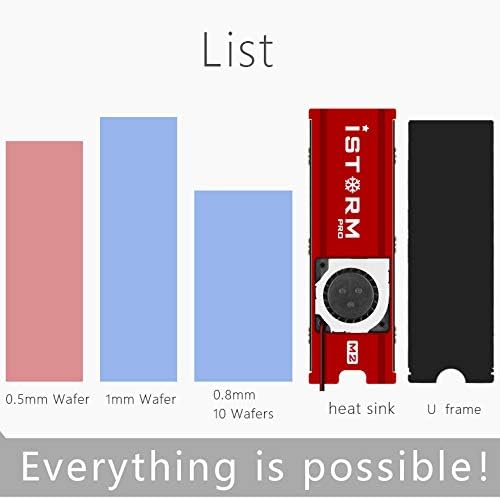
그림 3.1: Included components. This image illustrates the heat sink, U frame, and different thicknesses of thermal pads (0.5mm, 1mm, 0.8mm) that are part of the package.
4. 사양
| 특징 | 설명 |
|---|---|
| 상표 | 제이 |
| 모델 | SK4+Warship iStorm |
| 제조업체 참조 | N27361-G |
| 하드웨어 인터페이스 | PCI Express 3.0 X4 |
| Compatible PCIe Slots | PCIe X4, X8, X16 |
| 지원되는 SSD | NVMe M.2 SSDs (PCIe protocol) |
| Unsupported SSDs | M.2 NGFF disks (SATA protocol) |
| 냉각 | Integrated Warship iStorm Cooler with Fan |
| 전원 공급 장치 | SATA 15-Pin 5V (for cooler fan) |
| 특징 | JEYI high-speed signal enhancement technology, PCIe 3.0 GEN3 full-speed design, large capacity tantalum capacitor for stable voltag전자 필터링. |
| 한국어: | 761882095002 |
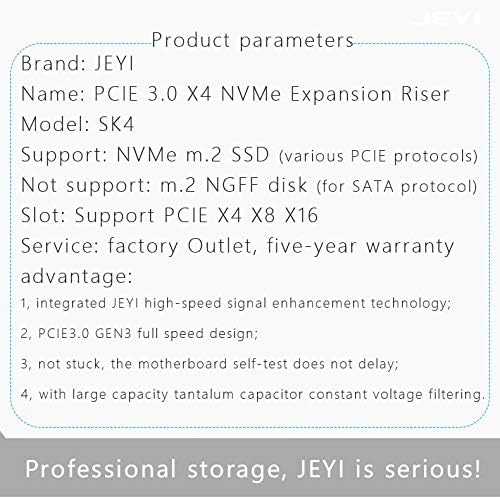
그림 4.1: Detailed product parameters. This image provides a summary of the product's key specifications, including its name, model, supported SSD types, and PCIe slot compatibility.
5. 설정
5.1. M.2 NVMe SSD 설치
- Carefully align your M.2 NVMe SSD with the M.2 slot on the JEYI SK4 adapter. The adapter supports various M.2 SSD lengths (2230, 2242, 2260, 2280).
- Insert the SSD into the slot at an angle and gently push it down until it is parallel with the adapter board.
- Secure the SSD with the provided screw or movable copper stud at the appropriate length. The adapter includes movable copper studs to accommodate different M.2 SSD lengths.

그림 5.1: M.2 SSD length compatibility. This image illustrates how the adapter supports various M.2 SSD lengths (2230, 2242, 2260, 2280) using movable copper studs.
5.2. Installing the Warship iStorm Cooler
- Apply the thermal pads to the M.2 NVMe SSD. Ensure good contact between the SSD chips and the thermal pads.
- Place the Warship iStorm cooler assembly over the SSD and adapter, aligning the mounting holes.
- Secure the cooler to the adapter using the provided screws. Do not overtighten.
5.3. Installing the Adapter into a PCIe Slot
- 컴퓨터 전원을 끄고 전원 케이블을 분리하세요.
- 컴퓨터 케이스를 엽니다.
- Locate an available PCI Express X4, X8, or X16 slot on your motherboard.
- 컴퓨터 케이스에서 해당 확장 슬롯 덮개를 제거하십시오.
- Carefully insert the JEYI SK4 adapter into the chosen PCIe slot, ensuring it is fully seated.
- Secure the adapter to the computer case with a screw.
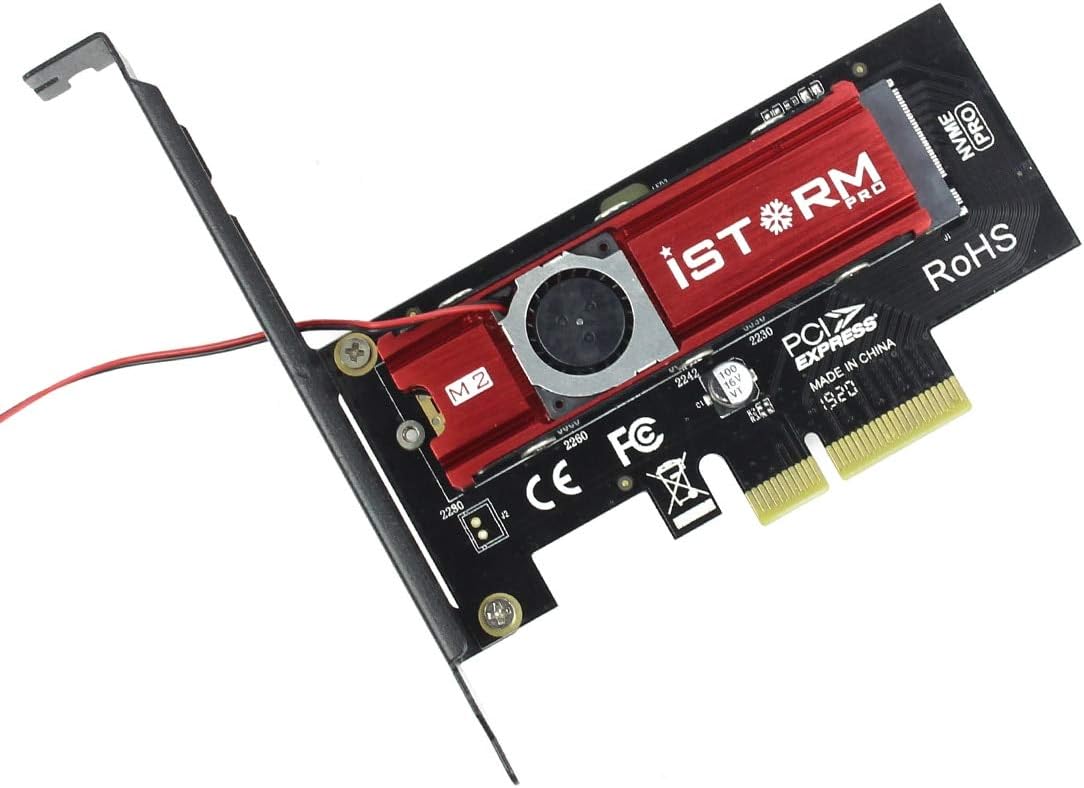
그림 5.2: Assembled adapter card. This image shows the JEYI SK4 adapter with the Warship iStorm cooler and an M.2 NVMe SSD installed, ready to be inserted into a PCIe slot.
5.4. 전원 케이블 연결
- Locate the small power cable extending from the Warship iStorm cooler.
- Connect the SATA 15-Pin 5V connector of this cable to an available SATA power connector from your power supply unit (PSU). This connection is essential for the cooling fan to operate.
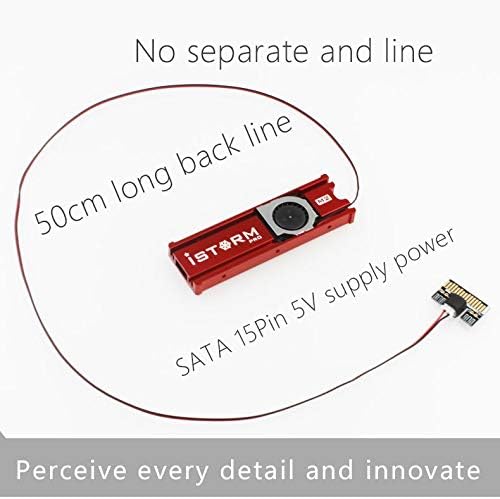
그림 5.3: Cooler power connection. This image highlights the 50cm long SATA 15-Pin 5V power cable that connects the cooler fan to the power supply unit.
6. 운영
After successful installation, close your computer case, reconnect the power cable, and power on your computer.
- 드라이버 설치: Most modern operating systems (Windows 10/11, Linux kernels 4.0+, macOS) have native support for NVMe SSDs and typically do not require additional drivers. If the SSD is not detected, check your motherboard's BIOS/UEFI settings to ensure PCIe slots are configured correctly and NVMe support is enabled.
- SSD Initialization: For a new SSD, you may need to initialize it and create partitions using your operating system's disk management tools before it can be used.
- 냉각 성능: The integrated Warship iStorm cooler with its fan will automatically operate to dissipate heat from the NVMe SSD, helping to maintain optimal performance and prevent thermal throttling.
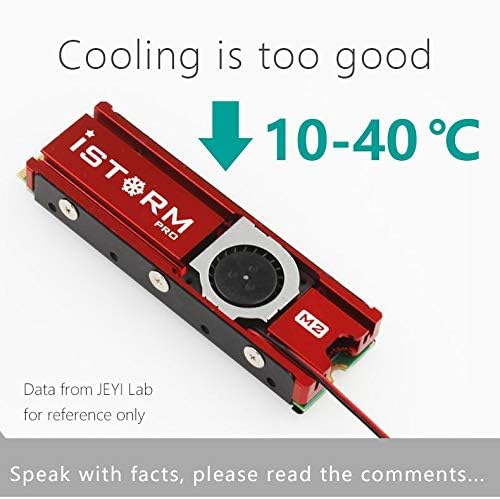
그림 6.1: Cooling performance indication. This image suggests that the iStorm Pro cooler can reduce SSD temperatures by 10-40°C, contributing to stable operation.
7. 유지관리
- 청소: Periodically inspect the cooler fan and heatsink for dust accumulation. Use compressed air or a soft brush to gently remove dust. Ensure the computer is powered off and unplugged before cleaning.
- 연결 확인: Occasionally verify that the adapter is securely seated in the PCIe slot and that the SATA power cable for the cooler is firmly connected.
- 써멀 패드: If you need to remove and re-install the SSD or cooler, inspect the thermal pads. Replace them if they appear damaged or have lost their adhesive properties to ensure effective heat transfer.

그림 7.1: Cooling design. This image shows the double-sided copper holes on the adapter, which are designed to enhance heat dissipation and improve overall cooling efficiency.
8. 문제 해결
| 문제 | 가능한 원인 | 해결책 |
|---|---|---|
| SSD not detected by the system. |
|
|
| Cooling fan not spinning. |
|
|
| SSD overheating or thermal throttling. |
|
|
9. 보증 및 지원
9.1. 보증 정보
The JEYI SK4 NVMe PCI-E Adapter with Warship iStorm Cooler comes with a XNUMX년 보증 from the date of purchase. This warranty covers defects in materials and workmanship under normal use. It does not cover damage caused by misuse, accident, unauthorized modification, or improper installation. Please retain your proof of purchase for warranty claims.
9.2. 기술 지원
For technical assistance, troubleshooting, or warranty inquiries, please contact JEYI customer support through their official web제품을 구매한 사이트 또는 소매업체.