1. 서론
This manual provides essential information for the proper installation, operation, and maintenance of your new AT Cartridge and Stylus. Designed for high-fidelity audio reproduction, this cartridge is compatible with various JVC turntable models, ensuring optimal performance when correctly set up. Please read these instructions carefully before use.
2. 제품 오버view
The AT Cartridge and Stylus system is engineered for precise tracking and clear sound. Your package includes the cartridge body, a pre-installed stylus, a spare stylus, a fixing bolt, and a stylus guard.
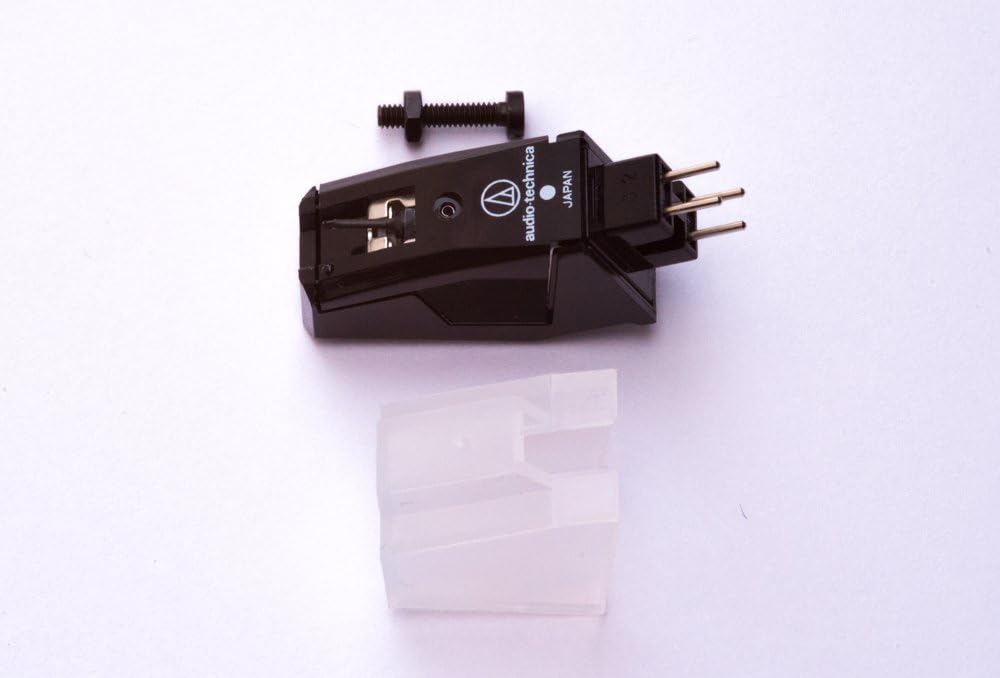
그림 2.1: The AT cartridge assembly, including the main cartridge body, a fixing bolt for mounting, and a clear stylus guard.

그림 2.2: 밑면 view of the cartridge, showing the connection pins and the fixing bolt. This view helps in understanding how the cartridge connects to the tonearm.

그림 2.3: A close-up of the green replacement stylus. The stylus is the component that makes contact with the record groove.
3. 설정 및 설치
Careful installation is crucial for optimal sound quality and to prevent damage to your records or equipment.
3.1 카트리지 장착
- 턴테이블의 전원이 꺼져 있고 플러그가 뽑혀 있는지 확인하십시오.
- Carefully remove your old cartridge, if applicable, by disconnecting the four color-coded wires and unscrewing the mounting bolts.
- Align the new AT cartridge with the headshell of your turntable's tonearm. Use the provided fixing bolt to secure the cartridge to the headshell. Do not overtighten.
- 톤암에서 나오는 색깔별로 구분된 네 개의 전선을 카트리지 뒷면의 해당 핀에 연결하십시오. 일반적인 연결 방법은 다음과 같습니다.
- 빨간색: 오른쪽 채널 핫(R+)
- 녹색: 우측 채널 접지(R-)
- 흰색: 왼쪽 채널 핫(L+)
- 파란색: 왼쪽 채널 접지(L-)
3.2 Installing the Stylus
The stylus is typically pre-installed. If you need to install the spare stylus or replace an existing one:
- Gently hold the cartridge body.
- Align the new stylus with the front of the cartridge body and push it firmly but carefully into place until it clicks securely. Avoid touching the stylus tip.
3.3 Setting Tracking Force (Downforce)
이 카트리지에 권장되는 트래킹 포스는 다음과 같습니다. 1.0~1.5그램. Refer to your turntable's manual for instructions on how to adjust the tonearm's counterweight and anti-skate settings to achieve the correct tracking force. Proper tracking force is essential for sound quality and to minimize record wear.
4. 사용 설명서
Once installed and properly adjusted, your AT Cartridge is ready for use. Always handle your turntable and records with care.
- Before playing a record, ensure the stylus guard is removed.
- Place the record on the platter and ensure it is clean.
- Gently lower the tonearm onto the record's lead-in groove using the cueing lever. Avoid dropping the tonearm directly onto the record.
- After playback, use the cueing lever to lift the tonearm and return it to its rest. Replace the stylus guard to protect the stylus when not in use.
5. 유지관리
Regular maintenance will prolong the life of your stylus and ensure consistent sound quality.
5.1 스타일러스 청소
- Clean the stylus regularly to remove dust and debris. Use a soft stylus brush, brushing gently from back to front (in the direction of the tonearm pivot). Never brush from side to side or front to back.
- For stubborn dirt, a specialized stylus cleaning fluid can be used sparingly with a stylus brush.
5.2 스타일러스 교체
The stylus is a delicate component that wears out over time. A worn stylus can damage your records and degrade sound quality. Replace the stylus after approximately 500-1000 hours of playback, or sooner if you notice a significant drop in sound quality or increased record wear. Refer to section 3.2 for replacement instructions.
6. 문제 해결
문제가 발생하면 다시 시도해 보세요.view 다음은 일반적인 문제와 해결책입니다.
| 문제 | 가능한 원인 / 해결책 |
|---|---|
| 한쪽 채널에서 소리가 나지 않거나 아주 약하게 들립니다. | Check cartridge wiring connections (Section 3.1). Ensure they are firm and correctly matched (L+/L-, R+/R-). Inspect stylus for damage. |
| 소리가 왜곡되거나 끊김 현상이 발생합니다. | Verify tracking force is set correctly (1.0-1.5g, Section 3.3). Clean the stylus (Section 5.1). Check for a worn or damaged stylus (replace if necessary). Ensure records are clean. |
| 윙윙거리는 소리 | Ensure all ground wires are properly connected (turntable to amplifier, tonearm to cartridge). Check for interference from other electronic devices. |
| 스타일러스가 홈을 따라가지 않음 | Check tracking force (Section 3.3) and anti-skate settings. Ensure the stylus is correctly seated in the cartridge body. |
7. 사양
- 주파수 응답: 20-22,000Hz
- 채널 분리: 22kHz에서> 1dB
- Recommended Tracking Force (Downforce): 1.0 - 1.5 grams
- 제조업체: 오디오테크니카
- 모델 번호: 4330367148
- Compatible JVC Turntable Models: AL-A155TN, AL-A155TNX, AL-F330BK, AL-F350BKX, L-E22, L-E50B, AL-FQ555BK
8. 보증 및 지원
For warranty information and technical support, please refer to the documentation provided by your retailer or contact the manufacturer, Audio-Technica, directly. Keep your proof of purchase for warranty claims.