
1. 이상view
The HyperX Cloud II is a high-performance gaming headset designed for comfort and superior audio quality across multiple platforms. It features virtual 7.1 surround sound, large 53mm drivers, and a durable aluminum frame. The headset is equipped with comfortable memory foam ear cushions and a detachable noise-cancelling microphone for clear communication.

Image 1: The HyperX Cloud II Gaming Headset in Gun Metal, showcasin디자인과 탈착식 마이크가 특징입니다.
Video 1: An official product video highlighting the key features and design of the HyperX Cloud II Gaming Headset.
2. 상자 안에 무엇이 들어있나요?
- HyperX Cloud II 게임용 헤드셋
- 탈착식 노이즈 캔슬링 마이크
- USB Sound Card Audio Control Box
- PC 연장 케이블
- 빠른 시작 가이드
- Additional Velour Ear Cushions (pre-installed are leatherette)
3. 설정
3.1 헤드셋 연결
- Connect the detachable microphone to the headset's microphone port on the left ear cup.
- For PC and Mac, connect the headset's 3.5mm jack to the USB Sound Card Audio Control Box. Then, plug the USB connector of the control box into an available USB port on your computer.
- For PS4, Xbox One, Nintendo Switch, and mobile devices, connect the headset's 3.5mm jack directly to the controller or device's audio port. The USB Sound Card Audio Control Box is not typically used for these connections for optimal stereo sound.

Image 2: A diagram illustrating the multi-platform compatibility of the HyperX Cloud II, showing USB connection for PC/Playstation/Nintendo Switch and 3.5mm connection for Xbox Controller/Mobile/VR.
3.2 Configuring 7.1 Virtual Surround Sound (PC/Mac)
The HyperX Cloud II features a USB sound card audio control box that enables virtual 7.1 surround sound on PC and Mac. Follow these steps to ensure proper configuration:
Windows의 경우:
- Open the Control Panel and navigate to 'Hardware and Sound', then select 'Sound'.
- In the 'Playback' tab, locate 'HyperX 7.1 Audio' (or 'USB Audio'). If it's not the default device, right-click and select 'Set as Default Device'. A green checkmark will appear.
- Repeat the same steps for the microphone under the 'Recording' tab, selecting 'HyperX 7.1 Audio' (or 'USB Audio') as the default input device.
Mac의 경우:
- Click the Apple menu and select 'System Preferences'.
- Click on the 'Sound' icon.
- In the 'Input' tab, select 'HyperX 7.1 Audio' (or 'USB Audio') for default sound input.
- In the 'Output' tab, select 'HyperX 7.1 Audio' (or 'USB Audio') for default sound output.
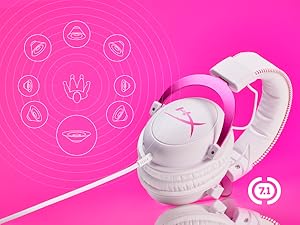
Image 3: The HyperX Cloud II headset with an overlay indicating its 7.1 virtual surround sound capability.
4. 헤드셋 작동
4.1 Audio Control Box Functions
The USB Sound Card Audio Control Box provides convenient access to audio settings:
- 헤드폰 볼륨 조절: Use the '+' and '-' buttons on the left side to adjust headphone volume.
- 마이크 볼륨 조절: Use the '+' and '-' buttons on the right side to adjust microphone volume.
- 7.1 서라운드 사운드 켜기/끄기: Press the '7.1' button in the center to activate or deactivate virtual 7.1 surround sound.
- 마이크 음소거: Use the switch on the side of the control box to quickly mute or unmute the microphone.
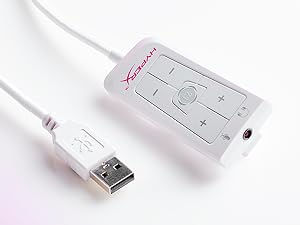
Image 4: The Advanced USB Sound Card Audio Control Box for the HyperX Cloud II headset, showing volume controls and 7.1 surround sound toggle.
4.2 분리형 마이크
The noise-cancelling microphone can be detached when not needed, allowing the headset to be used for music listening or other audio without the microphone boom in the way.

이미지 5: 클로즈업 view of the HyperX Cloud II's detachable, noise-cancelling microphone.
5. 유지관리
5.1 이어 쿠션 교체
The HyperX Cloud II comes with both leatherette and velour ear cushions. These are replaceable, allowing you to maintain comfort and hygiene over time. To replace, gently pull off the existing ear cushions and press the new ones onto the ear cups until securely attached.
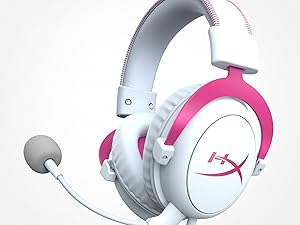
Image 6: The HyperX Cloud II headset highlighting its comfortable memory foam ear cushions.
Video 2: A video demonstrating the memory foam ear cushions of the HyperX Cloud II headset, emphasizing their comfort and flexibility.
5.2 일반 관리
- 사용하지 않을 때는 헤드셋을 깨끗하고 건조한 곳에 보관하세요.
- 헤드셋을 극심한 온도나 습도에 노출시키지 마십시오.
- 이어쿠션과 헤드밴드는 부드러운 천으로 닦아주세요.amp 천. 독한 화학 물질을 사용하지 마십시오.
6. 문제 해결
6.1 No Audio or Microphone Function
- 연결 확인: Ensure all cables (3.5mm jack, USB) are securely connected to the headset, control box, and device.
- Default Audio Device: Verify that 'HyperX 7.1 Audio' (or 'USB Audio') is set as the default playback and recording device in your operating system's sound settings (refer to Section 3.2 for detailed steps).
- 볼륨 레벨: Check both the headset's volume controls on the audio control box and your device's system volume. Ensure the microphone is not muted.
- Microphone Detached: Confirm the detachable microphone is fully inserted into its port.
7. 사양
| 특징 | 사양 |
|---|---|
| 상표 | 하이퍼엑스 |
| 모델 번호 | KHX-HSCP-GM |
| 색상 | 건메탈 |
| 귀 위치 | 귀 위 |
| 임피던스 | 60옴 |
| 주파수 응답 | 15-25kKhz |
| 오디오 드라이버 크기 | 53 밀리미터 |
| 소음 제어 | 패시브 노이즈 캔슬링 |
| 연결 기술 | 유선 (3.5mm 잭, USB) |
| 호환 장치 | PC, Mac, PS4, PS5, Xbox Series X|S, Xbox One, Nintendo Switch, Mobile, VR |
| 재료 | 알루미늄, 인조 가죽 |
| 품목 무게 | 11.29 온스 |
8. 보증 및 지원
For detailed warranty information and technical support, please refer to the official HyperX web사이트 또는 제품에 포함된 보증 카드를 참조하세요. 또한 HyperX 스토어 (아마존) 추가 자료가 필요합니다.