1. はじめに
The KCEVE HDMI KVM Switch allows two computers to share a single monitor, keyboard, mouse, and up to three additional USB 3.0 devices. This device supports high-resolution video up to 8K@60Hz and 4K@120Hz, making it suitable for demanding visual applications. It is designed for efficiency, reducing cable clutter and simplifying workstation management.
2. パッケージ内容
パッケージにすべてのアイテムが含まれていることを確認します。
- KCEVE 8K HDMI KVMスイッチ x 1
- USB 3.0 ケーブル 2 本 (各 1.5 m)
- 有線リモコンケーブル(1.5m)×1
- ユーザーマニュアル x 1
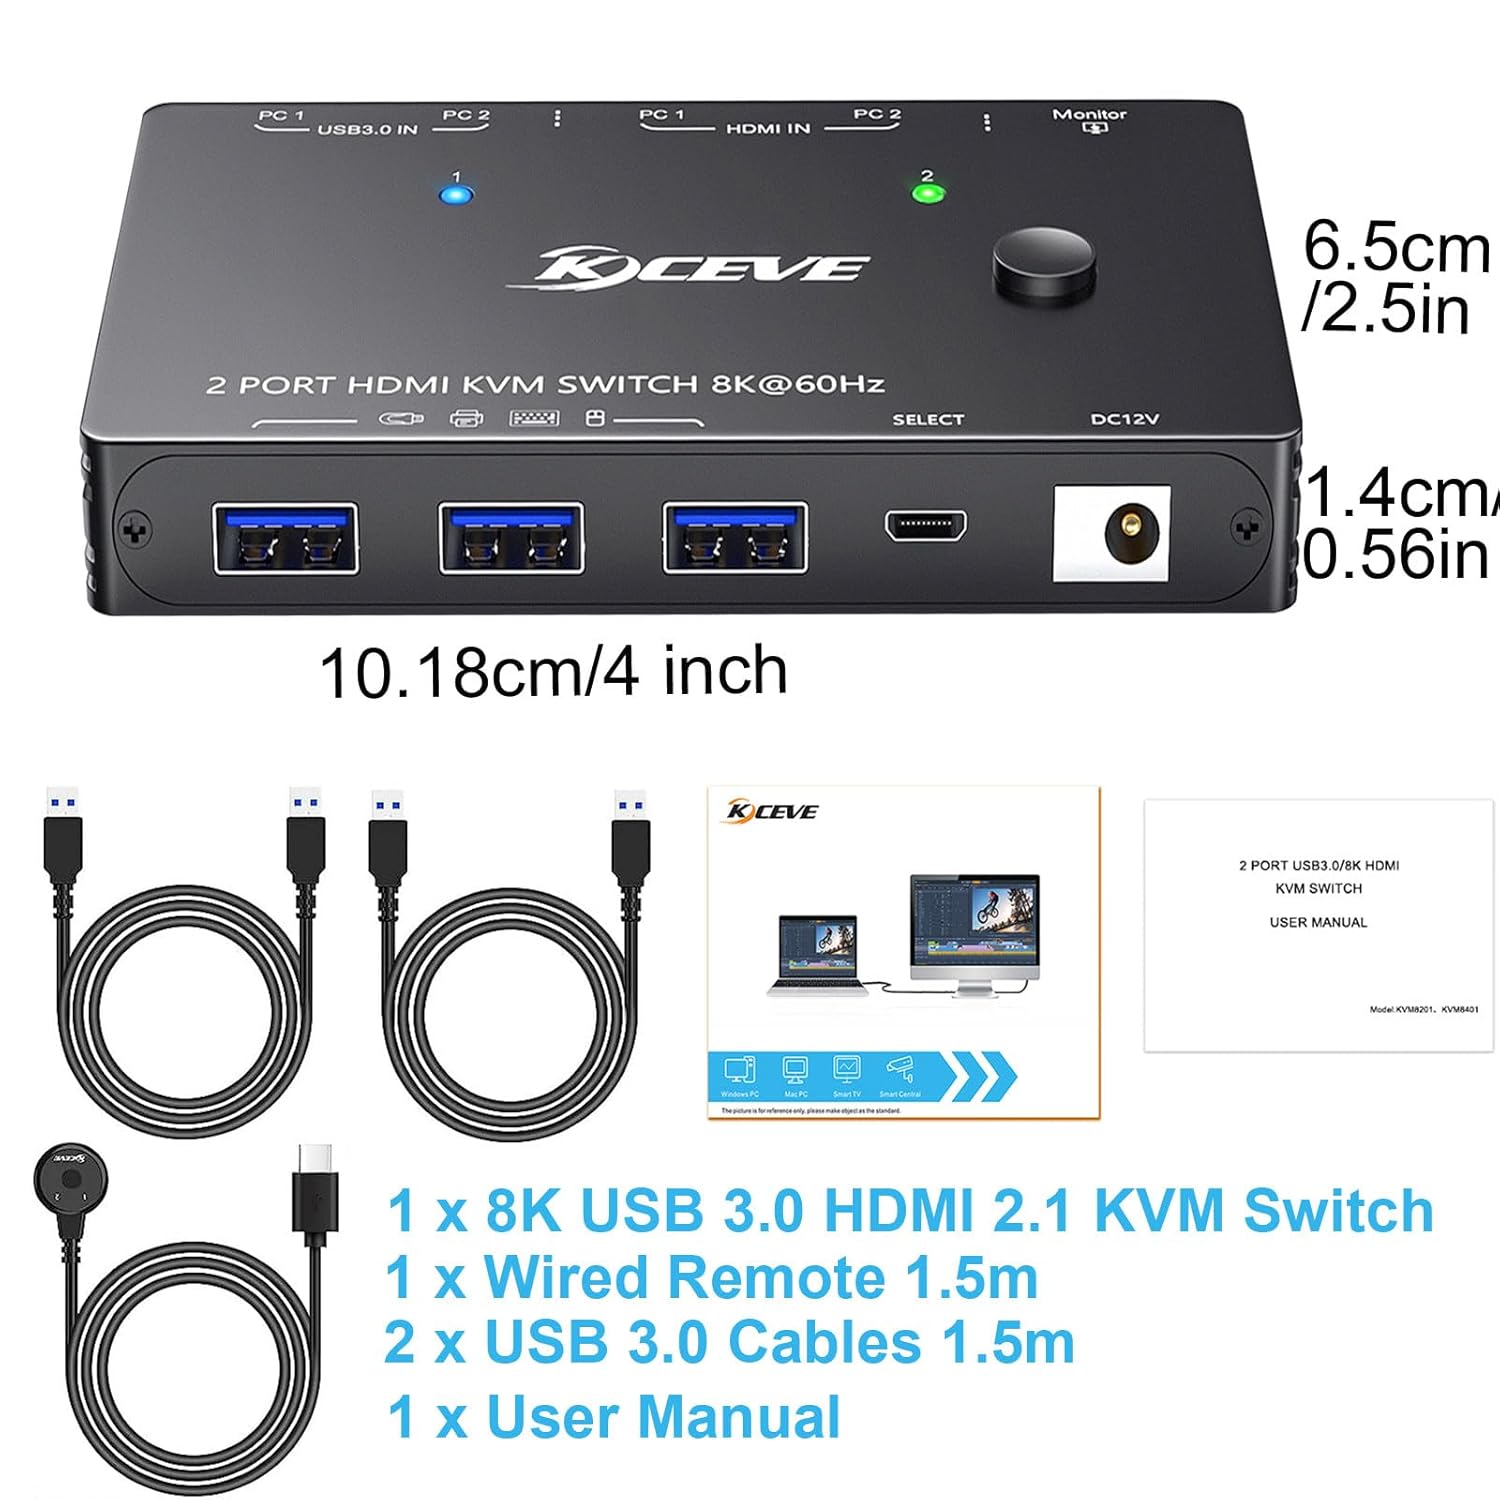
Image: The KVM switch unit, two USB 3.0 cables, a wired remote, and the user manual are shown, along with the dimensions of the KVM switch.
3.製品オーバーview
3.1 主な特徴
- 高解像度サポート: Supports resolutions up to 8K@60Hz, 4K@120Hz, 4K@60Hz, 8K@30Hz, and 1080P@120/60Hz.
- USB 3.0 接続: Features three USB 3.0 ports for sharing peripherals like keyboards, mice, printers, scanners, and flash drives with data transfer rates up to 5Gbps.
- HDMI 2.1準拠: Compatible with HDMI 2.1, HDCP 2.3, and backward compatible with HDMI 2.0 and HDMI 1.4.
- デュアルスイッチング方式: Switch between connected computers using the button on the device or the included 1.5m wired remote.
- 幅広い互換性: Works with Windows 11/10/8/7/XP/Vista, Chrome, Linux, Unix, Ubuntu, Fedora, Mac OS, and most HDMI input devices.
- プラグアンドプレイ: No additional driver software required for operation.
3.2 デバイスのレイアウトとポート

Image: A diagram illustrating the KVM switch's input and output ports. The top view shows the output HDMI port, three USB 3.0 ports, and the DC 12V power input. The bottom view shows two HDMI input ports (PC1, PC2) and two USB 3.0 input ports (PC1, PC2).
The KVM switch features the following ports:
- 入力ポート(コンピュータ用):
- 2 x HDMI Input (PC1, PC2)
- 2 x USB 3.0 Input (PC1, PC2)
- Output Ports (for Monitor & Peripherals):
- 1 x HDMI Output (to Monitor)
- 3 x USB 3.0 Output (for Keyboard, Mouse, USB devices)
- 電源入力: 1 x DC 12V (Power adapter not included, typically powered via USB)
- リモートコントロールポート: 1 x USB-C (for wired remote)
4. セットアップ手順
Follow these steps to set up your KCEVE KVM Switch:
- モニターを接続: HDMI ケーブルを使用して、モニターを KVM スイッチの HDMI 出力ポートに接続します。
- 周辺機器を接続します。 Connect your keyboard, mouse, and other USB 3.0 devices (e.g., printer, scanner, flash drive) to the USB 3.0 Output ports on the KVM switch.
- コンピューターを接続する: 各コンピュータ(PC1 および PC2)について:
- Connect an HDMI cable from your computer's HDMI output to the corresponding HDMI Input port (PC1 or PC2) on the KVM switch.
- Connect a USB 3.0 cable (provided) from your computer's USB 3.0 port to the corresponding USB 3.0 Input port (PC1 or PC2) on the KVM switch.
Note: Each computer requires both an HDMI cable and a USB 3.0 cable connection to the KVM switch for full functionality.
- 有線リモコンを接続する(オプション): Plug the wired remote control cable into the USB-C port on the KVM switch.
- 電源オン: The KVM switch is typically powered via the USB 3.0 connections from your computers. For stable operation, especially with 8K or 4K@60Hz and higher resolutions, or with high-power USB devices, it is recommended to connect an external DC 12V power adapter (not included) to the DC 12V input port.

Image: The KVM switch connected to two desktop computers, a single monitor, a keyboard, and a mouse, demonstrating a typical setup.
5. 操作手順
KVM スイッチには、接続されたコンピュータ間を切り替えるための 2 つの方法があります。
5.1ボタンスイッチ
- Locate the "SELECT" button on the top of the KVM switch.
- Press the button to toggle between PC1 and PC2.
- KVM スイッチの LED インジケーターが点灯し、現在アクティブなコンピューターが表示されます。
5.2 有線リモコン
- If you have connected the wired remote control, you can use it to switch computers.
- Press the button on the wired remote to toggle between PC1 and PC2.
- The LED on the remote and the KVM switch will indicate the active computer.
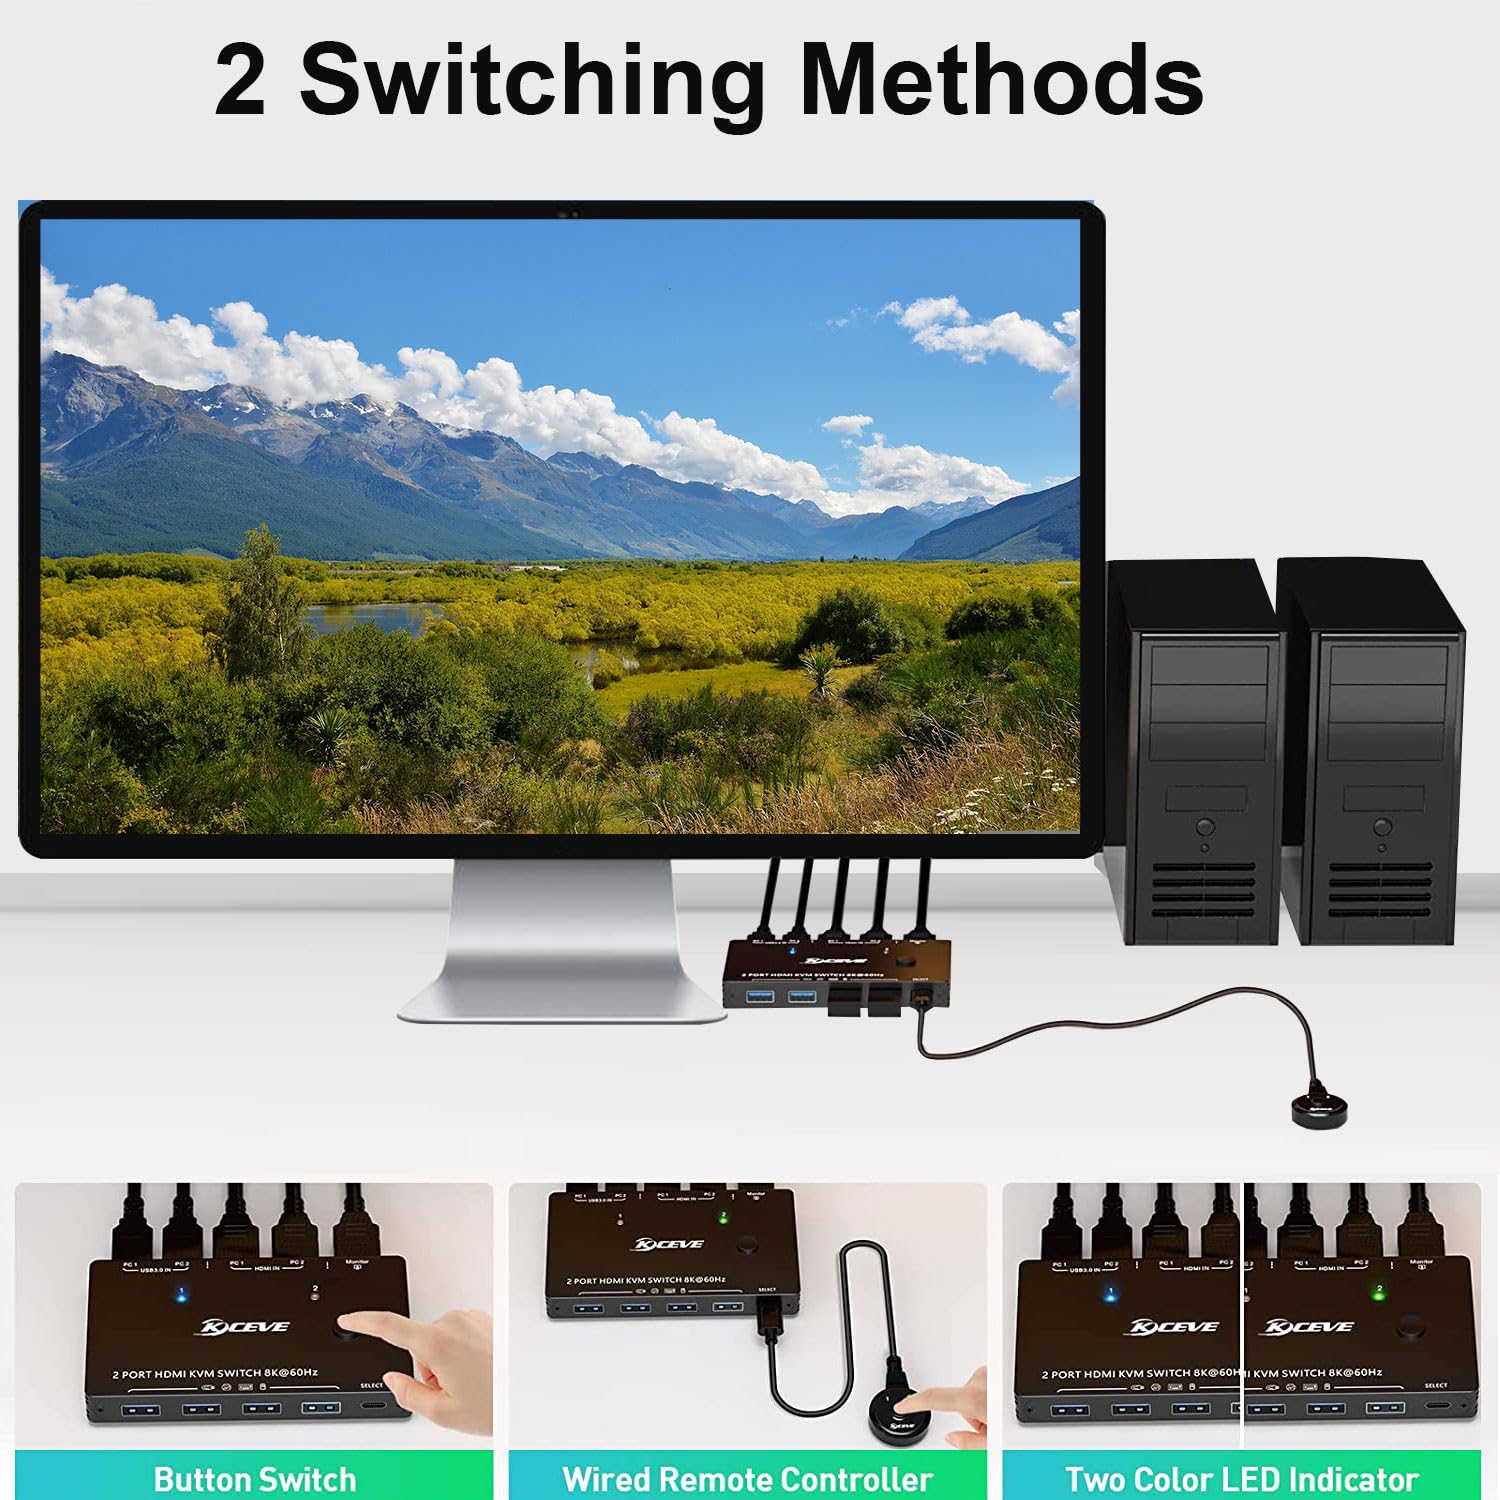
Image: Demonstrates the two methods of switching between computers: a direct button press on the KVM unit and using the external wired remote control. LED indicators show the active computer.
6. メンテナンス
- クリーニング: Use a soft, dry cloth to clean the surface of the KVM switch. Avoid using liquid or aerosol cleaners.
- ストレージ: デバイスは直射日光や極端な温度を避け、涼しく乾燥した場所に保管してください。
- 取り扱い: Avoid dropping or subjecting the device to strong impacts. Ensure cables are not excessively bent or strained.
7。 トラブルシューティング
問題が発生した場合は、次の一般的な解決策を参照してください。
- 何も表示されない、または画面がちらつく:
- すべての HDMI ケーブルがしっかりと接続されていることを確認します。
- Verify that your monitor and graphics card support the selected resolution and refresh rate.
- Use high-quality, certified HDMI 2.1 cables, especially for 8K or 4K@120Hz resolutions. Lower quality cables can cause flickering or black screens.
- Connect an external DC 12V power adapter to the KVM switch if you are using high resolutions or multiple power-hungry USB devices.
- キーボード/マウスが応答しない:
- Ensure the USB 3.0 cables from both computers are correctly connected to the KVM switch.
- Check that your keyboard and mouse are plugged into the USB 3.0 Output ports on the KVM switch.
- Try reconnecting the USB cables.
- Some older peripherals may require a power cycle (unplug and replug) after switching.
- USB Devices Not Detected or Slow:
- Ensure the USB 3.0 cables are properly connected.
- Verify that the USB device is compatible with USB 3.0.
- If using high-power USB devices, ensure the KVM switch is powered by an external DC 12V adapter.
- 切り替えの問題:
- Ensure the KVM switch has adequate power.
- Verify the wired remote control cable is securely connected.
8. 仕様
| モデル | KVM8201-A |
| 入力ポート | HDMI 2 x 2.1、USB 2 x 3.0 |
| 出力ポート | HDMI 1 x 2.1、USB 3 x 3.0 |
| ビデオ解像度 | Up to 8K@60Hz, 4K@120Hz, 4K@60Hz, 8K@30Hz, 1080P@120/60Hz |
| USBデータ転送速度 | 最大5Gbps(USB 3.0) |
| HDCPサポート | HDCP 2.3(下位互換性あり) |
| 切り替え方法 | デバイスのボタン、有線リモコン |
| 電源 | USB powered (optional DC 12V external power for high demand) |
| 材料 | 金属 |
| 寸法(長さ×幅×高さ) | 10.18 x 6.5 x 1.4 cm(4 x 2.56 x 0.55インチ) |
| 重さ | 12.32オンス |
| 対応OS | Windows, Chrome, Linux, Unix, Ubuntu, Fedora, Mac OS |
9. 保証とサポート
KCEVE provides comprehensive after-sales support for this product, including product replacement and technical assistance. For any inquiries or support needs, please contact KCEVE customer service through the retailer's platform or the official KCEVE webサイト。