1. はじめに
ご購入ありがとうございますasing the DEPSTECH DS620-TL Triple Lens Endoscope Camera. This device is designed for visual inspection in hard-to-reach areas, featuring a 1080P triple-lens camera, a 5-inch IPS monitor, and an IP67 waterproof semi-rigid cable. This manual provides essential information for safe and effective use of your endoscope camera.
2.製品オーバーview
2.1 主な特徴
- 1080P Triple Lens Camera: Equipped with three cameras (front, side B, side C) for multi-angle inspection.
- 5インチIPSモニター: Provides clear, real-time images with excellent color reproduction.
- IP67防水プローブ: The 7.9mm diameter semi-rigid cable is waterproof, suitable for wet environments.
- 調整可能なLEDライト: Features 8+1+1 high-brightness LED chips with adjustable intensity for optimal illumination.
- 5Mセミリジッドケーブル: Offers flexibility and durability for navigating various spaces.
- 充電式バッテリー: Built-in battery provides approximately 2-3 hours of continuous operation.
2.2 パッケージ内容
パッケージにすべてのアイテムが揃っていることを確認します。
- DEPSTECH DS620-TL Endoscope Camera
- タイプC充電ケーブル
- Hook and Magnet Attachments
- 収納用巾着バッグ
- ユーザーマニュアル

図2.2:同梱の付属品と本体。
3. 安全情報
- 可燃性または爆発性ガスのある環境ではデバイスを使用しないでください。
- デバイスを強い電磁場から遠ざけてください。
- Avoid direct exposure of the camera lens to strong light sources.
- 本製品を分解または改造しないでください。修理は必ず認定された担当者のみが行ってください。
- 検査中の中断を避けるため、使用前にデバイスが完全に充電されていることを確認してください。
- Clean the probe and lens after each use, especially after contact with liquids or corrosive substances.
4. セットアップ
4.1デバイスの充電
Connect the provided Type-C charging cable to the device's charging port and a suitable USB power adapter (not included). The charging indicator will show the charging status. A full charge typically takes 2-3 hours.
4.2マイクロSDカードの挿入
To save photos and videos, a Micro SD card (Class 10/Class 10 or higher, 8-32GB) is required (not included). Locate the Micro SD card slot on the side of the monitor unit and insert the card until it clicks into place.
4.3 付属品の取り付け
The endoscope comes with hook and magnet attachments. These can be screwed onto the tip of the camera probe for retrieving small objects or maneuvering in tight spaces.

Figure 4.3: Magnet and hook attachments for the probe.
5. 操作手順
5.1 電源のオン/オフ
Press and hold the power button (usually located on the side or front panel) for a few seconds to turn the device on. The screen will display the DEPSTECH logo. To power off, press and hold the power button again.

Figure 5.1: Monitor button layout and functions.
5.2 レンズの切り替え
The DS620-TL features a triple-lens system. Press the lens switch button (often labeled with a camera icon or 'M') to cycle between Front Camera A, Side Camera B, and Side Camera C. This allows for comprehensive viewing without repositioning the probe.

Figure 5.2: Triple lens camera detail.
5.3 LEDの明るさの調整
Use the up/down arrow buttons on the monitor to adjust the brightness of the LED lights on the camera probe. There are multiple levels of brightness to suit different inspection environments.
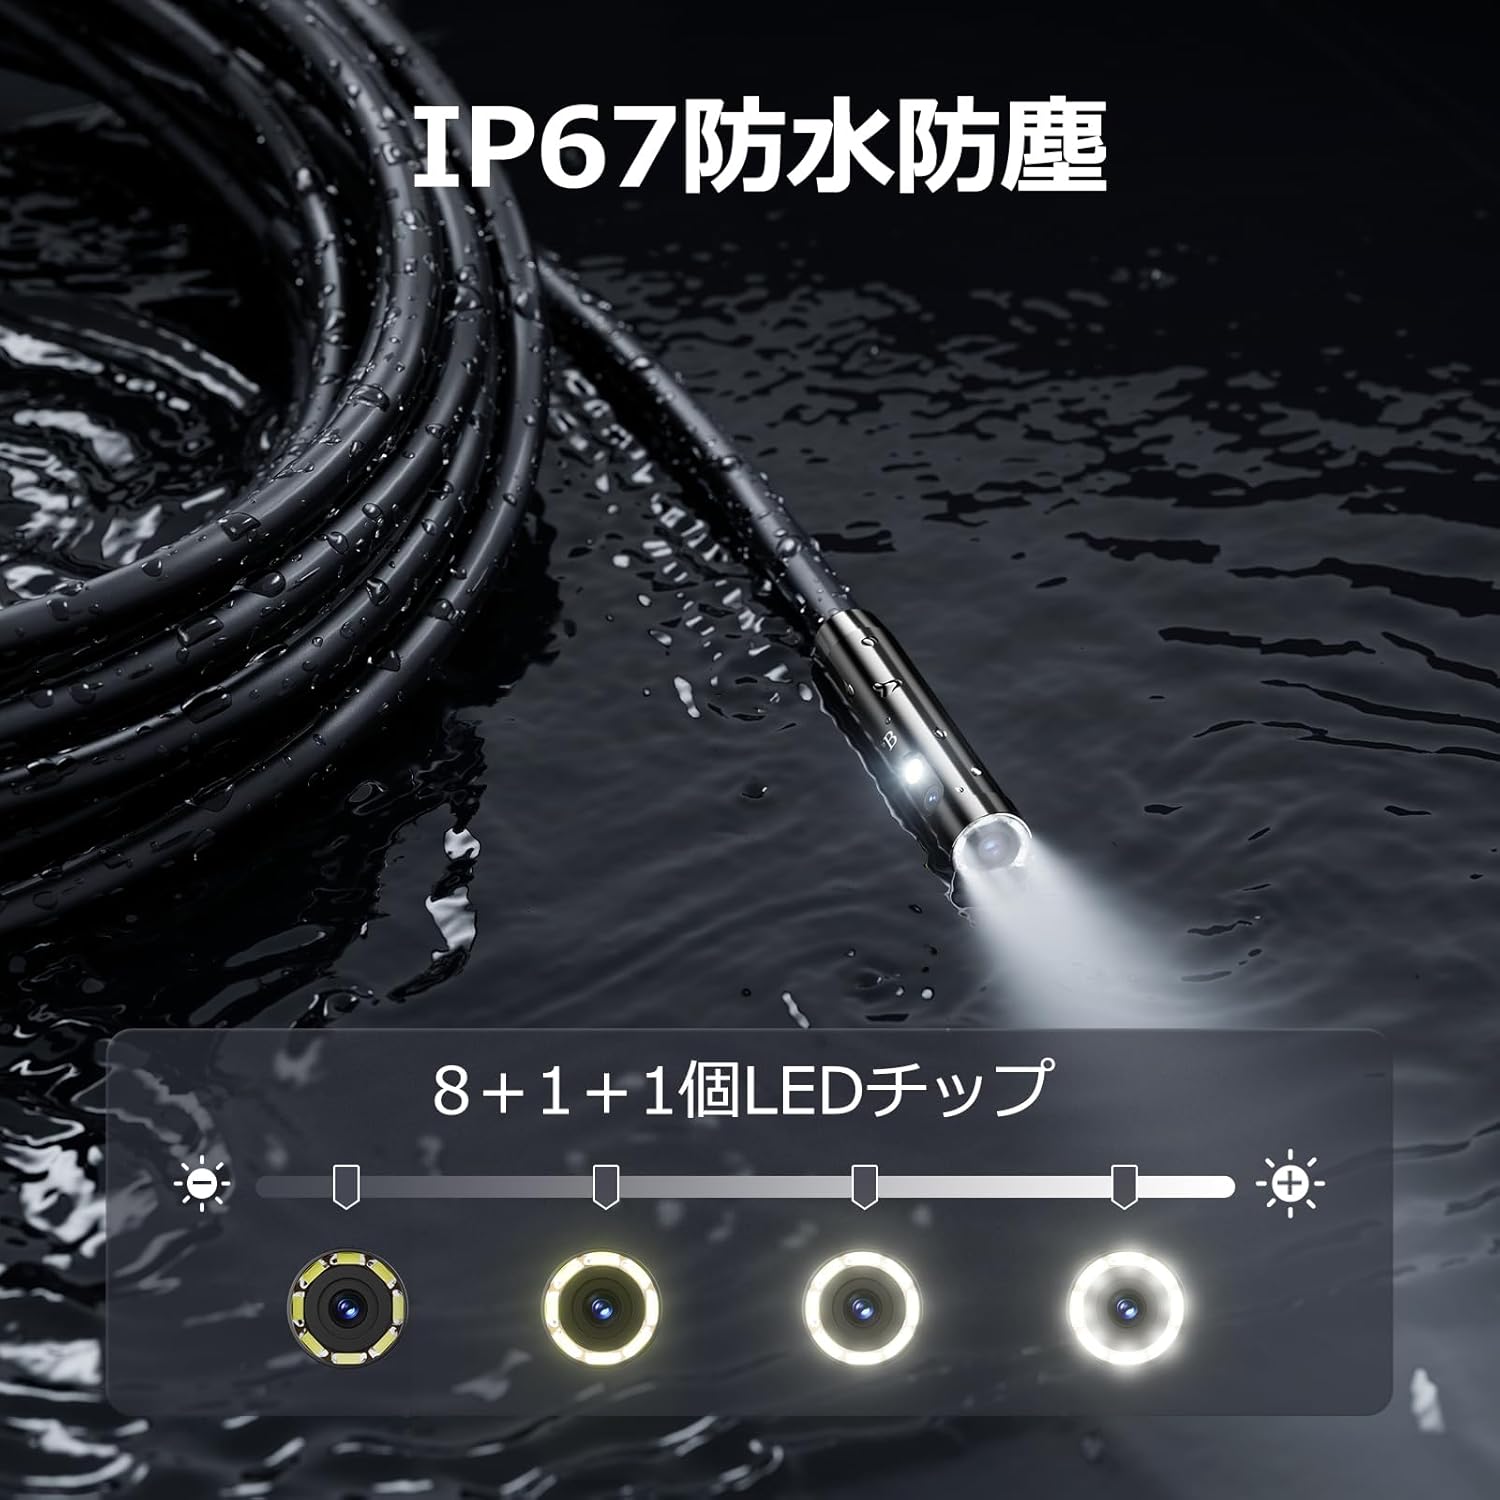
図 5.3: 調整可能な LED 照明を備えた IP67 防水プローブ。
5.4 写真の撮影とビデオの録画
Press the photo/video button (usually a camera icon) to capture a still image. To record video, press and hold the photo/video button; press again to stop recording. Ensure a Micro SD card is inserted to save your media.

Figure 5.4: Monitor interface for photo and video capture.
5.5 画面の回転
Press the screen rotation button (often a circular arrow icon) to rotate the image on the monitor by 180 degrees. This is useful when the probe is in an inverted position.
5.6 実用的な応用
The DS620-TL is suitable for various tasks including home appliance maintenance, pipe inspection, wall wiring checks, and automotive repairs.

Figure 5.6: Various inspection scenarios for the endoscope.
5.7 製品デモビデオ
Video 5.7: A demonstration of the DEPSTECH DS620-TL endoscope camera in use, showcasinその機能と用途について説明します。
6. メンテナンス
6.1 プローブとレンズのクリーニング
After each use, especially in dirty or wet conditions, gently wipe the camera probe and lens with a soft, dry cloth. For stubborn dirt, a slightly damp 布で拭き、乾燥させてください。研磨剤入りの洗剤や溶剤は使用しないでください。
6.2 ストレージ
Store the endoscope camera in a cool, dry place, away from direct sunlight and extreme temperatures. Use the provided drawstring bag for protection. Ensure the cable is coiled neatly without sharp bends.
6.3バッテリーケア
To prolong battery life, avoid fully discharging the device frequently. If storing for an extended period, charge the battery to approximately 50% every three months.
7。 トラブルシューティング
7.1 画面に画像が表示されない
- デバイスの電源がオンになっていて、完全に充電されていることを確認してください。
- Check if the camera cable is securely connected to the monitor unit.
- 検査エリアに十分な照明が確保されるように LED の明るさを調整します。
7.2 写真/ビデオを録画できない
- Verify that a compatible Micro SD card (Class 10/Class 10 or higher, 8-32GB) is inserted correctly.
- Micro SD カードに十分な空き容量があるかどうかを確認してください。
- Ensure the Micro SD card is not locked (read-only).
- Try formatting the Micro SD card (this will erase all data).
7.3 デバイスが充電されない
- Ensure the Type-C charging cable is properly connected to both the device and the power source.
- 別の USB 電源アダプターまたは充電ケーブルを使用してみてください。
- 充電ポートにゴミや損傷がないか確認してください。
If you encounter issues not listed here or if the problem persists, please contact DEPSTECH customer support.
8. 仕様
| 特徴 | 仕様 |
|---|---|
| ブランド | デプステック |
| モデル名 | DS620TL-JP |
| 色 | 黒 |
| 防水レベル | IP67 |
| メディアタイプ | SD Memory Card (8-32GB, Class 10/Class 10 or higher recommended) |
| File 形式 | MP4, MOV, AVI, JPEG, RAW |
| ビデオキャプチャフォーマット | MP4 |
| Viewファインダーの種類 | IPS |
| センサータイプ | シーモス |
| フォトセンサー解像度 | 2.1 MP |
| フォーカス機能 | 固定フォーカス |
| オートフォーカス | いいえ |
| バッテリーの平均寿命 | 2時間 |
| 含まれるコンポーネント | Type-C Cable, Attachments, Storage Drawstring Bag |
| メーカー保証 | 2年 |
| 原産国 | 中国 |
9. 保証とサポート
9.1 メーカー保証
The DEPSTECH DS620-TL comes with a 24-month manufacturer warranty. Your order number serves as proof of purchase for warranty claims.
9.2 カスタマーサポート
For any inquiries, technical assistance, or warranty claims, please contact our dedicated support team:
- メールアドレス: support@depstech.com
- 応答時間: We aim to respond to all inquiries within 24 hours. For requests submitted on weekends or holidays, a response will be provided on the next business day.

Figure 9.2: DEPSTECH support details.