1. はじめに
The ESP32-PICO-KIT-1 is a compact development board designed by Espressif, featuring the ESP32-PICO-V3 chip. This board provides a robust hardware platform for developing and prototyping applications based on the ESP32, enabling users to explore its extensive functionalities, including Wi-Fi connectivity. This manual will guide you through the essential steps to set up, operate, maintain, and troubleshoot your ESP32-PICO-KIT-1.
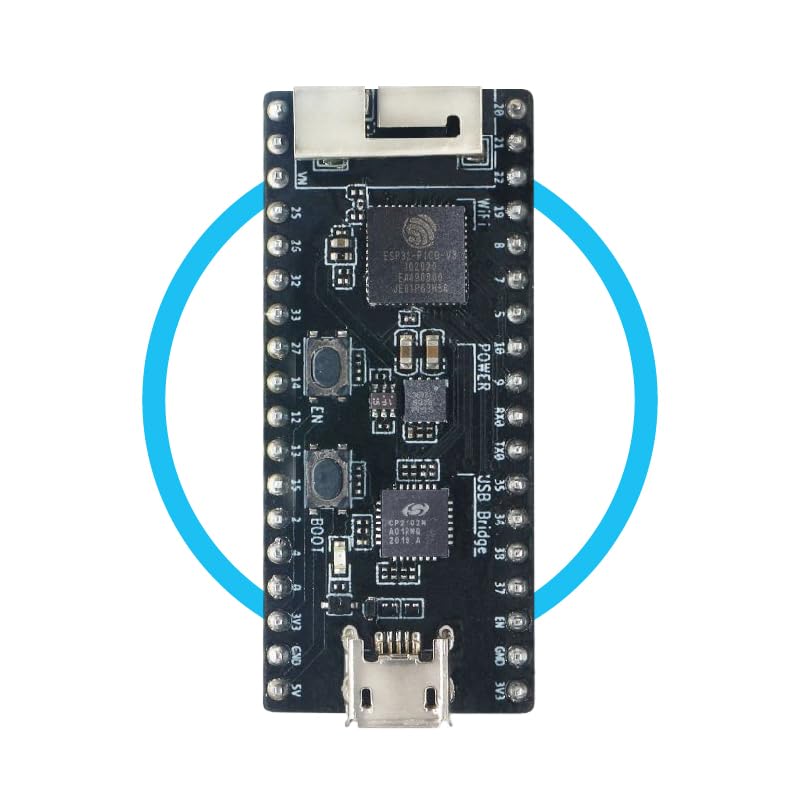
Figure 1: Espressif ESP32-PICO-KIT-1 Development Board. This image displays the compact form factor of the development board, highlighting its main components and pin headers.
2. セットアップ
Follow these steps to prepare your ESP32-PICO-KIT-1 for development:
- 開梱: Carefully remove the ESP32-PICO-KIT-1 board from its packaging. Inspect for any visible damage.
- 電源接続: Connect the board to your computer using a standard Micro-USB cable. The board will draw power from the USB port. Ensure the cable is securely connected to both the board's Micro-USB port and your computer's USB port.
- ドライバーのインストール: Depending on your operating system (Windows, macOS, Linux), you may need to install USB-to-Serial drivers (e.g., CP210x or FTDI drivers) to allow your computer to communicate with the ESP32-PICO-KIT-1. These drivers are typically available on the Espressif official website or the chip manufacturer's webサイト。
- 開発環境のセットアップ: Install the necessary development tools, such as the Espressif IDF (IoT Development Framework) or Arduino IDE with ESP32 board support. Refer to the official Espressif documentation for detailed instructions on setting up your preferred development environment.
3. Operating the ESP32-PICO-KIT-1
Once your development environment is set up, you can begin programming and operating your ESP32-PICO-KIT-1:
- Connecting to the IDE: Open your chosen Integrated Development Environment (IDE). Select the correct board model (ESP32 Dev Module or similar) and the serial port corresponding to your connected ESP32-PICO-KIT-1.
- Uploading Firmware: Write or load your application code. Compile the code and then upload it to the ESP32-PICO-KIT-1 board via the USB connection. The board will typically reset automatically after a successful upload.
- Monitoring Serial Output: Use the serial monitor feature in your IDE to view debug messages and output from your running application on the ESP32-PICO-KIT-1. Ensure the baud rate in the serial monitor matches the baud rate configured in your code.
- Wi-Fi接続: The ESP32-PICO-KIT-1 supports Wi-Fi. Your application code can utilize the ESP-IDF Wi-Fi libraries to connect to local networks, host access points, or perform other network-related tasks.
4. メンテナンス
Proper care ensures the longevity and reliable operation of your ESP32-PICO-KIT-1:
- 取り扱い: Always handle the board by its edges to avoid touching sensitive electronic components. Static electricity can damage the board.
- クリーニング: If necessary, gently clean the board with a soft, dry, anti-static brush or cloth. Avoid using liquids or abrasive materials.
- ストレージ: Store the board in a dry, cool environment, away from direct sunlight and extreme temperatures. Use anti-static bags if storing for extended periods.
- 電源: Use a stable and appropriate power supply (via USB) to prevent damage to the board. Avoid using uncertified or faulty USB cables.
5。 トラブルシューティング
発生する可能性のある一般的な問題に対する解決策は次のとおりです。
- ボードがコンピューターによって検出されません:
- USB ケーブルが完全に挿入され、機能していることを確認します。
- Verify that the correct USB-to-Serial drivers are installed for your operating system.
- コンピュータの別のUSBポートを試してください。
- ファームウェアのアップロードに失敗しました:
- Check if the correct serial port is selected in your IDE.
- Ensure the board is in programming mode (some boards require pressing a 'BOOT' button while resetting).
- Verify that your development environment is correctly configured for the ESP32.
- シリアル ポートを使用している可能性のある他のアプリケーションをすべて閉じます。
- No Output on Serial Monitor:
- Confirm the baud rate in the serial monitor matches the baud rate set in your code.
- Ensure your code includes serial print statements.
- Check if the board is powered and running your program.
- Wi-Fi 接続の問題:
- Double-check Wi-Fi credentials (SSID and password) in your code.
- Ensure the Wi-Fi network is within range and operating on a 2.4 GHz band (ESP32 typically supports 2.4 GHz).
- ルータが新しい接続をブロックしていないこと、または MAC アドレス フィルタリングが有効になっていることを確認します。
6. 仕様
Key technical specifications for the ESP32-PICO-KIT-1 Development Board:
| 特徴 | 詳細 |
|---|---|
| モデル名 | ESP32-PICO-KIT-1 |
| プロセッサブランド | エスプレッシフ |
| プロセッサ数 | 2 |
| RAMメモリインストールサイズ | 520KB |
| RAMメモリ技術 | LPDDR2 |
| 接続技術 | Wi-Fi |
| USBポート合計 | 1 |
| オペレーティング·システム | Linux(互換) |
| 対応デバイス | Computers, Smartphones, Microcontrollers |
7. 保証情報
The ESP32-PICO-KIT-1 Development Board comes with a 2年間のメーカー保証. This warranty covers defects in materials and workmanship under normal use. For warranty claims or detailed terms and conditions, please refer to the official Espressif webサイトにアクセスするか、カスタマー サポートにお問い合わせください。
Additionally, the product is eligible for a 30-day refund/replacement return policy from the point of purchase, subject to the retailer's terms.
8. サポート
For further assistance, technical documentation, and community support, please visit the official Espressif webサイト:
- エスプレッシフ公式 Webサイト: www.espressif.com
- ドキュメント: Access detailed datasheets, programming guides, and application notes for the ESP32-PICO-KIT-1 and ESP32 series.
- コミュニティフォーラム: Engage with other developers and Espressif experts to share knowledge and troubleshoot issues.
For direct inquiries regarding your purchase, please contact the seller, ESPRESSIF SYSTEMS, through the Amazon platform.