1. はじめに
ご購入ありがとうございますasing the Panasonic WX-ST200 DECT Handheld Microphone System. This microphone is designed for clear vocal delivery in educational and corporate presentation environments, such as lectures, training sessions, and video conferences. It features 1.9 GHz DECT wireless technology for reliable connectivity and is optimized for vocal clarity. This manual provides essential information for the safe and effective use of your WX-ST200 microphone.
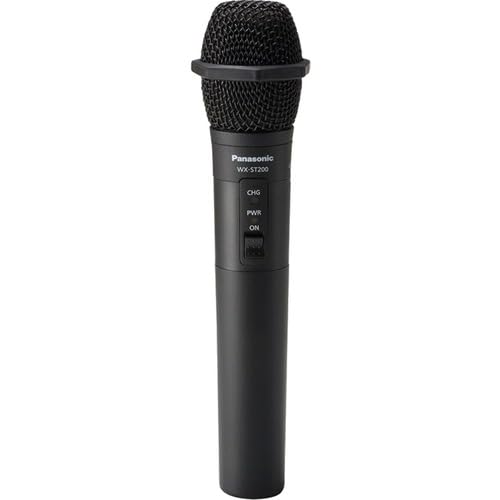
Figure 1: Panasonic WX-ST200 DECT Handheld Microphone. This image shows the microphone from a slight angle, highlighting its ergonomic design and the main body.
2. 安全情報
本製品をご使用になる前に、すべての安全に関する注意事項をよくお読みになり、ご理解ください。このマニュアルは、今後の参考のために保管してください。
- バッテリーの安全性: Use only specified AA alkaline or rechargeable batteries. Do not mix old and new batteries, or different types of batteries. Dispose of batteries according to local regulations.
- 水と湿気: Do not expose the microphone to water, rain, or excessive moisture. This product is not waterproof.
- 熱源: Keep the microphone away from heat sources such as radiators, heat registers, stoves, or other apparatus (including amp熱を発生する装置。
- クリーニング: 乾いた布でのみ拭いてください。 液体クリーナーやエアロゾルクリーナーは使用しないでください。
- サービス: この製品を自分で修理しようとしないでください。 すべてのサービスを資格のあるサービス担当者に依頼してください。
- 使用環境: Avoid using the microphone in extremely dusty, humid, or high-temperature environments.
3. パッケージ内容
下記のすべての品目がパッケージに含まれていることをご確認ください。不足または破損している品目がある場合は、直ちに販売店にご連絡ください。
- WX-ST200 Handheld Microphone
- 単3電池(1本)
- Octogen Color Rings (4)
- ユーザーマニュアル(このドキュメント)
Note: The contactless desktop charger (WX-SZ200) is sold separately and is not included in this package.
4. セットアップ
4.1. バッテリーの取り付け
- Unscrew the bottom cap of the microphone by turning it counter-clockwise.
- Insert one AA battery into the battery compartment, ensuring the correct polarity (+/-) as indicated inside the compartment.
- Screw the bottom cap back onto the microphone by turning it clockwise until secure.
Figure 2: Illustration of battery insertion. (Image not available, refer to physical product for visual guide.) This conceptual image would show the bottom cap removed and a single AA battery being inserted into the microphone body, with clear polarity markings.
4.2. Pairing with a Receiver (Sold Separately)
The WX-ST200 uses 1.9 GHz DECT wireless technology for automatic channel assignment and easy setup. Refer to the receiver's user manual for specific pairing instructions. Generally, the process involves:
- Ensure both the WX-ST200 microphone and the compatible Panasonic DECT receiver are powered on.
- Initiate the pairing mode on the receiver (consult receiver manual for exact steps).
- Press and hold the pairing button on the WX-ST200 microphone (location typically near the battery compartment or power button) until the indicator light flashes, signifying pairing mode.
- Once successfully paired, the indicator light on both devices will show a steady illumination.
4.3. Attaching Color Rings
The included octogen color rings can be used for easy identification of multiple microphones. Simply slide the desired color ring onto the microphone body, typically above the power button or near the base of the microphone head, until it sits securely.
5. 操作手順
5.1.電源のオン/オフ
- 電源を入れるには: Press and hold the power button (usually located on the microphone body) for approximately 2 seconds until the power indicator light illuminates.
- 電源を切るには: Press and hold the power button for approximately 3 seconds until the power indicator light turns off.
5.2. Microphone Usage for Speech
Hold the microphone approximately 2-6 inches (5-15 cm) from your mouth for optimal vocal clarity. The WX-ST200 is designed with a unidirectional polar pattern, meaning it primarily picks up sound from the front, reducing background noise. Speak directly into the top of the microphone.
5.3. Using the 3.5mm Audio Input Jack
The WX-ST200 features a 3.5mm audio input jack, allowing you to stream audio from a local source, such as a laptop or smartphone, through the microphone system. This is useful for playing background music or audio clips during a presentation.
- Connect a standard 3.5mm audio cable from your audio source (e.g., laptop headphone jack) to the 3.5mm input jack on the WX-ST200 microphone.
- Ensure the audio source is playing and its volume is adjusted appropriately. The audio will be transmitted wirelessly via the microphone system.
Figure 3: Connecting an external audio source. (Image not available, refer to physical product for visual guide.) This conceptual image would show a 3.5mm audio cable plugged into the microphone's input jack, with the other end connected to a laptop.
6. メンテナンス
6.1. 清掃
To maintain the appearance and functionality of your microphone:
- Wipe the exterior of the microphone with a soft, dry cloth.
- 研磨剤入りの洗剤、溶剤、強力な化学薬品は使用しないでください。仕上げや内部部品が損傷する可能性があります。
- For the microphone grille, gently brush away any dust or debris using a soft brush.
6.2. バッテリーの取り扱いと保管
- マイクを長期間使用しない場合は、液漏れを防ぐために電池を取り外してください。
- マイクは直射日光や極端な温度を避け、涼しく乾燥した場所に保管してください。
- If using rechargeable batteries, follow the manufacturer's guidelines for charging and maintenance.
7。 トラブルシューティング
If you experience issues with your WX-ST200 microphone, refer to the following common problems and solutions:
| 問題 | 考えられる原因 | 解決 |
|---|---|---|
| マイクから音が出ない。 |
|
|
| 音質が悪い、または音が途切れる。 |
|
|
| 3.5mm audio input not working. |
|
|
これらの解決策を試しても問題が解決しない場合は、パナソニックのカスタマー サポートにお問い合わせください。
8. 仕様
| 特徴 | 説明 |
|---|---|
| モデル | WX-ST200 |
| ブランド | パナソニック |
| 接続技術 | Wireless (DECT 1.9 GHz), Auxiliary (3.5 mm Jack) |
| マイクフォームファクター | ハンドヘルドマイクシステム |
| 極性パターン | 一方向 |
| 電源 | Battery Powered (1x AA battery) |
| 重さ | Approximately 0.4 lbs (with battery) |
| 推奨用途 | Speech, Video Conference, Karaoke |
| 含まれるコンポーネント | Battery, Octogen Color Rings |
| メーカー | PANASONIC SOLUTIONS COMPANY |
| 欧州連合 | 885170366206 |
| ASIN | B0CBSTGS43 |
9. 保証とサポート
9.1. 保証情報
This Panasonic product is covered by a limited warranty. For detailed information regarding warranty terms, conditions, and duration, please refer to the warranty card included with your product or visit the official Panasonic webサイトでご確認ください。保証請求の際は購入証明として領収書を保管してください。
9.2. カスタマーサポート
If you have any questions, require technical assistance, or need to report a problem that cannot be resolved using the troubleshooting guide, please contact Panasonic customer support:
- オンラインサポート: パナソニックの公式サポートをご覧ください webFAQ、ドライバー、および連絡先オプションに関するサイト。
- 電話サポート: Refer to your product packaging or the Panasonic web地域のカスタマー サービス電話番号のサイト。
Please have your product model number (WX-ST200) and serial number (if applicable) ready when contacting support.