pelsee P12
Pelsee P12 1440P ミラーダッシュカム ユーザーマニュアル
モデル: P12
1. はじめに
The Pelsee P12 Mirror Dash Cam is an advanced automotive recording system designed to enhance driving safety and provide reliable evidence in case of incidents. This device integrates a 12-inch full touch display, dual cameras (front 1440P and rear), GPS tracking, voice control, and various driver assistance features. This manual provides detailed instructions for installation, operation, maintenance, and troubleshooting to ensure optimal performance of your Pelsee P12 dash cam.
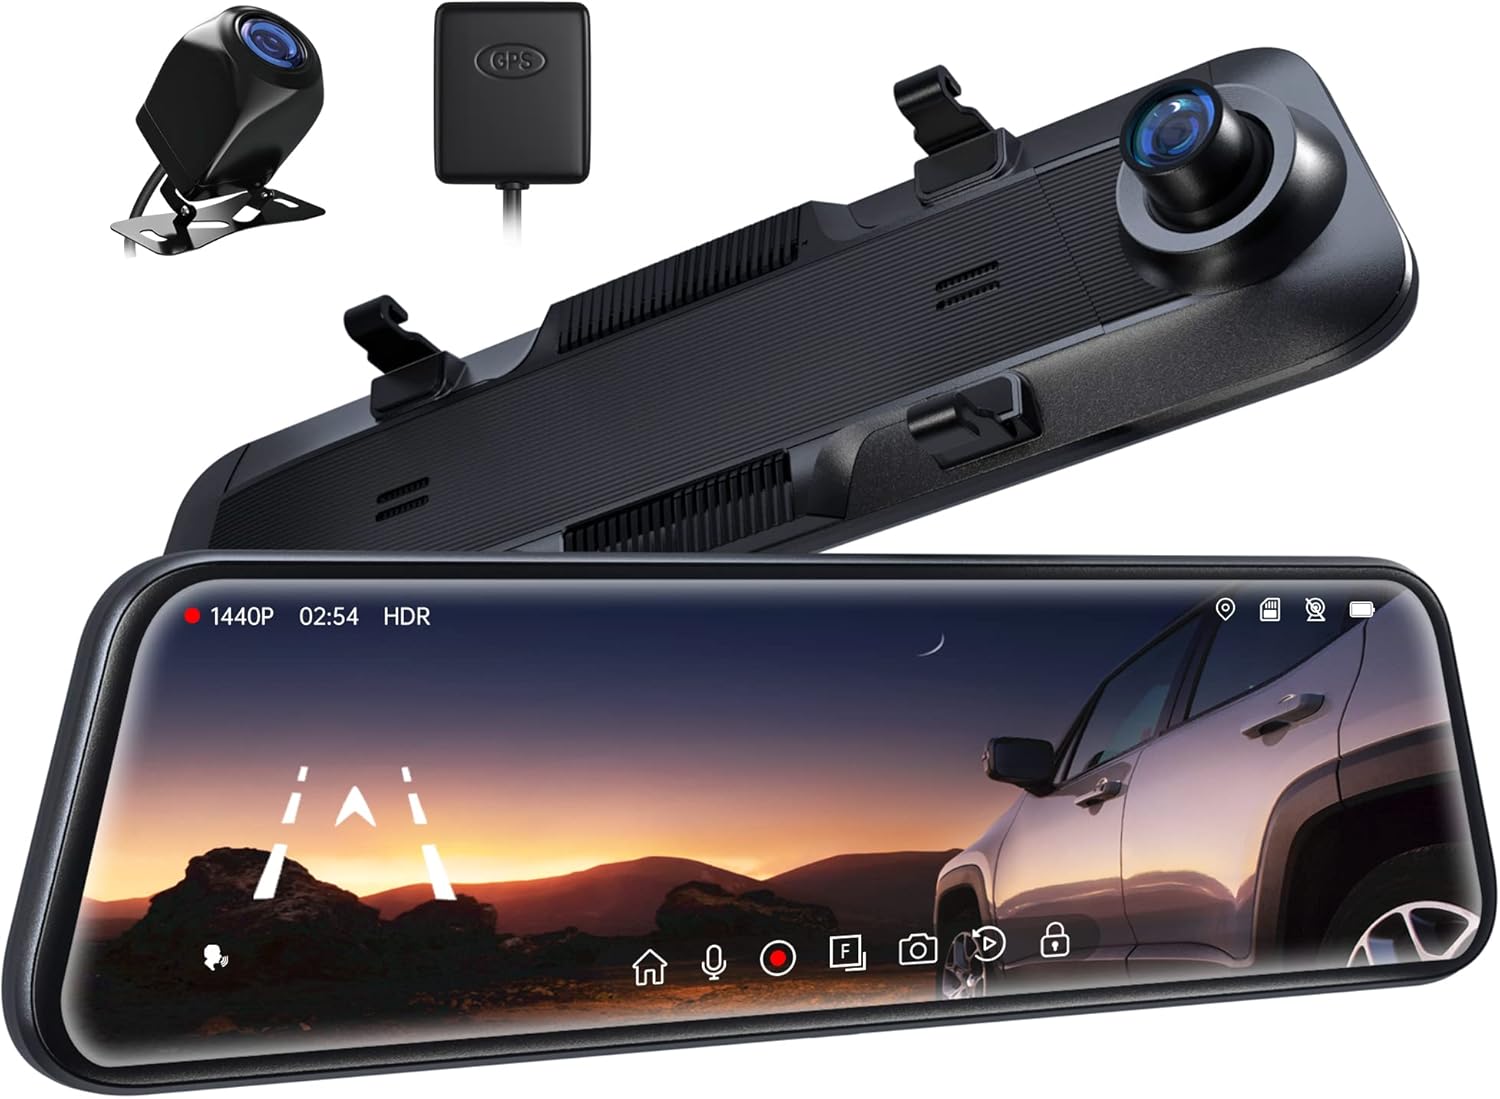
Figure 1.1: Pelsee P12 Mirror Dash Cam components including the main mirror unit, rear camera, and GPS module.
2.製品オーバーview
2.1 パッケージ内容
- Pelsee P12 Mirror Dash Cam Unit
- リアカメラ
- GPSモジュール
- 電源ケーブル(タイプC)
- リアカメラ延長ケーブル
- 取り付けストラップ/バンド
- ユーザーマニュアル
2.2 デバイスのレイアウト
Familiarize yourself with the various ports and components of the Pelsee P12 dash cam.
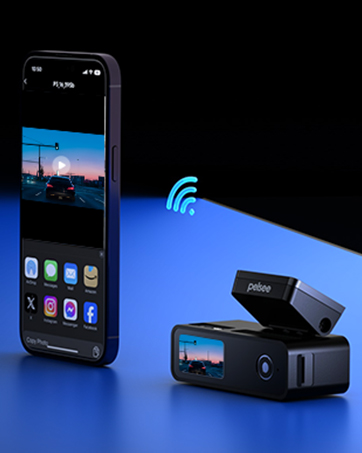
Figure 2.1: Main unit ports including Type-C power input, TF (MicroSD) card slot, GPS interface, and AV-IN for the rear camera.
- タイプCポート: 電源入力およびデータ転送用。
- TFカードスロット: Insert MicroSD card for video storage.
- GPS インターフェース: Connect the external GPS module.
- AV-IN: リアカメラケーブルを接続します。
3. セットアップとインストール
3.1 ミラー型ダッシュカムの取り付け
- Secure the Pelsee P12 unit over your vehicle's existing rearview mirror using the provided rubber mounting straps/bands. Ensure the unit is firmly attached and does not obstruct your view or the vehicle's original mirror buttons.
- Adjust the dash cam's front lens to ensure it captures the road ahead clearly without obstruction from the vehicle's original mirror or sun visor.
3.2 リアカメラの取り付け
- Determine the optimal mounting location for the rear camera, typically above the license plate or inside the rear window. Ensure the camera has a clear, unobstructed view.
- Route the rear camera cable from the mounting location to the main dash cam unit. Carefully tuck the cable along the vehicle's headliner, A-pillar, and dashboard to conceal it.
- リアカメラのケーブルを本体のAV-INポートに接続します。
- For reversing assistance, connect the red wire from the rear camera cable to your vehicle's reverse light power wire. This enables automatic display of the rear view with parking guidelines when shifting into reverse.
3.3 GPSモジュールの接続
- Attach the GPS module to the vehicle's windshield, ideally in an area with a clear view 最適な信号受信を確保するために、空の状態を監視します。
- Connect the GPS module cable to the GPS Interface port on the main unit.
3.4 Power Connection and MicroSD Card
- Connect the provided Type-C power cable to the dash cam's Type-C port and plug the other end into your vehicle's 12V power outlet (cigarette lighter socket).
- Insert a high-speed MicroSD card (Class 10 or higher, up to 256GB recommended) into the TF Card slot. Ensure the card is inserted correctly until it clicks into place.
- Upon first use, or if experiencing recording issues, format the MicroSD card directly on the dash cam unit via the settings menu.
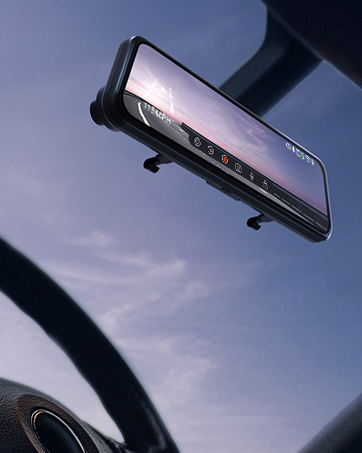
Figure 3.1: The Pelsee P12 mirror dash cam installed in a vehicle, providing a wide view 道路の。
4. 操作手順
4.1 基本操作
- 電源オン/オフ: The device automatically powers on and begins recording when the vehicle's ignition is turned on. It powers off automatically when the ignition is turned off.
- 画面のオン/オフ: Tap the screen to turn it on or off. You can also set an automatic screen-off timer in the settings to use the device as a traditional rearview 鏡。
- タッチスクリーンインターフェース: The 12-inch full touch display allows for intuitive navigation through menus and settings. Swipe gestures can be used to adjust camera views (front, rear, split screen) and screen brightness.

Figure 4.1: The 12-inch full touch display offers 1440P resolution with HDR for clear image capture.
4.2 録音モード
- ループ録音: ドライブレコーダーは、短いセグメント(例:1分、3分、5分)で継続的にビデオを録画します。メモリカードがいっぱいになると、最も古いロック解除されたビデオが削除されます。 file継続的に録画するために、自動的に上書きされます。
- G-Sensor (Emergency Capture): 内蔵のGセンサーは突然の衝撃や衝突を検知します。作動すると、現在のビデオセグメントを自動的にロックし、ループ録画による上書きを防ぎます。ロックされたセグメントは file別のフォルダに保存されます。
- タイムラプス録画: This feature compresses long periods of recording into short, viewable videos, saving storage space and allowing for quick review of extended events.

Figure 4.2: The G-sensor automatically detects collisions and locks video footage.

図4.3: ループ録画は最も古いものを上書きすることで継続的な操作を保証します files.
4.3つの高度な機能
- 音声コントロール: Command the dash cam hands-free for safer driving. Common commands include:
- 「録画を開始」
- "Stop Recording"
- 「写真を撮る」

Figure 4.4: AI Voice Control allows hands-free operation for increased safety.
- GPS追跡: The external GPS module accurately records your vehicle's location, speed, and driving route. This data can be viewed using a dedicated GPS player on a computer, providing crucial information in case of an accident.

Figure 4.5: GPS tracking provides detailed route and speed information.
- 24時間駐車監視: With an optional ACC hardwire kit (sold separately), the dash cam can monitor your vehicle for impacts even when parked. If a collision is detected, it will automatically record a short, locked video.

Figure 4.6: The 24H Parking Monitor provides surveillance when your vehicle is parked.
- ADAS Collision Avoidance Technology: The Advanced Driver-Assistance System detects nearby obstacles and provides alerts for safer driving. This includes:
- 前方衝突警告
- 歩行者衝突警告
- 車線逸脱警報
- Headway Monitoring
- Forward Movement Detection
- BSD Algorithm (Blind Spot Detection): Intelligent blind spot detection warns of potential collisions by monitoring dangerous blind spot areas, particularly when changing lanes or reversing.
- リバースパーキングアシスト: When the vehicle is in reverse, the dash cam displays the rear camera view with adjustable parking guidelines, assisting with precise parking maneuvers. The screen can be swiped to adjust the view.

Figure 4.7: Reverse parking assistance with guidelines for easier maneuvering.
- HDRテクノロジー: High Dynamic Range technology minimizes glare and overexposure from bright lights (e.g., headlights, sunlight), ensuring clear video capture in various lighting conditions, especially at night.

Figure 4.8: Ultra Clear Night Vision with anti-glare technology for enhanced visibility.

Figure 4.9: HDR technology optimizes image quality in varying light conditions.
5. メンテナンス
- クリーニング: ドライブレコーダーの画面とレンズを拭く際は、柔らかく乾いた布を使用してください。表面を傷つける可能性のある研磨剤入りの洗剤や溶剤の使用は避けてください。
- MicroSDカードのメンテナンス: Regularly format the MicroSD card (at least once a month) through the dash cam's settings menu. This helps prevent data corruption and ensures optimal recording performance. Back up any important file■フォーマットする前。
- ファームウェアの更新: Check the official Pelsee website periodically for firmware updates. Updates can improve performance, add new features, or resolve known issues. Follow the provided instructions carefully when updating firmware.
- 温度に関する考慮事項: Avoid exposing the dash cam to extreme temperatures for prolonged periods. If the vehicle is parked in direct sunlight, consider removing the dash cam or using a sunshade to prevent overheating.
6。 トラブルシューティング
This section addresses common issues you might encounter with your Pelsee P12 dash cam.
- ダッシュカムの電源が入らない:
- Ensure the power cable is securely connected to both the dash cam and the vehicle's 12V power outlet.
- Check the vehicle's 12V power outlet for functionality.
- Verify the vehicle's ignition is on (if not hardwired for constant power).
- Recording Issues (e.g., not recording, freezing):
- Ensure a high-speed (Class 10 or higher) MicroSD card is inserted correctly.
- Format the MicroSD card via the dash cam's settings.
- カードの故障を排除するために、別の MicroSD カードを試してください。
- ループ録画が有効になっているかどうかを確認します。
- Poor Video Quality (blurry, dark, overexposed):
- カメラのレンズを清掃します。
- レンズから保護フィルムが取り除かれていることを確認してください。
- Adjust exposure settings in the menu if available.
- Verify HDR is enabled for challenging lighting conditions.
- GPS信号が見つかりません:
- Ensure the GPS module is connected and mounted in an area with a clear view 空(ダッシュボード、フロントガラスなど)の。
- 高い建物や密集した植物から離れた、開けた場所に車を移動してください。
- 音声コントロールが応答しない:
- ダッシュ カメラに向かってはっきりと直接話してください。
- 車内の背景ノイズを低減します。
- 設定で音声制御機能が有効になっていることを確認してください。
- Original Mirror Buttons Blocked by Mounting Bands:
- Adjust the position of the rubber mounting bands to avoid obstructing critical buttons on your vehicle's original rearview 鏡。
- リアカメラ View Appears Zoomed In or Narrow:
- Ensure the rear camera is mounted correctly and not upside down, as image flipping may not be supported.
- の viewing angle is fixed; ensure the camera is positioned to capture the desired area.
- Screen On/Off Button Malfunction:
- Utilize the automatic screen-off timer feature in the settings to minimize manual button presses.
- Potential Car Battery Drain (when parked):
- If using the 24H Parking Monitor, an ACC hardwire kit is required to prevent draining the car battery. Without it, unplug the dash cam when the vehicle is off for extended periods.
7. 仕様
| ブランド | ペルセ |
| モデル名 | P12 |
| 製品寸法 | 30.5 x 2 x 7.4 cm; 256 g |
| ビデオキャプチャ解像度 | 1440p(前面) |
| オリエンテーション | フロント&リア |
| 車両サービスタイプ | 車、トラック |
| 接続技術 | USB |
| 特集 | Built-In GPS, Night Vision, Real 1440P + HDR, Voice Control, ADAS, BSD, Loop Recording, G-sensor, 24H Parking Monitor |
| 含まれるコンポーネント | P12 Pro mirror dash cam, Rear Camera, GPS Module, Power Cable, Mounting Straps |
| 取り付けタイプ | 後方view ミラーマウント |
| 色 | 黒 |
| バッテリー | リチウム金属電池 1 個 (付属) |
8. 保証とサポート
Pelsee is committed to providing high-quality products and customer satisfaction.
- 無料返品: 30日間
- 返金保証: 30日間
- 保証: 18ヶ月
技術サポート、保証請求、その他のお問い合わせについては、下記までご連絡ください。
メールアドレス: support@pelsee.com

Figure 8.1: Pelsee's customer assurance and service information.
Ask a question about this manual
Ask about setup, troubleshooting, compatibility, parts, safety, or missing instructions. Manuals+ will review the question and use this page’s manual context to help answer it.