MJJC GL-C-002P
MJJC GL-C-002P GLEDOPTO Zigbee 3.0 Mini 5-in-1 RGBCCT LED Strip Controller User Manual
Model: GL-C-002P | Brand: MJJC
導入
This manual provides detailed instructions for the installation, operation, and maintenance of your MJJC GL-C-002P GLEDOPTO Zigbee 3.0 Mini 5-in-1 RGBCCT LED Strip Controller. This device is designed to control various types of LED strip lights, offering versatile lighting options through smart home integration.
製品終了view
The GL-C-002P is an ultra-thin, compact LED controller utilizing Zigbee 3.0 protocol for smart home integration. It supports five different LED strip configurations: RGBCCT, RGBW, RGB, CCT, and Dimmer. Key features include:
- 超薄型設計: Compact dimensions (70x37x10mm) for discreet installation.
- 5-in-1 互換性: Works with Single Color, CCT, RGB, RGBW, and RGBCCT LED strip lights.
- Zigbee 3.0 プロトコル: Ensures low power consumption, high stability, strong anti-interference ability, and enhanced security. Supports connection of over 50 devices.
- Smart Speaker Integration: Compatible with popular smart speakers for voice control of brightness and other functions.
- Zigbeeゲートウェイの互換性: Works with various Zigbee gateways (e.g., SmartThings, Tuya) for app control on Android/iOS devices.
- 2.4G RF Remote Control Support: Can be controlled directly with a 2.4G RF remote or wall switch without a Zigbee hub.
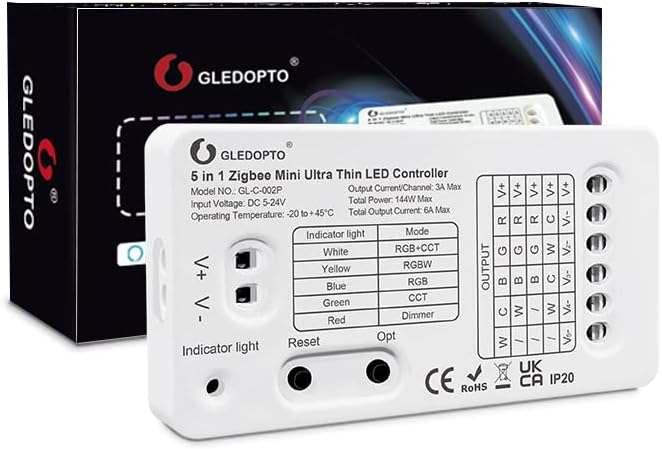
Image: The MJJC GL-C-002P Zigbee 3.0 Mini 5-in-1 RGBCCT LED Strip Controller, showcasing its compact design and connection terminals.
技術仕様
| パラメータ | 価値 |
|---|---|
| 製品名 | Zigbee Ultra Thin Mini 5 in 1 LED Controller |
| モデル番号 | GL-C-002P |
| 製品サイズ | 70 x 36 x 10 mm (2.76 x 1.46 x 0.39 インチ) |
| 入力ボリュームtage | DC 5-24V |
| 保護率 | IP20 |
| 総パワー | 最大144W |
| 出力電流/チャネル | 最大3A |
| 総出力電流 | 最大6A |
| 動作温度 | -20°C ~ +45°C |
| 材料 | プラスチック |
| 屋内/屋外での使用 | 屋内 |
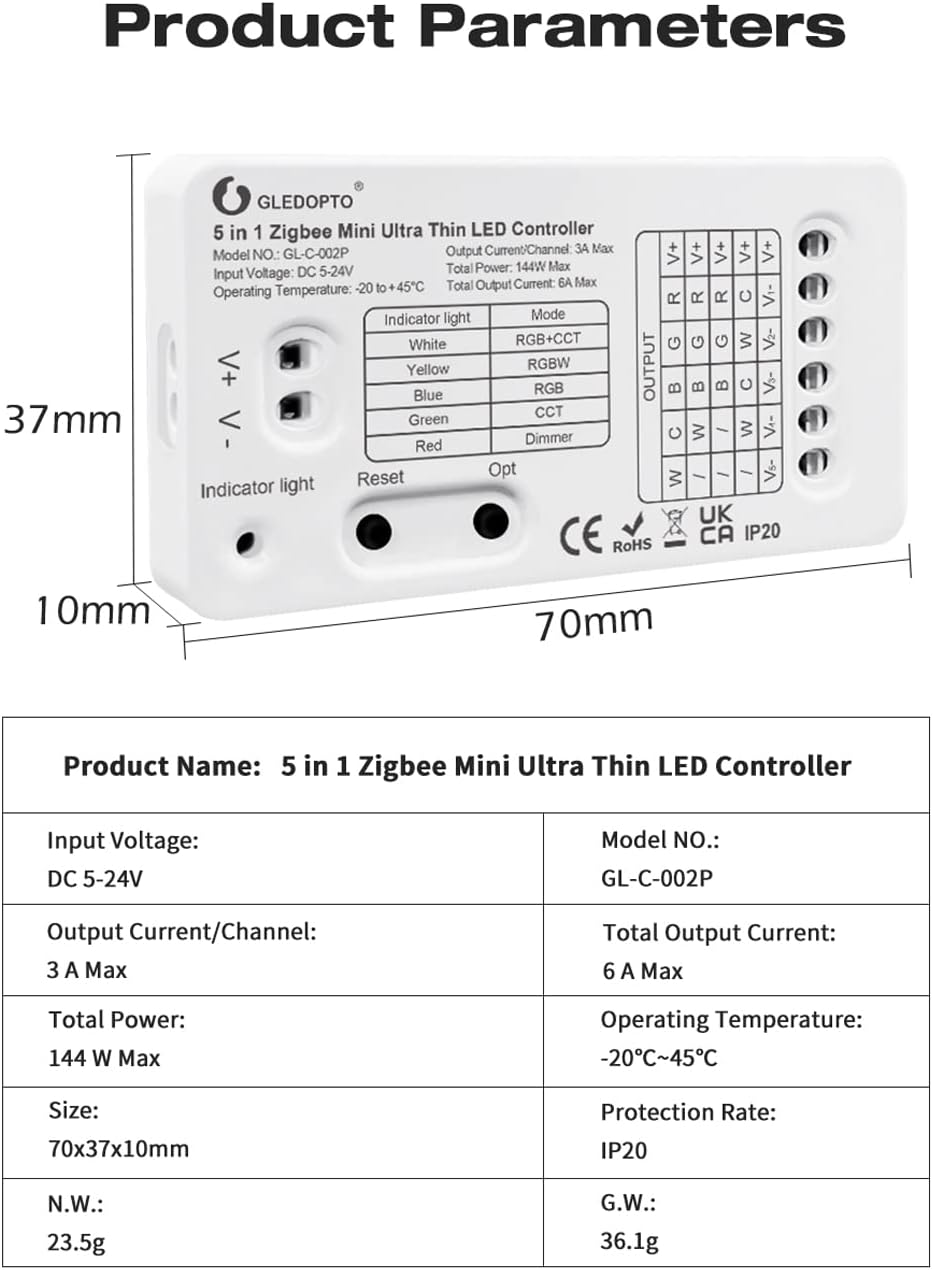
Image: Detailed product parameters including dimensions, input voltage、および出力電流。
パッケージ内容
- 1x MJJC GL-C-002P Zigbee Mini 5-in-1 LED Strip Controller
- ユーザーマニュアル (本書) x 1
- 3cmステッカー1枚
- 1x Wiring Tool
セットアップとインストール
Follow these steps to set up your LED strip controller:
1. Wiring the LED Strip
The controller supports various LED strip types. Ensure correct wiring based on your LED strip configuration (RGBCCT, RGBW, RGB, CCT, or Dimmer). The controller features a press-type design for wire connections.
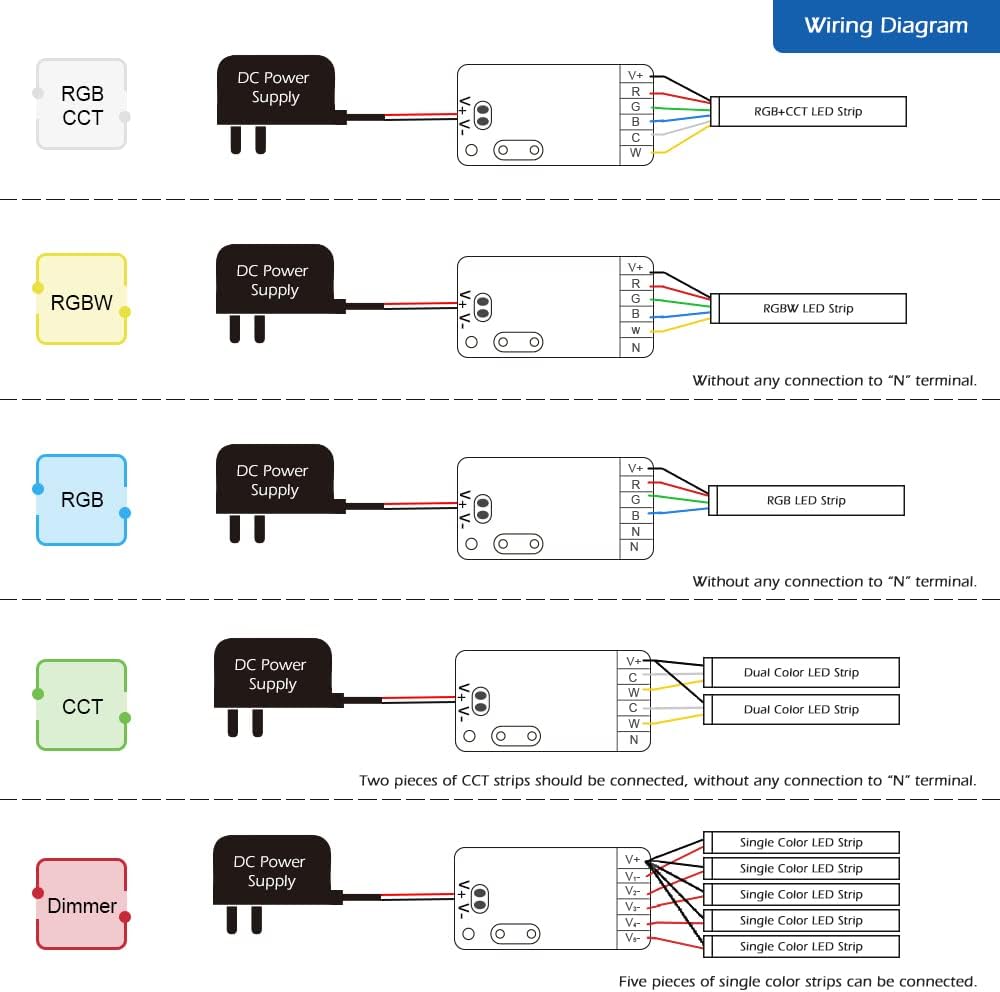
Image: Wiring diagrams illustrating connections for RGBCCT, RGBW, RGB, CCT, and Dimmer LED strips to the controller.
- RGBCCT: Connect R, G, B, CW, WW, and V+ terminals.
- RGBW: Connect R, G, B, W, and V+ terminals.
- 色: Connect R, G, B, and V+ terminals.
- CCT (Dual Color): Connect C, W, and V+ terminals. Two CCT strips can be connected.
- Dimmer (Single Color): Connect V- and V+ terminals. Up to five single color strips can be connected.
注記: For RGBW, RGB, CCT, and Dimmer configurations, ensure no connection to the "N" terminal if present on your strip.
2. Powering the Light Source
Connect the LED strip, controller, and a compatible DC 5-24V power adapter. Plug the power adapter into an electrical outlet. The controller will automatically power up.
3. Setting Up the Zigbee Bridge (Gateway)
If using a Zigbee gateway (e.g., SmartThings, Tuya, Philips Hue), plug it into power and connect it to your Wi-Fi router using the provided network cable. Refer to your gateway's manual for initial setup.
4. Downloading the Gateway App
Download the corresponding app for your Zigbee gateway on your Android or iOS phone. Follow the app's instructions to start searching for new devices. This process may take some time. If the device is not found, try power cycling the controller (power off/on) or performing a reset.
5. Completing Setup and Control
コントローラーが検出され、ゲートウェイとペアリングされると、アプリを使用して LED ストリップのライトの色、色温度、明るさを制御できるようになります。

Image: Visual guide showing the four main steps for setup: powering the light source, setting up the bridge, downloading the gateway app, and controlling the lights.
Pairing with a 2.4G RF Remote Control
To pair the controller with a 2.4G RF remote control:
- コントローラーの電源がオンになっていることを確認してください。
- Immediately after powering on, press the "I" button on your 2.4G RF remote control.
- The LED strip will flash to indicate successful pairing.
Video: Demonstrates the setup and operation of the Mini Zigbee LED Strip Light Controller, including pairing and various control functions.
操作手順
アプリコントロール
Through your Zigbee gateway's mobile application, you can:
- 色調整: Select from 16 million colors to create desired ambiance.
- 明るさコントロール: 明るさを1%から100%まで調整します。
- 色温度調整: Fine-tune white light from warm to cool. Color lamp beads automatically turn off for more accurate white light adjustment.
- グループ化: Create rooms or groups to control multiple light strips simultaneously or individually.
- シーン設定: Configure custom lighting scenes to match different moods or activities.

画像: Example of a smartphone application interface used to control LED strip lights, showing color and brightness selection.
音声コントロール
The controller supports voice control via Amazon Alexa, Google Home, and HomeKit when connected through a compatible Zigbee hub. Use voice commands to turn lights on/off, adjust brightness, and change colors or color temperature.

Image: Illustration of voice control functionality with Amazon Echo Plus, demonstrating commands like "Alexa, turn on the light" or "Alexa, set to warm white."
モード切り替え
The controller has an "Opt" key for switching between different LED strip modes (RGBCCT, RGBW, RGB, CCT, Dimmer). Short press the "Opt" key once to cycle through the modes. The indicator light on the controller will change color to reflect the current mode:
- 白: RGBCCT
- 黄: RGBW
- 青: RGB
- 緑: CCT
- 赤: 調光器
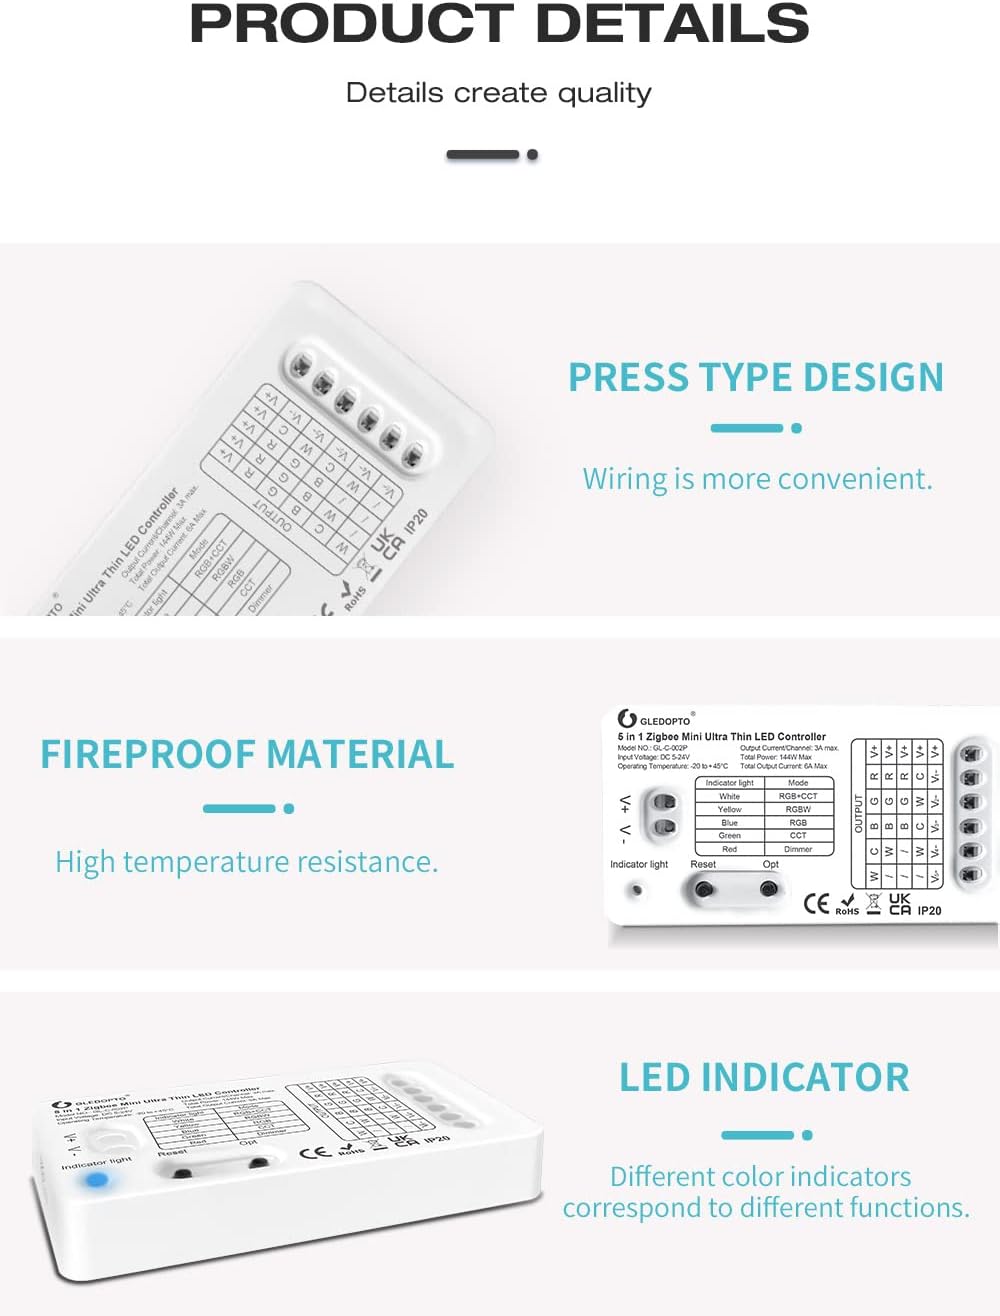
Image: Close-up of the controller highlighting the "Opt" button and the indicator light, with a table explaining indicator colors for different modes.
Frequency Settings for Noise Reduction
To reduce potential power supply noise, the controller allows adjustment of the output frequency. Press and hold the "Reset" button for five seconds to cycle through frequency options (600Hz, 800Hz, 1000Hz, 2000Hz, 4000Hz, 8000Hz). The LED strip will flash a specific number of times to indicate the selected frequency:
- 1 flash: 600Hz
- 2 flashes: 800Hz
- 3 flashes: 1000Hz
- 4 flashes: 2000Hz
- 5 flashes: 4000Hz
- 6 flashes: 8000Hz

Image: Diagram explaining the frequency setting options and their corresponding flashing times for noise reduction.
Power-On Status Memory
The device remembers its last on/off status. To set the default power-on status (on or off), press and hold the "Opt" button for five seconds. The light will flash to indicate successful setting. When power is restored, the device will revert to the saved status.
メンテナンス
- クリーニング: Use a dry, soft cloth to clean the controller. Do not use liquid cleaners or aerosols.
- 環境: Ensure the controller is installed in a dry, indoor environment within the specified operating temperature range (-20°C to +45°C). Avoid exposure to direct sunlight, high humidity, or extreme temperatures.
- 接続: すべての配線接続が安全であるかどうかを定期的に確認してください。
トラブルシューティング
- Issue: LED strip does not light up.
- Check if the power adapter is correctly connected and receiving power.
- LED ストリップがコントローラーの出力端子に正しく配線されていることを確認します。
- 入力ボリュームを確認するtage (DC 5-24V) matches the requirements of both the controller and the LED strip.
- LED ストリップ自体が機能していることを確認します。
- Issue: Controller not found by Zigbee gateway/app.
- Ensure the Zigbee gateway is powered on and connected to your network.
- Place the controller within range of the Zigbee gateway.
- Try power cycling the controller (unplug and replug power).
- Perform a factory reset on the controller (long press the "Reset" button for 5 seconds until the indicator light flashes).
- Ensure your gateway app is up to date.
- Issue: Power supply noise (e.g., coil whine).
- Adjust the output frequency of the controller by pressing and holding the "Reset" button for five seconds to cycle through frequency options (600Hz, 800Hz, 1000Hz, 2000Hz, 4000Hz, 8000Hz). Select the frequency that minimizes noise.
- Ensure your power supply is of good quality and compatible with the controller's requirements.
- Issue: Wire connections are loose or difficult.
- The controller uses a press-type terminal design. Ensure wires are fully inserted and secured. Use the provided wiring tool if necessary.
- For very thin wires, consider tinning the ends slightly with solder to provide more rigidity, but be careful not to make them too thick for the terminals.
保証とサポート
For warranty information or technical support, please contact MJJC customer service through your retailer or the official MJJC webサイト。 保証請求に備えて購入時のレシートを保管しておいてください。
Ask a question about this manual
Ask about setup, troubleshooting, compatibility, parts, safety, or missing instructions. Manuals+ will review the question and use this page’s manual context to help answer it.