1. はじめに
This manual provides detailed instructions for the installation, operation, and maintenance of your ZOSI 16-Channel H.265+ Hybrid DVR Recorder. This DVR supports 16 channels and is compatible with Analog, AHD, TVI, and CVI camera types, offering a versatile solution for your security surveillance needs. The system includes a pre-installed 2TB hard disk drive for immediate recording capabilities.
2. パッケージ内容
以下にリストされているすべてのアイテムがパッケージに含まれていることを確認してください。
- 1 x 16CH 1080p DVR
- 1 x 12V / 3A電源
- マウス x 1
- 1TBハードドライブ×2(プリインストール)
- クイックスタートガイド x 1

Image: Contents of the ZOSI DVR package, showing the DVR unit, USB mouse, power supply, and a quick start guide.
3.製品オーバーview
The ZOSI DVR is designed for efficient and reliable video surveillance. Familiarize yourself with the front and rear panels for proper connection and operation.

画像: 前面と背面 views of the ZOSI 16-Channel DVR. The front panel features status indicators and a USB port. The rear panel includes video input ports (1-16), audio input/output, HDMI, VGA, Ethernet, USB 2.0, and power input.
3.1. Supported Camera Types
This DVR is a 4-in-1 hybrid system, supporting various camera technologies:
- Analog (CVBS): Standard definition cameras.
- AHD (Analog High Definition): High-definition analog cameras.
- TVI (Transport Video Interface): High-definition analog cameras over coaxial cable.
- CVI (Composite Video Interface): High-definition analog cameras over coaxial cable.
It is important to note that this DVR is 互換性がない with WiFi cameras, IP cameras, or PoE cameras.

Image: Illustration demonstrating the compatibility of the ZOSI DVR with TVI, AHD, CVI, and CVBS camera types, highlighting its 4-in-1 capability.

Image: A detailed chart indicating that the ZOSI DVR supports AHD, CVI, CVBS, and TVI cameras, but explicitly states it is not compatible with SDI, PoE, or IP cameras.
4. セットアップ
Follow these steps for initial setup of your ZOSI DVR system:
- カメラを接続する: Connect your compatible security cameras to the video input ports on the rear of the DVR.
- モニターを接続: HDMI または VGA ポートを使用してモニターを DVR に接続します。
- マウスを接続する: 付属の USB マウスを DVR の USB ポートに接続します。
- ネットワークを接続: Connect an Ethernet cable from your router to the DVR's LAN port for remote access features.
- 電源オン: Connect the 12V/3A power supply to the DVR and plug it into a power outlet.
- 初期設定: Follow the on-screen prompts to complete the initial setup, including setting up a password and configuring network settings.

Image: A visual guide illustrating the simple three-step setup process: 1. Connect ZOSI CCTV System, 2. Download the free ZOSI Smart App, and 3. Enjoy Live View on your devices.
4.1. Hard Drive Installation (if not pre-installed or for replacement)
If your DVR did not come with a hard drive or if you need to replace it, follow these instructions. Always ensure the DVR is powered off before performing any hardware changes.
Video: This video demonstrates the process of installing a hard drive into the ZOSI DVR. It shows how to open the casing, connect the power and data cables to the hard drive, secure the hard drive, and reassemble the unit. Remember to format the hard drive after installation for proper recording.
5. 操作
5.1. H.265+ビデオ圧縮
The ZOSI DVR utilizes advanced H.265+ video compression technology. This technology significantly improves the compression ratio compared to H.264, saving approximately 80% of storage space while maintaining high image quality. This results in more efficient storage resource usage and a smoother viewing の経験。

Image: A comparison graphic illustrating the benefits of H.265+ compression over H.264, showing reduced storage space and bandwidth usage, and improved loading speed.
5.2. Local and Remote Access
You can access and control your security system in two ways:
- ローカルアクセス: Connect the DVR directly to a monitor for local viewing and control without an internet connection.
- リモート アクセス: Use the free ZOSI Smart mobile application (for smartphones and tablets) or the ZOSI Client software (for PC) to view and control your system remotely from anywhere with an internet connection. You can also playback recorded footage by searching specific dates and times.

画像: ユーザー viewing live and recorded security footage from their ZOSI system across multiple devices, including a smartphone, laptop, and desktop computer, demonstrating remote access capabilities.
5.3. 動きの検知とアラート
DVR には高度なモーション検出機能が搭載されています。
- カスタマイズ可能な検出領域: Define specific motion detection zones for each camera to minimize false alerts from non-critical movements like tree branches or small animals.
- プライバシーマスキング: Block out selected areas within the camera's view to ensure privacy where needed.
- インスタント通知: Receive immediate notifications and email alerts with screenshots directly to your phone when motion is detected.

Image: A visual representation of the smart human and vehicle detection feature, showing a person and a car highlighted within the camera's view, with options for email and app push notifications.
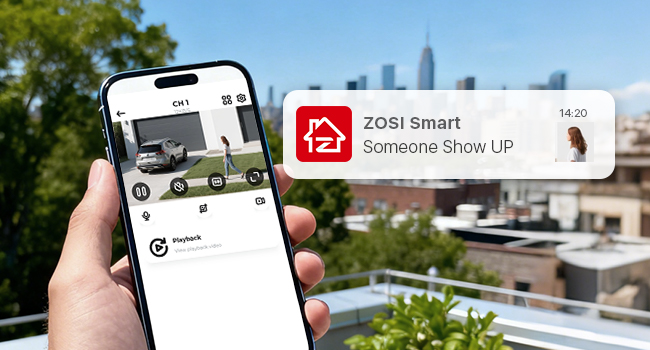
Image: A smartphone screen displaying a ZOSI Smart App notification, indicating that 'Someone Show UP' with a small preview image, demonstrating instant alerts.
5.4. Customizable Record Modes
The ZOSI DVR offers four recording modes to suit your preferences:
- 連続記録: レコードfootage 常に。
- スケジュールされた記録: 指定された期間のみ記録します。
- 動き検出記録: 動きが検知されたときのみ録画します。
- 記録をリサイクルする: 最も古いfooを上書きしますtage when the hard drive is full (ensure this function is enabled).
You can customize the recording mode for each camera individually. Recorded fileUSB バックアップ用にダウンロードできます。

Image: A timeline interface showing recorded events at specific times, with a focus on smart recording and playback features, including customizable motion detection areas.
6. メンテナンス
To ensure optimal performance and longevity of your ZOSI DVR, regular maintenance is recommended:
- ハードドライブ管理: Regularly check the hard drive status. If replacing the hard drive, ensure it is formatted after installation for proper recording.
- ソフトウェアアップデート: Periodically check for firmware updates on the ZOSI official website to ensure your system has the latest features and security patches.
- クリーニング: Keep the DVR unit clean and free from dust to prevent overheating. Use a soft, dry cloth for cleaning.
7。 トラブルシューティング
If you encounter issues with your ZOSI DVR, consider the following common troubleshooting steps:
- ビデオ出力なし: Check all cable connections (power, HDMI/VGA, camera cables). Ensure the monitor is set to the correct input source.
- 録音なし: Verify that the hard drive is correctly installed and formatted. Check recording schedules and motion detection settings. Ensure 'Recycle Record' is enabled if you want continuous overwriting.
- リモート アクセスの問題: Confirm the DVR is connected to the internet. Check network settings on the DVR and your router. Ensure the ZOSI Smart App or Client software is updated to the latest version.
- 誤動作アラート: Adjust the sensitivity of motion detection and refine the detection areas for each camera.
- パスワードのリセット: If you forget your password, refer to the ZOSI support resources for password recovery procedures.
さらにサポートが必要な場合は、ZOSI カスタマー サポートにお問い合わせください。
8. 仕様
| 特徴 | 仕様 |
|---|---|
| モデル番号 | 1AR-16CK20-US |
| ビデオ圧縮 | H.265 + |
| チャンネル | 16 |
| サポートされているカメラの種類 | Analog, AHD, TVI, CVI (4-in-1 Hybrid) |
| ビデオ解像度 | 1080P ライト |
| ハードディスクサイズ | 2 TB (Included) |
| メモリストレージ容量 | 2000ギガバイト |
| 接続技術 | イーサネット |
| 対応デバイス | カメラ |
| パッケージ寸法 | 17.56 x 11.42 x 4.17インチ |
| アイテム重量 | 5.02ポンド |
9. 保証とサポート
ZOSI は、信頼性の高い製品と優れた顧客サービスの提供に尽力しています。
- 返品規則: Enjoy a 30-day hassle-free return policy.
- テクニカルサポート: 製品に対する生涯にわたるテクニカル サポートをご利用ください。
- カバレッジ: 製品には 2 年間の保証が付いています。
For any inquiries or support, please visit the official ZOSI webサイトにアクセスするか、カスタマー サービス チームに連絡してください。