1. はじめに
This manual provides instructions for the safe and effective operation of the SMART SENSOR AS8906 Handheld NO2 Gas Leak Detector. This device is designed for detecting Nitrogen Dioxide (NO2) gas concentrations in various environments. Please read this manual thoroughly before using the product.
1.1 安全情報
- Always operate the device in accordance with the instructions provided.
- ご自身でデバイスの改造や修理を試みないでください。修理は資格のある担当者にご相談ください。
- Ensure the device is charged using the provided charging adapter and USB cable.
- Avoid exposing the device to extreme temperatures or humidity outside the specified operating conditions.
- This device is intended for professional use and should be handled with care.
2.製品オーバーview
2.1 パッケージ内容
標準パッケージには次の項目が含まれています。
- 1 x Nitrogen Dioxide Gas Monitor (AS8906)
- ユーザーマニュアル x 1
- 充電アダプター x 1
- USBケーブル1本
- 1 x Hand Carry Case
- 1x校正証明書
- 1 x CNEX Certificate
- 1 x Gift Paper Box

図 2.1: 標準パッケージの内容。
2.2 デバイスコンポーネント
Familiarize yourself with the main components of the AS8906 detector:

図2.2: 前面 view and labeled components of the AS8906 detector.
- High Sensitive Sensor: Detects NO2 gas concentration.
- Sampling Pump Connecting Port: For attaching the optional sampリングポンプ。
- LCDスクリーン: Displays gas concentration, battery status, and other information.
- 下ボタン: ナビゲーションとデクレに使用asing 値。
- 上ボタン: ナビゲーションと増加に使用asing 値。
- サウンドアラーム: Emits an audible alert when gas concentration exceeds set limits.
- 充電ポート: USB充電ケーブルを接続します。
- ライトアラーム: Visual alert (LED) when gas concentration exceeds set limits.
- 電源オン/オフボタン: デバイスの電源を制御します。
- 入力ボタン: 選択と設定を確認します。
2.3 寸法
The AS8906 detector features a compact design for portability.
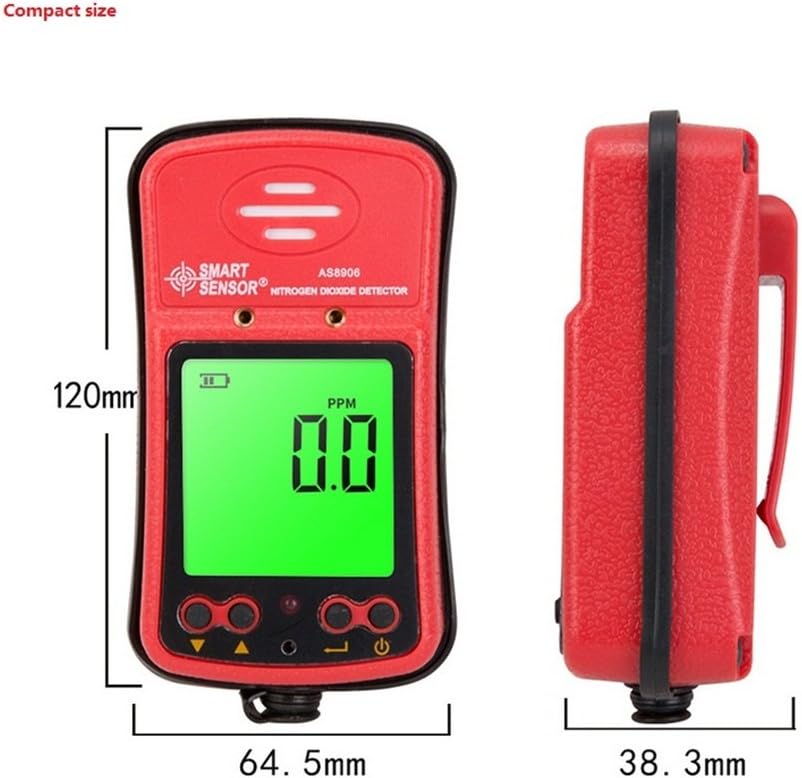
図 2.3: デバイスの寸法。
寸法: 120.2mm (高さ) x 64.5mm (幅) x 38.3mm (奥行き)。

Figure 2.4: The compact size allows for easy portability.
3. セットアップ
3.1デバイスの充電
The AS8906 detector is powered by a built-in 3.7V Li-battery. Before first use, ensure the device is fully charged.
- Locate the charging port at the bottom of the device.
- 付属のUSBケーブルを充電ポートに接続します。
- Connect the other end of the USB cable to the charging adapter.
- Plug the charging adapter into a standard power outlet.
- The battery indicator on the LCD screen will show charging status. A full charge typically provides up to 12 hours of continuous operation.
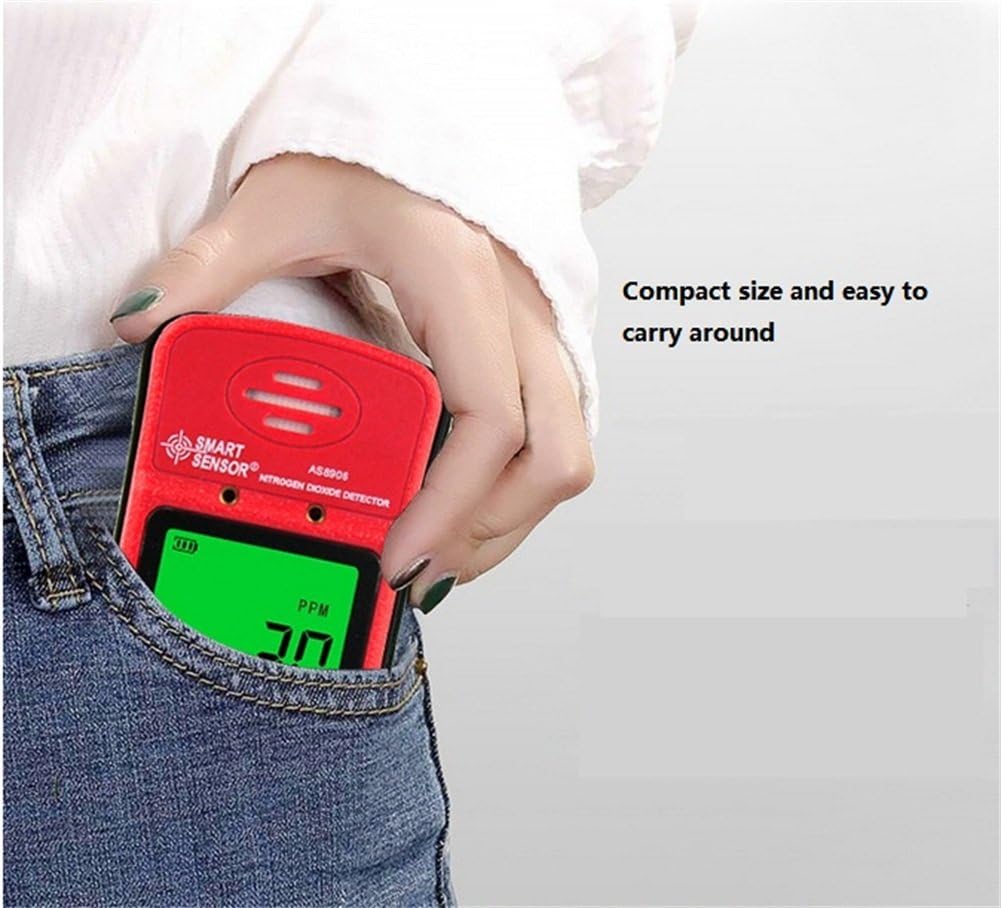
図 3.1: 充電ポートの位置。

Figure 3.2: Gas detector with recharge adapter.
3.2 Sの接続ampリングポンプ(オプション)
The optional sampling pump (AS8930) is designed to assist the gas detector in environments with limited access or poor air circulation. It does not operate independently and requires power from the gas detector.
- を揃えるampling pump with the gas detector's sampling pump connecting port.
- Securely attach the sampling pump to the gas detector using the two closed-type screws. Ensure a tight connection to avoid poor contact.
- Connect the soft rubber tube (500mm long) to the nozzle of the sampリングポンプ。
- 重要: Do not connect any other voltage power supply to the sampling pump to prevent damage.
図3.3:Sampling pump and accessories.
4. 操作
4.1 電源のオン/オフ
- 電源を入れるには: を押し続けます 電源オン/オフボタン until the LCD screen illuminates. The device will perform a self-test.
- 電源を切るには: を押し続けます 電源オン/オフボタン 画面が消えるまで。
4.2 表示の見方
The high-density digital LCD screen displays real-time gas concentration values, battery status, and other operational indicators. The backlight function allows for use in dark areas.
- 数量: Indicates parts per million, the unit for gas concentration.
- バッテリーアイコン: 現在のバッテリー充電レベルを表示します。
- アラームインジケータ: Visual cues for alarm status.
4.3つのアラーム機能
The device features high and low alarm functions with three alert methods: sound, light, and vibration. Alarm values are adjustable.
- When the gas concentration reaches a preset high or low alarm value, the device will activate its sound, light, and vibration alarms.
- The alarm sound can reach up to 80dB.
4.4 Adjusting Alarm Values
Refer to the on-screen menu for adjusting high and low alarm thresholds. Use the Up そして 下 buttons to navigate and change values, and the 入力 確認するにはボタンを押してください。
4.5 Using the Sampリンポンプ
sがampling pump is connected, it will draw air into the detector, allowing for gas concentration measurement in remote or confined spaces. The air flow velocity is approximately 0.5 cubic inches per hour, with a maximum gas sample collecting distance of about 50 feet.
5. メンテナンス
5.1バッテリーケア
- Recharge the device when the battery indicator shows low power to ensure continuous operation.
- バッテリーの寿命を延ばすために、頻繁にバッテリーを完全に使い切らないようにしてください。
- デバイスを長期間保管する場合は、約 50% まで充電し、数か月ごとに再充電してください。
5.2 クリーニング
- 装置の外側を柔らかい布で拭きます。amp 布。
- 研磨剤入りの洗剤や溶剤は使用しないでください。asing または画面。
- Ensure no liquids enter the sensor area or charging port.
5.3 キャリブレーション
The device comes with a calibration certificate. For optimal accuracy and compliance, periodic professional calibration is recommended. Refer to the manufacturer or authorized service centers for calibration services.
6。 トラブルシューティング
If you encounter issues with your AS8906 detector, refer to the following common problems and solutions:
| 問題 | 考えられる原因 | 解決 |
|---|---|---|
| デバイスの電源が入りません。 | バッテリー残量が少ない、または消耗しています。 | 付属のアダプターと USB ケーブルを使用してデバイスを充電します。 |
| 不正確な測定値。 | Sensor contamination or need for calibration. | Ensure the sensor area is clean. Consider professional calibration if readings remain inconsistent. |
| Alarm not sounding/lighting/vibrating. | Alarm settings configured incorrectly or disabled. | デバイスメニューでアラーム設定を確認してください。音量とバイブレーションが有効になっていることを確認してください。 |
| Sampling pump not working. | Poor connection to the detector or pump malfunction. | を確認してくださいampling pump is securely attached with screws. Verify the detector is powered on. |
これらの解決策を試しても問題が解決しない場合は、カスタマー サポートに連絡してサポートを受けてください。
7. 仕様
7.1 検出器の仕様
| 特徴 | 詳細 |
|---|---|
| ブランド | スマートセンサー |
| モデル | AS8906 |
| ガスの種類 | 二酸化窒素(NO2) |
| 測定範囲 | 0~20ppm |
| 解決 | 0.1ppm |
| 動作原理 | 電気化学センサー |
| アラームタイプ | Sound, Light, Vibration (adjustable values) |
| アラーム音レベル | 最大80dB |
| 動作温度 | -10〜50℃ |
| 動作湿度 | 15~95% RH (standard) |
| 電源 | 3.7V Li-battery (Built-in) |
| 動作電流 | 16mA |
| 連続運転 | 約12時間(フル充電) |
| 材料 | ABSプラスチック |
| 正味重量 | 200g(7.1オンス) |
| 寸法 | 120.2 x 64.5 x 38.3 ミリメートル |
| 認定資格 | JJG693; JJG695: JJG915 and GB3836 series anti-explosion standard, CNEX |
7.2年ampling Pump Specifications (Optional Accessory)
| 特徴 | 詳細 |
|---|---|
| 営業巻tage範囲 | DC 2.2V-3.2V |
| 動作電流 | <280mA |
| ノズル径 | 2.5mm |
| ノイズ | <75dB |
| 寸法 | 100.8 x 62.3 x 50 ミリメートル |
| マックスSample Distance | 約50フィート |
| Air Flow Velocity | Approx. 0.5 cubic inches per hour |
8. 保証とサポート
8.1 保証情報
Your SMART SENSOR AS8906 Handheld NO2 Gas Leak Detector comes with a warranty. Please refer to the included Warranty Card in your package for specific terms and conditions, including warranty period and coverage details.
8.2 カスタマーサポート
For technical assistance, troubleshooting beyond this manual, or warranty claims, please contact SMART SENSOR customer support. Contact information can typically be found on the product packaging, the warranty card, or the official SMART SENSOR webサイト。