1. はじめに
This manual provides instructions for the EEEkit OBD1 to OBD2 Adapter cable, designed to connect vehicles with a Toyota 22-pin diagnostic port to standard 16-pin OBD2 diagnostic scanners. This adapter facilitates communication between older Toyota vehicles and modern diagnostic tools, enabling vehicle fault diagnosis.

Image 1: EEEkit OBD1 to OBD2 Adapter cable, showing the 22-pin male connector and 16-pin female connector.
2 製品の特徴
- 互換性: Specifically designed for Toyota vehicles equipped with a 22-pin diagnostic socket, allowing connection to standard 16-pin OBD2 diagnostic tools.
- 使いやすさ: Features a plug-and-play design for straightforward connection, converting the Toyota 22-pin interface to a standard OBD2 16-pin interface.
- 安定した伝送: Engineered for stable data transmission and effective anti-jamming, ensuring reliable communication with scanning software.
- 耐久性のある構造: Manufactured with high-quality metal and PVC materials for long-lasting performance and durability.
- 標準準拠: Adheres to strict quality control standards and original specifications for consistent and reliable operation.

Image 2: Illustration of the adapter's compatibility with various Toyota vehicle models.

画像3: 詳細 view of the adapter highlighting its durable cable and anti-slip connector design.
3. 仕様
| 属性 | 詳細 |
|---|---|
| ブランド | EEEKit |
| モデル番号 | 124855 |
| コネクタ1 | Toyota 22-Pin Male (OBD1) |
| コネクタ2 | Standard 16-Pin Female (OBD2) |
| ケーブル長さ | 約30cm(11.81インチ) |
| コア材料 | High-quality copper |
| 外側素材 | ポリ塩化ビニル |
| 色 | 黒 |
| アイテム重量 | 3.2オンス |
| 製品寸法 | 1 x 1 x 6インチ(パッケージ/全体) |

Image 4: Diagram illustrating the adapter's dimensions and connector types.
4. セットアップとインストール
The EEEkit OBD1 to OBD2 Adapter is designed for simple, non-destructive installation. Follow these steps to connect your diagnostic scanner to a compatible Toyota vehicle:
- Locate the Vehicle's Diagnostic Port: Identify the 22-pin diagnostic port in your Toyota vehicle. This port is typically located under the dashboard, near the steering column, or in the engine bay, depending on the vehicle model and year. Consult your vehicle's service manual if you have difficulty locating it.
- Connect the Adapter to the Vehicle: Plug the 22-pin male connector of the EEEkit adapter into the vehicle's 22-pin diagnostic port. Ensure a firm and secure connection.
- Connect the Diagnostic Scanner: Plug your standard 16-pin OBD2 diagnostic scanner into the 16-pin female connector of the EEEkit adapter.
- Power On and Initiate Scan: Turn on your diagnostic scanner. The scanner should now be able to establish communication with the vehicle's onboard computer system. Follow the instructions provided with your diagnostic scanner to perform scans, read codes, or access live data.
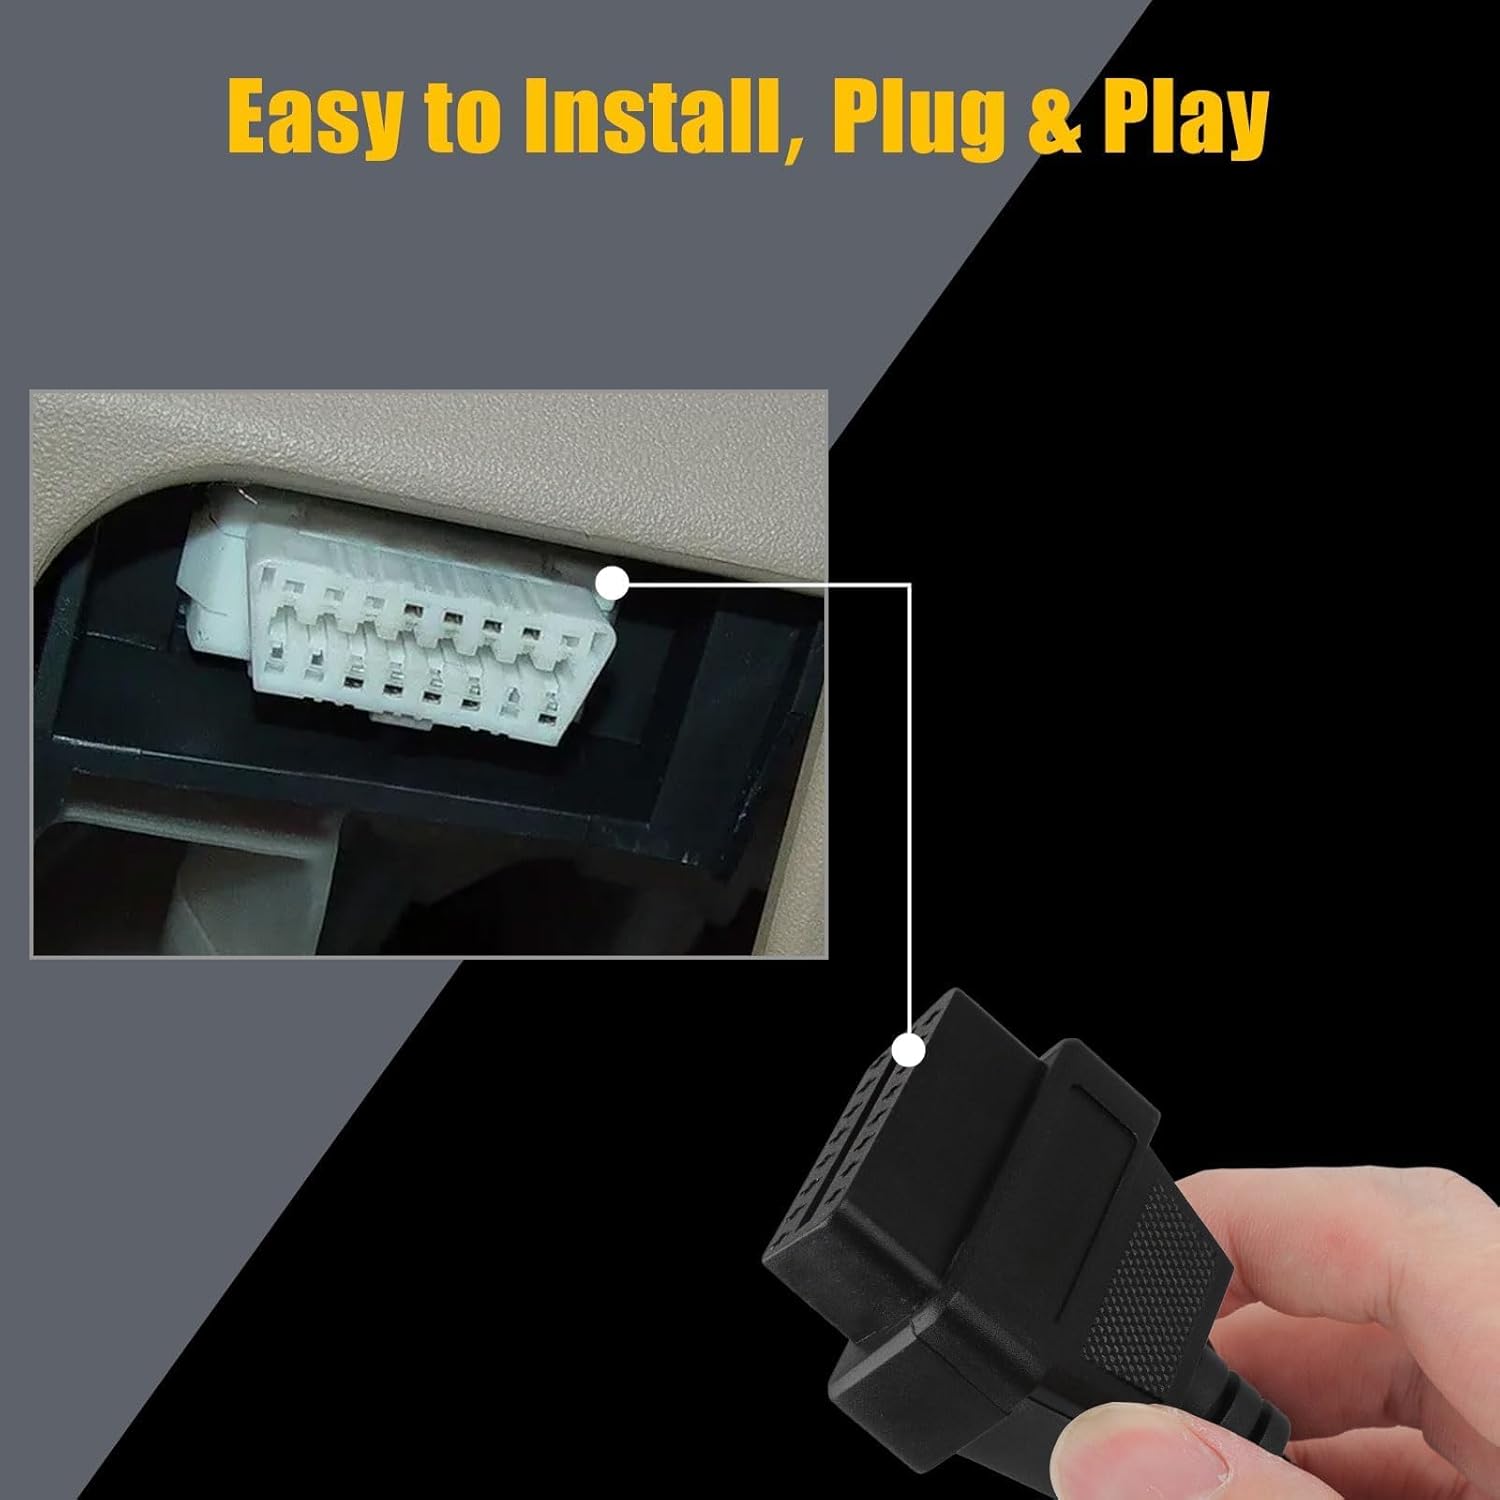
Image 5: Illustration of connecting the 16-pin end of the adapter to a diagnostic tool, demonstrating the plug-and-play installation.
Video 1: A seller-provided video demonstrating the physical connection of a Toyota 22-pin to 16-pin OBD2 diagnostic cable adapter. This video shows the physical appearance and connection points of the cable.
5. 操作手順
Once the adapter is securely connected to both your vehicle and the diagnostic scanner, operate your scanner as you normally would for an OBD2-compatible vehicle. The adapter acts as a pass-through, translating the older OBD1 Toyota protocol to the modern OBD2 standard for your scanner.
- 車両の点火: Ensure the vehicle's ignition is in the "ON" position (engine off or running, as required by your specific diagnostic procedure).
- Scanner Functions: Use your diagnostic scanner to perform functions such as:
- 診断トラブルコード(DTC)の読み取り
- DTCのクリア
- Viewing Live Data Streams
- Performing Readiness Monitor Tests
- データ解釈: Refer to your diagnostic scanner's manual for interpreting codes and data. The adapter ensures the physical and electrical compatibility; the scanner handles the data interpretation.
6. お手入れとメンテナンス
To ensure the longevity and reliable performance of your EEEkit OBD1 to OBD2 Adapter, follow these maintenance guidelines:
- ストレージ: Store the adapter in a clean, dry place away from direct sunlight and extreme temperatures.
- クリーニング: 必要に応じて、ケーブルとコネクタを柔らかく乾いた布で優しく拭いてください。刺激の強い化学薬品や研磨剤の使用は避けてください。
- 取り扱い: Always grasp the connectors when plugging or unplugging the cable. Avoid pulling directly on the cable itself to prevent damage to the internal wiring.
- 検査: Periodically inspect the connectors and cable for any signs of wear, damage, or corrosion. Do not use the adapter if any damage is observed.
7。 トラブルシューティング
If you encounter issues while using the EEEkit OBD1 to OBD2 Adapter, consider the following troubleshooting steps:
- No Communication with Scanner:
- 接続を確認してください: Ensure both the 22-pin and 16-pin connectors are fully and securely seated.
- 車両互換性: Verify that your vehicle indeed uses a Toyota 22-pin diagnostic port. This adapter is not universal for all OBD1 vehicles.
- スキャナー機能: Test your OBD2 scanner with a known OBD2-compatible vehicle to ensure it is functioning correctly.
- 車両の点火: Confirm the vehicle's ignition is in the correct position (usually "ON" or "ACC" for diagnostics).
- 断続的な接続:
- コネクタを検査します。 Look for bent pins or debris in either the adapter's connectors or the vehicle's diagnostic port.
- ケーブルの完全性: Check the cable for any visible damage, kinks, or cuts.
- 誤った読み取り/データ:
- スキャナー設定: Ensure your diagnostic scanner is configured correctly for the vehicle type and year, if applicable.
- ソフトウェアアップデート: Verify that your diagnostic scanner's software is up to date.
If problems persist after attempting these steps, consult the user manual for your diagnostic scanner or contact EEEkit customer support for further assistance.
8. 保証とサポート
For information regarding product warranty, returns, or technical support, please refer to the EEEkit official website or contact their customer service directly. Details are typically available on the product packaging or the seller's online store page.
You can visit the EEEkit Store for more products and support: EEEkit Store on Amazon.


