1. はじめに
Thank you for choosing the SONY HDRCX240/L Video Camera. This manual provides essential information for the safe and efficient operation, maintenance, and troubleshooting of your camcorder. Please read this manual thoroughly before using the device and retain it for future reference.
The SONY HDRCX240/L is a compact and versatile camcorder designed to capture high-quality video and still images. Featuring a 9.2MP Exmor R CMOS Sensor, 27x optical zoom Carl Zeiss lens, and a 2.7-inch LCD, it is ideal for capturing family events, vacations, sports, and content creation.
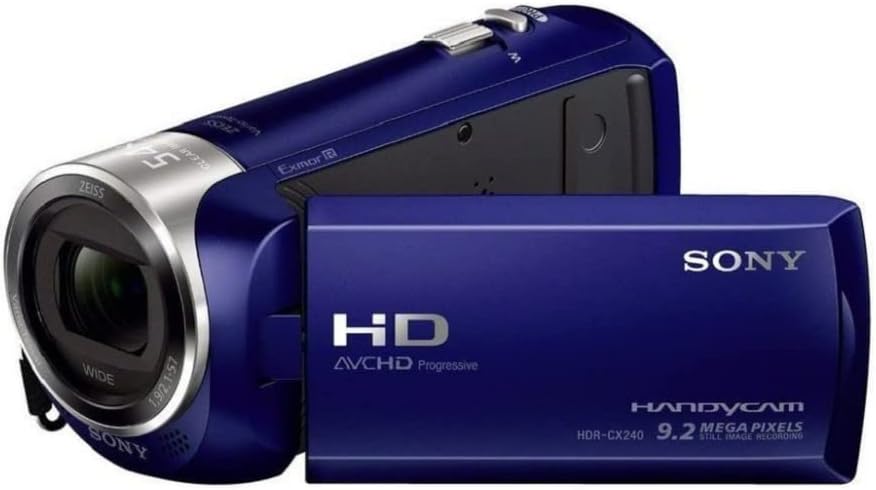
Figure 1: SONY HDRCX240/L Video Camera (Front View)
This image displays the SONY HDRCX240/L Video Camera from the front, showcasing its compact design, the Carl Zeiss lens, and the SONY branding. The camcorder is blue.
2. セットアップ
2.1. バッテリーの取り付けと充電
- バッテリー収納部を開きます。 Locate the battery compartment cover on the rear of the camcorder and slide it open.
- バッテリーを挿入します: Insert the supplied Lithium-Ion battery into the compartment, ensuring the terminals align correctly. Push until it clicks into place.
- コンパートメントを閉じます: 電池カバーをしっかりと閉じてください。
- バッテリーを充電する: Connect the camcorder to a power outlet using the supplied USB cable and AC adapter (if included). The charging indicator will illuminate. Charge the battery fully before first use. A full charge typically takes several hours.
2.2. メモリーカードの挿入
The HDRCX240/L uses a Micro SD card for storage.
- メモリカードスロットを見つけます。 Open the LCD panel to reveal the memory card slot, typically located near the battery compartment or on the side.
- Micro SD カードを挿入します: Gently insert the Micro SD card with the metal contacts facing down (or as indicated by the diagram near the slot) until it clicks into place. Ensure it is a Class 10 or higher speed card for optimal performance.
- メモリカードをフォーマットします。 For optimal performance and to prevent data corruption, it is recommended to format a new memory card using the camcorder's menu system. Refer to the 'Operating the Camera' section for menu navigation.
3. カメラの操作
3.1.電源のオン/オフ
To power on the camcorder, open the LCD panel. To power off, close the LCD panel or press and hold the power button (if available).

Figure 2: SONY HDRCX240/L Video Camera with LCD Screen Open
This image shows the SONY HDRCX240/L Video Camera with its 2.7-inch LCD screen articulated and open, displaying a vibrant scene. This view highlights the operational readiness of the camcorder.
3.2. ビデオ録画
- ビデオモードを選択します: Ensure the camcorder is in video recording mode. This is usually indicated by an icon on the LCD screen.
- 録画を開始: Press the REC START/STOP button, typically located on the back or side of the camcorder. A red indicator light or on-screen icon will confirm recording is in progress.
- 録画を停止: 録画を停止するには、もう一度 REC START/STOP ボタンを押してください。
3.3. 静止画の撮影
- Select Still Photo Mode: Switch the camcorder to still photo mode using the mode button or menu option.
- 写真を撮る: Press the PHOTO button (or the shutter button) to capture a 9.2-megapixel still image.
3.4. ズーム機能
Use the zoom lever, usually located near the top of the camcorder, to control the zoom. Push the lever towards 'T' (Telephoto) to zoom in and towards 'W' (Wide) to zoom out. The camcorder features 27x optical zoom and 54x Clear Image Zoom.
3.5.再生
- 再生モードに入る: Press the PLAYBACK button or select playback mode from the menu.
- コンテンツを選択: Use the directional buttons or touch screen (if applicable) to navigate through your recorded videos and photos.
- 再生を開始: PLAYボタンを押して view 選択されたコンテンツ。
3.6.転送 Fileコンピュータに
To transfer videos and photos to a computer:
- Connect the Camcorder: Use the supplied USB cable to connect the camcorder to your computer.
- アクセス Files: The camcorder should appear as a removable drive on your computer. Open the drive to access your recorded MP4 video fileと画像 files.
- コピー Files: Drag and drop or copy the desired fileをコンピュータに送信します。
4. メンテナンス
4.1. ビデオカメラのクリーニング
- レンズ: Use a soft, dry lens cleaning cloth to gently wipe the lens. Avoid using harsh chemicals or abrasive materials.
- LCDスクリーン: Wipe the LCD screen with a soft, lint-free cloth. For stubborn smudges, slightly damp布を水で濡らします。
- 体: ビデオカメラ本体を清掃するときは、柔らかく乾いた布を使用してください。
4.2. バッテリーのお手入れ
- バッテリーを頻繁に完全に放電することは避けてください。
- バッテリーを使用しないときは、涼しく乾燥した場所に保管してください。
- 長期間保管する場合は、バッテリーを約 50% の容量まで充電してください。
4.3. ストレージ
When not in use, store the camcorder in a dry, dust-free environment, away from extreme temperatures and direct sunlight. Consider using a protective case.
5。 トラブルシューティング
| 問題 | 考えられる原因 | 解決 |
|---|---|---|
| ビデオカメラの電源が入らない | バッテリーが放電しているか、正しく挿入されていません。 | バッテリーを完全に充電してください。バッテリーを正しく挿入し直してください。 |
| Recording stops unexpectedly or shows errors | Memory card is full, slow, or corrupted. | 不要な削除 files. Use a high-speed (Class 10 or higher) Micro SD card. Format the card in the camcorder. |
| Poor image or video quality | 照明が不十分、レンズが汚れている、設定が間違っている。 | Ensure adequate lighting. Clean the lens. Adjust shooting modes (e.g., Night Vision for low light). |
| Software glitches or freezing | 一時的なソフトウェアの問題です。 | デバイスをリセットするには、バッテリーを取り外して再度挿入します。 |
| 再生中に音が出ない | 音量がミュートされているか、低すぎます。 | Adjust the volume settings on the camcorder. |
6. 仕様
- ブランド: ソニー
- モデル: HDRCX240/L
- ビデオキャプチャ解像度: 1080pフルHD
- 有効な静止画解像度: 9.2 MP
- フォトセンサー技術: Exmor R CMOS
- レンズ: Carl Zeiss, 29.8mm wide angle
- 光学ズーム: 27倍
- Clear Image Zoom: 54倍
- 画面サイズ: 2.7インチ
- フラッシュ メモリ タイプ: Micro SD (C10 recommended)
- ビデオキャプチャフォーマット: MP4
- サポートされているオーディオ形式: MP3、AAC、MPXNUMX
- 画像安定化: Yes (Optical)
- 接続技術: USB
- 特徴: ナイトビジョン
- 力: リチウムイオン電池1個(付属)
- 商品の寸法(奥行き×幅×高さ): 6.3インチ x 4.8インチ x 3.5インチ
7. 保証とサポート
保証情報およびテクニカルサポートについては、ご購入時に付属のマニュアルを参照するか、ソニーの公式サポートサイトをご覧ください。 webサイトでご確認ください。保証請求に備えて購入証明書を保管してください。