1. הקדמה
This manual provides detailed instructions for the installation, operation, and maintenance of your Soundstream VL-11A Single DIN Digital Media Receiver. Please read this manual thoroughly before using the product to ensure proper operation and to prevent damage.
The Soundstream VL-11A is designed to provide high-quality audio playback from various digital sources, including USB drives, SD cards, and auxiliary input devices. It features a compact single DIN chassis for easy integration into most vehicle dashboards.
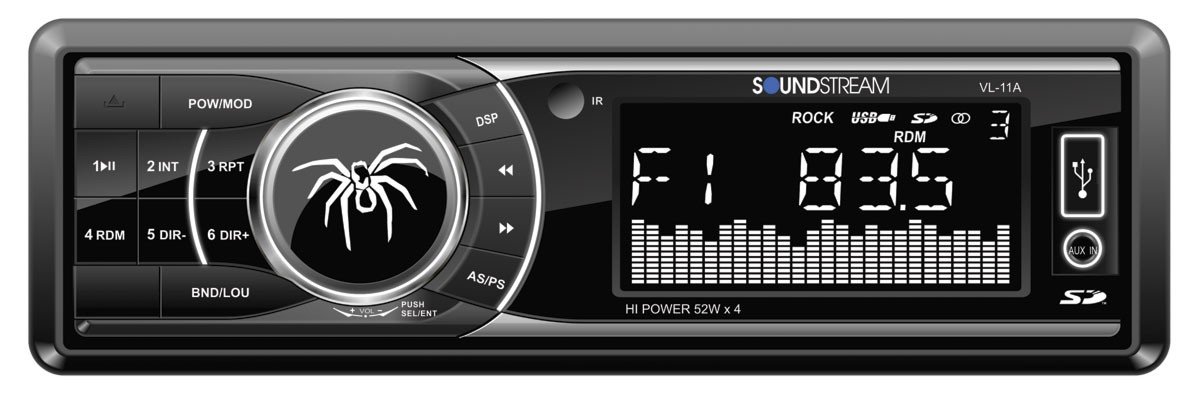
איור 1.1: חֲזִית view of the Soundstream VL-11A Digital Media Receiver. This image displays the main unit with its control buttons and display panel.
2. מידע בטיחות
יש להקפיד על אמצעי הזהירות הבאים כדי למנוע פגיעה או נזק ליחידה:
- אל תפעילו את היחידה באופן שמסיח את דעתכם מהנהיגה. תנו תמיד עדיפות לבטיחות בדרכים.
- Ensure proper wiring connections. Incorrect wiring can cause fire or damage to the vehicle's electrical system.
- הימנעו מחשיפת היחידה ללחות או לטמפרטורות קיצוניות.
- אין לנסות לפרק או לשנות את היחידה. יש לפנות לכל תיקון וטיפול באנשי מקצוע מוסמכים.
- שמרו על עוצמת הקול ברמה שתאפשר לכם לשמוע רעשי תנועה מבחוץ.
3. תכולת החבילה
ודא שכל הפריטים נמצאים בחבילה:
- Soundstream VL-11A Digital Media Receiver
- רתמת חיווט
- חומרת הרכבה (ברגים, שרוול הרכבה)
- שְׁלַט רָחוֹק
- מדריך למשתמש (מסמך זה)
4. המוצר נגמרview
4.1 בקרות בלוח הקדמי
The front panel provides access to primary functions and media inputs.
איור 4.1: Illustrative diagram of the VL-11A front panel. This image highlights the display, volume knob, mode button, track controls, USB port, SD card slot, and auxiliary input.
- לחצן הפעלה / מצב: Press to turn on/off. Short press to cycle through audio sources (Radio, USB, SD, AUX).
- ידית עוצמת הקול: סובבו כדי לכוונן את עוצמת הקול. לחצו כדי לגשת להגדרות השמע (בס, טרבל, איזון, פידר, אקולייזר).
- לְהַצִיג: מציג את הסטטוס הנוכחי, פרטי הרצועה וההגדרות.
- יציאת USB: חבר התקני אחסון USB להפעלת מדיה.
- חריץ לכרטיס SD: הכנס כרטיסי SD להפעלת מדיה.
- כניסת AUX: חברו התקני שמע חיצוניים באמצעות שקע 3.5 מ"מ.
- כפתורי מסלול/כוונון: Navigate tracks or tune radio frequencies.
4.2 חיבורים אחוריים
The rear of the unit contains the main wiring harness and preamp תפוקות.
איור 4.2: Illustrative diagram of the VL-11A rear connections. This image shows the main wiring harness connector and the RCA preamp תפוקות.
- Main Wiring Harness: Connects to vehicle power, ground, accessory, and speaker wires.
- RCA Preamp פלטים: Two sets of 2V outputs for connecting external ampבעלי חיים.
5. התקנה
5.1 התקנה
Professional installation is recommended. If installing yourself, ensure the vehicle's battery is disconnected before beginning.
- הַרכָּבָה: Insert the metal mounting sleeve into the vehicle's dashboard opening. Bend the tabs to secure it.
- תִיוּל: Connect the supplied wiring harness to the vehicle's wiring. Match wire colors and functions carefully.
- חיבורי רמקולים: Connect the speaker wires from the harness to your vehicle's speakers. Ensure correct polarity.
- חיבורי חשמל: Connect the yellow wire (constant 12V), red wire (switched 12V), and black wire (ground) to the appropriate vehicle circuits.
- אַנטֶנָה: חבר את כבל האנטנה של הרכב לכניסת האנטנה של היחידה.
- יחידה מאובטחת: Slide the VL-11A into the mounting sleeve until it clicks into place.
Warning: Incorrect wiring can cause severe damage to the unit or vehicle. Consult a professional if unsure.
5.2 הפעלה ראשונית
After installation, reconnect the vehicle's battery. Press the power button on the unit or remote control to turn it on. The display should illuminate.
6. הוראות הפעלה
6.1 בקרות בסיסיות
- הפעלה/כיבוי: הקש על PWR/MODE לַחְצָן.
- התאמת עוצמת הקול: סובב את ה כֶּרֶך כַּפתוֹר.
- בחירת מקור: לחץ קצר על PWR/MODE button to cycle through Radio, USB, SD, and AUX.
6.2 הגדרות שמע
הקש על כֶּרֶך knob to enter the audio menu. Rotate the knob to navigate options and press to select.
- בס/טרבל: כוונן את רמות הבס והטרבל.
- לְאַזֵן: כוונון איזון השמע בין הרמקולים השמאליים והימניים.
- מַדעֵך: Adjust audio balance between front and rear speakers.
- EQ (אקולייזר): Select from preset EQ curves (e.g., Pop, Rock, Classic) or a custom setting.
6.3 השמעת USB/SD
Insert a USB drive into the USB port or an SD card into the SD card slot. The unit will automatically switch to the respective source and begin playback.
- הפעל/השהה: הקש על PLAY/PAUSE לַחְצָן.
- הרצועה הבאה / הקודמת: הקש על הבא / מקדים כפתורים.
- ניווט בתיקיות: השתמש ב- תיקייה למעלה/למטה buttons (if available on remote or unit).
6.4 קלט עזר (AUX)
Connect an external audio device (e.g., smartphone, MP3 player) to the 3.5mm AUX input on the front panel using an audio cable. Select AUX as the source using the MODE לַחְצָן.
6.5 מקלט רדיו
Select Radio as the source. The unit supports AM/FM bands.
- בחירת להקה: הקש על לְהִתְאַגֵד כפתור כדי לעבור בין FM1, FM2, FM3 ו-AM.
- כוונון ידני: לחץ קצר על TUNE UP/DOWN buttons to adjust frequency step-by-step.
- כוונון חיפוש: לחץ לחיצה ארוכה על TUNE UP/DOWN כפתורים כדי לחפש באופן אוטומטי את התחנה החזקה הבאה.
- תחנות מוגדרות מראש: Press and hold a numbered preset button (1-6) to save the current station. Short press to recall a saved station.
שלט רחוק 6.6
The included remote control provides convenient access to most functions. Point the remote control towards the unit's front panel sensor.
איור 6.1: Illustrative diagram of the VL-11A remote control. This image shows the various buttons for power, mode, volume, track control, and numeric presets.
7. תחזוקה
7.1 ניקוי היחידה
- השתמש במטלית רכה ויבשה כדי לנגב את הפאנל הקדמי ואת הצג.
- אין להשתמש בחומרי ניקוי שוחקים, שעווה או ממיסים.
- הימנעו מריסוס תמיסות ניקוי ישירות על היחידה.
7.2 טיפול כללי
- ודא אוורור נאות סביב היחידה כדי למנוע התחממות יתר.
- הימנע מהנחת חפצים כבדים על היחידה.
- If the unit is exposed to extreme cold, allow it to warm up before operation to prevent condensation.
8. פתרון תקלות
If you encounter issues, refer to the following table before contacting support:
| בְּעָיָה | סיבה אפשרית | פִּתָרוֹן |
|---|---|---|
| אין כוח | Blown fuse; Incorrect wiring; Disconnected battery. | Check vehicle fuses and unit fuse. Verify wiring connections. Ensure battery is connected. |
| אין קול | עוצמת קול נמוכה מדי; השתקה מופעלת; חיווט רמקולים שגוי; מקור לא נבחר. | Increase volume. Deactivate mute. Check speaker connections and polarity. Select correct audio source. |
| USB/SD לא מתנגן | לא נתמך file format; Corrupt media; Incorrectly inserted device. | ודא שהמדיה מכילה אודיו נתמך files (e.g., WMA). Try a different USB/SD. Reinsert device. |
| קליטת רדיו גרועה | אנטנה לא מחוברת; אזור אות חלש. | בדוק את חיבור האנטנה. נסה לכוון לתחנה חזקה יותר. |
| השלט רחוק לא עובד | Dead battery; Obstruction; Not pointing at sensor. | Replace remote battery. Remove obstructions. Ensure direct line of sight to unit's IR sensor. |
9. מפרטים
Technical specifications for the Soundstream VL-11A Digital Media Receiver:
- דֶגֶם: VL-11A
- מותג: סאונדסטרים
- יַצרָן: סאונדסטרים
- מידות המוצר: 22.35 x 20.32 x 9.65 ס"מ
- משקל פריט: 771.11 גרם (1.7 פאונד)
- אודיו וואטtage: 52 וואט (מקסימום)
- מספר ערוצים: 4
- מִרֹאשׁamp פלטים: 2 Sets of 2V
- פורמט מדיה: WMA (and other common digital audio formats)
- מאפיינים מיוחדים: SD Card Input, USB Input, Auxiliary Input
- סוג מחבר: Auxiliary, USB, 3.5mm Jack
- מכשירים תואמים: רַמקוֹל
- שיטת בקרה: מְרוּחָק
10. אחריות ותמיכה
Soundstream products are designed and manufactured to the highest quality standards. For specific warranty information, please refer to the warranty card included with your product or visit the official Soundstream webאֲתַר.
For technical support or service inquiries, please contact Soundstream customer service through their official channels. Keep your purchase receipt and product model number (VL-11A) handy when contacting support.