1. Finitaview
The PUSOKEI A78SD3 is a desktop motherboard designed for reliable performance and versatile connectivity. It supports compatible AMD AM3 socket processors and DDR3 memory, offering a solid foundation for various computing needs. Featuring integrated graphics, 100Mbps Ethernet, and 6-channel audio, it provides a comprehensive multimedia experience.
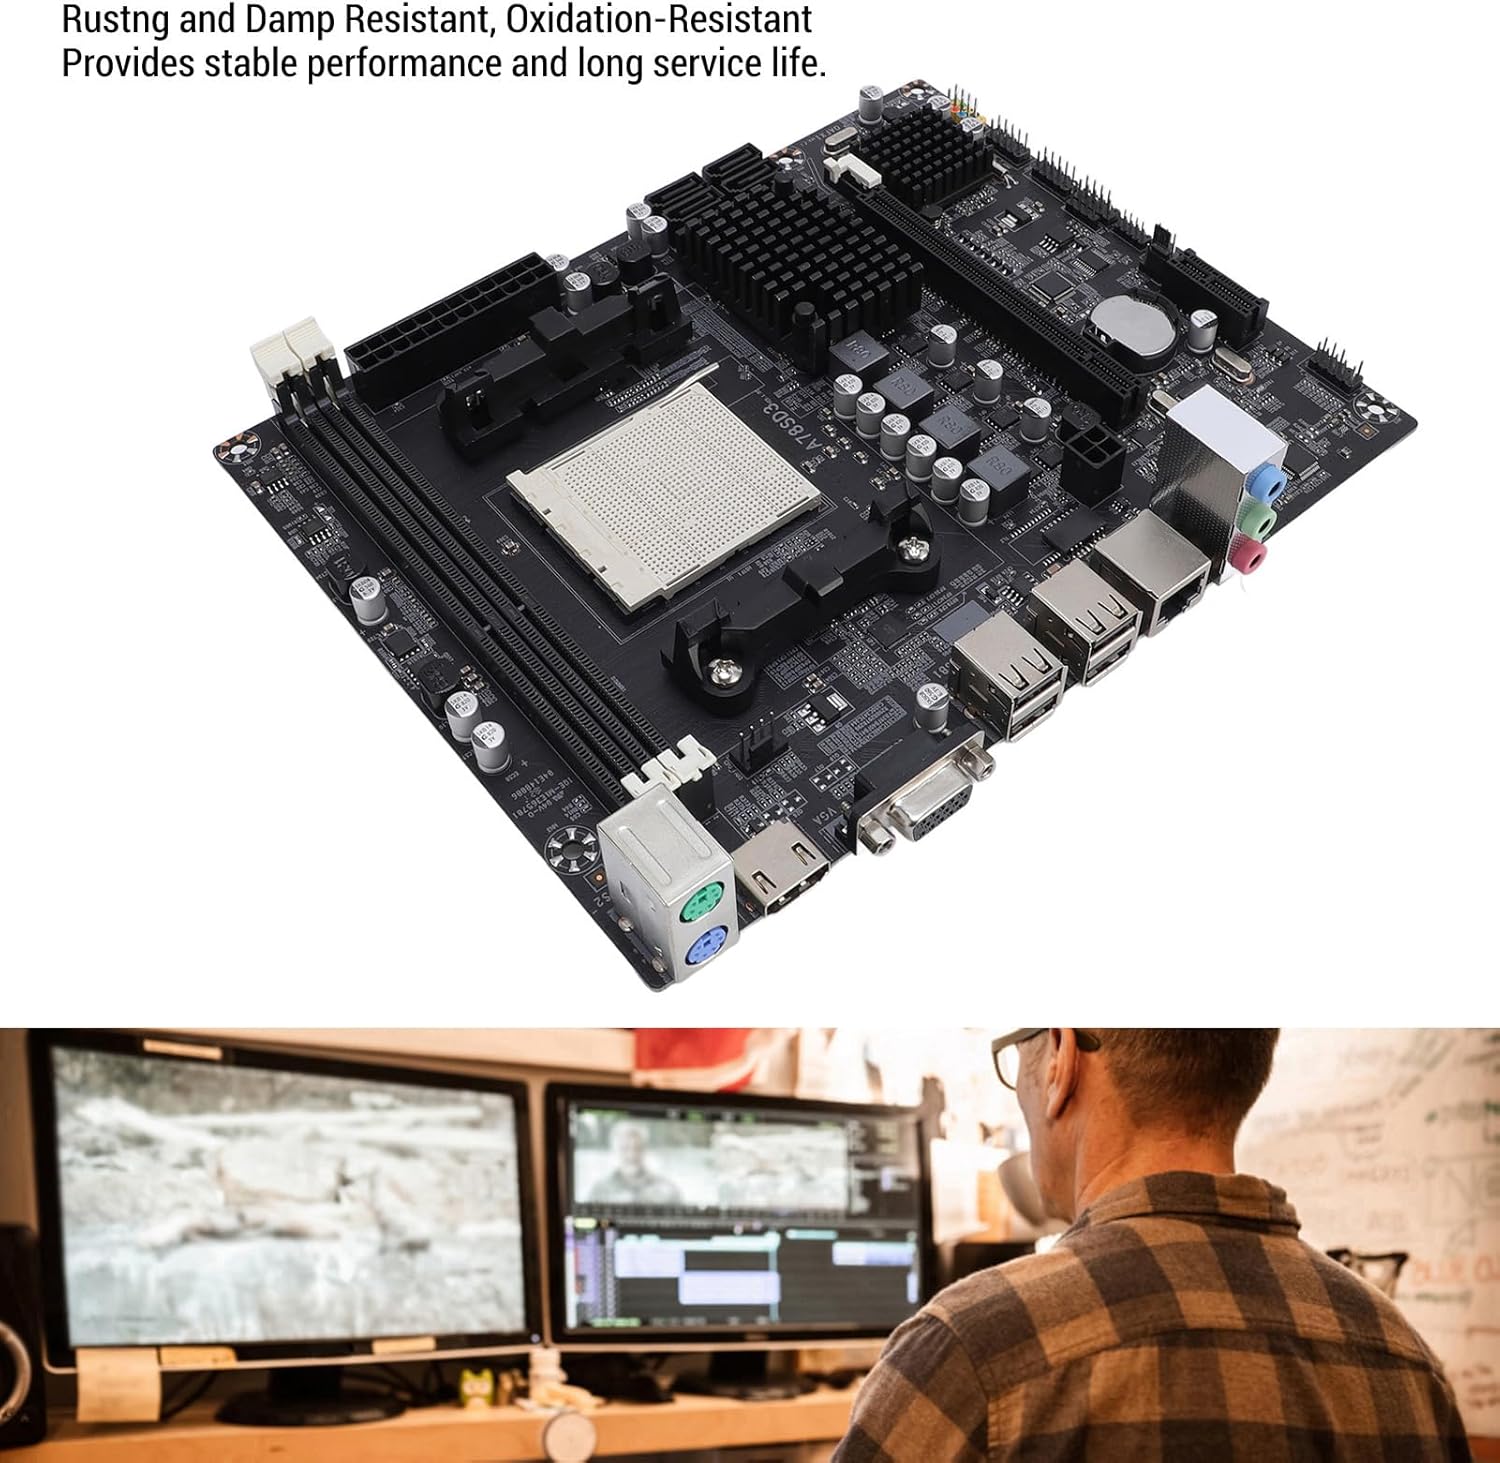
This image shows the motherboard from an angle, emphasizing its robust construction designed to be rust, damp, and oxidation resistant. This design contributes to stable performance and extended service life.
2. Specifiche
| Caratteristica | Specificazione |
|---|---|
| Tipo di articolo | A78SD3 Desktop Motherboard |
| Materiale | PCB |
| Chip della scheda madre | Integrated graphics card, integrated network card |
| Chipset principale | For Series (compatible with AMD A78/A75/A55 series) |
| Chip della scheda di rete | 100Mbps Ethernet |
| Chip audio | Integrated 6-channel audio |
| Presa CPU | AM3 (Supports compatible AMD AM3 socket processors. Note: The product title mentions 'Richland Series APUs', but this motherboard features an AM3 socket, which is incompatible with Richland APUs, which require FM2/FM2+ sockets. Please ensure your CPU is compatible with the AM3 socket.) |
| Supported CPU Quantity | 1 (CPU not included) |
| Tipo di memoria | DDR3 1600/1333/1066 MHz |
| Slot di memoria | 2 x DDR3 slots (Max 16GB capacity) |
| Slot di espansione | 1 x PCIe X16 slot |
| Interfacce di archiviazione | 4 x Serial ATA 3.0 ports |
| Interfacce I / O | 1 x PS/2 (keyboard/mouse), 1 x RJ45 Ethernet Port, 1 x VGA Port, 1 x High-Definition Multimedia Interface (HDMI) Output, 4 x USB 2.0 Ports, Audio Interfaces |
| Dimensioni della scheda madre | Approx. 17x21.3cm / 6.7x8.4in |
| Tipo di batteria | 1 x CR2032L Battery |
| Capacità della batteria | 240 mAH (included) |
| Connettori di alimentazione | 4-pin and 24-pin power connectors |
| Fase di potenza | Monofase |

Un overhead view of the motherboard with measurements indicating its dimensions: approximately 17cm (6.7 inches) in width and 21.3cm (8.4 inches) in length.
3. Contenuto della confezione
- 1 x PUSOKEI A78SD3 Motherboard
- 1 x cavo SATA
- 1 x schermo I/O
- 1 x Manuale utente

This image displays the complete package contents: the PUSOKEI A78SD3 motherboard, a red SATA data cable, and the metal I/O shield for the computer case.
4. Configurazione e installazione
This section provides general guidelines for installing your PUSOKEI A78SD3 motherboard. Always refer to your CPU, RAM, and other component manuals for specific installation instructions.
4.1 Layout della scheda madre

This image displays the PUSOKEI A78SD3 motherboard from an overhead perspective, highlighting key components and their functions. Labels include the 24-pin Modern ATX Power Connector, 2 Channel DDR3 Memory Slots, All Solid Capacitors, Serial ATA 2.0 Ports x4 (note: text description says 3.0), Keyboard and Mouse Ports (PS/2), High-Definition Multimedia Interface Port (HDMI), VGA Port, USB 2.0 Ports, Network Port (RJ45), 4-pin CPU Independent Power Connector, and PCIe X16 Slot.
4.2 Lista di controllo pre-installazione
- Ensure you have a compatible AM3 socket CPU.
- Acquire DDR3 RAM modules (1600/1333/1066MHz).
- Prepare a compatible ATX power supply.
- Gather necessary tools (screwdriver, anti-static wrist strap).
4.3 Passaggi di installazione
- Preparare il caso: Installare la schermatura I/O nell'apertura posteriore del case del computer.
- Installare la CPU: Carefully open the CPU socket lever. Align the CPU with the socket, ensuring the golden triangle on the CPU matches the marking on the socket. Gently place the CPU into the socket without force. Close the lever to secure the CPU.
- Installare il dissipatore della CPU: Seguire le istruzioni del produttore del dissipatore per installare il dissipatore della CPU sulla scheda madre.
- Installa RAM: Open the clips on the DDR3 memory slots. Align your DDR3 RAM modules with the slots, ensuring the notch on the module matches the notch in the slot. Press down firmly on both ends until the clips snap into place.

Un dettagliato view of the two DDR3 memory slots on the motherboard, indicating where RAM modules should be installed. The slots are designed for dual-channel memory configurations.
- Montare la scheda madre: Posizionare con attenzione la scheda madre nel case del computer, allineando i fori delle viti con i distanziali. Fissare la scheda madre con le viti.
- Connetti alimentazione: Collegare il connettore di alimentazione ATX a 24 pin e il connettore di alimentazione CPU a 4 pin dell'alimentatore alle porte corrispondenti sulla scheda madre.
- Collegare i dispositivi di archiviazione: Use the provided SATA cable to connect your SATA 3.0 storage devices (HDD/SSD) to the SATA ports on the motherboard.
- Collegare i cavi del pannello frontale: Connect the front panel headers (power button, reset button, USB ports, audio jacks, LED indicators) from your case to the corresponding pins on the motherboard. Refer to your case manual for pin assignments.
- Installare le schede di espansione: If using a dedicated graphics card or other PCIe expansion cards, insert them into the PCIe X16 slot and secure them.
- Connetti le periferiche: Connect your keyboard, mouse, monitor (VGA or HDMI), and Ethernet cable to the rear I/O ports.
5. Istruzioni per l'uso
Una volta installati e collegati tutti i componenti, è possibile accendere il sistema.
5.1 Primo avvio
- Premere il pulsante di accensione sul case del computer.
- Il sistema dovrebbe accendersi e sul monitor dovrebbe apparire una schermata.
- Access the BIOS/UEFI setup (usually by pressing DEL or F2 during boot) to configure boot order, system time, and other settings.
- Installa il sistema operativo da un'unità USB avviabile o da un DVD.
5.2 Installazione del driver
After installing the operating system, install the necessary drivers for the motherboard's integrated components (chipset, graphics, audio, network). These drivers are typically provided on a CD/DVD with the motherboard or can be downloaded from the PUSOKEI support websito.
5.3 High-Definition Multimedia Experience
The A78SD3 supports high-definition visuals via its HDMI and VGA outputs. Combined with 100Mbps Ethernet and 6-channel audio, it offers an exceptional multimedia experience for gaming, streaming, and other activities.
6. Manutenzione
Proper maintenance can extend the lifespan and ensure stable operation of your motherboard.
- Mantienilo pulito: Regularly clean dust from inside your computer case using compressed air. Dust accumulation can lead to overheating.
- Garantire un flusso d'aria adeguato: Make sure your computer case has adequate ventilation and that fans are functioning correctly to prevent heat buildup.
- Aggiornamenti del BIOS: Controllare periodicamente le istruzioni del produttore website for BIOS updates. Updates can improve stability, compatibility, and performance. Follow update instructions carefully.
- Controlli dei componenti: Assicurarsi che tutti i cavi siano collegati saldamente e che nessun componente sia allentato.
7. Risoluzione Dei Problemi
Se riscontri problemi con la scheda madre, fai riferimento ai seguenti passaggi comuni per la risoluzione dei problemi.
7.1 Nessuna alimentazione / Nessun display
- Controllare i collegamenti di alimentazione: Ensure the 24-pin ATX and 4-pin CPU power connectors are firmly seated.
- Verificare l'alimentazione: Test your power supply unit (PSU) to ensure it is functional.
- Riposizionare i componenti: Remove and re-install RAM modules, graphics card (if applicable), and CPU to ensure they are properly seated.
- Cancella CMOS: Refer to the motherboard manual for instructions on how to clear the CMOS (Complementary Metal-Oxide-Semiconductor) settings, which can resolve boot issues. This usually involves removing the CR2032L battery for a few minutes or using a jumper.
- Test con componenti minimi: Disconnect all non-essential components (e.g., extra drives, expansion cards) and try booting with only the CPU, one RAM stick, and the necessary power connections.
7.2 Instabilità del sistema / arresti anomali
- Controllare le temperature: Monitor CPU and motherboard temperatures. Overheating can cause instability. Ensure proper cooling.
- Prova RAM: Use memory diagnostic tools to check for faulty RAM modules.
- Aggiorna driver: Assicurarsi che tutti i driver della scheda madre e dei componenti siano aggiornati.
- Check PSU: Un'alimentazione insufficiente o difettosa può causare instabilità.
7.3 Peripheral Issues (USB, Audio, Network)
- Install/Update Drivers: Ensure the latest drivers for these components are installed.
- Controllare le connessioni: Verify that internal headers (for front panel USB/audio) and external cables are securely connected.
- Impostazioni BIOS: Check BIOS settings to ensure integrated peripherals are enabled.
8. Garanzia e supporto
For warranty information and technical support, please refer to the documentation included with your purchase or visit the official PUSOKEI websito. Conservare la prova d'acquisto per eventuali reclami in garanzia.