1. Introduzione
This manual provides essential information for the safe and efficient operation, setup, and maintenance of your CREWORKS MLMN210EU 750W Mini Metal Lathe. Please read this manual thoroughly before operating the machine to ensure proper usage and to prevent injury or damage.
1.1 Prodotto finitoview
The CREWORKS MLMN210EU is a compact yet powerful mini metal lathe designed for small to medium-scale precision work on various materials, including metal and wood. It features a 750W motor, a 3-jaw chuck, a digital display for speed monitoring, and a 4-way tool post, offering versatility for turning, cutting, drilling, and threading operations. With a 210 mm (8.3 inch) swing over bed and 400 mm (15.7 inch) distance between centers, it accommodates a range of projects.

Immagine 1.1: The CREWORKS MLMN210EU Mini Metal Lathe shown with its various included accessories, such as wrenches, screwdrivers, chuck keys, and gear sets.
1.2 Istruzioni di sicurezza
Always prioritize safety when operating machinery. Failure to follow safety guidelines can result in serious injury or damage to the equipment.
- Leggere e comprendere l'intero manuale prima dell'uso.
- Wear appropriate personal protective equipment (PPE), including safety glasses, hearing protection, and suitable clothing. Avoid loose clothing, jewelry, and long hair.
- Assicurarsi che l'area di lavoro sia pulita, ben illuminata e libera da ostacoli.
- Never operate the lathe under the influence of drugs, alcohol, or medication that impairs judgment.
- Always disconnect power before performing maintenance, adjustments, or changing accessories.
- Securely fasten the workpiece in the chuck or collet.
- Non lasciare la macchina incustodita mentre è in funzione.
- Tenere mani e dita lontane dalle parti in movimento.
- Use the correct tools and attachments for the task.
- Ensure proper ventilation to dissipate fumes and dust.
2. Contenuto della confezione
Dopo aver disimballato il prodotto, verificare che tutti i componenti siano presenti e integri. Se qualche articolo risulta mancante o danneggiato, contattare immediatamente il fornitore.
- CREWORKS MLMN210EU Mini Metal Lathe
- 3-Jaw Chuck (125mm)
- Portautensili
- Set of Change Gears
- Wrenches and Hex Keys
- Cacciaviti
- Lattina di olio
- Chiave Chuck
- Manuale di istruzioni
- Toolbox (for accessories)
Immagine 2.1: The main unit of the lathe along with the various tools and components included in the package, such as the chuck, gears, and hand tools.
3. Configurazione e installazione
3.1 Disimballaggio e posizionamento
- Estrarre con cautela il tornio e tutti gli accessori dall'imballaggio.
- Pulire eventuali tracce di grasso o olio protettivo dalle superfici della macchina utilizzando uno sgrassatore adatto.
- Place the lathe on a sturdy, level workbench capable of supporting its weight (approximately 61 kg).
- Assicurarsi che vi sia spazio sufficiente attorno alla macchina per un funzionamento e una manutenzione sicuri.
3.2 Collegamento elettrico
- Verificare che l'alimentazione vol.tage matches the requirements specified on the machine's nameplate (typically 220-240V AC).
- Collegare il cavo di alimentazione a una presa elettrica con messa a terra.
- Non utilizzare prolunghe se non strettamente necessario e assicurarsi che siano adatte ai requisiti di alimentazione della macchina.
3.3 Controlli iniziali
- Controllare tutti i dispositivi di fissaggio per la tenuta.
- Lubricate all moving parts as indicated in the maintenance section.
- Ensure the chuck is securely mounted.
4. Istruzioni per l'uso
This section details the controls and basic operations of the CREWORKS MLMN210EU mini metal lathe.
4.1 Controlli e componenti
- Display digitale: Shows the current spindle speed (RPM).
- Manopola di controllo della velocità: Adjusts the spindle speed continuously from 0 to 2500 RPM.
- Pulsante di arresto di emergenza: Interrompe immediatamente l'alimentazione della macchina.
- Mandrino: Holds the workpiece.
- Portautensili: Contiene l'utensile da taglio.
- Volantino del carrello: Moves the carriage along the bed.
- Volantino a slitta trasversale: Moves the cross slide perpendicular to the bed.
- Volantino di appoggio composto: Moves the compound rest at an angle.
- Volantino contropunta: Advances the tailstock quill.

Immagine 4.1: Avvicinamento view of the digital display showing spindle speed and the speed control knob, allowing for precise adjustments up to 2500 RPM.

Immagine 4.2: Illustration of the various handwheels for controlling the movement of the bed carriage, cross slide, compound rest, and tailstock feed, along with the digital speed display.
4.2 Pezzo da lavorare Clamping (mandrino a 3 griffe)
The 125mm 3-jaw chuck is designed to securely hold cylindrical and hexagonal workpieces.
- Insert the chuck key into the chuck.
- Rotate the chuck key to open the jaws sufficiently to insert the workpiece.
- Insert the workpiece and tighten the jaws firmly using the chuck key. Ensure the workpiece is centered and held securely.
- Rimuovere sempre la chiave del mandrino prima di avviare il tornio.

Immagine 4.3: Detailed diagram illustrating the internal and external jaw configurations of the 125mm 3-jaw chuck, with clamping ranges for various workpiece sizes.
| Tipo di mascella | Clamping gamma |
|---|---|
| Internal Jaws (A-A1) | 2.5 - 40 millimetro |
| Internal Jaws (B-B1) | 38 - 125 millimetro |
| External Jaws (C-C1) | 38 - 110 millimetro |
4.3 Operazioni di base
The CREWORKS MLMN210EU is capable of various machining operations:
- Tornitura: Riduzione del diametro di un pezzo in lavorazione.
- Perforazione: Creating holes in the workpiece using the tailstock.
- Filettatura: Cutting internal or external threads. This requires setting up the appropriate change gears according to the thread cutting table (refer to the machine's label).
- Di fronte: Creating a flat surface on the end of a workpiece.
- Parting: Cutting off a section of the workpiece.
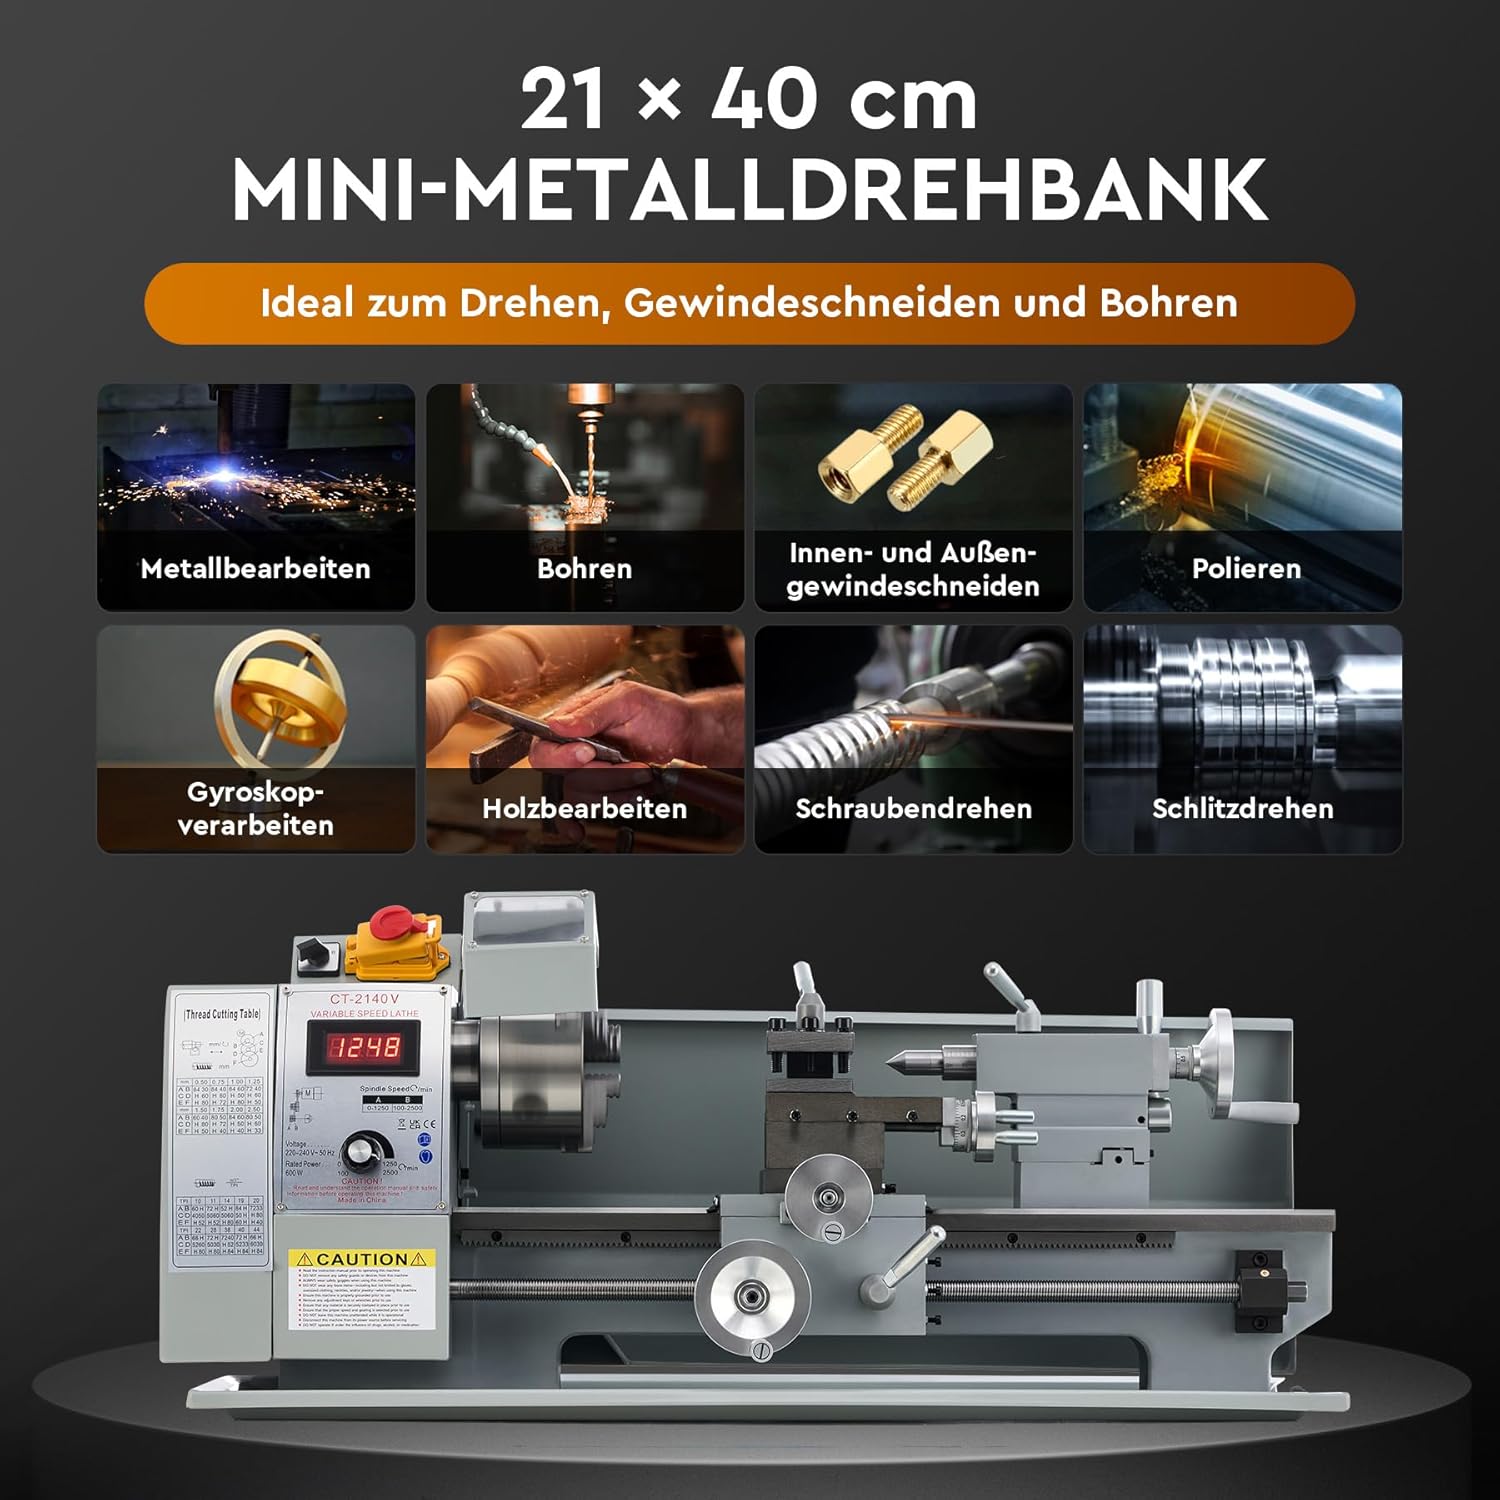
Immagine 4.4: Visual representation of the diverse applications possible with the mini metal lathe, including metal turning, drilling, threading, polishing, and woodworking.
5. Manutenzione
Una manutenzione regolare è fondamentale per la longevità e le prestazioni ottimali del tornio.
5.1 Pulizia
- After each use, clean chips and debris from the machine bed, carriage, and chuck. Use a brush or shop vacuum; never use compressed air as it can embed chips into moving parts.
- Pulire tutte le superfici con un panno pulito.
5.2 Lubrificazione
- Regularly lubricate the lead screw, guide rails, and other moving parts with appropriate machine oil.
- Check the gearbox oil level periodically and replenish if necessary.
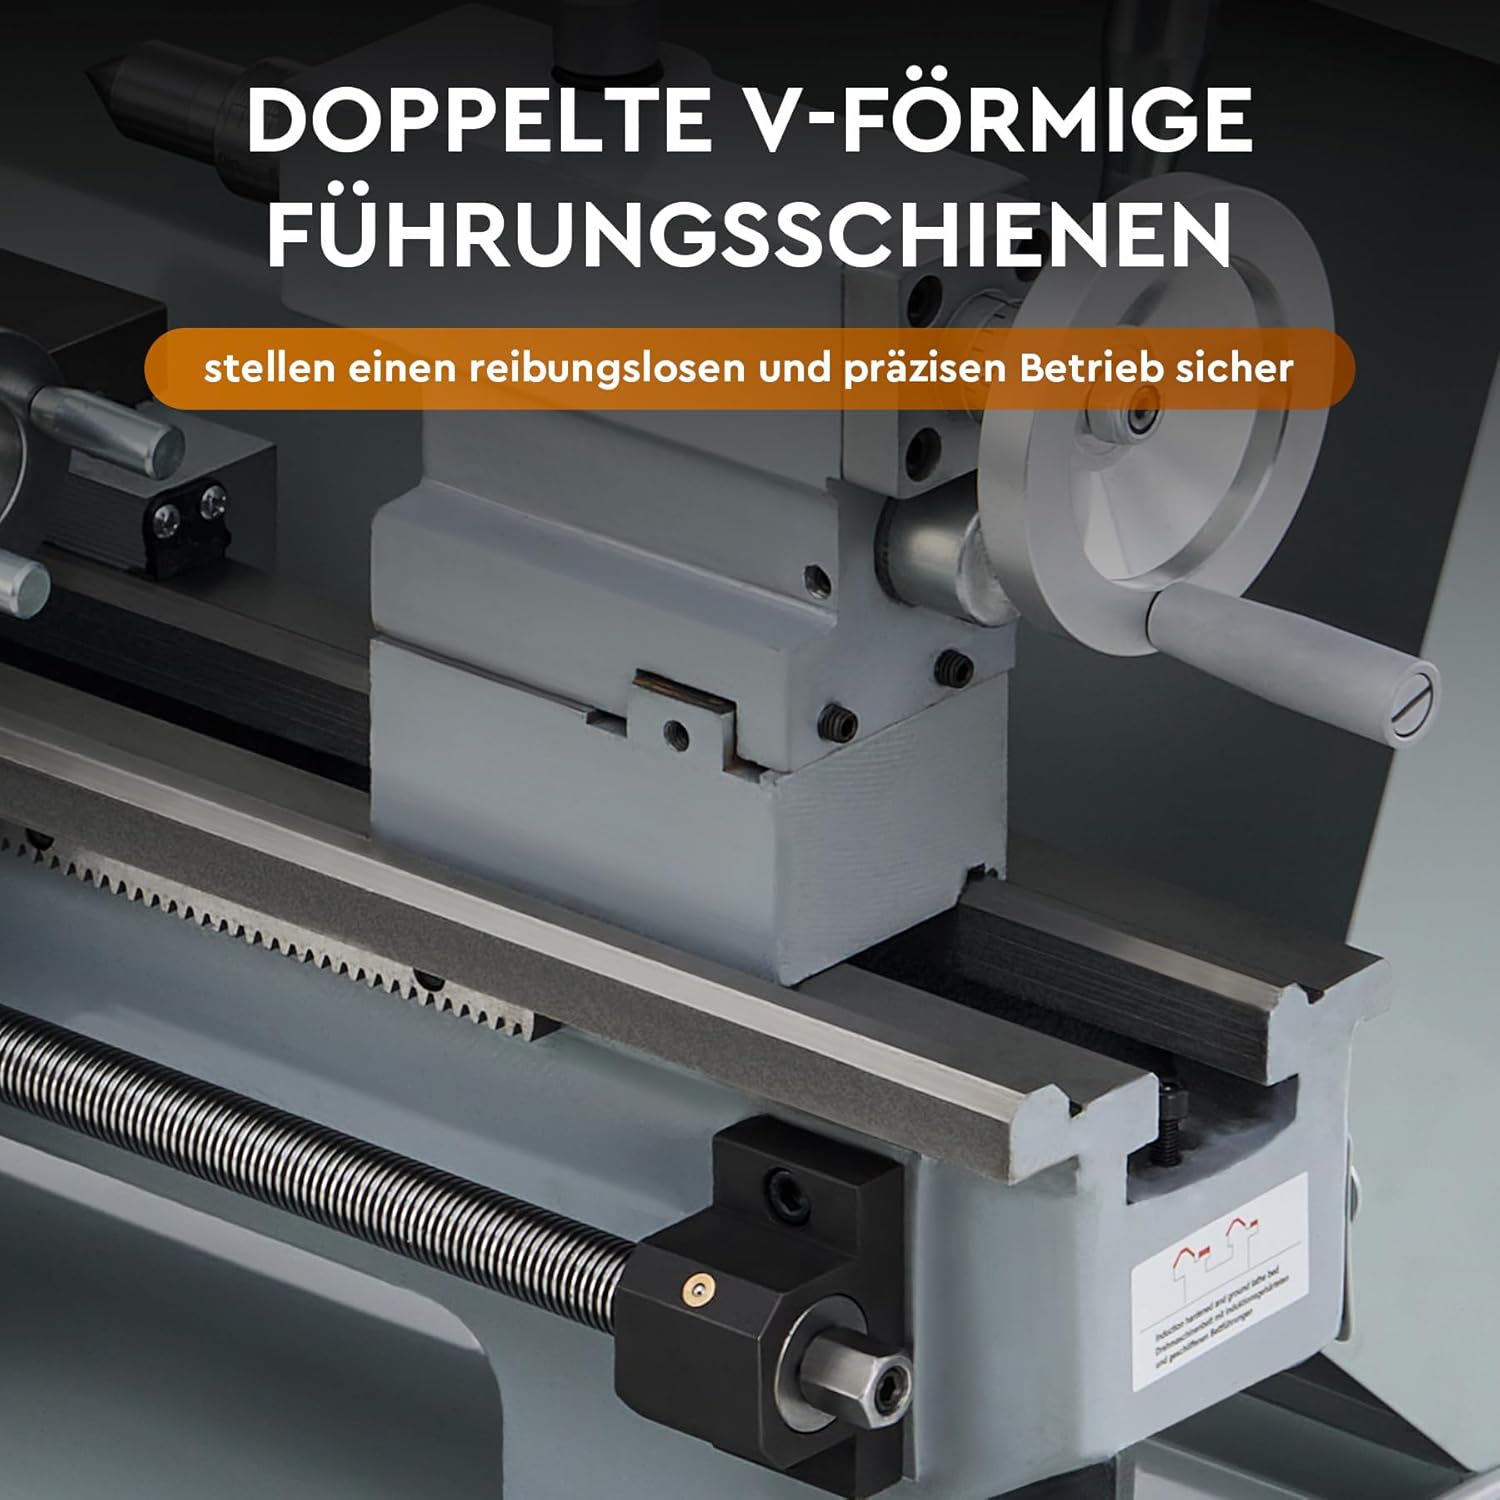
Immagine 5.1: The double V-shaped guide rails, which require regular cleaning and lubrication for smooth and precise operation.
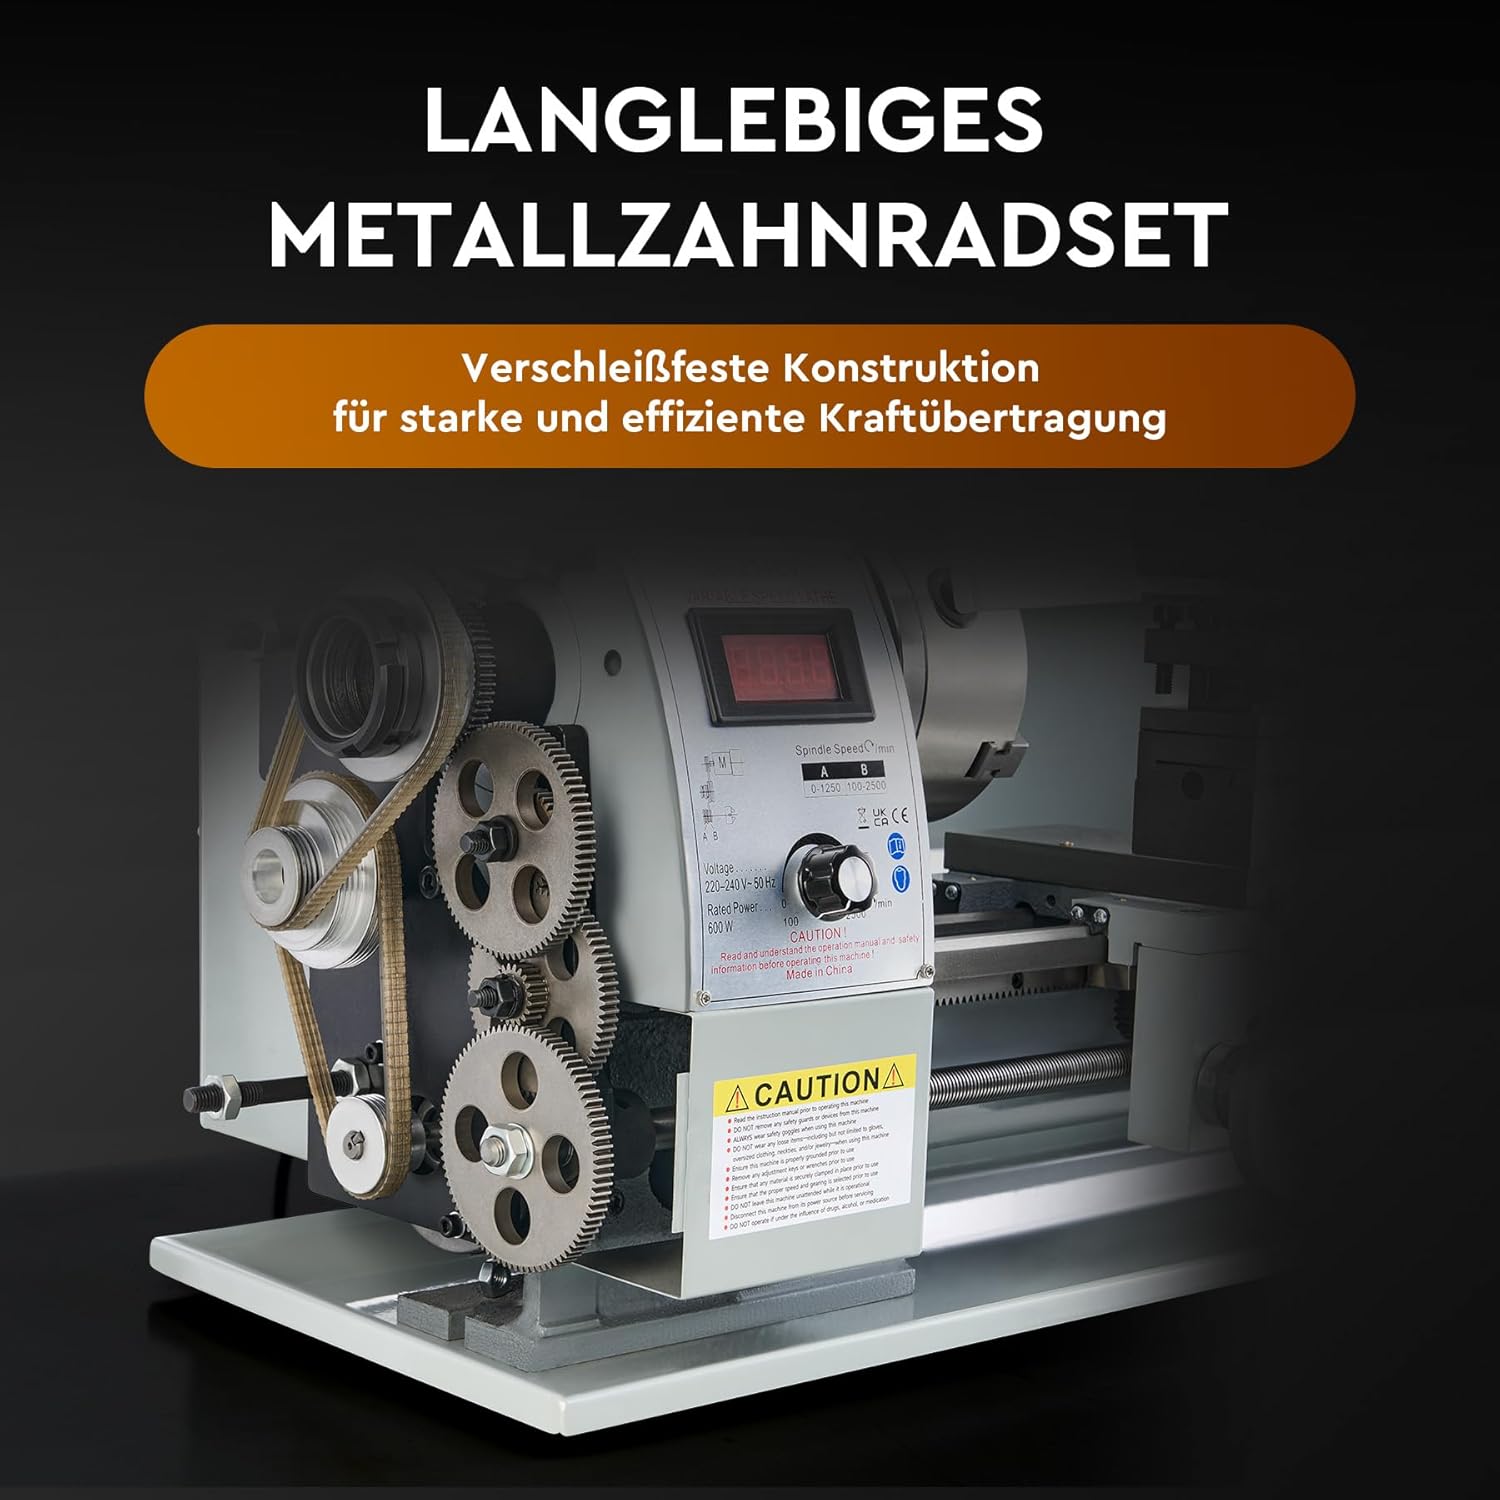
Immagine 5.2: The robust metal gear set, designed for strong and efficient power transmission, which should be inspected periodically for wear and lubricated.
5.3 Ispezione
- Inspect the drive belts for wear or damage. Replace if necessary.
- Check the condition of the cutting tools. Sharpen or replace dull tools.
- Assicurarsi che tutti i collegamenti elettrici siano sicuri e privi di danni.
6. Risoluzione Dei Problemi
Questa sezione affronta i problemi più comuni che potresti riscontrare con il tuo tornio.
| Problema | Possibile causa | Soluzione |
|---|---|---|
| Il tornio non si avvia | No power supply, emergency stop engaged, faulty switch | Check power connection, release emergency stop, inspect power switch |
| Vibrazione eccessiva | Unbalanced workpiece, loose mounting, dull tool, worn bearings | Balance workpiece, tighten mounting bolts, sharpen/replace tool, inspect bearings |
| Finitura superficiale scadente | Dull tool, incorrect speed/feed, excessive depth of cut, machine vibration | Sharpen/replace tool, adjust speed/feed, reduce depth of cut, check for vibration |
| Velocità del mandrino incoerente | Loose drive belt, motor issue, speed control fault | Check/adjust drive belt tension, consult qualified technician |
For issues not listed here or if solutions do not resolve the problem, contact CREWORKS customer support or a qualified technician.
7. Specifiche
Technical specifications for the CREWORKS MLMN210EU Mini Metal Lathe.

Immagine 7.1: A visual summary of the lathe's technical data and key dimensions, including power, swing, and spindle speed.
| Caratteristica | Specificazione |
|---|---|
| Modello | MLMN210EU |
| Potenza nominale | 750 L |
| Altalena sopra il letto | 210 mm (8.3 pollici) |
| Distanza tra i centri | 400 mm (15.7 pollici) |
| Foro del mandrino | 38 millimetri |
| Cono mandrino | MK#5 |
| Cono contropunta | MK#2 |
| Diametro del mandrino | 125 millimetri |
| Gamma di velocità del mandrino | 0 - 2500 RPM (Continuously Variable) |
| Gamma di filettatura metrica | 0.5 - 3 millimetro |
| Imperial Thread Range | 8 - 44 T.P.I. |
| Materiale | Ghisa, acciaio inossidabile, ABS |
| Peso netto | 61 kg |
| Dimensioni (L x P x A) | Dimensioni: 80 cm x 29.2 cm x 34.3 cm |
8. Garanzia e supporto
For warranty information, technical support, or to order replacement parts, please contact CREWORKS customer service. Keep your purchase receipt and product model number (MLMN210EU) handy when contacting support.
Refer to the official CREWORKS websito o nella documentazione di acquisto per i termini di garanzia e i dettagli di contatto più aggiornati.