1. Introduzione
Thank you for choosing the Greesum 8x6FT Outdoor Storage Shed. This manual provides essential information for the safe and efficient assembly, operation, and maintenance of your new storage shed. Designed for durability and functionality, this metal shed offers a secure and spacious solution for organizing your outdoor equipment, tools, bikes, and more. Please read these instructions carefully before beginning assembly and retain them for future reference.

Figure 1: Greesum 8x6FT Outdoor Storage Shed (Brown)
This image displays the Greesum 8x6FT Outdoor Storage Shed in a brown finish, situated in a backyard. The shed features a sloped roof, a single hinged door with a lockable latch, and corrugated metal panels. It is designed to blend into outdoor environments while providing practical storage.
2. Informazioni sulla sicurezza
- Indossare guanti protettivi: Always wear gloves during installation to protect your hands from sharp edges on metal components.
- Fondamenta stabili: The shed must be installed on a flat, solid, and level surface (e.g., a concrete slab or a wooden platform) to ensure stability and prevent moisture intrusion. A floor is not included with the shed.
- Normative locali: Prima dell'acquistoasing and installing, check with your local Homeowners' Association (HOA) or municipal authorities for any specific rules, permits, or approvals required for shed installation.
- Utilizzo dello strumento: Use a hand screwdriver for assembly. Avoid using power drills for tightening screws, as this can easily strip the screws or damage the metal panels.
- Ispezione dei componenti: Carefully inspect all components upon receipt. While efforts are made to prevent damage, some pieces may arrive slightly bent. Gently straighten minor bends if possible. Contact customer service for significantly damaged or missing parts.
- Assistenza al montaggio: Assembly is easier and safer with at least two people.
3. Contenuto della confezione
Your Greesum 8x6FT Outdoor Storage Shed is delivered in a single box. All components are clearly numbered to facilitate straightforward assembly. Please verify that all parts are present and undamaged before beginning assembly.
I componenti tipici includono:
- Pannelli murali in acciaio zincato
- Roof panels and support beams
- Door panels and hinges
- Lockable door latch mechanism (padlock not included)
- Corner protection caps
- Elementi di fissaggio (viti, dadi, rondelle)
- Manuale di montaggio
Note: A floor base is not included with this shed. You will need to prepare a suitable foundation.
4. Istruzioni per l'installazione e il montaggio
Follow these steps for assembling your Greesum 8x6FT Outdoor Storage Shed. Refer to the numbered parts and diagrams in the included assembly guide for detailed visual instructions.
- Preparazione: Choose a flat, level, and solid site for your shed. Clear the area of any debris. Unpack all components and lay them out, matching them with the numbered parts list in your separate assembly guide. This familiarizes you with the parts and simplifies the process.
- Montaggio base: Assemble the base frame according to the instructions. Ensure all corners are square and secure. Minor bending or maneuvering may be required to align holes perfectly.
- Installazione del pannello a parete: Attach the wall panels to the base frame. Ensure panels are correctly oriented and securely fastened using the provided screws. Remember to wear gloves.
- Telaio della porta e installazione della porta: Assemble the door frame and attach it to the designated opening. Install the door panels onto the hinges. Ensure the door opens and closes smoothly.
- Assemblaggio del tetto: Construct the roof frame and attach the roof panels. Pay close attention to the alignment and secure all fasteners. Some users have noted that the front roof section may feel less secure; consider adding additional reinforcement if your area experiences strong winds.
- Controlli finali: Double-check all screws and connections to ensure they are tight and secure. Install any remaining caps or trim pieces.
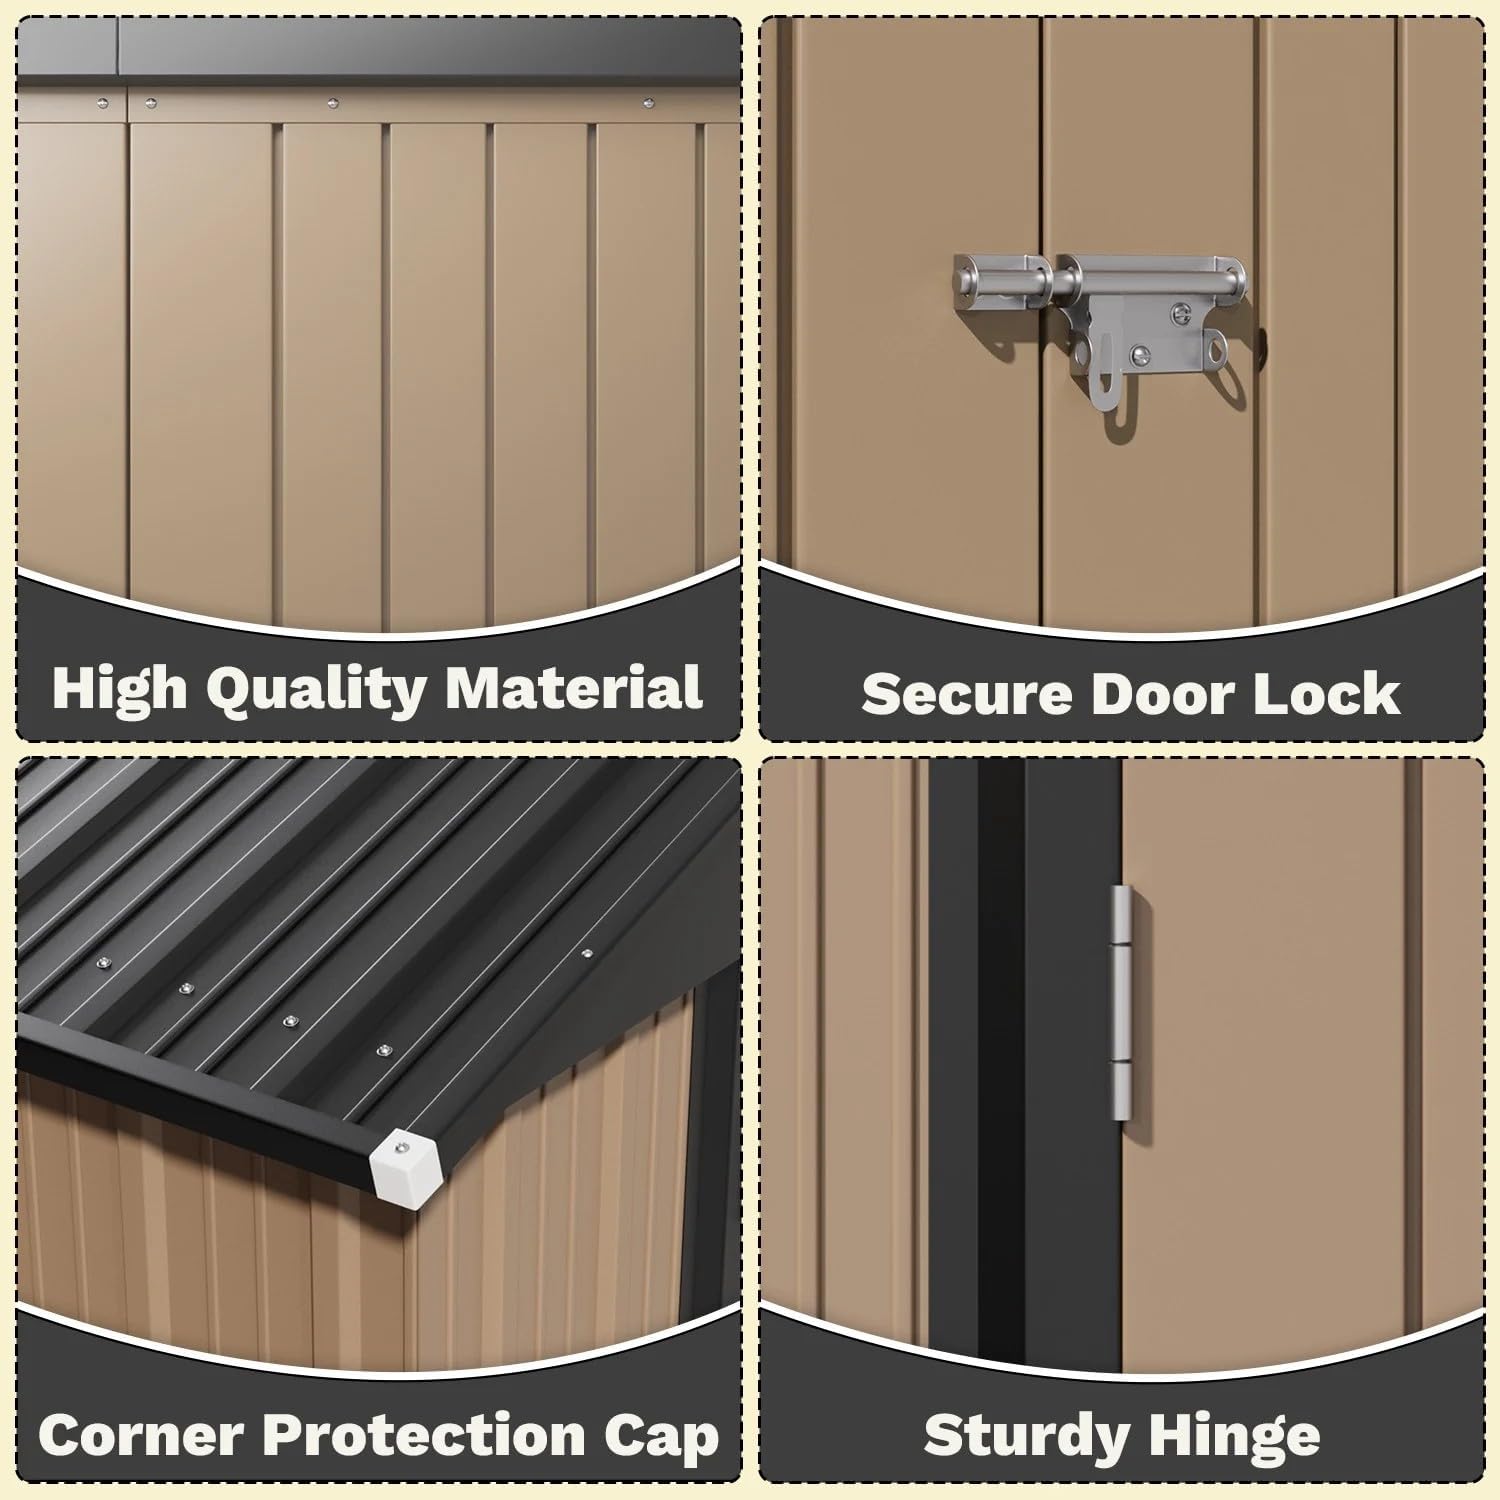
Figura 2: Caratteristiche e componenti principali
Questa immagine fornisce un primo piano views of the shed's construction details. It highlights the corrugated high-quality material of the panels, the secure door lock mechanism (ready for a padlock), a corner protection cap for safety and finish, and a sturdy hinge ensuring smooth door operation.
5. Istruzioni per l'uso
The Greesum 8x6FT Outdoor Storage Shed is designed for straightforward use.
- Accesso: Open and close the single hinged door using the handle.
- Sicurezza: The door features pre-drilled holes for adding a padlock (not included). This allows you to secure your stored items.
- Capacità di archiviazione: Utilizzare il ample interior space to store garden tools, lawnmowers, bicycles, pool equipment, and other outdoor items. Consider adding shelving or organizers for maximum efficiency.

Figure 3: All-Weather Durability and Versatile Storage
This image illustrates the shed's resilience against weather, with rain depicted falling on one side, and its capacity for versatile storage. Icons below the shed suggest its use for sports facilities, children's outdoor toys, a work room, and garden tools, emphasizing its multi-purpose functionality.
6. Manutenzione
Regular maintenance will ensure the longevity and optimal performance of your Greesum storage shed.
- Pulizia: Periodically clean the exterior of the shed with mild soap and water to remove dirt, dust, and debris. Avoid abrasive cleaners or harsh chemicals that could damage the finish.
- Controllo del dispositivo di fissaggio: Annually inspect all screws and bolts for tightness. Re-tighten any loose fasteners to maintain structural integrity.
- Prevenzione della ruggine: Although made from galvanized steel, inspect for any signs of rust, especially in areas where the finish might be scratched. Touch up any affected areas with rust-inhibiting paint if necessary.
- Drenaggio: Ensure that water drains away from the shed's base to prevent pooling and potential moisture damage.
7. Risoluzione Dei Problemi
| Problema | Possibile causa | Soluzione |
|---|---|---|
| Parts are bent or damaged upon arrival. | Shipping damage or manufacturing imperfection. | For minor bends, gently straighten with pliers. For significant damage or missing parts, contact Greesum customer service immediately. |
| I fori delle viti non sono allineati. | Slight manufacturing tolerance or improper alignment during assembly. | Apply gentle pressure or slightly adjust the panel position. Avoid forcing screws. If holes are significantly misaligned, contact customer service. Do not drill new holes unless instructed. |
| Screws strip easily. | Over-tightening, use of power tools. | Always use a hand screwdriver. Tighten screws until snug, but do not over-tighten. If a screw is stripped, replace it with a suitable alternative. |
| Dopo il montaggio, la tettoia sembra instabile. | Uneven foundation or loose fasteners. | Ensure the shed is on a perfectly flat and level surface. Re-check and tighten all fasteners. Consider anchoring the shed to the ground for added stability. |
| Roof appears weak or vulnerable to wind. | Design characteristic or local weather conditions. | For areas with high winds, consider adding internal bracing or external anchors to reinforce the roof structure. |
8. Specifiche
| Caratteristica | Dettaglio |
|---|---|
| Marca | Greesum |
| Numero di modello | GS-86BN-820 |
| Colore | Marrone |
| Materiale | Acciaio legato (zincato) |
| Dimensioni del prodotto (P x L x A) | 73"P x 93.9"L x 74.2"A |
| Peso dell'articolo | 137.1 libbre |
| Livello di resistenza all'acqua | Resistente all'acqua |
| Stile della porta | Single Hinged Door |
| Assemblaggio richiesto | SÌ |
9. Garanzia e supporto
Greesum is committed to providing quality products and customer satisfaction. If you encounter any issues during assembly or use, or if you have questions about your product, please do not hesitate to contact our customer service team.
- Resi: Questo prodotto può essere restituito facilmente entro 30 giorni tramite Amazon.com.
- Assistenza clienti: Our dedicated customer service team is ready to assist you. Please refer to your purchase documentation or the Greesum brand store on Amazon for contact information.
We recommend keeping your purchase receipt and model number (GS-86BN-820) handy when contacting support.