1. Informazioni sulla sicurezza
Please read and understand all instructions before assembling and using this product. Failure to follow these instructions may result in injury or product damage.
- Dispositivo antiribaltamento: Always install the provided anti-tipping hardware to prevent the cabinet from tipping over, especially in households with children.
- Distribuzione del peso: Place heavier items in the lowest drawers and shelves to enhance stability.
- Punti critici: Prestare attenzione ai punti di schiacciamento quando si aprono e si chiudono porte e cassetti.
- Esposizione all'acqua: While the cabinet features a waterproof finish, prolonged direct contact with water should be avoided to prevent damage. Wipe spills immediately.
- Montaggio: Ensure all parts are securely fastened before use. Do not overtighten screws, as bamboo is prone to splitting.
- Bambini: Never allow children to climb on, stand on, or hang from drawers, doors, or shelves.
2. Elenco delle parti
Before beginning assembly, ensure all parts are present and undamaged. Refer to the included diagram for identification.

Immagine: Esploso view of the VINGLI Fluted Bathroom Floor Storage Cabinet showing all individual components and hardware.
Hardware incluso:
- Viti (vari tipi)
- Tasselli di legno
- Cam locks and pins
- Drawer slides (3-section silent slides)
- Soft-close hinges
- Champagne gold handles
- Anti-tip hardware (L-shaped brackets, screws, plastic anchors)
- Magnetic cabinet closure
- Assembly tool (screwdriver/Allen wrench)
3. Istruzioni di montaggio
Assembly typically requires two people and a screwdriver. Follow the steps carefully to ensure proper construction.
Step 1: Prepare Panels and Attach Hardware
Insert cam pins and wooden dowels into the designated holes on the main panels (sides, top, bottom, shelves). Attach drawer slides to the side panels using the provided screws. Ensure the fluted door and drawer fronts are correctly oriented.

Immagine: Primo piano view of the fluted door and drawers, highlighting the champagne gold handles and the arc design for hand protection.
Step 2: Construct the Main Frame
Connect the side panels to the bottom and top panels using cam locks and pins. Ensure all connections are tight and secure. Install the back panel by sliding it into the grooves on the side panels.
Video: EYYTHUNG Fluted Bathroom Cabinet Assembly. This video demonstrates the general assembly process for a fluted bathroom cabinet, including connecting panels and installing hardware.
Step 3: Install Shelves and Doors
Insert adjustable shelves into the desired positions using shelf pins. Attach the fluted door using soft-close hinges. Ensure the door opens and closes smoothly.
Video: VINGLI Hinge Installation Demo. This video provides a detailed demonstration of how to install hinges for VINGLI cabinets, ensuring proper alignment and function.
Fase 4: assemblare e installare i cassetti
Assemble the three fluted drawers by connecting the sides, front, and back panels. Attach the drawer slides to the assembled drawers. Carefully insert the drawers into the cabinet, ensuring they glide smoothly on the 3-section silent drawer slides.
Video: VINGLI 3-in-1 Connector & Wooden Drawer Installation Demo. This video illustrates the assembly of wooden drawers using 3-in-1 connectors, a common method for VINGLI products.
Video: VINGLI Slide Rail Installation & Removal Demo. This video demonstrates the installation and removal of slide rails for drawers, ensuring smooth operation.
Fase 5: installare l'hardware antiribaltamento
Secure the cabinet to the wall using the provided anti-tipping hardware. Mark the wall, drill pilot holes, insert plastic anchors, and then screw the L-shaped brackets to both the cabinet and the wall. This step is crucial for safety.
Video: VINGLI Anti-Tipping Device Installation Demo. This video demonstrates the correct procedure for installing the anti-tipping device to secure the cabinet to the wall.
4. Istruzioni per l'uso
This VINGLI storage cabinet is designed for organizing various items in small spaces, such as bathrooms, entryways, or living rooms.
- Ripiano regolabile: The internal shelf can be adjusted to different heights to accommodate items of varying sizes. Simply remove the shelf pins, reposition the shelf, and reinsert the pins.
- Cassetti: The three fluted drawers operate on 3-section silent slides, allowing for smooth and quiet opening and closing.
- Porta: The fluted door is equipped with soft-close hinges and a magnetic closure for secure and quiet operation.
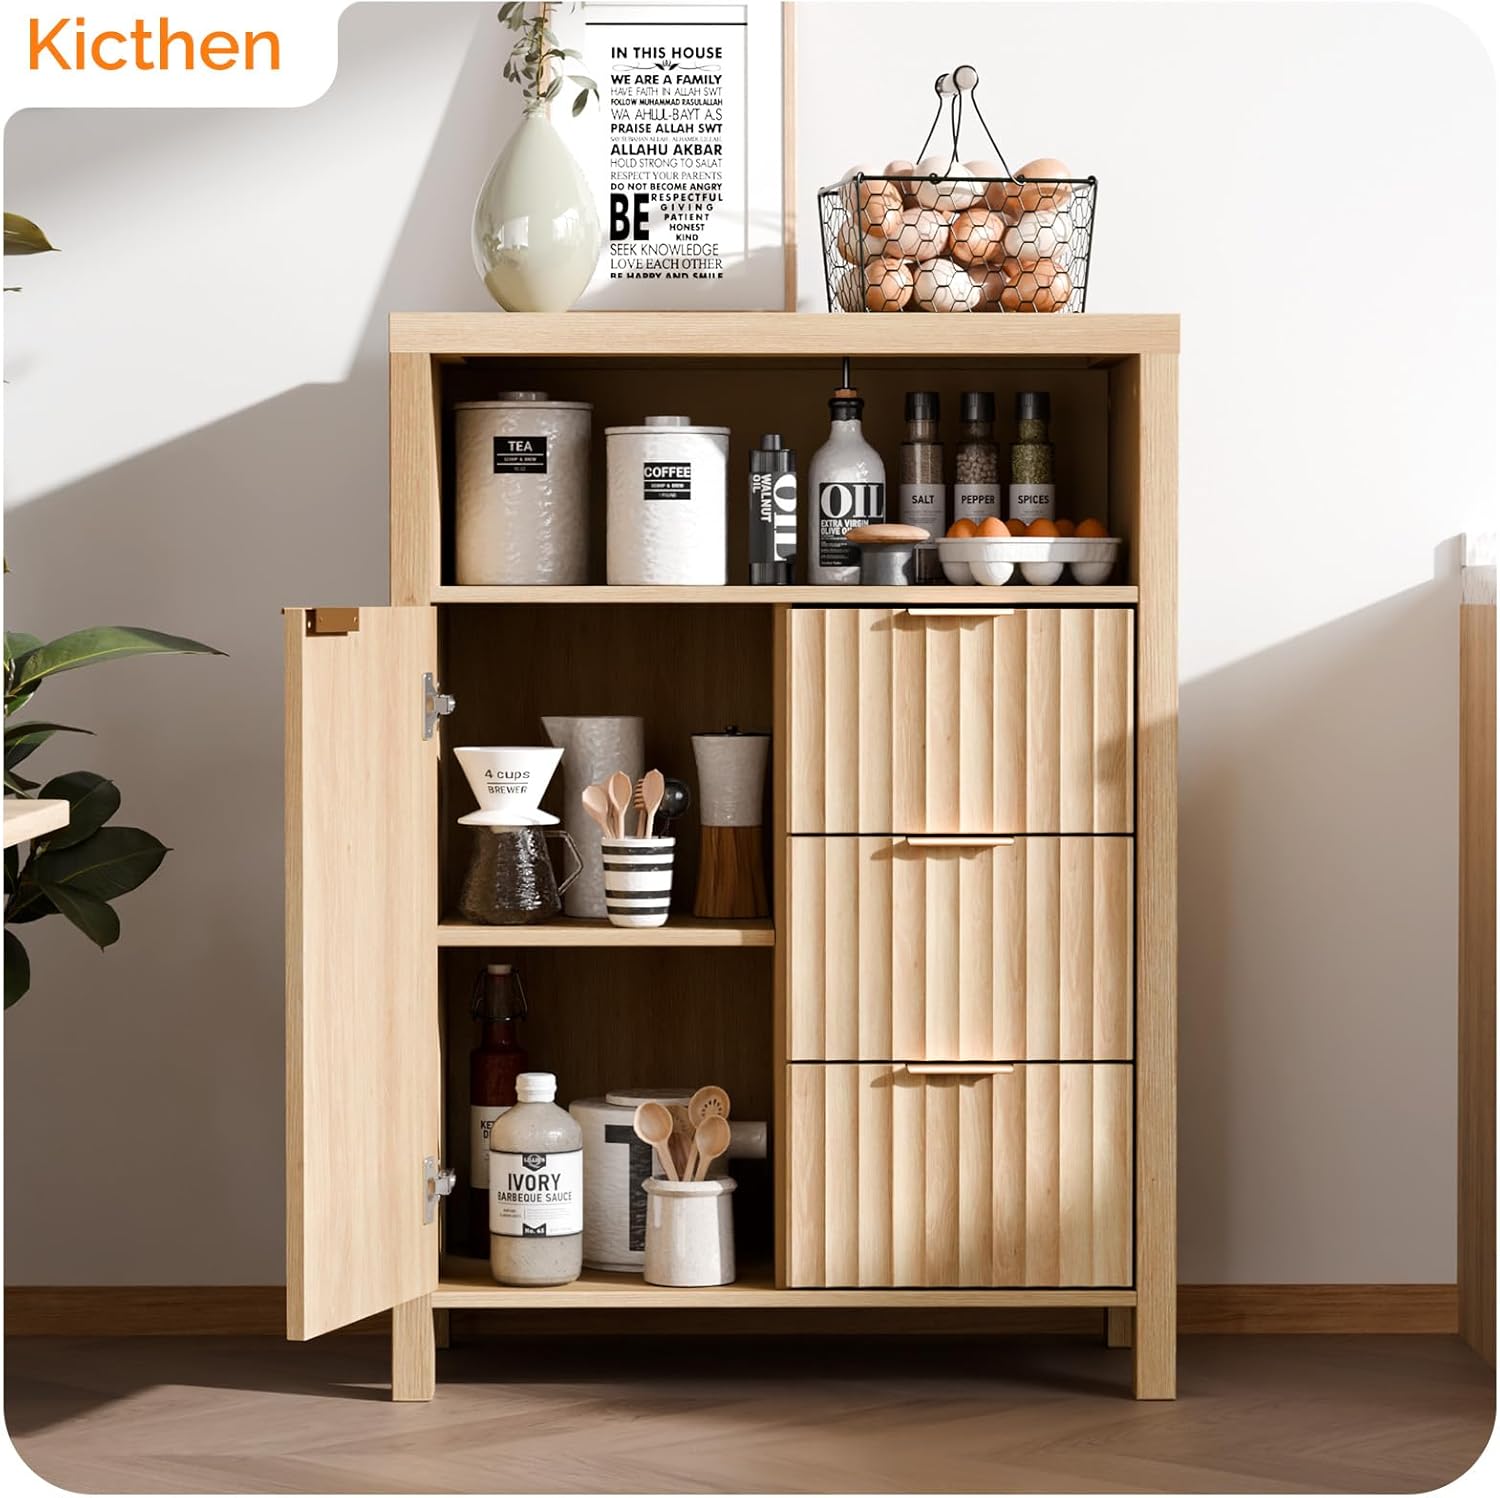
Image: The VINGLI Fluted Bathroom Floor Storage Cabinet in a bathroom, demonstrating its use for organizing toiletries, towels, and other essentials.
5. Manutenzione
Proper care will extend the life and appearance of your VINGLI cabinet.
- Pulizia: Pulire le superfici con un panno morbido, damp stoffa. Evitare detergenti abrasivi o prodotti chimici aggressivi che potrebbero danneggiare la finitura.
- Fuoriuscite: Immediately wipe away any liquid spills to prevent water damage, especially on the engineered wood surfaces.
- Hardware: Controllare periodicamente tutte le viti e i collegamenti per assicurarsi che siano ben serrati. Serrare nuovamente se necessario, ma senza esagerare.
- Ambiente: Evitare di posizionare il mobiletto alla luce diretta del sole o vicino a fonti di calore per evitare deformazioni o scolorimenti.

Immagine: dettagliata view highlighting the waterproof surface, soft-close hinge, and anti-tipping kit for enhanced safety and durability.
6. Risoluzione Dei Problemi
| Problema | Possibile causa | Soluzione |
|---|---|---|
| Il mobile è traballante/instabile. | Screws are loose; anti-tip hardware not installed or improperly installed. | Ensure all screws are tightened. Install or re-secure the anti-tipping hardware to the wall. Place heavier items on lower shelves. |
| I cassetti non scorrono agevolmente. | Drawer slides are misaligned or damaged; items are obstructing the slides. | Check alignment of drawer slides and ensure they are securely attached. Remove any obstructions. Lubricate slides if necessary. |
| La porta non si chiude correttamente. | Hinges are misaligned; magnetic closure is not engaging. | Adjust hinges for proper alignment. Check if the magnetic closure is correctly positioned and functioning. |
7. Specifiche
| Marca: | VINGLI |
| Nome modello: | BF0XM3C |
| Dimensioni del prodotto: | 11.6"P x 23.2"L x 32"A |
| Colore: | Rovere naturale |
| Materiale: | Legno ingegnerizzato |
| Peso dell'articolo: | 60 libbre |
| Tipo di montaggio: | Montaggio a pavimento |
| Caratteristiche speciali: | 3 Fluted Drawers, Adjustable Shelf, Anti-Tipping, Fluted Panel, Waterproof |
| Assemblaggio richiesto: | SÌ |
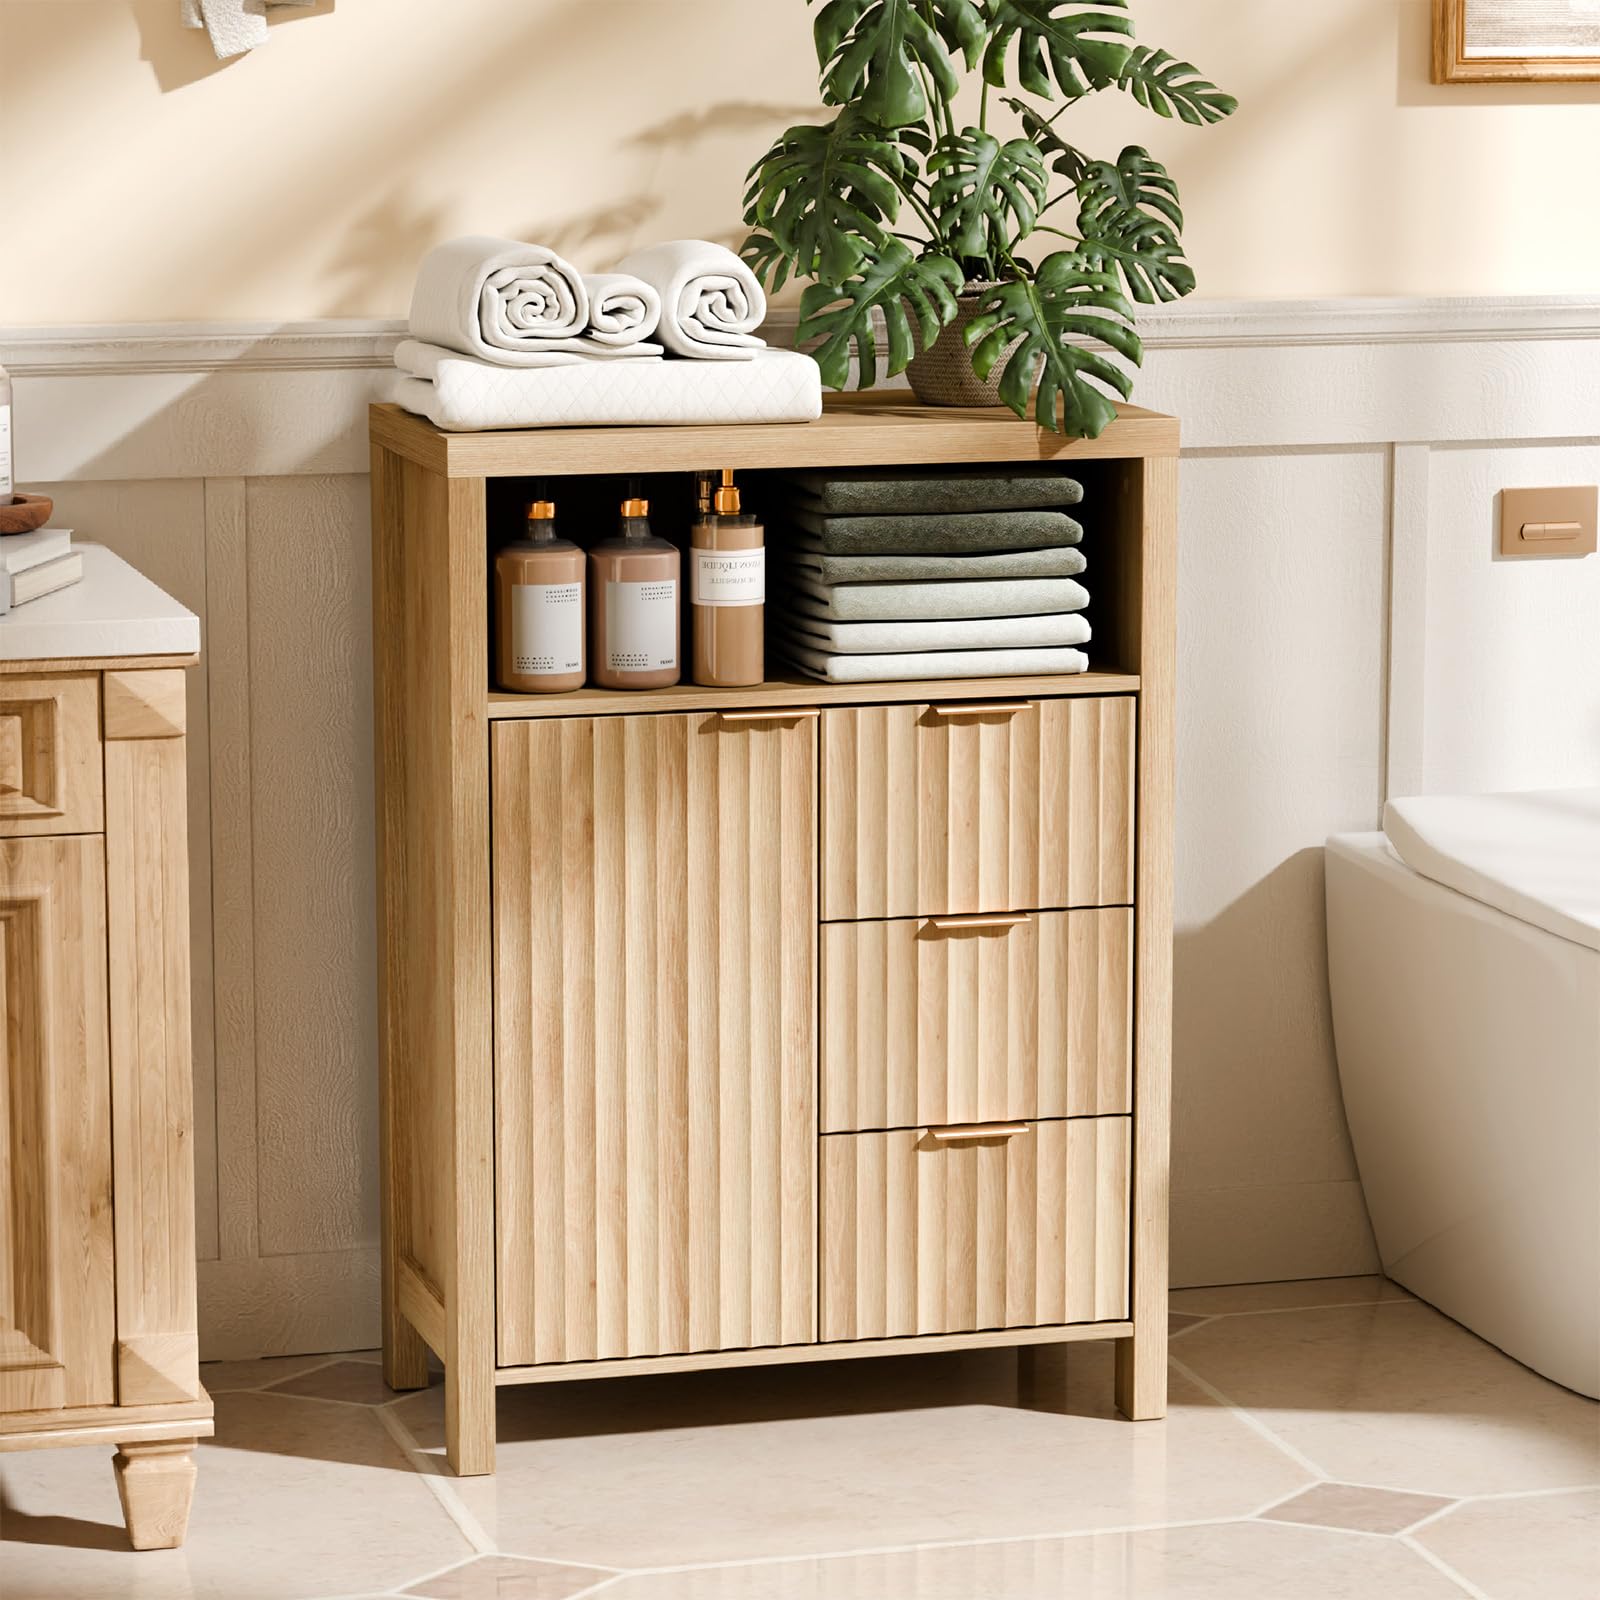
Image: Detailed diagram illustrating the dimensions of the VINGLI Fluted Bathroom Floor Storage Cabinet, including overall height, width, depth, and internal shelf/drawer measurements.
8. Garanzia e supporto
For warranty information, customer support, or to purchase protection plans, please refer to your purchase documentation or contact VINGLI-Direct customer service.
- Resi: Questo prodotto può essere restituito facilmente entro 30 giorni.
- Piani di protezione: Sono disponibili piani di protezione opzionali da 2 e 3 anni.
- Produttore: VINGLI
- Venditore: VINGLI-Direct