E-ACE DMMRUTXB
E-ACE 4.3-Inch Dual Lens Car DVR Rearview Manuale utente Mirror Dash Cam
Model: DMMRUTXB
1. Prodotto finitoview
The E-ACE 4.3-inch Dual Lens Car DVR Rearview Mirror Dash Cam is designed to enhance driving safety by providing comprehensive video recording of your journeys. This device integrates a front-facing camera and supports an optional rear-facing camera, offering a wide field of view and continuous recording capabilities. Its sleek design replaces your existing rearview mirror, providing a discreet and integrated solution for vehicle surveillance.
Key features include a 4.3-inch high-definition display, dual-lens recording, night vision, loop recording, and a G-sensor for automatic incident detection.

Image: The E-ACE rearview mirror dash cam displaying both front and rear camera feeds on its integrated screen.
2. Contenuto della confezione
Si prega di controllare la confezione per verificare la presenza dei seguenti elementi:
- E-ACE Rearview Unità Dash Cam a specchio
- Caricabatterie per auto
- Fixed Bandages (for mounting)
- Manuale d'uso
- Lettore di schede
- Opzionale: Posteriore View Camera + Cable (6M or 10M, depending on variant)
- Optional: Buck Line (for parking monitoring power)
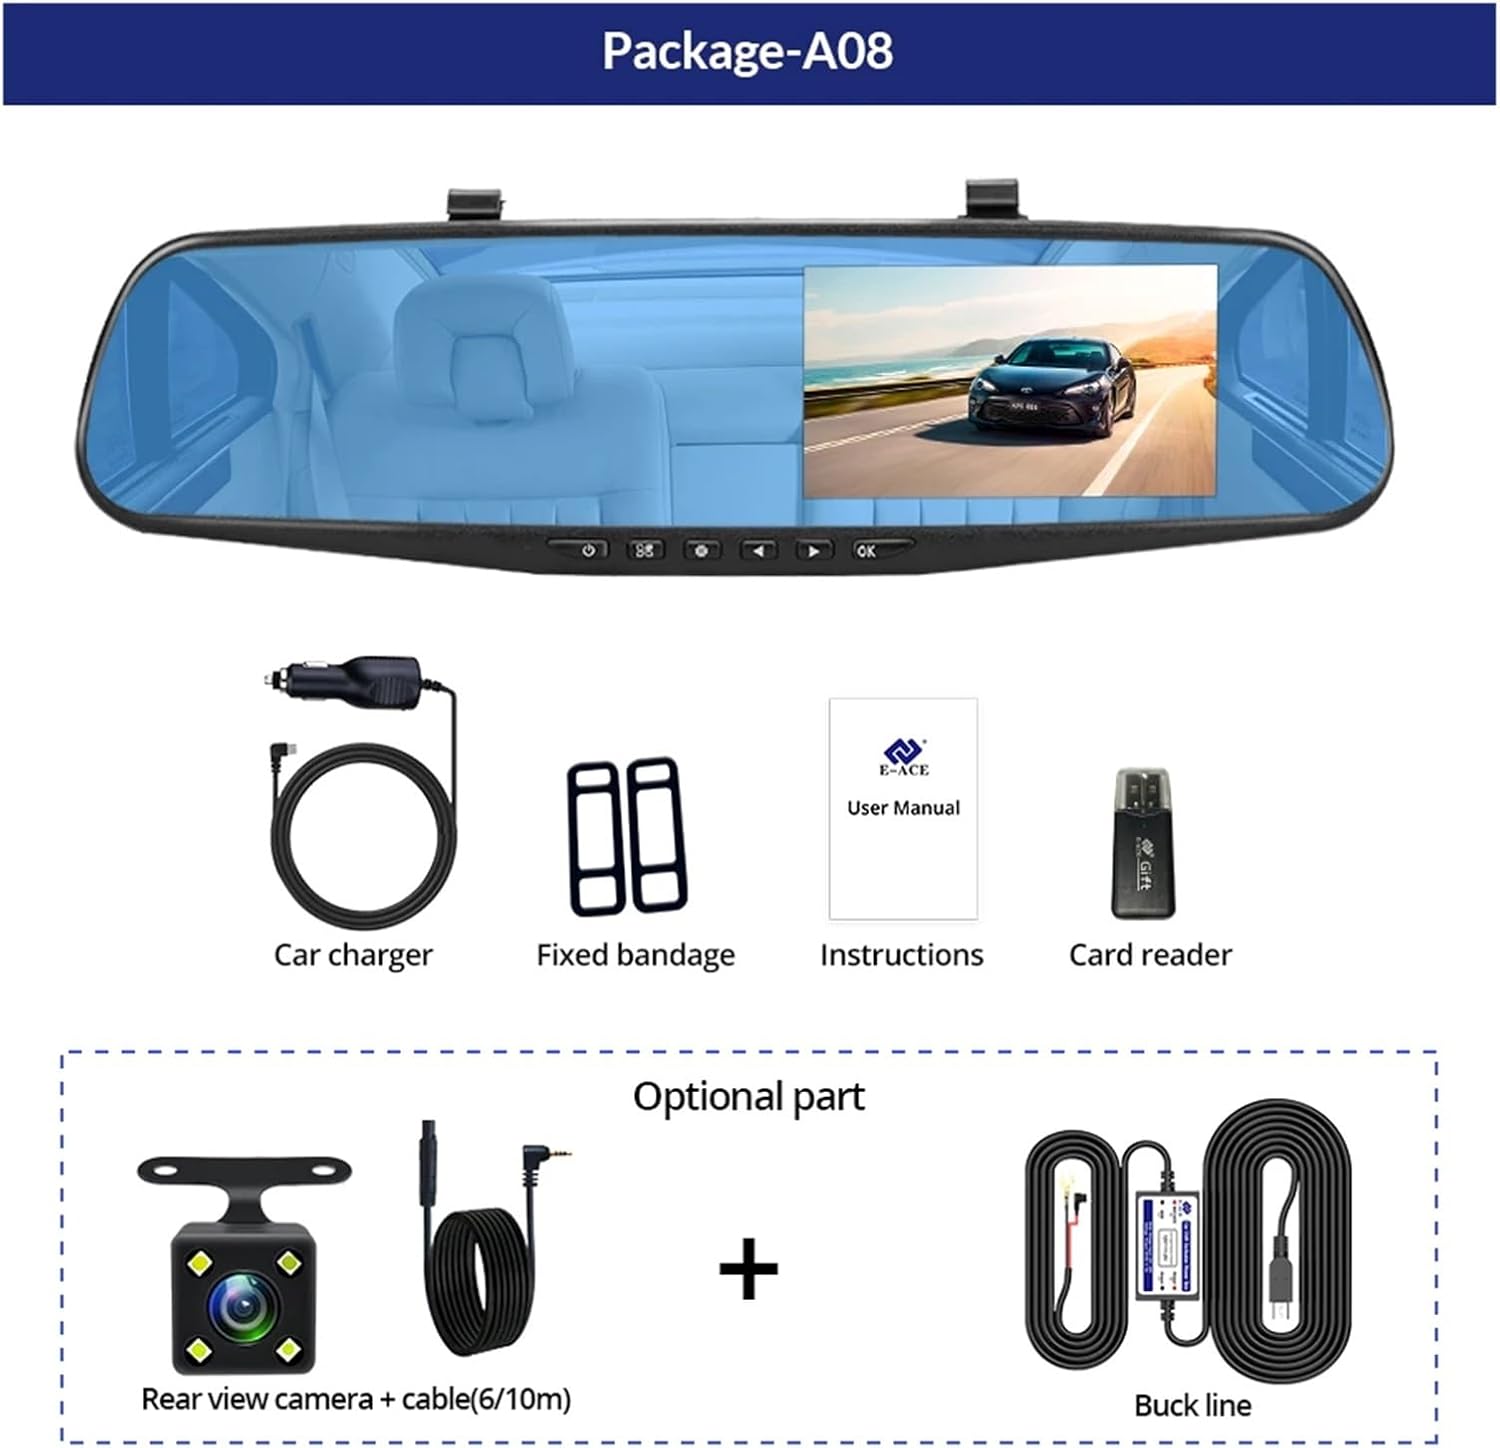
Image: A visual representation of the items included in the E-ACE dash cam package, showing the main unit and accessories.
3. Caratteristiche del prodotto
- Display ad alta definizione da 4.3 pollici: Provides clear visibility for real-time monitoring and playback.
- Design a doppia lente: Captures both front and rear footage simultaneously for comprehensive coverage.
- Built-in Night Vision Technology: Garantisce registrazioni nitide anche in condizioni di scarsa illuminazione.
- Installazione intuitiva: Sleek rearview mirror design integrates seamlessly into your vehicle.
- Registrazione in loop: Sovrascrive automaticamente il foo più vecchiotage quando la scheda di memoria è piena, garantendo una registrazione continua.
- G-Sensor Feature: Detects sudden movements or impacts and automatically locks the current video file per evitare che venga sovrascritto.
- Monitoraggio del parcheggio: Records video when motion or impact is detected while the vehicle is parked (requires buck line connection).
- Grandangolo da 170 gradi: Fornisce un'ampia view della strada da percorrere.
- Immagine inversa: Displays the rear camera view con le linee guida per il parcheggio in retromarcia.

Image: An illustration highlighting the various functional features of the E-ACE dash cam.
4. Identificazione dei componenti
Familiarize yourself with the various parts and controls of your E-ACE dash cam:

Image: A detailed diagram identifying the buttons, ports, and features on the E-ACE dash cam unit.
- Pulsante ON/OFF: Accende o spegne il dispositivo.
- Pulsante Menu: Accede alle impostazioni e alle opzioni.
- Pulsante Modalità: Switches between video recording, photo, and playback modes.
- Pulsante SU: Consente di spostarsi verso l'alto nei menu o di regolare le impostazioni.
- Pulsante Giù: Consente di scorrere i menu verso il basso o di regolare le impostazioni.
- Pulsante OK: Conferma le selezioni o avvia/arresta la registrazione.
- Slot per schede TF: Insert your MicroSD (TF) card here.
- Porta AV-IN: Collega la fotocamera posteriore.
- Porta USB: Per l'alimentazione e il trasferimento dati.
- Pulsante di reset: Resets the device to factory settings (use a thin pin).
- Microfono: Registra l'audio all'interno del veicolo.
5. Configurazione e installazione
5.1 Inserimento della scheda di memoria
Before installation, insert a high-speed MicroSD (TF) card (Class 10 or higher, up to 64GB recommended) into the TF Card Slot (7) with the contacts facing the screen. Ensure the card is inserted correctly until it clicks into place.
5.2 Montaggio della Dash Cam
- Attach the fixed bandages to the back of the dash cam unit.
- Securely strap the dash cam over your vehicle's existing rearview mirror using the fixed bandages. Ensure it is centered and stable.
5.3 Collegamento dell'alimentatore
- Connect the car charger to the USB Port (9) on the dash cam.
- Collegare l'altra estremità del caricabatteria per auto alla presa accendisigari del veicolo.
- Route the power cable neatly along the windshield trim to avoid obstructing your view.
5.4 Installazione della telecamera posteriore (opzionale)
- Connect the rear camera cable to the AV-IN Port (8) on the dash cam.
- Route the rear camera cable from the dash cam to the rear of your vehicle. This typically involves tucking the cable under the headliner and along the side pillars.
- Mount the rear camera on the rear windshield or near the license plate using its adhesive or screws. Ensure it has a clear view della strada dietro.
- If using the reverse image function, connect the red wire from the rear camera cable to your vehicle's reverse light power supply.
6. Istruzioni per l'uso
6.1 Accensione/spegnimento
- Automatico: The dash cam will automatically power on and start recording when your vehicle's ignition is turned on (if connected to a switched power source).
- Manuale: Press and hold the ON/OFF Button (1) to manually power the device on or off.
6.2 Funzionamento di base
- Cambia modalità: Press the Mode Button (3) to cycle between Video Recording, Photo, and Playback modes.
- Menu di accesso: In any mode, press the Menu Button (2) to enter the settings menu. Use the UP (4) and Down (5) buttons to navigate, and OK (6) to select.
- Avvia/Interrompi registrazione: In Video Recording mode, press the OK Button (6) to manually start or stop recording.
6.3 Modalità di visualizzazione
While recording, you can typically switch between different display views by pressing the UP or Down buttons:
- Solo fotocamera frontale
- Rear Camera Only
- Picture-in-Picture (Front main, Rear sub-window)
- Picture-in-Picture (Rear main, Front sub-window)
6.4 Registrazione in loop
Set the loop recording duration (e.g., 1, 3, or 5 minutes) in the settings menu. When the memory card is full, the oldest unlocked fileverranno sovrascritti dalle nuove registrazioni.
6.5 Sensore G
The G-sensor automatically detects collisions or sudden braking. When triggered, it locks the current video file, preventing it from being overwritten by loop recording. Adjust sensitivity in the settings.
6.6 Monitoraggio del parcheggio (facoltativo)
If the buck line is installed, the dash cam can monitor your vehicle while parked. When motion or impact is detected, it will automatically record a short video. Enable this feature in the settings.
6.7 Impostazione di data e ora
It is important to set the correct date and time in the system settings for accurate timestamps sulle tue registrazioni.
7. Manutenzione
- Pulizia: Utilizzare un panno morbido e asciutto per pulire la lente e lo schermo. Evitare detergenti abrasivi o solventi.
- Scheda di memoria: Format the MicroSD card regularly (e.g., once a month) within the dash cam's settings to maintain optimal performance and prevent data corruption. Back up important files prima della formattazione.
- Temperatura: Avoid exposing the device to extreme temperatures, as this can affect battery life and component integrity.
- Aggiornamenti del firmware: Controllare il produttore webperiodicamente sul sito per aggiornamenti del firmware che potrebbero migliorare le prestazioni o aggiungere funzionalità.
8. Risoluzione Dei Problemi
| Problema | Possibile causa | Soluzione |
|---|---|---|
| La dash cam non si accende. | No power supply; faulty charger; loose connection. | Check car charger connection and vehicle's cigarette lighter. Try a different USB cable/charger. |
| La registrazione si interrompe automaticamente. | Memory card full; slow memory card; G-sensor sensitivity too high. | Format the memory card. Use a Class 10 or higher MicroSD card. Lower G-sensor sensitivity in settings. |
| Video pippotage è sfocato. | Pellicola protettiva sulla lente; lente sporca; messa a fuoco errata. | Remove any protective film. Clean the lens with a soft cloth. |
| La telecamera posteriore non viene visualizzata. | Collegamento allentato; cavo/telecamera difettosi. | Check the AV-IN connection. Ensure the rear camera is properly installed. |
| Il dispositivo si blocca o si arresta in modo anomalo. | Problema software; errore della scheda di memoria. | Press the Reset Button (10) with a thin pin. Format the memory card. |
9. Specifiche
- Nome modello: DMMRUTXB
- Display: 4.3 pollici
- Telecamera: Dual Lens (Front & Rear support)
- Risoluzione video: FHD 1920x1080P (Front)
- Caratteristiche: Loop Recording, G-Sensor, Night Vision, Parking Monitoring, 170-degree wide angle
- Magazzinaggio: Supports MicroSD (TF) card, Class 10 or higher (up to 64GB)
- Connettività: USB, AV-IN (for rear camera)
- Peso dell'articolo: Circa 1.76 once (50 grammi)
- Dimensioni della confezione: Circa 0.39 x 0.39 x 0.39 pollici
- Produttore: DMMRUTXB
10. Garanzia e supporto
Per informazioni sulla garanzia e sull'assistenza tecnica, consultare la documentazione fornita con l'acquisto o contattare direttamente il rivenditore/produttore. Conservare la ricevuta d'acquisto come prova d'acquisto.