EVERSECU CS621SR-2
EVERSECU Triple Lens WiFi PTZ Security Camera CS621SR-2 User Manual
Model: CS621SR-2 | Brand: EVERSECU
1. Introduzione
This manual provides comprehensive instructions for the installation, operation, and maintenance of your EVERSECU Triple Lens WiFi PTZ Security Camera, model CS621SR-2. Please read this manual thoroughly before using the product to ensure proper functionality and safety.

Image 1.1: Two EVERSECU Triple Lens WiFi PTZ Security Cameras, showing the main unit with two adjustable side cameras.
2. Caratteristiche del prodotto
- Triple Lens Design: Features one central Pan-Tilt-Zoom (PTZ) camera and two manually adjustable side cameras, providing a comprehensive 360° visual coverage without blind spots.
- Qualità video HD 2K: Delivers clear 2K high-resolution video for detailed surveillance.
- Visione notturna avanzata: Offers color and infrared night vision modes up to 60 feet, ensuring clear imaging in low-light or dark conditions.
- Audio bidirezionale: Equipped with a built-in speaker and microphone for real-time communication.
- Rilevamento umano e tracciamento automatico tramite IA: Utilizes an integrated AI algorithm to detect human motion, track movement, and send alerts, returning to a preset guard position after the person leaves the detection area.
- Opzioni di archiviazione flessibili: Supports secure cloud storage (with a 30-day trial) and local storage via an SD card (up to 128GB, not included).
- Condivisione multi-dispositivo: Consente la simultanea viewing on multiple devices (Android, iOS, Windows, Mac).
- Connettività robusta: Supports both 2.4GHz Wi-Fi and wired network connections for stable operation.
- Design resistente alle intemperie: IP66 rated housing ensures durability against rain, sun, storms, and snow, operating in temperatures from -30°F to 140°F.

Image 2.1: Illustration of the camera's 360° visual coverage, detailing the pan and tilt range of the central lens and the manual adjustment range of the side lenses.

Image 2.2: Comparison demonstrating how the three-lens system provides simultaneous monitoring of three different areas, reducing blind spots compared to a single-lens camera.
3. Contenuto della confezione
Si prega di controllare il contenuto del pacco al momento della ricezione. Se qualche articolo risulta mancante o danneggiato, contattare l'assistenza clienti.
- EVERSECU Triple Lens WiFi PTZ Security Camera (2 units)
- Adattatore di alimentazione (2 unità)
- Viti di montaggio e tasselli
- Manuale dell'utente (questo documento)
4. Guida all'installazione
4.1 Prima dell'installazione
- Assicurati che la tua rete Wi-Fi sia a 2.4 GHz. La telecamera non supporta la rete Wi-Fi a 5 GHz.
- Prepare a smartphone or tablet for app installation.
- Choose a suitable mounting location with a stable Wi-Fi signal and access to a power outlet.
- If using an SD card for local storage, insert it into the designated slot (refer to section 4.3).
4.2 Installazione dell'app e creazione dell'account
- Download the "O-Kam Pro" app from your device's app store (iOS or Android).
- Apri l'app e segui le istruzioni sullo schermo per creare un nuovo account.
- Accedi al tuo account appena creato.
4.3 Collegamento della telecamera
- Power on the camera by connecting the power adapter. Wait for the camera to initialize (indicated by a status light or voice prompt).
- In the O-Kam Pro app, tap the "+" icon to add a new device.
- Select your camera model or scan the QR code located on the camera.
- Follow the app's instructions to connect the camera to your 2.4GHz Wi-Fi network. This typically involves entering your Wi-Fi password and scanning a QR code displayed on your phone with the camera lens.
- Una volta connesso, puoi dare un nome alla tua telecamera e iniziare a trasmettere in diretta viewing.
Note: For wired connection, connect an Ethernet cable to the camera's LAN port before powering on, then follow app instructions for wired device setup.

Image 4.1: The O-Kam Pro mobile application interface, showing multiple camera views and control options.
4.4 Installazione fisica
- Mark the drilling positions on the wall using the camera's mounting base as a template.
- Se si monta su muratura, praticare dei fori e inserire i tasselli.
- Fissare la base di montaggio della telecamera alla parete utilizzando le viti fornite.
- Attach the camera unit to the mounting base.
- Adjust the side cameras manually to cover desired areas. The central PTZ camera can be controlled via the app.
5. Istruzioni per l'uso
5.1 Vivere View e riproduzione
- Open the O-Kam Pro app and select the desired camera to view il feed dal vivo.
- Use the on-screen controls to pan, tilt, and zoom the central camera.
- Access the playback feature to review registrato footage dall'archiviazione cloud o dalla scheda SD.
5.2 Modalità di visione notturna
La telecamera offre tre modalità di visione notturna:
- Visione notturna a colori: Utilizes warm LED lights to provide color images in darkness.
- Visione notturna a infrarossi (IR): Uses infrared LEDs for black and white images in darkness.
- Visione notturna intelligente: Automatically switches between IR and color night vision based on detected motion.
You can select your preferred mode within the app's camera settings.

Image 5.1: Visual comparison demonstrating the clarity and detail provided by color night vision versus traditional infrared night vision.
5.3 Audio bidirezionale
Per utilizzare l'audio bidirezionale, tocca l'icona del microfono nella modalità live view interface of the O-Kam Pro app. Speak into your phone's microphone to transmit audio through the camera's speaker. Release the icon to listen.
5.4 Rilevamento del movimento e tracciamento automatico
- Enable AI Human Detection in the app settings to receive alerts only for human figures.
- When human motion is detected, the camera will automatically track the movement.
- Set a "Guard Point" in the app. After tracking, the camera will return to this preset position.
- Customize detection zones to focus on specific areas and reduce unwanted alerts.
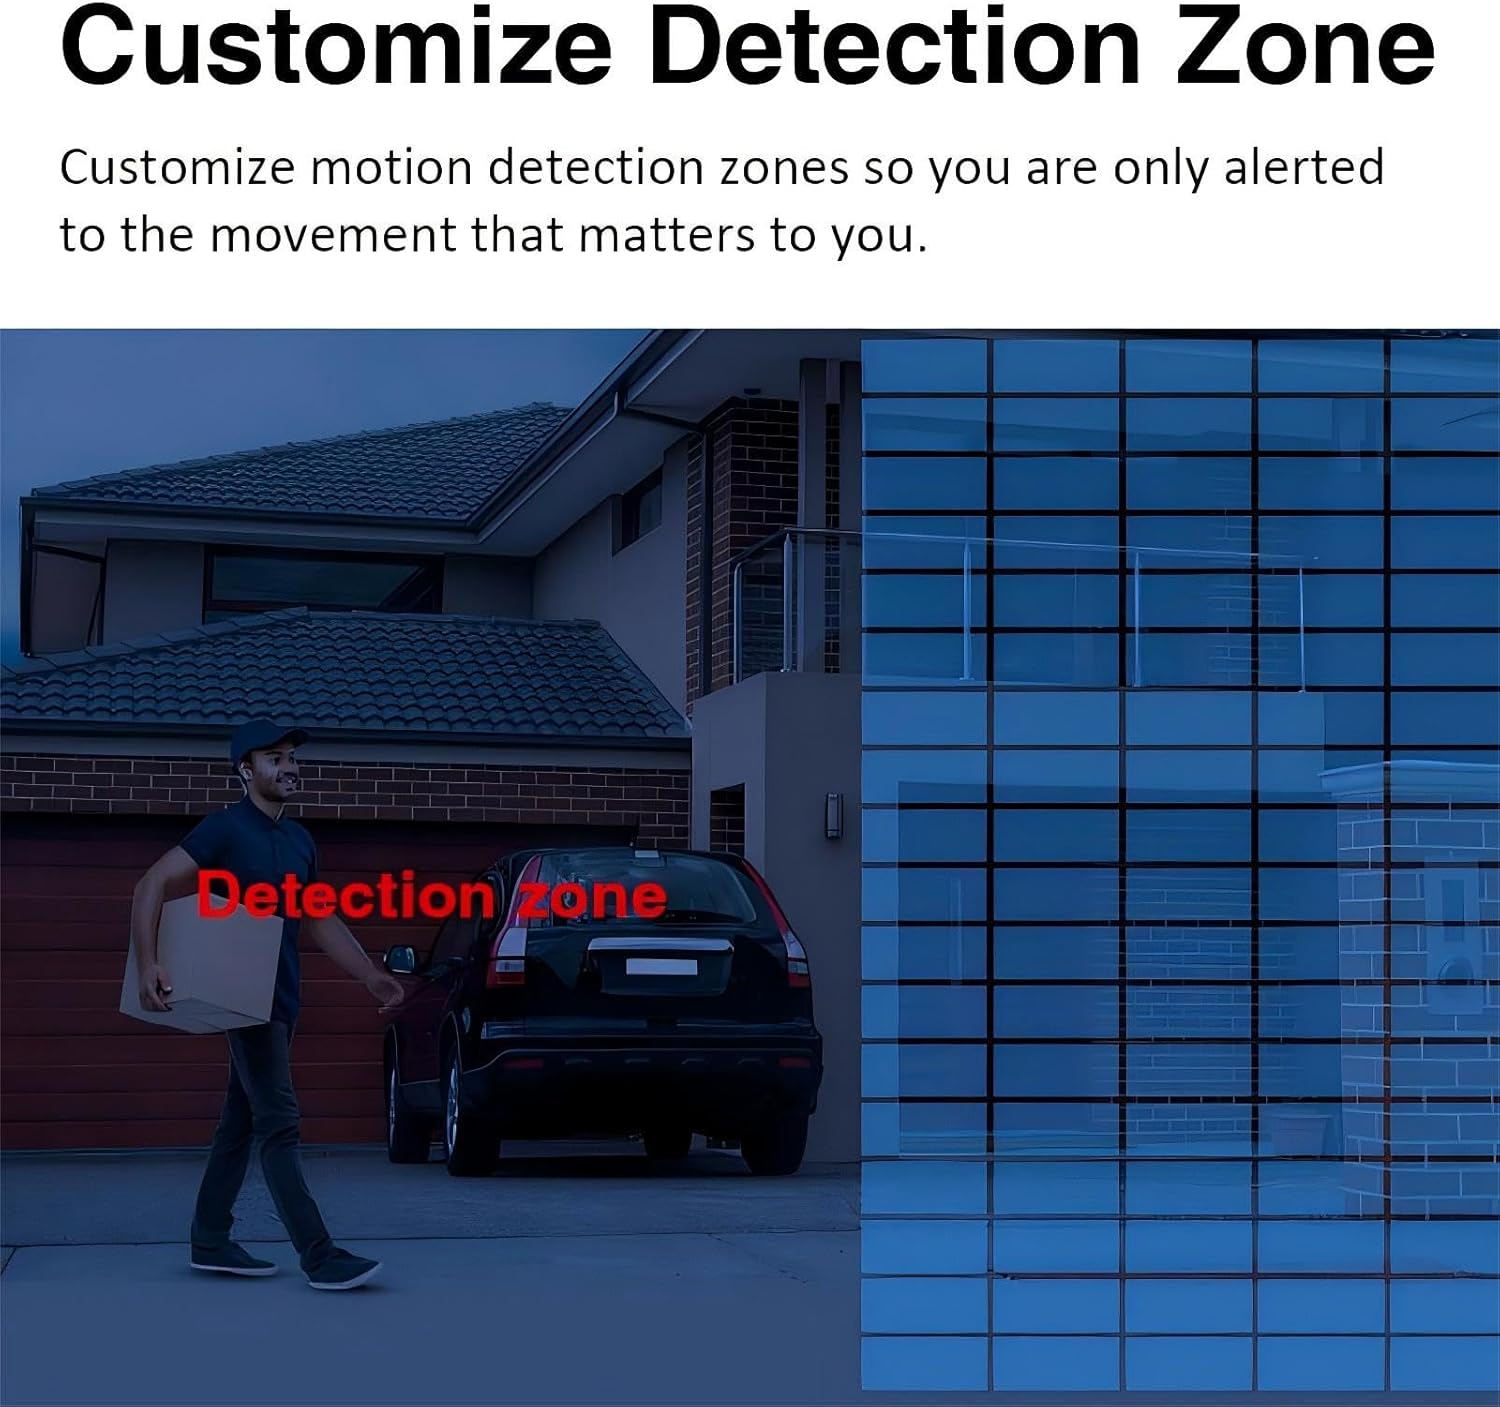
Immagine 5.2: Un example of the AI algorithm detecting and tracking a human figure within the camera's field of view.
5.5 Gestione dell'archiviazione
- Archiviazione su scheda SD: Insert a microSD card (up to 128GB, Class 10 or higher recommended) into the camera's SD card slot. The camera will automatically begin recording. Format the SD card via the app if necessary.
- Archiviazione cloud: Activate the cloud storage service through the O-Kam Pro app. A 30-day free trial is typically available.
6. Manutenzione
- Pulizia: Pulire regolarmente le lenti e l'alloggiamento della fotocamera con un panno morbido e asciutto.amp panno per rimuovere polvere e sporco. Non utilizzare prodotti chimici aggressivi o detergenti abrasivi.
- Aggiornamenti del firmware: Check the O-Kam Pro app periodically for firmware updates. Keeping the firmware updated ensures optimal performance and security.
- Alimentazione elettrica: Ensure the power adapter and cable are free from damage. Protect the power supply box from direct exposure to rain or moisture.
- Condizioni ambientali: While the camera is IP66 weatherproof, extreme conditions can still affect performance. Ensure proper mounting to prevent water accumulation around connections.
7. Risoluzione Dei Problemi
| Problema | Possibile soluzione |
|---|---|
| La fotocamera non riesce a connettersi al Wi-Fi. |
|
| Nessuna immagine o schermo nero in diretta view. |
|
| Gli avvisi di rilevamento del movimento sono troppo frequenti o non funzionano. |
|
| La scheda SD non registra o non viene riconosciuta. |
|
| L'audio bidirezionale non è chiaro o non funziona. |
|
8. Specifiche
| Caratteristica | Dettaglio |
|---|---|
| Nome del modello | CS621SR-2 |
| Marca | EVERSECU |
| Risoluzione video | 2K (6MP total, 2MP per lens) |
| Configurazione dell'obiettivo | 1 PTZ lens, 2 manually adjustable side lenses |
| PTZ Range (Central Lens) | Panoramica: 0-270°, Inclinazione: 0-90° |
| Side Lens Adjustment | Manual Horizontal: up to 180°, Manual Vertical: up to 180° |
| Visione notturna | Visione notturna a colori, visione notturna a infrarossi (fino a 60 piedi) |
| Audio | Audio bidirezionale (altoparlante e microfono integrati) |
| Rilevamento del movimento | AI Human Detection, Auto Tracking, Customizable Detection Zones |
| Opzioni di archiviazione | Cloud Storage (subscription required after trial), Local SD Card (up to 128GB, not included) |
| Connettività | Wi-Fi a 2.4 GHz, Ethernet cablata |
| Fonte di alimentazione | Elettrico con cavo, 5 Volt |
| Resistenza alle intemperie | IP66 intemperie |
| Temperatura di esercizio | Da -30°C a 140°C (da -34°F a 60°F) |
| Dimensioni (L x P x A) | 7 x 4.3 x 7.5 pollici (circa) |
| Peso | 5.29 libbre (circa) |
| Dispositivi compatibili | Smartphone, Tablet, Desktop, Laptop |
9. Garanzia e supporto
9.1 Informazioni sulla garanzia
EVERSECU products typically come with a limited warranty. Please refer to the warranty card included in your package or visit the official EVERSECU webPer i termini e le condizioni di garanzia dettagliati, consultare il sito. Conservare la ricevuta d'acquisto come prova d'acquisto per eventuali reclami in garanzia.
9.2 Assistenza clienti
For technical assistance, troubleshooting, or any questions regarding your EVERSECU Triple Lens WiFi PTZ Security Camera, please contact EVERSECU customer support:
- Websito: Visit the EVERSECU Store on Amazon (per informazioni generali sul prodotto)
- E-mail: Refer to your product packaging or the official EVERSECU websito per i dettagli specifici di contatto dell'assistenza.
- Telefono: Refer to your product packaging or the official EVERSECU websito per i dettagli specifici di contatto dell'assistenza.
When contacting support, please have your product model number (CS621SR-2) and purchase information ready.
Ask a question about this manual
Ask about setup, troubleshooting, compatibility, parts, safety, or missing instructions. Manuals+ will review the question and use this page’s manual context to help answer it.