1. Informazioni sulla sicurezza
Si prega di leggere attentamente tutte le istruzioni prima del montaggio e dell'uso. Conservare il manuale per riferimento futuro.
- Capacità di peso: Do not overload or stand on the stool. The maximum weight capacity is 300 lb (136 kg) per stool. Exceeding this limit may cause damage or injury.
- Superficie stabile: Posizionare sempre gli sgabelli da bar su una superficie piana, stabile e livellata per evitare che si ribaltino.
- Ispezione regolare: Controllare periodicamente tutti i bulloni e i collegamenti per assicurarsi che siano ben serrati. Serrare nuovamente se necessario.
- Sicurezza dei bambini: Keep children away from the assembly area. Do not allow children to climb or play on the stools.
- Uso esterno: While designed for outdoor use, prolonged exposure to extreme weather conditions (heavy rain, strong winds, direct intense sunlight) may reduce product lifespan. Consider using a protective cover when not in use.
- Sgabelli mobili: Lift the stools when moving them; do not drag to avoid damage to the legs or floor.
2. Contenuto della confezione
Ensure all parts are present before beginning assembly. If any parts are missing or damaged, please contact customer support.
| Parte | Descrizione | Quantità (per sgabello) |
|---|---|---|
| A | Backrest/Seat Frame | 1 |
| B | Base del sedile | 1 |
| C | Barra poggiapiedi | 1 |
| D | Telaio laterale | 1 |
| E | Cuscino del sedile | 1 |
| F | Cuscino lombare | 1 |
| 1 | Viti (M6*25) | 4 |
| 2 | Viti (M6*35) | 4 |
| 3 | Chiave a brugola | 1 |
Note: Quantities listed are per individual stool. For a set of 4, multiply quantities by 4.
3. Istruzioni di montaggio
Follow these steps carefully to assemble your Yaheetech Patio Bar Stools. It is recommended to assemble on a soft, clean surface to prevent scratches.
Guida video di montaggio
Official assembly video for Yaheetech Set of 2 Patio Bar Stools. The assembly process is identical for the Set of 4.
- Step 1: Attach Backrest/Seat Frame (A) to Seat Base (B).
Align the holes on Part A with the corresponding holes on Part B. Secure them using four M6*25 screws (Part 1) and the Allen wrench (Part 3). Non stringere ancora completamente le viti.
- Step 2: Attach Side Frame (D).
Connect the Side Frame (Part D) to the assembled Parts A and B. Use four M6*35 screws (Part 2) and the Allen wrench (Part 3) to secure these connections. Again, do not fully tighten the screws.
- Step 3: Attach Footrest Bar (C).
Insert the Footrest Bar (Part C) into the designated slots on the chair legs. Secure it with the remaining M6*35 screws (Part 2) and the Allen wrench (Part 3). Once all screws are in place for the entire stool, gradually tighten all screws evenly until secure. Do not overtighten.
- Step 4: Add Cushions and Pillows.
Place the Seat Cushion (Part E) onto the seat of the assembled stool. Use the attached ties to secure it to the chair frame. Position the Lumbar Pillow (Part F) against the backrest for added comfort.

Image of a hand pressing down on the soft seat cushion, demonstrating its comfort.
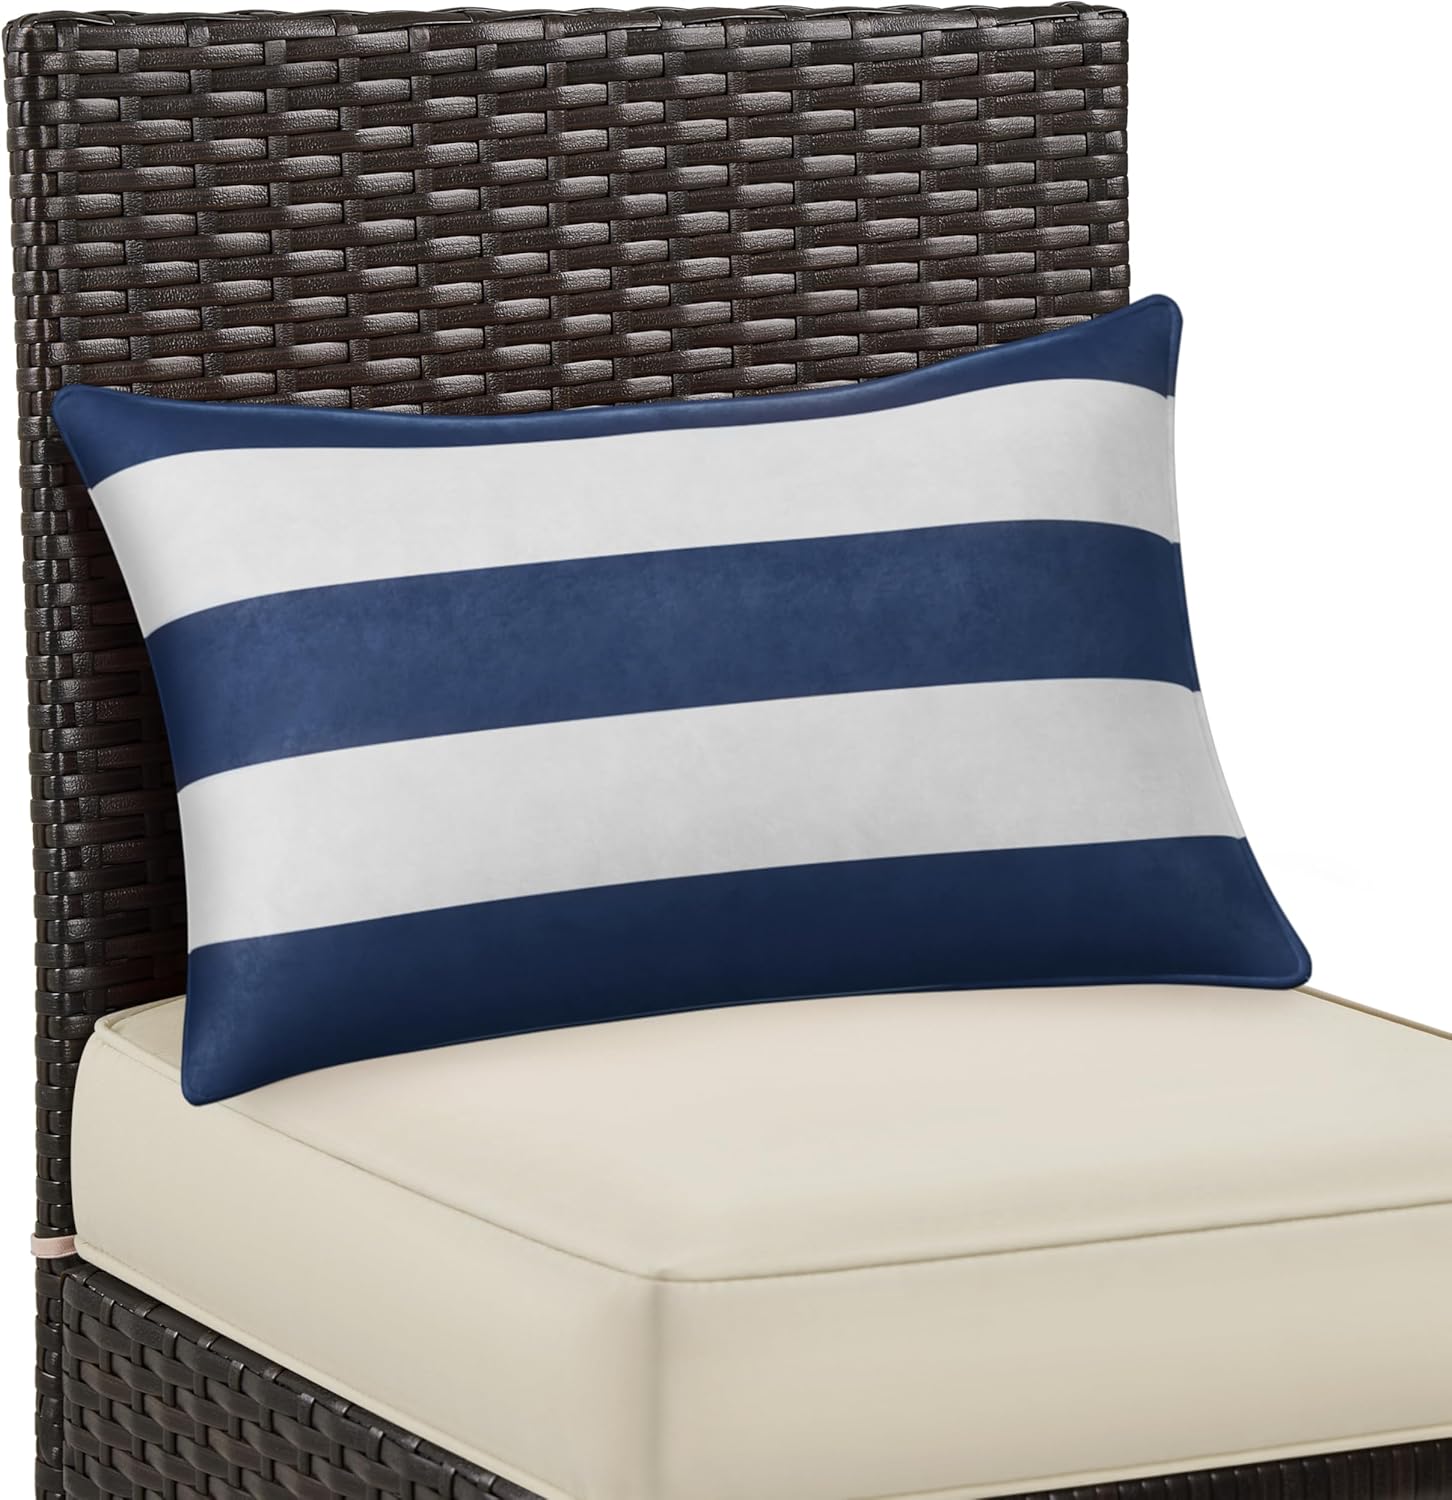
Image of the striped lumbar pillow placed on the stool's backrest.
4. Istruzioni per l'uso
- Seduta corretta: Sit centrally on the stool with both feet on the footrest for optimal balance and comfort.
- Poggiapiedi regolabili: The stools are equipped with adjustable foot pads. Rotate these pads to stabilize the stool on uneven surfaces and prevent scratching floors.
- Posizionamento all'aperto: These bar stools are suitable for various outdoor settings such as patios, backyards, decks, and porches.

Detail of the adjustable foot pad for stability on uneven ground.
5. Manutenzione
- Pulizia del rattan: Wipe the PE rattan and iron frame with a soft, damp cloth. For stubborn dirt, use a mild soap solution and rinse thoroughly. Dry completely to prevent rust on metal parts.
- Cura del cuscino: The seat and back cushions feature removable, washable covers. Hand wash or machine wash on a gentle cycle with cold water. Air dry only; do not tumble dry.
- Rimessaggio invernale: During off-seasons or harsh weather, store the stools in a dry, protected area or use a weather-resistant furniture cover to prolong their lifespan.
- Controllo del dispositivo di fissaggio: Periodically inspect all screws and bolts. Tighten any loose fasteners to maintain structural integrity.
6. Risoluzione Dei Problemi
| Problema | Possibile causa | Soluzione |
|---|---|---|
| Le feci sono traballanti. | Uneven surface; loose fasteners. | Adjust the foot pads on the bottom of the legs. Check and tighten all assembly screws. Ensure the stool is on a flat surface. |
| Cushions slide off the seat. | Legacci del cuscino non fissati. | Ensure the ties on the seat cushion are securely fastened to the chair frame. |
| Difficoltà nell'assemblaggio delle parti. | Screws overtightened prematurely; misaligned parts. | Loosen all screws, realign parts, then gradually tighten all screws evenly. Refer to the assembly video for visual guidance. |
7. Specifiche
| Marca | Prodotti |
| Numero di modello | Codice YT-00145053 |
| Product Dimensions (per stool) | 17.5" L x 20.5" P x 43.5" A |
| Dimensioni del sedile | 17" L x 17" P |
| Altezza del sedile (con cuscino) | 31" |
| Altezza poggiapiedi | 10.4" |
| Spessore del cuscino del sedile | 3.4" |
| Colore | Marrone/Beige |
| Materiale del telaio | Ferro verniciato a polvere |
| Woven Material | Rattan PE |
| Materiale del cuscino | Poliestere, Schiuma |
| Capacità massima di peso (per sgabello) | 300 libbre (136 kg) |
| Peso dell'articolo (per sgabello) | Circa 25 libbre |
| Assemblaggio richiesto | SÌ |
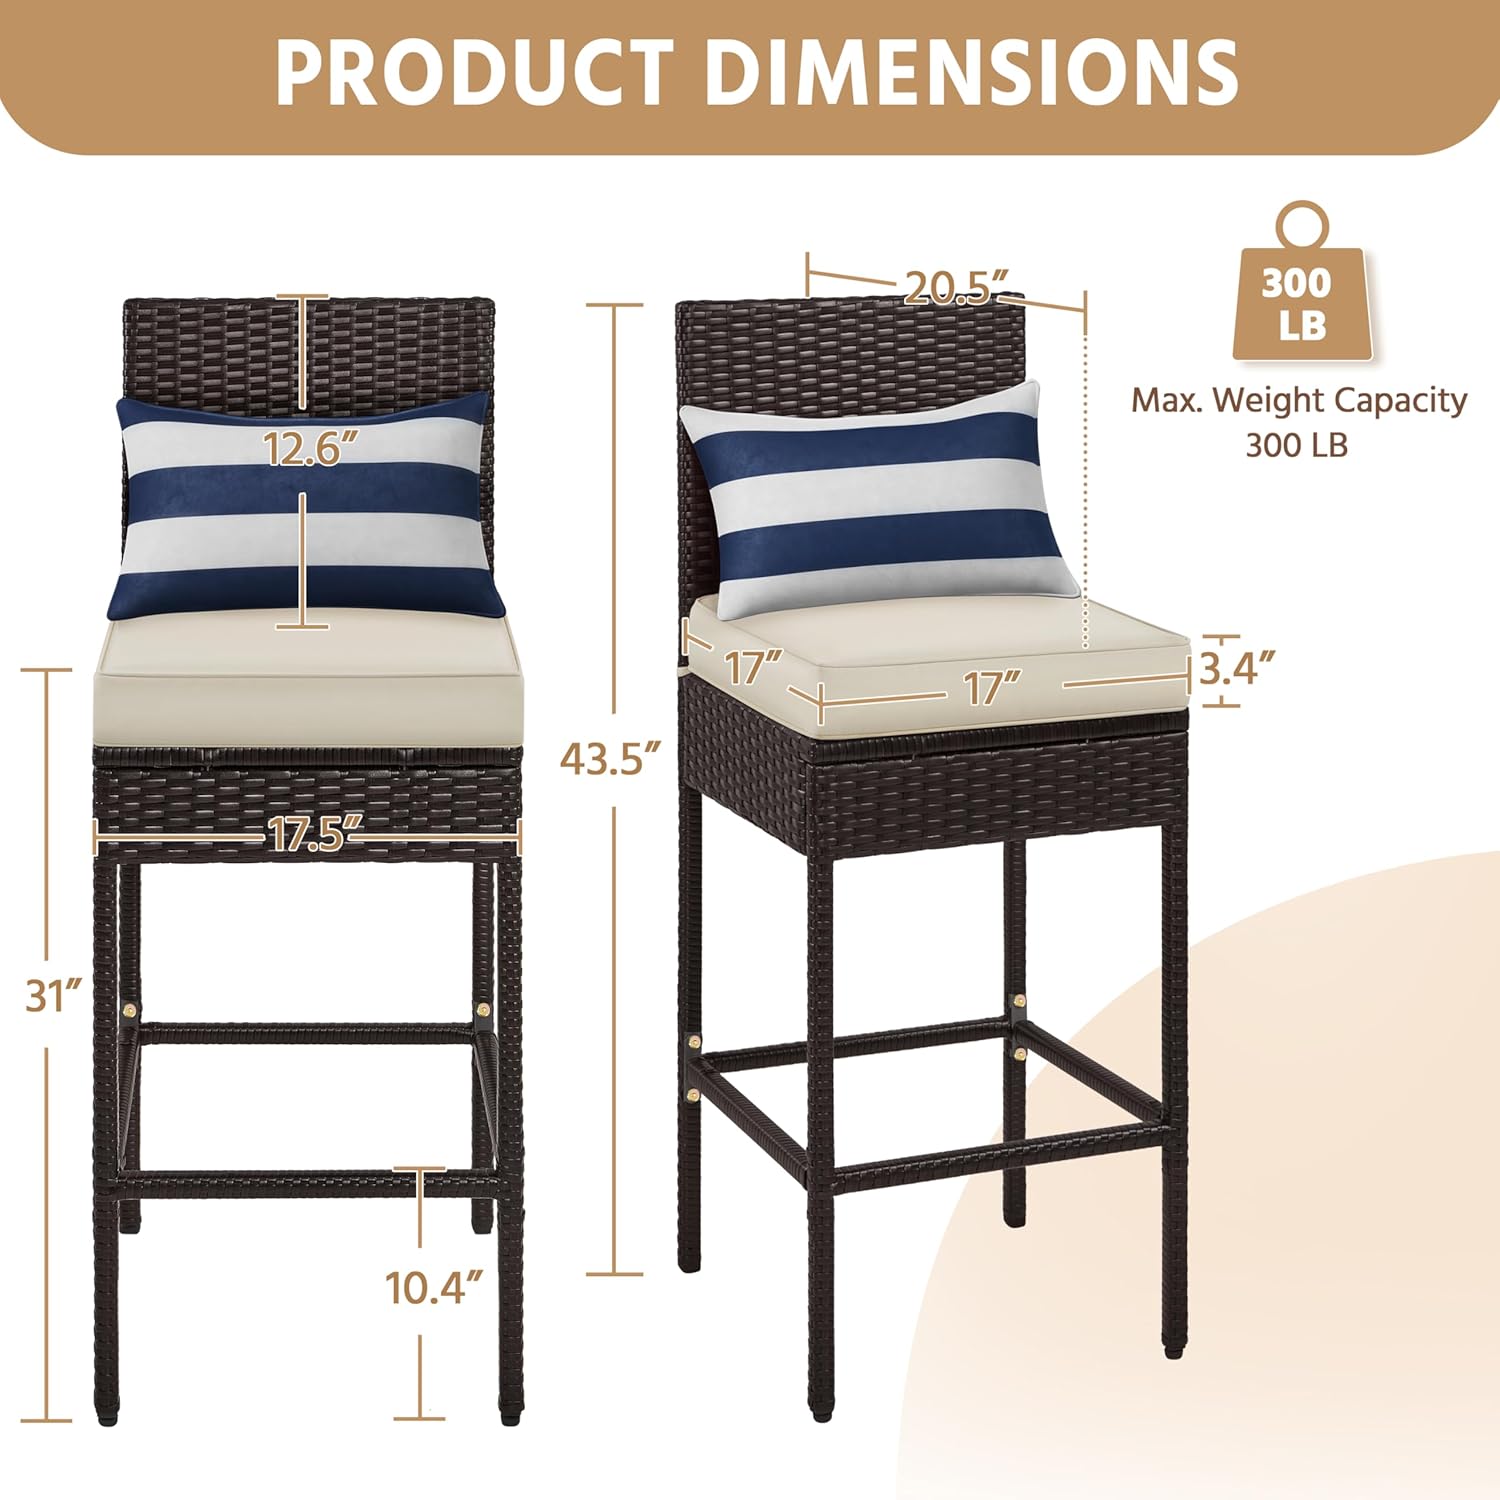
Detailed product dimensions for the bar stool.
8. Garanzia e supporto
Yaheetech products are designed for quality and durability. For specific warranty information, please refer to the product packaging or contact Yaheetech customer service directly.
If you have any questions, require assistance with assembly, or need to report missing/damaged parts, please reach out to our customer support team. Contact details can typically be found on our official websito o tramite la tua piattaforma di acquisto.