1. Introduzione
This manual provides essential information for the safe and efficient operation of your XWJNE 3000W Pure Sine Wave Power Inverter. This inverter converts 24V DC power to 120V AC power, suitable for various applications including off-grid systems, RVs, trucks, and home backup power. It features a pure sine wave output, ensuring compatibility with sensitive electronics, and includes an LCD display and remote control for convenient monitoring and operation.
Please read all instructions carefully before installation and use to prevent damage or injury. Always ensure proper grounding and adhere to all safety precautions.

Figure 1.1: XWJNE 3000W Pure Sine Wave Power Inverter with included cables, remote, and fuses.
2. Contenuto della confezione
Verificare che tutti gli articoli siano presenti nel pacco:
- 1 x XWJNE 3000W Pure Sine Wave Power Inverter
- 2 x 2.62ft 1AWG Positive Battery Cable (Red)
- 2 x 2.62ft 1AWG Negative Battery Cable (Black)
- 1 x Remote Controller with Cable
- 1 x 1.64ft Ground Wire
- 2 x 40A 32V Fuses (Spare)
- 1 x Manuale di istruzioni
- 1 x Chiave inglese

Figura 2.1: Tutti i componenti inclusi nella confezione del prodotto.
3. Prodotto finitoview
3.1 Caratteristiche del pannello frontale
The front panel of the inverter provides various connection points and indicators:
- Interruttore di alimentazione: Toggles the inverter on/off.
- Fault/Power Indicators: LEDs indicating operational status or fault conditions.
- Porte USB: Includes 2 x QC 18W USB-A ports, 1 x QC 24W USB-A port, and 1 x PD 60W Type-C port for charging various devices.
- Presa telecomando: Per collegare il telecomando cablato.
- Uscita CA: 2 x 120V GFCI (Ground Fault Circuit Interrupter) AC outlets for connecting appliances.
- Morsettiera CA: For hardwiring AC loads directly.

Figure 3.1: Front panel showing AC outlets, USB ports, and control switches.
3.2 Caratteristiche del pannello posteriore
The rear panel is equipped with the DC input terminals and cooling fans:
- Terminali di ingresso CC: Positive (Red) and Negative (Black) terminals for connecting to your 24V DC battery bank.
- Ventole di raffreddamento: Two high-efficiency cooling fans automatically activate when the internal temperature exceeds 45°C (113°F) or the load is over half, ensuring optimal performance and durability.

Figure 3.2: Rear panel showing DC input terminals and cooling fans.
Display LCD 3.3
Lo schermo LCD integrato fornisce dati operativi in tempo reale:
- Ingresso volumetage: Visualizza il volume CCtage dalla batteria.
- Volume di uscita CAtage: Mostra l'uscita 120 V CA.
- Carichi Potenza: Indica il wat correntetage viene disegnato dai dispositivi connessi.
- Potenza della batteria: Visual representation of the battery charge level.
- Temperatura di lavoro: Visualizza la temperatura interna dell'inverter.
- Frequenza: Shows the output frequency (60Hz).
- Pure Sine Wave Indicator: Confirms pure sine wave output.
- Normal Working/Fault Indicators: Icons to quickly identify operational status or abnormal problems.

Figure 3.3: LCD display showing input/output voltage, watage, battery level, and temperature.
3.4 telecomando
The wired remote control allows you to monitor the inverter's status and control its power from a convenient location, especially when the inverter is installed in a less accessible area. The remote displays the same information as the inverter's main LCD screen.

Figure 3.4: Remote control unit for convenient operation and monitoring.
4. Impostazione
4.1 Collegamento della batteria
Connect the inverter to a 24V deep-cycle battery bank. Ensure the battery has a discharge level of 80% or more for optimal performance. Use the provided 2.62ft 1AWG positive (red) and negative (black) battery cables. Connect the red cable to the positive (+) terminal of the inverter and the battery, and the black cable to the negative (-) terminal of the inverter and the battery. Always ensure correct polarity.

Figure 4.1: Proper connection of the inverter to a 24V battery bank.
The inverter can be integrated into various systems, including off-grid solar setups. The diagram below illustrates a typical connection for basic power supply.

Figure 4.2: Typical inverter connection for standalone and off-grid solar systems.
4.2 Messa a terra
Connect the provided 1.64ft ground wire to the inverter's grounding screw and to a reliable earth ground point. This is crucial for safety, especially with GFCI outlets.
4.3 Collegamento del telecomando
Plug the remote control cable into the designated remote socket on the inverter's front panel. The remote will then display the inverter's status and allow for remote power control.
5. Istruzioni per l'uso
5.1 Accensione/Spegnimento
To power on the inverter, press the main power switch on the front panel to the 'ON' position. The LCD display will illuminate, and the cooling fans will briefly activate. To power off, switch the main power switch to the 'OFF' position.
5.2 Collegamento dei carichi CA
Plug your 120V AC appliances into the GFCI outlets on the front panel. For higher power or permanent installations, use the AC terminal block for hardwiring. The pure sine wave output ensures compatibility with sensitive electronic devices like laptops, TVs, refrigerators, and stereos.

Figure 5.1: Inverter providing power to electronic devices, demonstrating pure sine wave output.
5.3 Utilizzo delle porte USB
Connect your USB-compatible devices to the available USB-A (QC 18W, QC 24W) or Type-C (PD 60W) ports for fast charging.
6. Meccanismi di protezione
The inverter is equipped with six comprehensive protection mechanisms to ensure safe operation and protect connected devices:
- Sotto-Voltage Protezione: Safeguards against battery over-discharge.
- Over-Voltage Protezione: Protects the inverter and devices from excessive input voltage.
- Protezione da sovraccarico: Previene i danni causati da un eccessivo assorbimento di potenza.
- Protezione da sovratemperatura: Activates cooling fans and shuts down if internal temperature becomes too high.
- Protezione da cortocircuito: Guards against short circuits in the output.
- Protezione da inversione di polarità: Previene i danni causati da collegamenti errati della batteria.
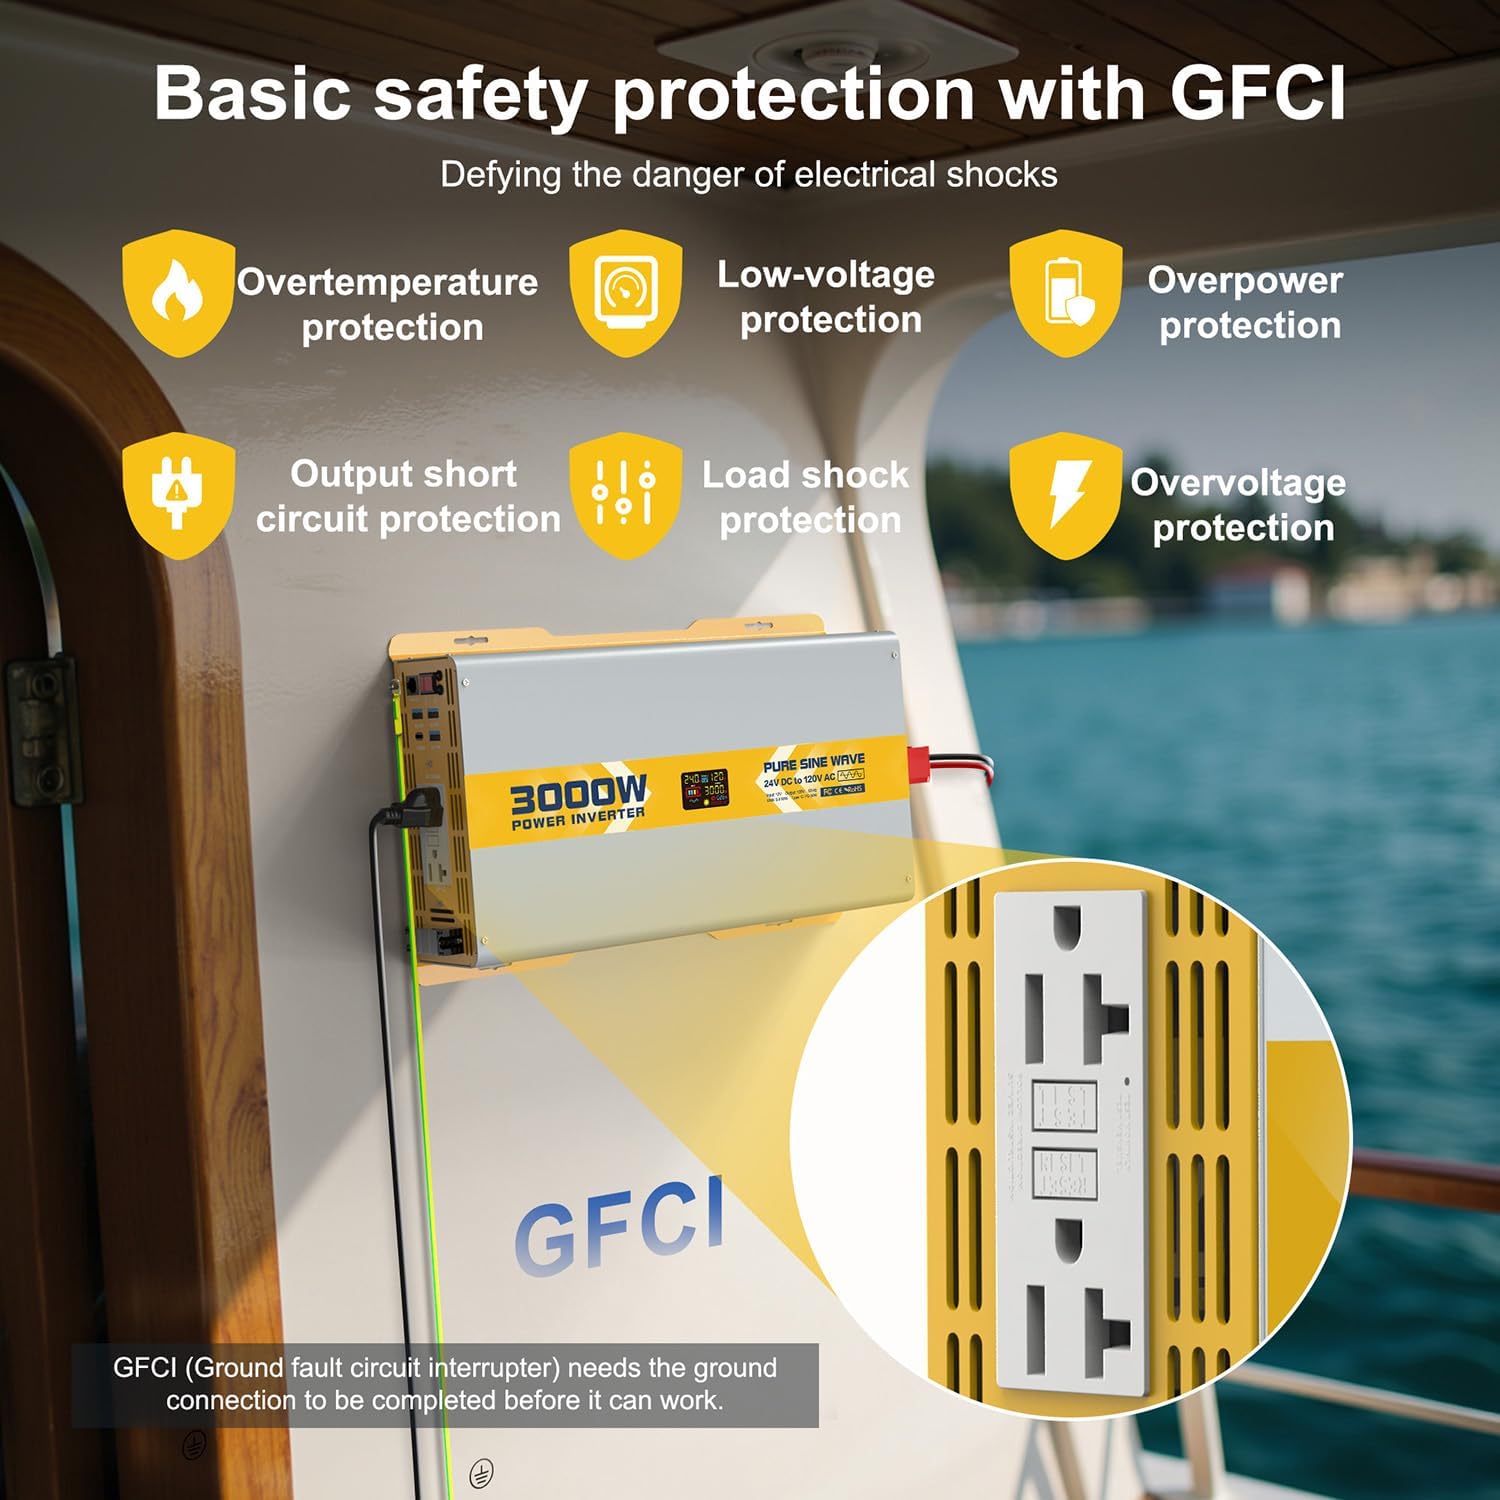
Figure 6.1: GFCI outlets and visual indicators for safety protections.
7. Specifiche
| Caratteristica | Specificazione |
|---|---|
| Numero di modello | 25IVBTK-3KW-24V-120 |
| Potenza continua | 3000W |
| Potenza di picco | 6000W |
| Ingresso volumetage | 24V CC |
| Volume di uscitatage | 120 V CA |
| Frequenza di uscita | 60 Hz |
| Forma d'onda di uscita | Onda sinusoidale pura |
| THD | <3% |
| Efficienza | >90% |
| Corrente a vuoto | <1A |
| Uscita USB-A | 2 x QC 18W, 1 x QC 24W |
| Uscita USB-C | 1 x PD 60W |
| Dimensioni del prodotto | 10.24 x 12.99 x 23.62 pollici |
| Peso dell'articolo | 16 libbre |
7.1 Compatibilità del carico
The inverter is compatible with a wide range of loads. Refer to the table below for general guidance on wattage compatibility with different inverter sizes. This 3000W model can power most common household and outdoor appliances.

Figure 7.1: General load compatibility for various inverter wattages.
7.2 Battery Capacity Requirements
For optimal performance and to prevent battery damage, ensure your battery bank meets the recommended capacity for the inverter's wattage. For the 3000W inverter, it is recommended to use at least 3 x 100Ah, 2 x 150Ah, or 2 x 200Ah deep-cycle batteries.

Figure 7.2: Recommended battery configurations for different inverter sizes.
8. Risoluzione Dei Problemi
The LCD display provides detailed fault codes and indicators to help diagnose and resolve common issues. Refer to the display and the table below for guidance:

Figure 8.1: Common fault displays and their corresponding protection states.

Figure 8.2: Detailed fault codes and their explanations for troubleshooting.
9. Manutenzione
The inverter is designed for durability with a sturdy metal structure that also aids in heat dissipation. The smart cooling fans will automatically activate when the internal temperature exceeds 45°C (113°F) or the load is over half, ensuring the inverter operates within appropriate temperature ranges. Keep the inverter in a well-ventilated, cool, and dry environment. Regularly check battery connections for tightness and corrosion.
10. Supporto
For any questions or assistance, 24-hour customer service is available to help you with your XWJNE Power Inverter.
11. Video di prodotto
Il seguente video fornisce una panoramicaview of the XWJNE Pure Sine Wave Inverter, demonstrating its features and basic operation. Please note that this video features a 2000W model, but the general functionality and accessories are similar to the 3000W model.
Video 11.1: Oltreview of the XWJNE 2000W Pure Sine Wave Inverter, including unboxing and basic connections. (Note: This video features a 2000W model, but general features apply to the 3000W model.)