1. Introduzione
Thank you for choosing the NOENNULL LED Digital Timer. This device is designed to assist with various timing needs, offering both countdown and count-up functions with multiple reminder modes. Please read this manual carefully to ensure proper use and to maximize the timer's functionality.
2. Informazioni sulla sicurezza
- Tenere il dispositivo lontano dall'acqua e da umidità elevata per evitare danni.
- Do not expose the timer to extreme temperatures or direct sunlight for extended periods.
- Use only the specified battery type (2 x AAA batteries).
- Non mischiare batterie vecchie e nuove o diversi tipi di batterie.
- Smaltire le batterie usate secondo le normative locali.
- Tenere fuori dalla portata dei bambini.
3. Contenuto della confezione
Dopo aver disimballato, verificare che siano presenti tutti gli articoli:
- 1 x NOENNULL LED Digital Timer
- 1 x Manuale utente (questo documento)
Nota: per il funzionamento sono necessarie 2 batterie AAA, non incluse nella confezione.
4. Prodotto finitoview
Familiarizzare con i componenti e i comandi del timer.

Figura 4.1: Davanti view of the NOENNULL LED Digital Timer, showing the large LED display and control buttons (M, S, CLEAR, SP/ST) at the bottom.

Figura 4.2: Lato view of the timer, highlighting the reminder mode switch with icons for high volume, low volume, silent/flash, and vibration modes.

Figura 4.3: Lato opposto view of the timer, showing the brightness adjustment switch and the ECO (power-saving) mode switch.
Controlli e funzionalità:
- Display a LED: Large, clear digital display for time.
- Pulsante M: Utilizzato per impostare i minuti.
- Tasto S: Utilizzato per impostare i secondi.
- Pulsante CANCELLA: Resets the timer to 00:00.
- SP/ST Button: Starts and stops the timer. Also used to return to the last set time after a countdown.
- Reminder Mode Switch: Located on the side, allows selection between high volume (80-90dB), low volume (60-75dB), silent with flash, and vibration modes.
- Interruttore di luminosità: Located on the side, adjusts display brightness between two levels.
- Interruttore modalità ECO: Located on the side, enables power-saving mode where the screen turns off after 10 seconds of inactivity.
- Retro magnetico: Two circular magnets for attachment to metal surfaces.
- Supporto retrattile: Per posizionamento da tavolo.
- Gancio pieghevole: Per appendere il timer.
5. Impostazione
5.1 Installazione della batteria
The timer requires 2 x AAA batteries (not included).
- Individuare il coperchio del vano batterie sul retro del timer.
- Far scorrere il coperchio per aprirlo.
- Inserire due batterie AAA, assicurandosi che la polarità sia corretta (+ e -) come indicato all'interno del vano.
- Chiudere saldamente il coperchio del vano batterie.
The timer display should illuminate upon successful battery installation.
6. Istruzioni per l'uso
6.1 Impostazione del timer (conto alla rovescia)
The timer supports countdowns from 1 second up to 9 hours, 59 minutes, and 59 seconds.
- Ensure the timer is stopped (display shows 00:00 or a paused time). If it's counting, press the SP/ST button to pause it.
- Premere il tasto M button repeatedly to set the desired minutes. Hold the M pulsante per una regolazione più rapida.
- Premere il tasto S button repeatedly to set the desired seconds. Hold the S pulsante per una regolazione più rapida.
- Una volta impostato il tempo desiderato, premere il tasto SP/ST pulsante per avviare il conto alla rovescia.
- Per mettere in pausa il conto alla rovescia, premere SP/ST ancora. Premere SP/ST di nuovo per riprendere.
- When the countdown reaches 00:00, the alarm will sound/vibrate/flash according to the selected reminder mode.
- Per interrompere l'allarme, premere un pulsante qualsiasi.
6.2 Count-Up Function
The timer can also function as a stopwatch, counting up from 00:00.
- Ensure the timer display is at 00:00. If not, press the CHIARO pulsante.
- Premere il tasto SP/ST pulsante per iniziare il conteggio.
- Per mettere in pausa il conteggio, premere SP/ST ancora. Premere SP/ST di nuovo per riprendere.
- To reset the count-up timer to 00:00, press the CHIARO pulsante mentre il timer è in pausa o arrestato.
6.3 Funzione di memoria
After a countdown ends and the alarm sounds, pressing the SP/ST button will return the display to the last set countdown time. This is useful for repetitive tasks.
6.4 Adjusting Reminder Modes
Use the Reminder Mode Switch on the side of the timer to select your preferred alert method:
- Alto volume: 80-90dB audible alarm.
- Basso volume: 60-75dB audible alarm.
- Silent & Flash: The display will flash when the timer reaches zero, with no sound.
- Vibrazione: The timer will vibrate when the timer reaches zero, with no sound.
6.5 Regolazione della luminosità del display
Use the Brightness Switch on the side of the timer to toggle between two brightness levels for the LED display, suitable for different lighting conditions.
6.6 ECO (Power Saving) Mode
To conserve battery life, activate the ECO Mode Switch. When enabled, the display will automatically turn off after 10 seconds of inactivity (after setting a countdown or if the timer is paused/stopped). Press any button to reactivate the display.
7. Opzioni di montaggio
The NOENNULL LED Digital Timer offers versatile placement options:
- Attacco magnetico: The two circular magnets on the back allow you to securely attach the timer to metal surfaces such as refrigerator doors, whiteboards, or metal cabinets.
- Supporto da tavolo: Pull out the retractable bracket on the back to stand the timer upright on any flat surface, like a desk or kitchen counter.
- Gancio per appendere: Utilize the foldable hook on the back to hang the timer on a nail, hook, or pegboard.
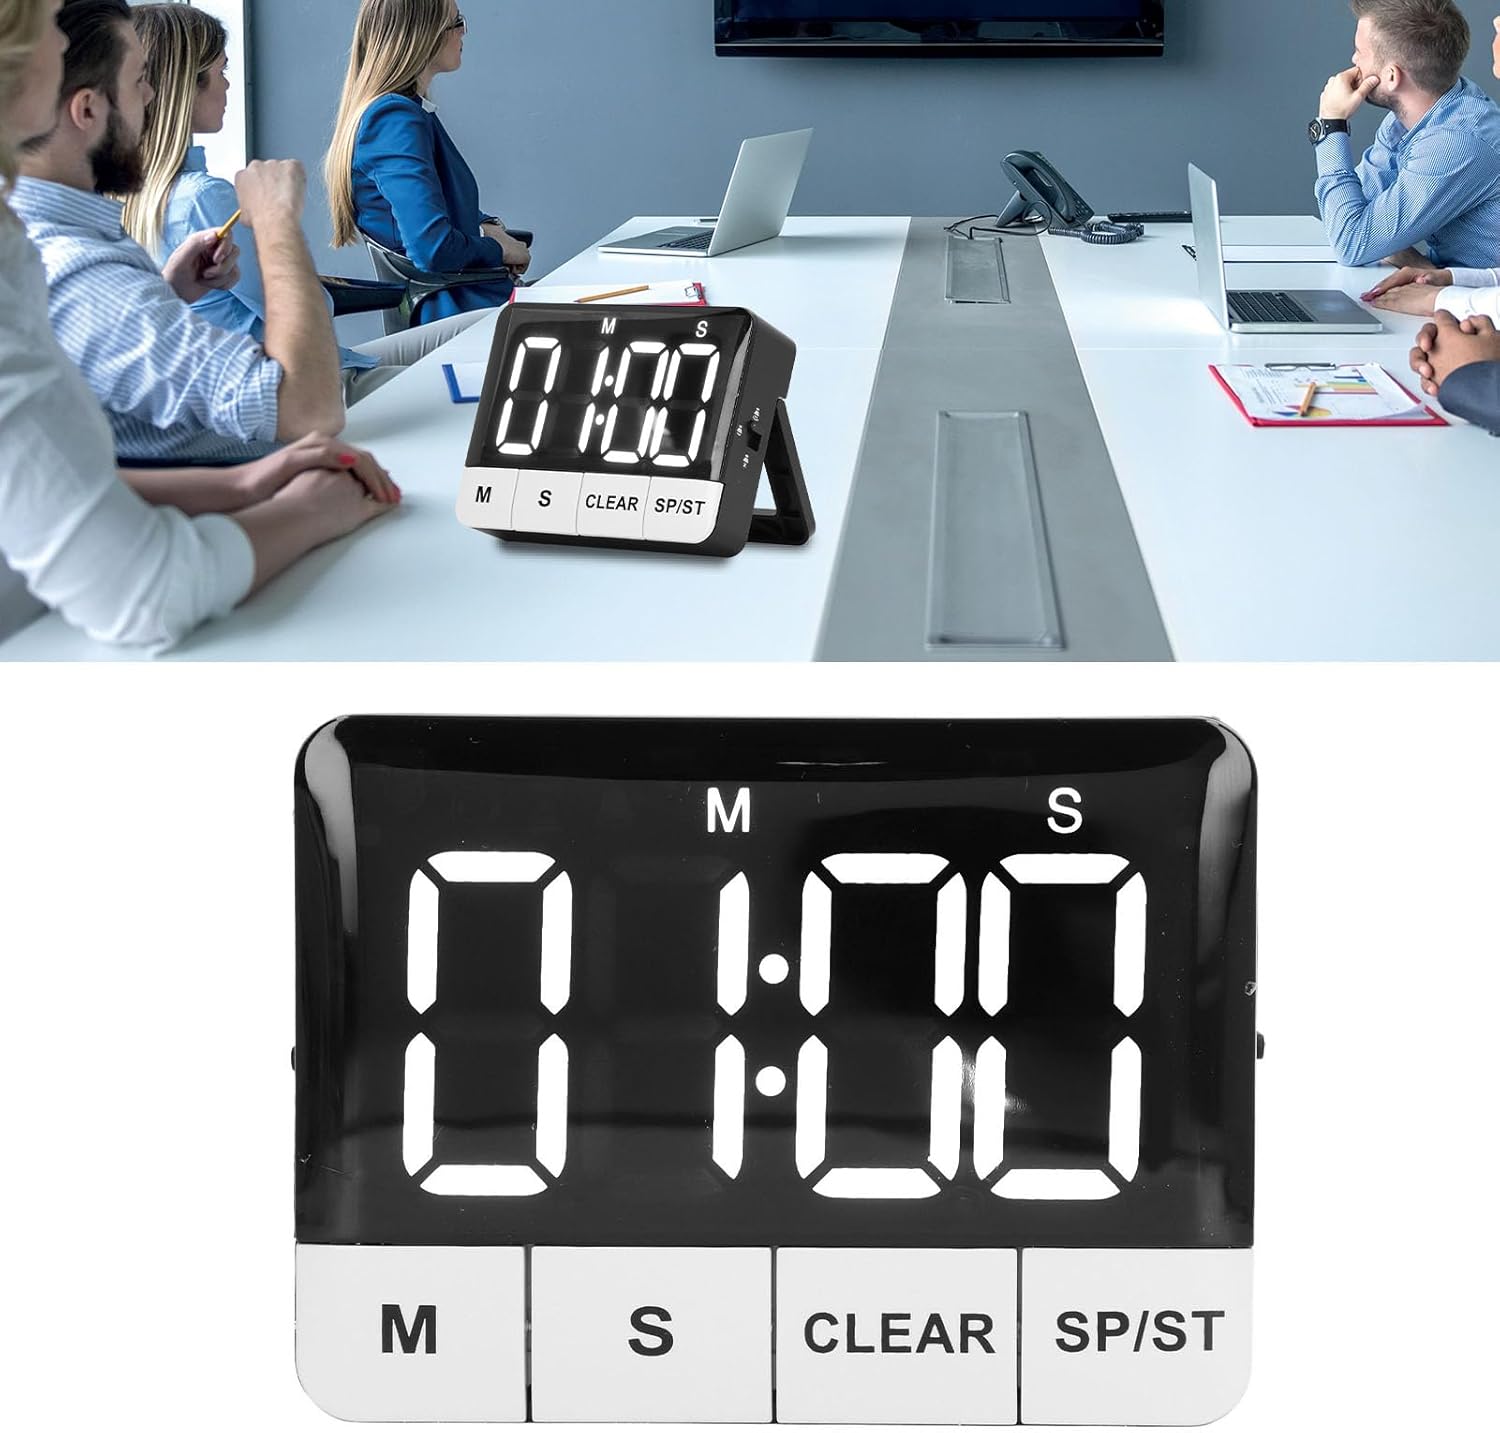
Figura 7.1: The timer displayed on a table, demonstrating its use in a professional setting.

Figura 7.2: The timer positioned on a kitchen counter, illustrating its versatility for home use.
8. Manutenzione
8.1 Pulizia
To clean the timer, wipe it with a soft, dry, or slightly damp panno. Non utilizzare detergenti abrasivi, solventi o immergere il dispositivo in acqua.
8.2 Sostituzione della batteria
When the display becomes dim or the timer functions erratically, it's time to replace the batteries. Follow the steps in Section 5.1 Battery Installation to replace the 2 x AAA batteries.
9. Risoluzione Dei Problemi
| Problema | Possibile causa | Soluzione |
|---|---|---|
| Timer does not turn on or display is blank. | Le batterie sono scariche o installate in modo errato. | Controllare la polarità delle batterie. Sostituirle con batterie AAA nuove. |
| Il display è scuro. | Low batteries or brightness setting is on low. | Replace batteries. Adjust the Brightness Switch to a higher setting. |
| L'allarme non suona. | Reminder mode is set to Silent & Flash or Vibration. | Adjust the Reminder Mode Switch to High Volume or Low Volume. |
| Timer automatically turns off. | ECO (Power Saving) Mode is enabled. | This is normal behavior. Press any button to reactivate. If you prefer the display to stay on, disable ECO Mode. |
| Timer does not reset to last set time. | Memory function only works after a countdown completes and alarm sounds. | Ensure the countdown completes fully before pressing SP/ST to recall the last time. |
10. Specifiche
| Caratteristica | Dettaglio |
|---|---|
| Tipo di articolo | Timer digitale |
| Materiale | addominali |
| Tipo di batteria | 2 batterie AAA (non incluse) |
| Countdown/Count-up Range | Da 1 secondo a 9 ore, 59 minuti e 59 secondi |
| Modalità promemoria | High Volume (80-90dB), Low Volume (60-75dB), Silent & Flash, Vibration |
| Luminosità dello schermo | 2 livelli regolabili |
| Modalità di risparmio energetico | ECO mode (screen off after 10 seconds) |
| Opzioni di montaggio | Magnetic back, Retractable stand, Foldable hook |
| Dimensioni del prodotto | 3.94 x 3.15 x 1.57 pollici |
| Peso dell'articolo | 3.21 once |
| Numero di modello | NOENNULL0ugtgdayqx |
| ASIN | B0DSJCLCS1 |
11. Garanzia e supporto
For warranty information or technical support, please refer to the retailer's return policy or contact the seller directly through your purchase platform. Keep your purchase receipt as proof of purchase.