1. Introduzione
This manual provides detailed instructions for the installation, operation, and maintenance of your WEILAILIFE Outdoor Wired Security Camera System. This system features an integrated 10.1-inch Full HD IPS display, four 5.0MP wired HD-Analog cameras, and a 500GB hard drive for local storage.
The system is designed for comprehensive surveillance, offering features such as PIR motion detection with red and blue flashing LEDs, 122° ultra wide-angle coverage, 90ft night vision, and remote viewing via the "HonestView" app without monthly fees.
2. Cosa c'è nella scatola
Verificare che tutti i componenti siano presenti nella confezione:
- Monitor 8-Channel 5.0MP DVR with Pre-installed 500GB Hard Drive (x1)
- 5.0MP Wired HD-Analog Camera (x4)
- 2-in-1 Cable 60ft for Camera (x4)
- DC12V2A Power Supply for DVR (x1)
- Telecomando (x1)
- 1m LAN Cable (x1)
- Cavo HDMI (x1)
- Mouse USB (x1)
- Separation Power Cord 1-to-4 (x1)
- Screw Kits (x4)
- Manuale utente (x1)
- Security Sticker (x1)

Figura 2.1: Contenuto della confezione
3. Configurazione e installazione
3.1 Installazione della telecamera
Follow these steps to install the cameras:
- Marcatura dei fori di perforazione: Position the camera in the desired location. Use a marker to indicate the positions for drilling the mounting holes.
- Perforazione: Praticare i fori nelle posizioni contrassegnate.
- Inserting Wall Anchors: Insert the provided wall anchors into the drilled holes to ensure a secure fit for the screws.
- Securing the Camera: Align the camera base with the wall anchors and secure it using the provided screws.
Video 3.1: Camera Installation Guide. This video demonstrates the physical installation process of the WEILAILIFE security camera, including marking, drilling, and securing the camera to a wall.
3.2 Connessione DVR
Connect the DVR (Digital Video Recorder) to power, network, and display:
- Collegamento elettrico: Connect the DC12V2A power supply to the DVR's power input and plug it into an electrical outlet.
- Connessione di rete: Connect one end of the LAN cable to the DVR's Ethernet port and the other end to your router.
- Connessione display: Connect the HDMI cable from the DVR's HDMI output to an HDMI input on your monitor or TV. Alternatively, use a VGA cable for VGA displays.
- Mouse USB: Connect the USB mouse to one of the DVR's USB ports for navigation.
- Connessione telecamera: Connect each camera to the DVR using the provided 2-in-1 cables. Ensure secure connections for both video (BNC) and power (DC connector). Use the separation power cord if multiple cameras share a single power adapter.
Video 3.2: DVR Connection Setting. This video illustrates the correct wiring and connection procedures for the DVR unit, including power, network, display, and camera inputs.
3.3 Configurazione iniziale e configurazione dell'app
After connecting all hardware, power on the DVR. The system will boot up and display on the connected monitor. For remote viewing and advanced settings, download and configure the "HonestView" app:
- Scarica l'app: Download the free "HonestView" app from the App Store (iOS) or Google Play Store (Android).
- Aggiungi dispositivo: Open the app, tap the "+" icon to add a new device.
- Scansiona il codice QR: Scan the QR code displayed on the DVR monitor or located on the DVR unit itself.
- Configurazione di rete: Follow the on-screen prompts to complete the network setup.
- Vivere View: Once connected, tap the play button to start live viewing from your cameras.
Video 3.3: CCTV Camera System App Setup. This video guides users through the process of setting up the security camera system with the mobile application, including device pairing and live view attivazione.
4. Funzionamento del sistema
4.1 Monitoraggio in tempo reale
The integrated 10.1-inch Full HD IPS display provides a clear view of all camera feeds. You can also monitor live footage remotely via the "HonestView" app on your smartphone, PC, or tablet.
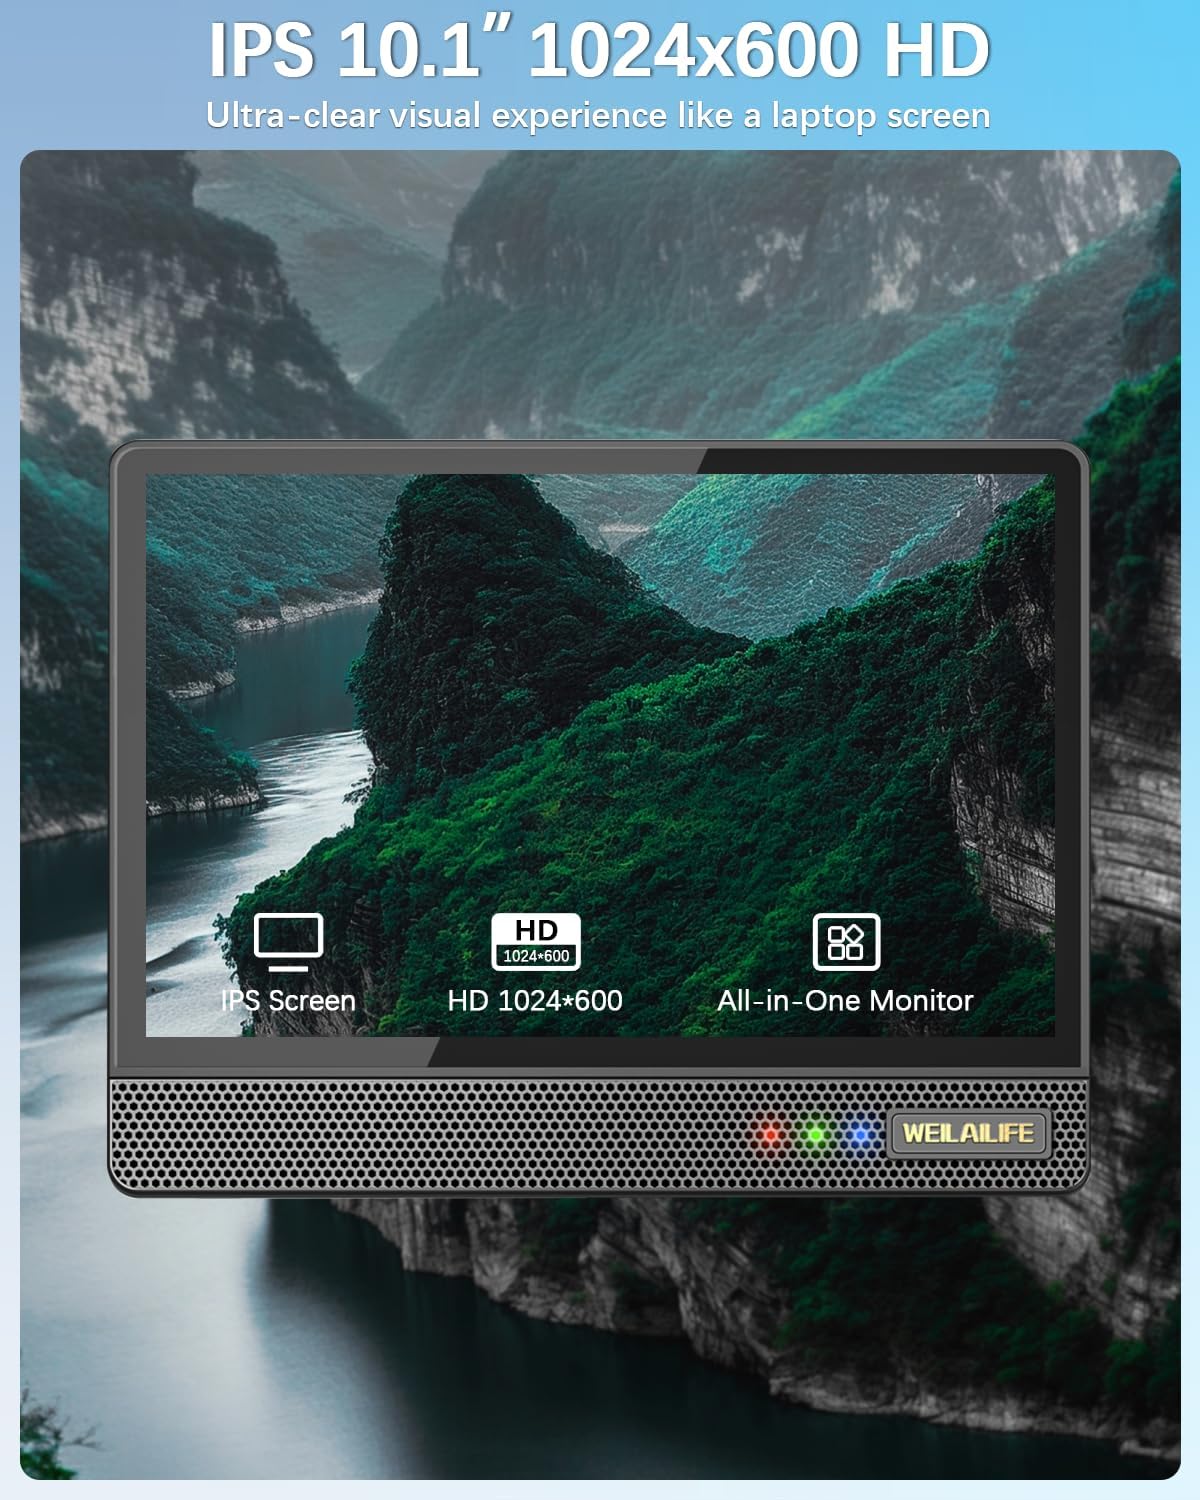
Figure 4.1: 10.1-inch Full HD IPS Monitor Display
4.2 Rilevamento del movimento e avvisi
The system features PIR motion detection. When motion is detected, the cameras activate red and blue flashing LEDs for 15 seconds to deter potential intruders. The system can also send email alerts and app notifications, and trigger recording.
- Personalizzazione: You can customize the motion detection area, sensitivity, and time within the DVR settings or the "HonestView" app.
- AI WDR Function: The AI WDR (Wide Dynamic Range) function enhances image clarity by balancing bright and dark areas in surveillance footage, ensuring details are visible in challenging lighting conditions.

Figure 4.2: Red & Blue Flashing LEDs in Action

Figure 4.3: PIR Motion Detection Zones

Figure 4.4: AI WDR Function
4.3 Modalità di registrazione
The system supports multiple recording modes to suit your surveillance needs:
- Registrazione di rilevamento del movimento: Registra solo quando viene rilevato un movimento, risparmiando spazio di archiviazione.
- Registrazione programmata: Records continuously during specified time periods.
- Registrazione manuale: Allows you to start and stop recording manually.

Figura 4.5: Modalità di registrazione multiple
4.4 Visione notturna
The cameras are equipped with 90ft Super Night Vision, utilizing enhanced 2 Array Infrared Light and an Auto IR-Cut Filter for clear black-and-white video even in complete darkness.
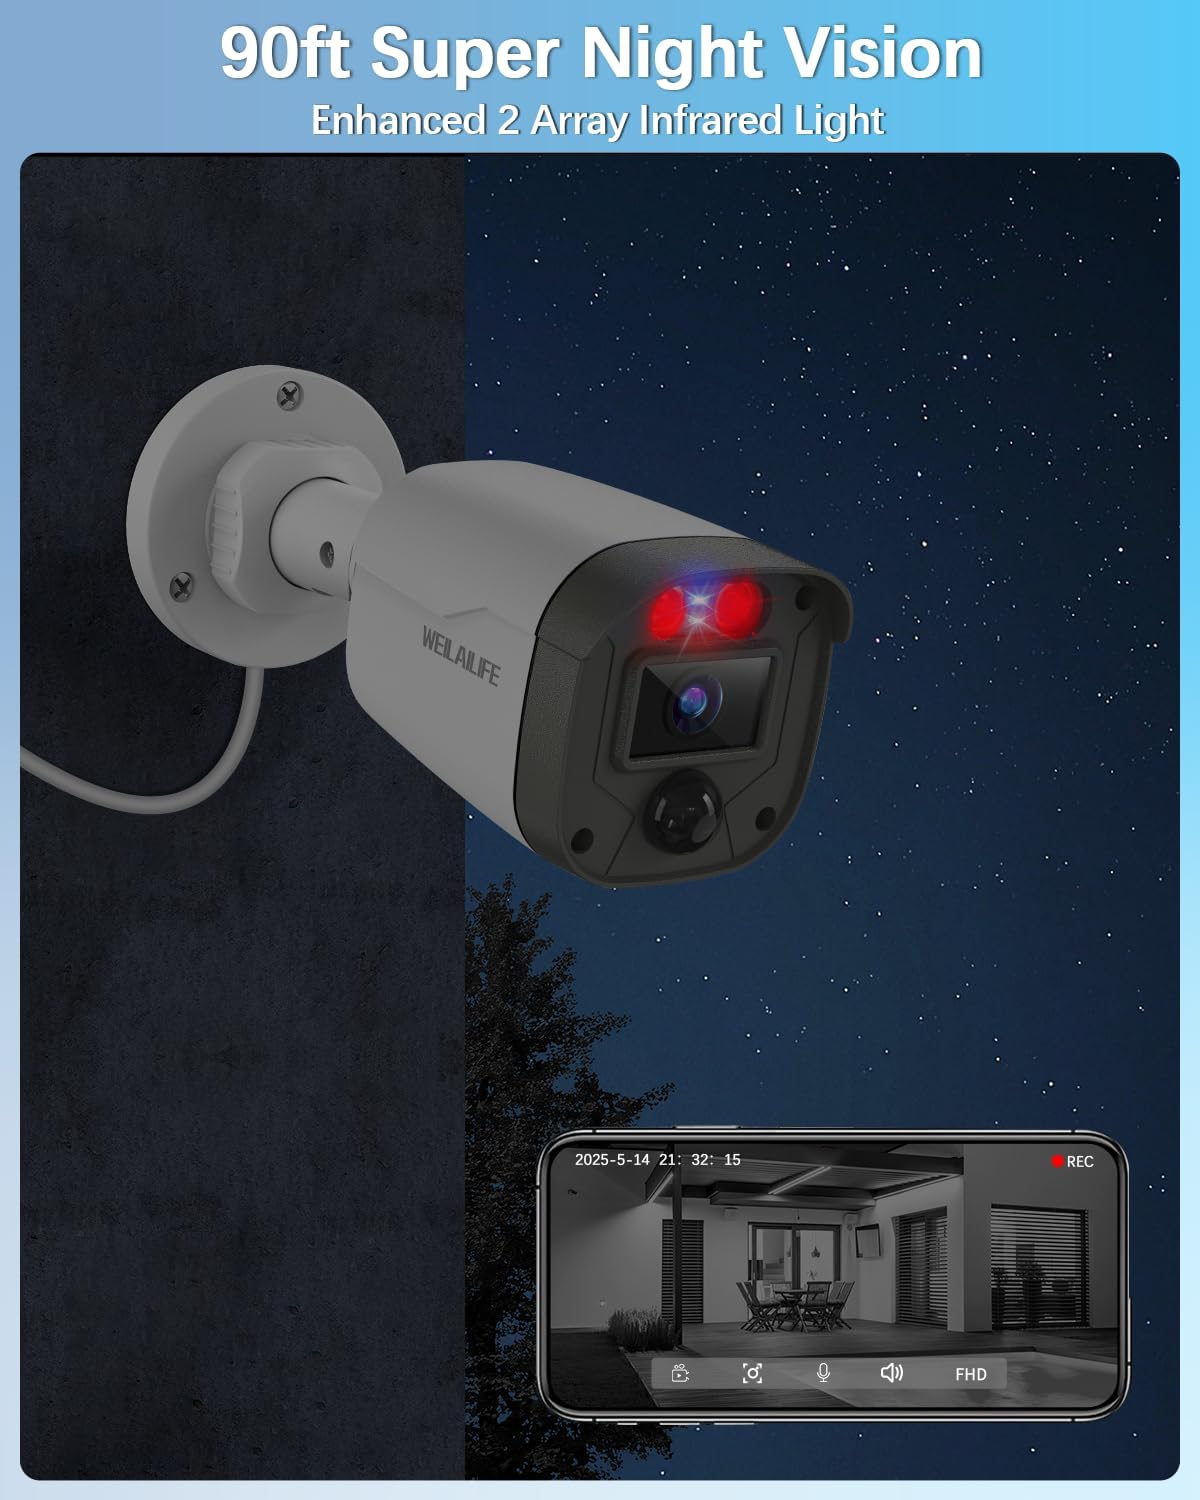
Figure 4.6: 90ft Super Night Vision
4.5 Audio bidirezionale
While the product description mentions two-way audio in a customer review, specific details on its operation are not provided in the product features. If available, this feature typically allows you to speak through the camera's speaker and hear audio from the camera's microphone via the mobile app.
5. Manutenzione
5.1 Resistenza alle intemperie
The outdoor cameras are IP67 waterproof, ensuring reliable operation in various weather conditions including rain, snow, and extreme temperatures ranging from -20°C (-5°F) to 60°C (140°F).

Figura 5.1: Telecamera impermeabile IP67
5.2 Cura generale
- Pulisci regolarmente le lenti della fotocamera con un panno morbido eamp panno per garantire una qualità dell'immagine nitida.
- Ensure all cable connections remain secure and free from damage.
- Per evitare il surriscaldamento, conservare l'unità DVR in un luogo ben ventilato.
6. Risoluzione Dei Problemi
Questa sezione fornisce soluzioni ai problemi più comuni che potresti riscontrare:
- Nessun segnale video: Check all cable connections (power, video, HDMI/VGA) to ensure they are secure. Verify that the cameras are powered on.
- Scarsa qualità dell'immagine: Clean camera lenses. Ensure there are no obstructions in the camera's field of view. Adjust camera position if necessary.
- Il rilevamento del movimento non funziona: Verify motion detection settings in the DVR or app. Adjust sensitivity and detection areas. Ensure the PIR sensor is not obstructed.
- Remoto Viewproblemi: Check your internet connection and router settings. Ensure the DVR is connected to the network and the "HonestView" app is properly configured and updated.
- Il DVR non registra: Check hard drive status in DVR settings. Ensure sufficient storage space is available. Verify recording schedules and motion detection settings.
7. Specifiche
| Caratteristica | Dettaglio |
|---|---|
| Marca | WEILAILLIFE |
| Numero di modello | WE-44500 |
| Tecnologia di connettività | HD-Analog, Wired |
| Risoluzione di acquisizione video | 2536 x 1944p, 5.0 Megapixel |
| Caratteristiche speciali | 10" Full HD IPS Screen, 90ft Night Vision, AI WDR Function, Human Detection, Red & Blue Flashing LEDs |
| Numero di canali | 8 (Il sistema include 4 telecamere) |
| Capacità di archiviazione della memoria | 500 GB (Pre-installed) |
| Colore | Bianco |
| Fonte di alimentazione | Elettrico con cavo |
| Dimensioni articolo (L x P x A) | 13 x 11 x 7 pollici |
| Sistema operativo | Linux |
| Usi consigliati | Interno, Esterno |
| Dispositivi compatibili | Cameras, Personal Computers, Smartphones, TV, Tablets |
| Altre caratteristiche della fotocamera | 122° Wide-Angle, 90ft Super Night Vision, Motion Detection |
| Tecnologia a bassa luminosità | 90ft Night Vision with Auto IR-Cut Filter and Infrared LEDs |
| Gamma di visione notturna | 90 piedi |
| Frequenza dei fotogrammi | 15 fps |
| Modalità di registrazione | Evento, Programma |
| Porte USB totali | 2 |
| Interfaccia Hardware | HDMI, USB 2.0 |
| Tipo di lente | Grandangolo |
| Ingresso video | HD-Analog Cameras, RJ45 |
| Viewangolo di ing | 122 gradi |
| Produttore | WEILAILLIFE |
| Compatibilità con la casa intelligente | Smart Home Compatible |
| Peso dell'articolo | 11.05 libbre |
8. Garanzia e supporto
Specific warranty details are not provided in the product information. Please refer to the warranty card included in your package or contact WEILAILIFE customer support for information regarding warranty coverage and technical assistance.
For customer support, please visit the official WEILAILIFE website or use the contact information provided in your product documentation.