1. Prodotto finitoview
The ACEZUK M02-V01 is a powerful and versatile portable jump starter designed to provide emergency starting power for vehicles. It also features a built-in LED light and can function as a power bank for electronic devices.

Image 1.1: ACEZUK M02-V01 Portable Jump Starter with smart clamps and USB-C charging cable.
- Corrente di picco elevata: Delivers up to 6000A peak current for reliable starting.
- Ampia compatibilità: Suitable for 12V vehicles, supporting up to 10.0L gasoline and 8.0L diesel engines.
- Luce LED multifunzionale: Features Brightness, SOS, Strobe, and Warning Light modes.
- Display LCD da 2 pollici: Provides clear information on battery status, input/output, temperature, and charging status.
- Operazioni in condizioni meteorologiche estreme: Designed to operate in temperatures ranging from -20°C (-4°F) to 60°C (140°F).
2. Istruzioni di sicurezza
Si prega di leggere attentamente tutte le informazioni di sicurezza prima di utilizzare questo prodotto. Il mancato rispetto di queste istruzioni può causare scosse elettriche, incendi o lesioni gravi.
- Leggi il manuale: Always read the entire user manual before operating the jump starter.
- Collegamento corretto: Assicurarsi della corretta polarità quando si collega il clamps to the vehicle battery (red to positive, black to negative).
- Evitare i cortocircuiti: Non permettere il rosso e il nero clampche si tocchino tra loro o tocchino lo stesso oggetto metallico.
- Ventilazione: Utilizzare in un'area ben ventilata.
- Tenere lontano dalla portata dei bambini: Questo dispositivo non è un giocattolo. Tenerlo fuori dalla portata dei bambini.
- Non smontare: Do not attempt to disassemble, modify, or repair the unit yourself. Contact qualified service personnel.
- Temperatura di esercizio: Non esporre il dispositivo a temperature al di fuori dell'intervallo operativo specificato (da -20°C a 60°C).
- Ricarica: Utilizzare solo il cavo di ricarica fornito e un adattatore di alimentazione USB compatibile.
- Remove Immediately: Disconnect the jump starter from the vehicle battery immediately after the engine starts.
3. Configurazione e ricarica
3.1 Addebito iniziale
Before first use, fully charge the ACEZUK M02-V01 jump starter. Connect the provided USB-C charging cable to the jump starter's input port and the other end to a USB power adapter (not included). The LCD display will show the charging progress. A full charge is indicated by 100% on the display.
3.2 Controllo del livello della batteria
Press the power button once to activate the LCD display and check the current battery percentage. Ensure the jump starter has sufficient charge (above 50% is recommended) before attempting to jump start a vehicle.

Image 3.1: The 2-inch LCD display provides real-time status information.
4. Istruzioni per l'uso
4.1 Avviamento di emergenza di un veicolo
Per avviare il tuo veicolo in tutta sicurezza, segui questi passaggi:
- Phase 1: Insert the Connection Cable. Ensure the jump starter is turned off. Insert the smart clamp connector firmly into the jump starter's output port.
- Phase 2: Connect Clampalla batteria dell'auto. Collegare il rosso (+) clamp al terminale positivo (+) della batteria del veicolo. Collegare il polo nero (-)amp to the negative (-) terminal of the vehicle battery. Ensure a secure connection. The smart clamps indicherà se la connessione è corretta.
- Phase 3: Start the Car Engine. Una volta che il clampsono collegati correttamente e l'avviatore di emergenza è pronto (indicato dalla spia intelligenteamps o LCD), avviare il motore del veicolo.
- Phase 4: Remove Clamps. Immediately after the vehicle engine starts, disconnect the black (-) clamp prima, poi il rosso (+) clamp from the vehicle battery. Finally, disconnect the smart clamp connettore dall'avviatore di emergenza.
Nota importante: Rimuovi il clamps immediately after the vehicle starts to prevent damage to the jump starter or vehicle electronics.

Image 4.1: Step-by-step guide for jump starting a vehicle.
4.2 Utilizzo della luce LED
The ACEZUK M02-V01 features a powerful 400 Lumen LED light with multiple modes:
- Modalità luminosità: Press and hold the light button to turn on the flashlight. Press again to cycle through brightness levels (if applicable).
- Modalità SOS: Press the light button twice quickly to activate the SOS signal.
- Modalità strobo: Press the light button three times quickly to activate the strobe light.
- Modalità spia di avvertimento: Some models may feature a red/blue warning light. Refer to the device for specific activation.

Image 4.2: The 400 Lumen LED light offers various modes for emergency situations.
4.3 Funzionalità del Power Bank
The jump starter can also be used to charge electronic devices via its USB output port. Connect your device's charging cable to the jump starter's USB output port. The LCD display will indicate 'OUT' when charging a device.
5. Manutenzione
Proper maintenance ensures the longevity and optimal performance of your ACEZUK M02-V01 jump starter.
- Ricaricare regolarmente: To maintain battery health, recharge the jump starter at least once every 3-6 months, even if not in use.
- Magazzinaggio: Store the device in a cool, dry place, away from direct sunlight and extreme temperatures. The operating temperature range is -20°C (-4°F) to 60°C (140°F).
- Pulizia: Pulire l'unità con un panno morbido e asciutto. Non utilizzare prodotti chimici aggressivi o detergenti abrasivi.
- Ispezionare i cavi: Controllare periodicamente la smart clampe cavi per eventuali segni di danneggiamento o usura.

Image 5.1: The jump starter is designed for operation in a wide range of temperatures.
6. Risoluzione Dei Problemi
If you encounter issues with your ACEZUK M02-V01 jump starter, refer to the following common problems and solutions:
| Problema | Possibile causa | Soluzione |
|---|---|---|
| Il veicolo non si avvia. | Bassa carica sull'avviatore di emergenza; codice erratoamp collegamento; batteria del veicolo completamente scarica. | Assicurarsi che l'avviatore di emergenza sia completamente carico. Controllare clamp connections for correct polarity and secure contact. If vehicle battery is completely dead, it may require a longer connection time or professional assistance. |
| Jump starter display is off or unresponsive. | Jump starter battery is depleted; device is in standby mode. | Charge the jump starter. Press the power button to activate the display. |
| cl . intelligenteamps mostra un errore. | Incorrect polarity; short circuit; faulty connection. | Disconnetti clamps and re-connect, ensuring red to positive and black to negative. Ensure clampnon si toccano. |
7. Specifiche
Key technical specifications for the ACEZUK M02-V01 Portable Jump Starter:
- Marca: ACEZUK
- Numero modello: M02-V01
- Peso dell'articolo: 1.03 chilogrammi
- Dimensioni: Dimensioni: 25.6 x 13.9 x 10.1 cm
- Composizione delle celle della batteria: Lithium Polymer (implied from 'Polimero di litio pile necessarie' and common jump starter tech)
- Voltage: 12 Volt
- Amperage (Peak): 6000 Ampqui
- Tipo di servizio del veicolo: Automobile
- Compatibilità motore: Fino a 10.0 l a benzina, 8.0 l a gasolio
- Luce LED: 400 lumen
- Temperatura di esercizio: Da -20°C (-4°F) a 60°C (140°F)
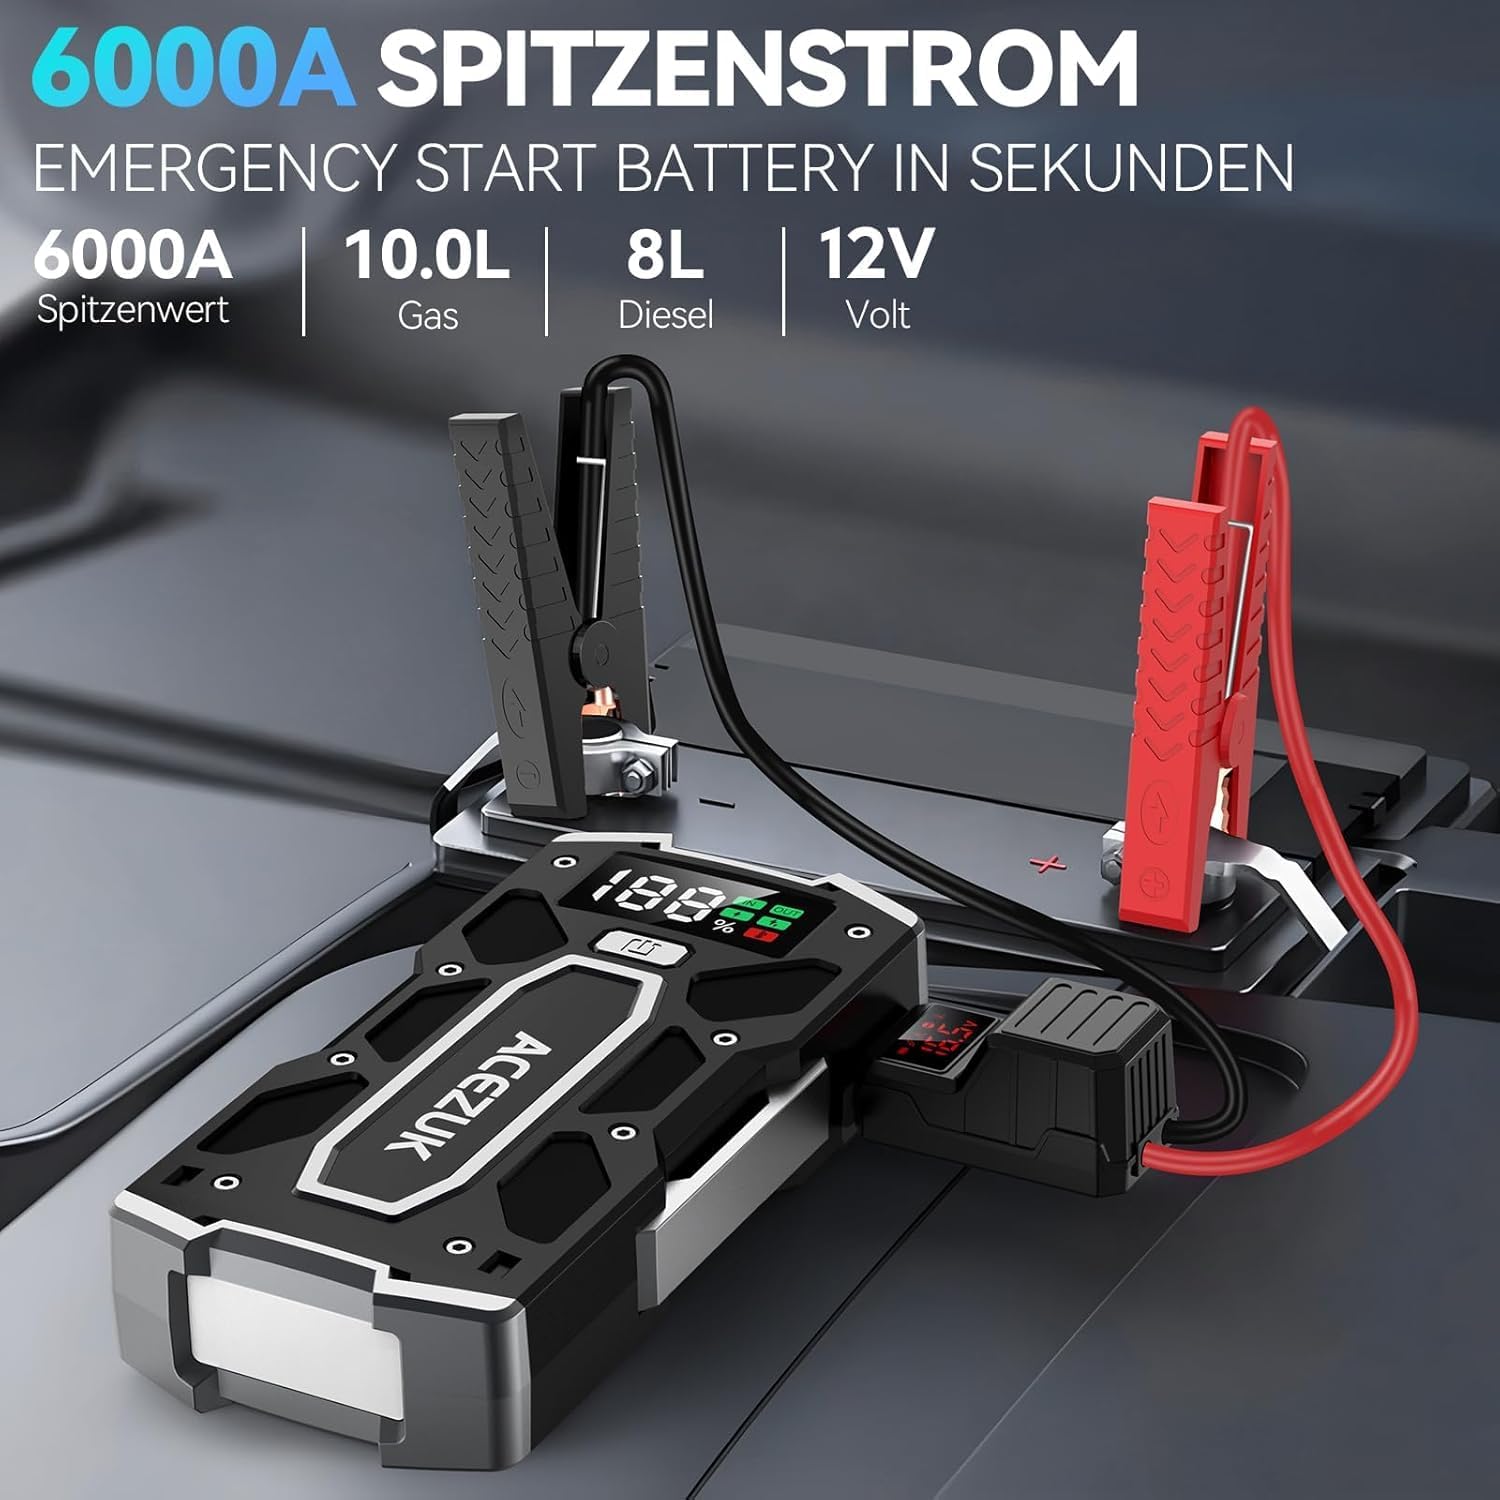
Image 7.1: Key performance specifications of the jump starter.
8. Garanzia e supporto
For warranty information or technical support, please refer to the documentation included with your purchase or contact ACEZUK customer service directly. Contact details can typically be found on the product packaging or the official ACEZUK websito.