1. Introduzione
Thank you for choosing the GENBOLT 2K Wireless Outdoor Solar Security Camera. This advanced security solution features a dual-lens system, 360° pan-tilt-zoom (PTZ) functionality, and is powered by an integrated 8W solar panel and a 15600mAh rechargeable battery. Designed for outdoor use, it offers comprehensive surveillance with PIR motion detection, automatic tracking, color night vision, and two-way audio communication. This manual provides essential information for proper installation, operation, and maintenance to ensure optimal performance and longevity of your device.
2. Prodotto finitoview
2.1 Caratteristiche principali
- Risoluzione 2K (4MP): Fornisce video foo chiari e dettagliatitage.
- Sistema a doppia lente: Combines a fixed lens and a PTZ lens for broader coverage.
- 360° PTZ Functionality: Offre una panoramica orizzontale di 355° e un'inclinazione verticale di 90° per un monitoraggio completo dell'area.
- Alimentato ad energia solare: Equipped with an 8W solar panel for continuous charging, reducing the need for manual recharging.
- Batteria ad alta capacità: Built-in 15600mAh rechargeable battery ensures extended operation.
- PIR Motion Detection & Auto Tracking: Detects human movement and automatically tracks the subject.
- Visione notturna a colori: Fornisce video a colori anche in condizioni di scarsa illuminazione.
- Audio bidirezionale: Microfono e altoparlante integrati per comunicazioni in tempo reale.
- Connettività WiFi migliorata: Features 5dBi dual antennas for stable 2.4GHz WiFi signal.
- Archiviazione su cloud e scheda SD: Supports cloud storage (7-day free trial available) and local storage via TF card.
- Accesso multipiattaforma: View and control via iOS/Android app, macOS, and Windows software.
2.2 Componenti del prodotto

Immagine: Dettagliato view dei componenti della fotocamera.
- Doppia antenna: For improved WiFi signal reception.
- Sensore PIR: Sensore a infrarossi passivi per il rilevamento del movimento.
- Obiettivo HD: Lente ottica ad alta definizione per immagini nitide.
- 8 LED IR/bianchi: Infrared LEDs for black and white night vision, white LEDs for color night vision and spotlight.
- Oratore: Per comunicazioni audio bidirezionali e suoni di allarme.
- Slot per schede TF: Per l'archiviazione video locale (supporta fino a 128 GB, scheda non inclusa).
- Pulsante di reset: Per ripristinare le impostazioni di fabbrica.
- Type-C Slot & Power ON/OFF: For charging and power control.
- Infrared LED (4pcs): Illuminazione infrarossa aggiuntiva.
- Indicatore Lamp: Mostra lo stato del dispositivo.
2.3 Contenuto della confezione
- GENBOLT 2K Wireless Outdoor Solar Security Camera
- 8W Solar Panel (integrated)
- Cavo USB di tipo C (0.7 m)
- Network Cable (1m)
- Viti di montaggio e tasselli
- Manuale d'uso
3. Impostazione
3.1 Caricamento della batteria
Before initial use, fully charge the camera's built-in 15600mAh battery using the provided USB Type-C cable and a 5V/2A power adapter (not included). The solar panel will maintain the charge once installed, but a full initial charge is recommended.
3.2 Installazione di una scheda TF (opzionale)
If you plan to use local storage, insert a TF (microSD) card (up to 128GB, Class 10 or higher recommended) into the TF card slot. Ensure the camera is powered off before inserting or removing the card.
3.3 Montaggio della telecamera
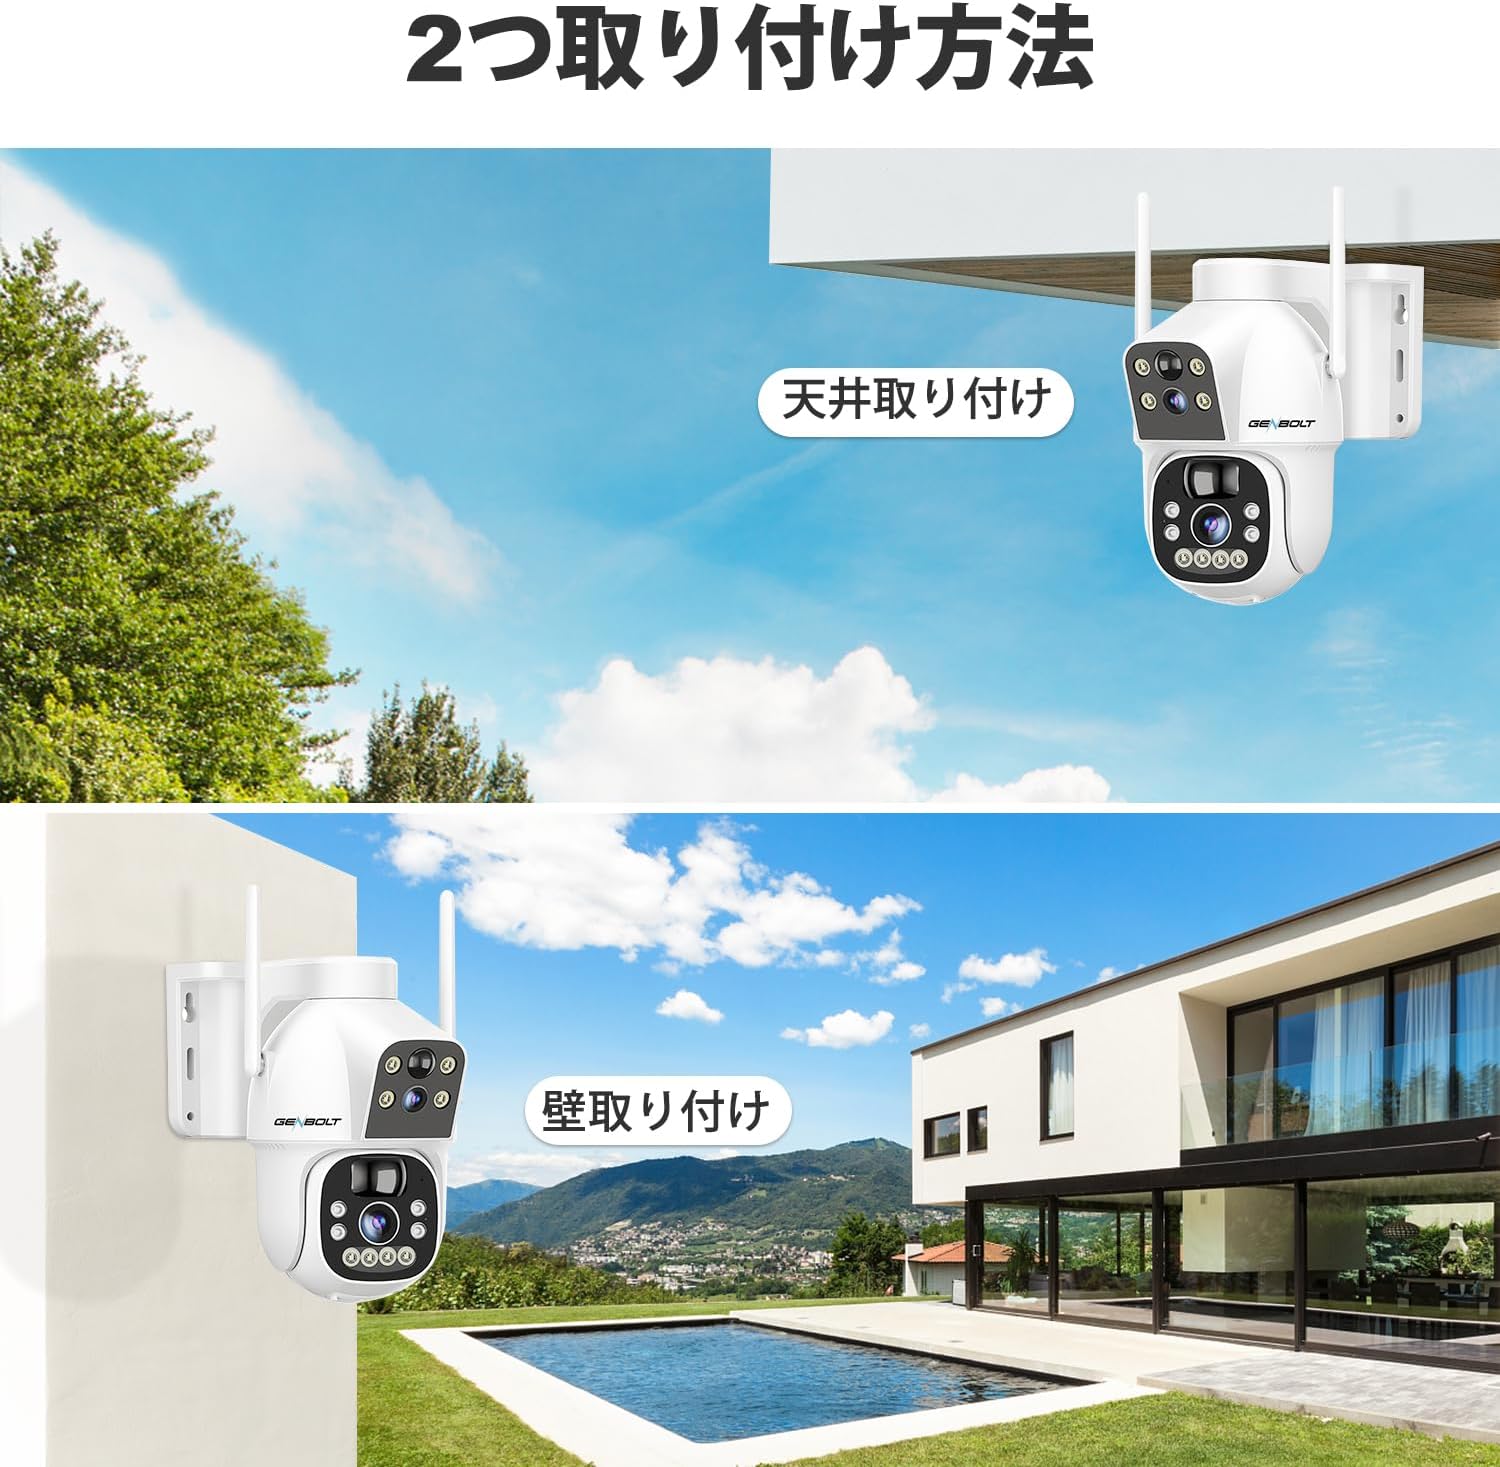
Immagine: Two common installation methods: wall mounting and ceiling mounting.
The camera supports both wall and ceiling mounting. Choose a location with optimal sunlight exposure for the solar panel and a strong 2.4GHz WiFi signal. Use the provided screws and wall plugs to securely attach the camera bracket. Adjust the camera angle for the desired viewzona di ingaggio.
3.4 Installazione dell'app e connessione WiFi

Immagine: Step-by-step guide for connecting the camera to WiFi via the mobile app.
- Download the official GENBOLT app from the iOS App Store or Google Play Store.
- Registra un account e accedi.
- Tap 'Add Device' or the '+' icon and select your camera model.
- Follow the on-screen instructions to connect the camera to your 2.4GHz WiFi network. This typically involves scanning a QR code displayed on your phone with the camera lens.
- Ensure your phone's location services are enabled during setup for proper network detection.
Nota: The camera does not support 5GHz WiFi networks. If you encounter issues, ensure your router is broadcasting a 2.4GHz signal and that your phone is connected to it during the setup process. Some users have reported difficulties with initial wired LAN connection instructions in the manual; this camera primarily uses wireless setup.
4. Istruzioni per l'uso
4.1 Vivere View e controllo PTZ

Immagine: The camera's pan and tilt range for flexible monitoring.
Una volta connesso, apri l'app per view the live feed. Use the on-screen controls to pan (355° horizontally) and tilt (90° vertically) the camera. The dual-lens system allows you to switch between a fixed wide-angle view e una PTZ mobile view.
4.2 Rilevamento del movimento e tracciamento automatico

Immagine: PIR motion detection in action, highlighting the detection area.
Enable PIR motion detection in the app settings. When motion is detected, the camera will automatically begin recording and can track the moving object. You will receive instant alerts on your mobile device. Adjust sensitivity settings to minimize false alarms.
4.3 Registrazione e riproduzione

Immagine: The app interface for accessing recorded footage dall'archiviazione cloud.
Recordings are triggered by motion detection or can be scheduled. Access recorded footage through the app's playback feature. Videos are stored either on the inserted TF card or in the cloud (subscription may apply after the initial free trial). The app allows you to review past events by date and time.
4.4 Modalità di visione notturna

Immagine: Visual comparison between color night vision and standard infrared night vision.
The camera supports multiple night vision modes: infrared (black and white), full-color (using white LEDs), and smart mode (switches between IR and color based on detected motion). Configure your preferred mode in the app settings.
4.5 Audio bidirezionale
Use the microphone and speaker functions in the app to communicate with visitors or deter intruders in real-time.
4.6 Condivisione multiutente

Immagine: App interface demonstrating the multi-user sharing feature.
You can share access to your camera's live feed and recordings with family members or trusted individuals through the app. Each user can have different permission levels.
5. Manutenzione
- Pulizia del pannello solare: Pulire regolarmente il pannello solare con un panno morbido e asciutto.amp panno per rimuovere polvere, sporco o detriti che potrebbero ridurre l'efficienza della ricarica.
- Pulizia delle lenti: Pulisci delicatamente le lenti della fotocamera con un panno in microfibra per garantire una qualità dell'immagine nitida. Evita materiali abrasivi.
- Aggiornamenti del firmware: Controlla periodicamente l'app per verificare la presenza di aggiornamenti del firmware, per assicurarti che la tua fotocamera disponga delle funzionalità più recenti e dei miglioramenti di sicurezza.
- Stato della batteria: While the solar panel helps maintain charge, prolonged periods of low sunlight may require occasional manual charging via the Type-C port to preserve battery health.
6. Risoluzione Dei Problemi
| Problema | Possibile causa/soluzione |
|---|---|
| Camera fails to connect to WiFi |
|
| Scarsa qualità dell'immagine o video sfocato |
|
| Motion detection alerts are delayed or missed |
|
| La batteria si scarica rapidamente |
|
| Cloud storage issues or plan changes |
|
| SD card recording not working |
|
| No response from camera |
|
7. Specifiche
| Caratteristica | Dettaglio |
|---|---|
| Marca | GENBOLT |
| Modello | B0DNFMMMQN |
| Risoluzione | 2K (4MP) |
| Campo di View | Dual Lens (Fixed & PTZ) |
| Gamma di panoramica/inclinazione | Orizzontale 355°, Verticale 90° |
| Fonte di alimentazione | 8W Solar Panel, 15600mAh Rechargeable Battery |
| Connettività | Wi-Fi a 2.4 GHz (IEEE 802.11b/g/n) |
| Visione notturna | Infrared, Full-Color, Smart Mode |
| Rilevamento del movimento | PIR Human Motion Detection, Auto Tracking |
| Audio | Audio bidirezionale (microfono e altoparlante integrati) |
| Magazzinaggio | Scheda TF (fino a 128 GB), archiviazione cloud |
| Supporto del sistema operativo | iOS, Android, macOS, Windows |
| Funzionalità di sicurezza | RSA Encryption, SSL Data Transmission |
| Dimensioni | Dimensioni: 26.4 x 21.7 x 18.1 cm |
| Peso | 1.96 kg |
8. Garanzia e supporto
8.1 Informazioni sulla garanzia
- Garanzia di 1 anni: Your GENBOLT camera is covered by a 1-year warranty from the date of purchase, protecting against manufacturing defects.
- Reso/cambio entro 30 giorni: You are eligible for a return or exchange within 30 days of purchase, subject to the retailer's policy.
Conservare la prova d'acquisto per eventuali richieste di garanzia.
8.2 Assistenza clienti
For technical assistance, troubleshooting, or warranty inquiries, please contact GENBOLT customer support. We offer 24/7 technical support to ensure your satisfaction.
- Supporto online: Visita il sito ufficiale GENBOLT websito per FAQ, articoli di supporto e moduli di contatto.
- Supporto via e-mail: Reach out via email for detailed assistance.
We are committed to providing reliable home security solutions and excellent customer service.