1. Introduzione
Thank you for choosing the CEYOMUR 4K Solar Trail Camera. This manual provides detailed instructions to help you set up, operate, and maintain your camera for optimal performance in wildlife observation and outdoor monitoring. Please read this manual thoroughly before use and retain it for future reference.

The CEYOMUR 4K Solar Trail Camera, designed for robust outdoor use.
2. Cosa c'è nella scatola
Dopo aver aperto la confezione, verificare che siano presenti tutti i seguenti componenti:
- 1 x CEYOMUR 4K Solar Trail Camera (Model CY75)
- 1 scheda SD da 32 GB (preinstallata)
- 1 cavo USB (tipo C)
- 1 x Cinghia di montaggio
- 1 x Manuale utente
3. Guida all'installazione
Per la configurazione iniziale della tua telecamera da pista, segui questi passaggi:
3.1 Carica iniziale
Before first use, fully charge the camera's built-in 5200mAh lithium-ion battery for at least 8 hours using the provided USB Type-C cable. The charging indicator light will be red while charging and turn green when fully charged.
Official CEYOMUR Quick Setup Guide video, demonstrating initial charging and setup steps.
3.2 Optional AA Battery Installation
For extended operation or as a backup power source, you can install 4 AA batteries (not included) into the designated battery compartment. Ensure correct polarity (+/-) when inserting batteries.

View of the optional AA battery compartment for backup power.
3.3 Installazione della scheda SD
The camera comes with a 32GB SD card pre-installed. If you need to replace it or re-insert, ensure the camera is in the OFF mode. Insert the SD card into the side slot until it clicks into place.

Close-up of the SD card slot on the side of the camera.
3.4 Impostazioni iniziali della fotocamera
Slide the power switch to the 'TEST' mode to access the camera's menu. Use the navigation buttons to:
- Seleziona la lingua preferita.
- Imposta la data e l'ora correnti.
- Format the SD card (IMPORTANT): This prepares the card for use with the camera and deletes any existing data. Confirm 'Yes' when prompted.
3.5 PIR Sensor Test
In 'TEST' mode, you can test the Passive Infrared (PIR) sensors to ensure they are functioning correctly. Move your hand in front of the central and side PIR sensors. A blue indicator light will flash when motion is detected, confirming the sensors are active.
4. Istruzioni per l'uso
Understanding the camera's modes and features will help you capture the best footage.
4.1 Modalità foto e video
The camera supports 60MP still images and 4K Ultra HD videos. You can select from Photo, Video, or Photo+Video modes in the settings menu to suit your monitoring needs. The advanced H.264 video encoding ensures efficient storage and MP4 format compatibility.

Example of vivid details captured in 4K resolution by the camera.
4.2 Trigger Speed and Detection Range
Equipped with 3 PIR sensors, the camera offers a 120° wide detection range and an ultra-fast 0.1-second trigger speed. This ensures that moving targets entering the detection zone are captured quickly and efficiently.

Visual representation of the camera's rapid 0.1-second trigger speed.

Diagram illustrating the 120-degree wide detection range of the PIR sensors.
4.3 Visione notturna
The camera features 40pcs 850nm IR LEDs for clear night vision, allowing you to capture detailed images and videos in low-light conditions without disturbing wildlife.
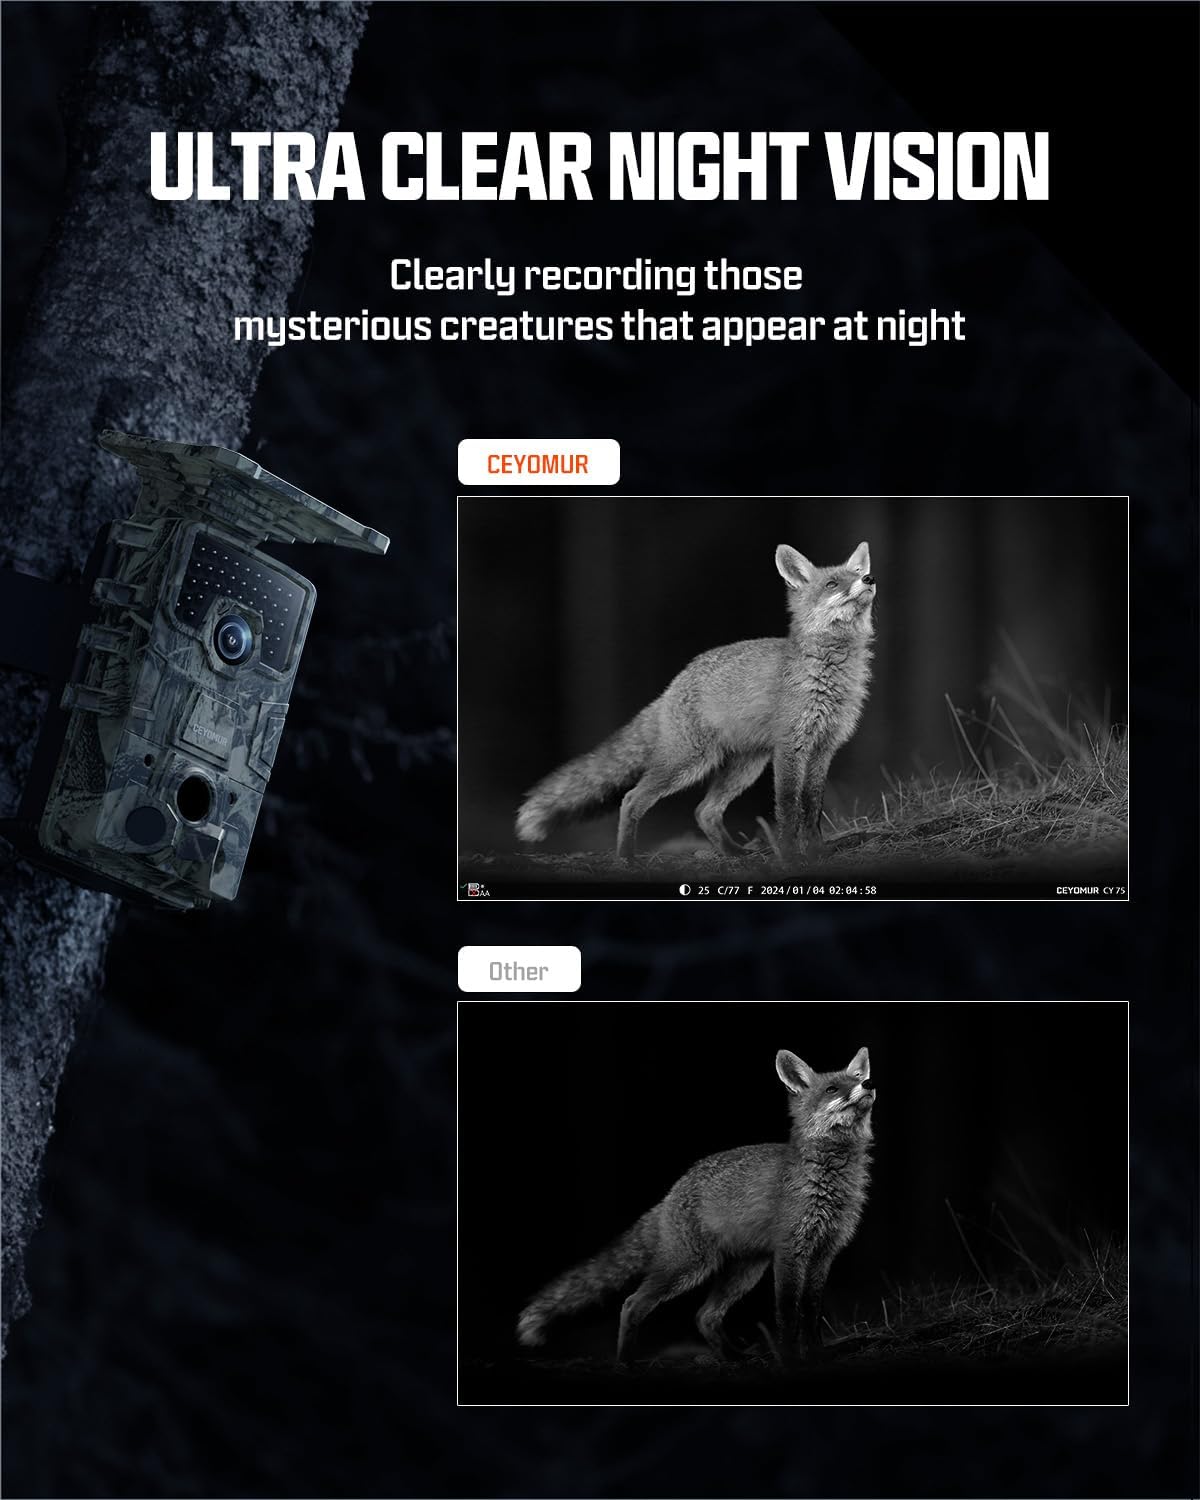
Comparison showing the clarity of night vision captured by the CEYOMUR camera.
4.4 Wi-Fi 6 Connectivity and App Usage
Utilize the built-in Wi-Fi 6 for fast pairing and connection with your smartphone via the free 'TrailCam Go' app. This allows you to preview videos, download files, and adjust settings without physically removing the camera. The Wi-Fi signal range is limited to approximately 33 feet (10 meters).

Step-by-step guide for connecting the camera to the 'TrailCam Go' app via Wi-Fi.
4.5 Solar Power and Dual Power Supply
The integrated solar panel and built-in 5200mAh lithium-ion battery provide continuous power, reducing the need for frequent battery changes. The solar panel is adjustable by approximately 5° to optimize charging efficiency based on sunlight conditions. For added reliability, the camera also supports 4 AA batteries as a backup power source.

Illustration of the camera's non-stop solar powered feature.
4.6 Montaggio e posizionamento
Use the included mounting strap to secure the camera to a tree or pole. Ensure the camera is positioned to capture the desired area, avoiding direct sunlight or strong artificial light sources that might interfere with sensor performance. The integrated design with the lens and screen on the same side aids in intuitive aiming.

Diagram highlighting key features including the adjustable solar panel and side SD card slot.
5. Manutenzione
Una corretta manutenzione garantisce la longevità e le prestazioni della tua fotocamera.
- Pulizia: Regularly wipe the lens, PIR sensors, and solar panel with a soft, dry cloth to remove dust, dirt, or moisture. Avoid abrasive cleaners.
- Cura della batteria: If using optional AA batteries, replace them when the battery indicator is low. For optimal performance, use high-quality alkaline or rechargeable AA batteries.
- Gestione della scheda SD: Eseguire periodicamente il backup dei dati importantitage from the SD card to a computer and format the card in the camera to maintain optimal recording performance.
- Magazzinaggio: When not in use for extended periods, store the camera in a cool, dry place, ideally with the built-in battery partially charged.
6. Risoluzione Dei Problemi
If you encounter issues with your CEYOMUR Trail Camera, refer to the following common problems and solutions:
| Problema | Possibile causa | Soluzione |
|---|---|---|
| Camera not triggering/missing events | Incorrect PIR sensitivity setting; Obstruction in front of sensors; Subject too far or moving too fast/slow. | Adjust PIR sensitivity in settings; Clear any obstructions; Ensure subject is within detection range and moving at an appropriate speed. |
| Scarsa qualità dell'immagine/video | Obiettivo sporco; Condizioni di scarsa illuminazione; Impostazioni di risoluzione errate. | Clean the lens; Ensure adequate lighting or proper night vision activation; Check and adjust photo/video resolution settings. |
| Problemi di connessione Wi-Fi | Out of Wi-Fi range; App not updated; Incorrect connection procedure. | Ensure you are within 33 feet (10 meters) of the camera; Update 'TrailCam Go' app; Follow the app connection steps carefully. |
| Durata breve della batteria | Insufficient solar charging; High frequency of triggers; Cold weather; Old/low-quality AA batteries. | Ensure solar panel is clean and exposed to direct sunlight; Reduce trigger frequency; Consider using fresh, high-quality AA batteries in cold conditions. |
| Errore della scheda SD | SD card not formatted; Corrupted card; Incompatible card. | Format the SD card in the camera; Try a different, high-quality SD card (Class 10 or higher recommended). |
7. Specifiche
Detailed technical specifications for the CEYOMUR 4K Solar Trail Camera:
| Caratteristica | Dettaglio |
|---|---|
| Modello | CY75 |
| Risoluzione di immagini fisse | Fino a 60 MP |
| Risoluzione video | 4K Ultra HD (H.264, MP4) |
| Trigger Speed | 0.1 secondi |
| Intervallo di rilevamento PIR | 120° wide detection, up to 65ft/20m |
| Visione notturna | 40pcs 850nm IR LEDs (Black and White) |
| Fonte di alimentazione | Built-in 5200mAh Lithium Battery, Solar Powered, Optional 4xAA Batteries |
| Connettività | Built-in Wi-Fi 6, Bluetooth |
| Magazzinaggio | Supporta scheda SD (32 GB inclusa) |
| Resistenza all'acqua | IP66 impermeabile |
| Display | Schermo LCD da 2 pollici |
| Dimensioni (L x P x A) | 5.6 x 4.2 x 3.7 pollici |
| Peso | 1.5 libbre |
8. Garanzia e supporto
CEYOMUR is committed to providing excellent customer support. If you encounter any difficulties or have questions regarding your camera, please do not hesitate to contact our professional service team. We are dedicated to providing timely and effective assistance to ensure a positive user experience.
For support, please refer to the contact information provided on the product packaging or the official CEYOMUR websito.