Introduzione
Thank you for choosing the LEMNOI 7-inch Digital Calendar Clock (Model SG9). This device is designed to assist individuals, particularly those with memory loss or dementia, by clearly displaying the time, date, and day of the week. It features multiple alarm and medication reminder functions, adjustable brightness, and can also serve as a digital photo frame. Please read this manual carefully to ensure proper setup and operation.
Contenuto della confezione
- LEMNOI 7-inch Digital Calendar Clock (SG9)
- Adattatore di alimentazione
- Manuale d'uso
- Supporto (per uso da tavolo)

Prodotto finitoview
The LEMNOI SG9 features a clear 7-inch HD display and intuitive controls. The front panel includes navigation buttons for easy menu interaction.

Impostare
1. Collegamento elettrico
- Connect the power adapter to the DC IN port on the back of the clock.
- Collega l'alimentatore a una presa elettrica standard.
- The clock will power on automatically.
Nota: The clock operates on AC power and does not use batteries for primary function. A built-in backup system saves settings during power outages.
2. Selezione iniziale della lingua
- Upon first power-on, the clock may display a language selection screen.
- Utilizzare il Up E Giù buttons to navigate through the language options (English, French, German, Italian, Spanish).
- Premere il tasto OK pulsante per confermare la selezione.

3. Impostazione di ora e data
- Premere il tasto Menù/Invio pulsante per accedere al menu principale.
- Navigate to "Date & Time" using the Up/Giù pulsanti e premere OK.
- Adjust the year, month, day, hour, and minute using the Up/Giù pulsanti. Utilizzo Sinistra/Giusto per spostarsi tra i campi.
- Selezionare il formato preferito, ovvero 12 o 24 ore.
- Premere OK per salvare le modifiche e Menù/Invio per uscire.
Istruzioni per l'uso
1. Modalità di visualizzazione
The clock offers 6 distinct display modes, including a unique floral surface mode that changes weekly. You can cycle through these modes by pressing the Sinistra or Giusto buttons from the main display.

2. Brightness Adjustment and Auto-Dimming
The clock features 5 levels of adjustable brightness and an automatic dimming function to optimize visibility day and night.
- Luminosità manuale: Access the "Brightness" setting in the menu to select a level from 1 to 5.
- Oscuramento automatico: Enable "Auto Dimming" in the settings. You can customize the start and end times for dimming, and set the desired dimming brightness level (e.g., 0% for a completely dark screen at night).


3. Impostazioni di allarme
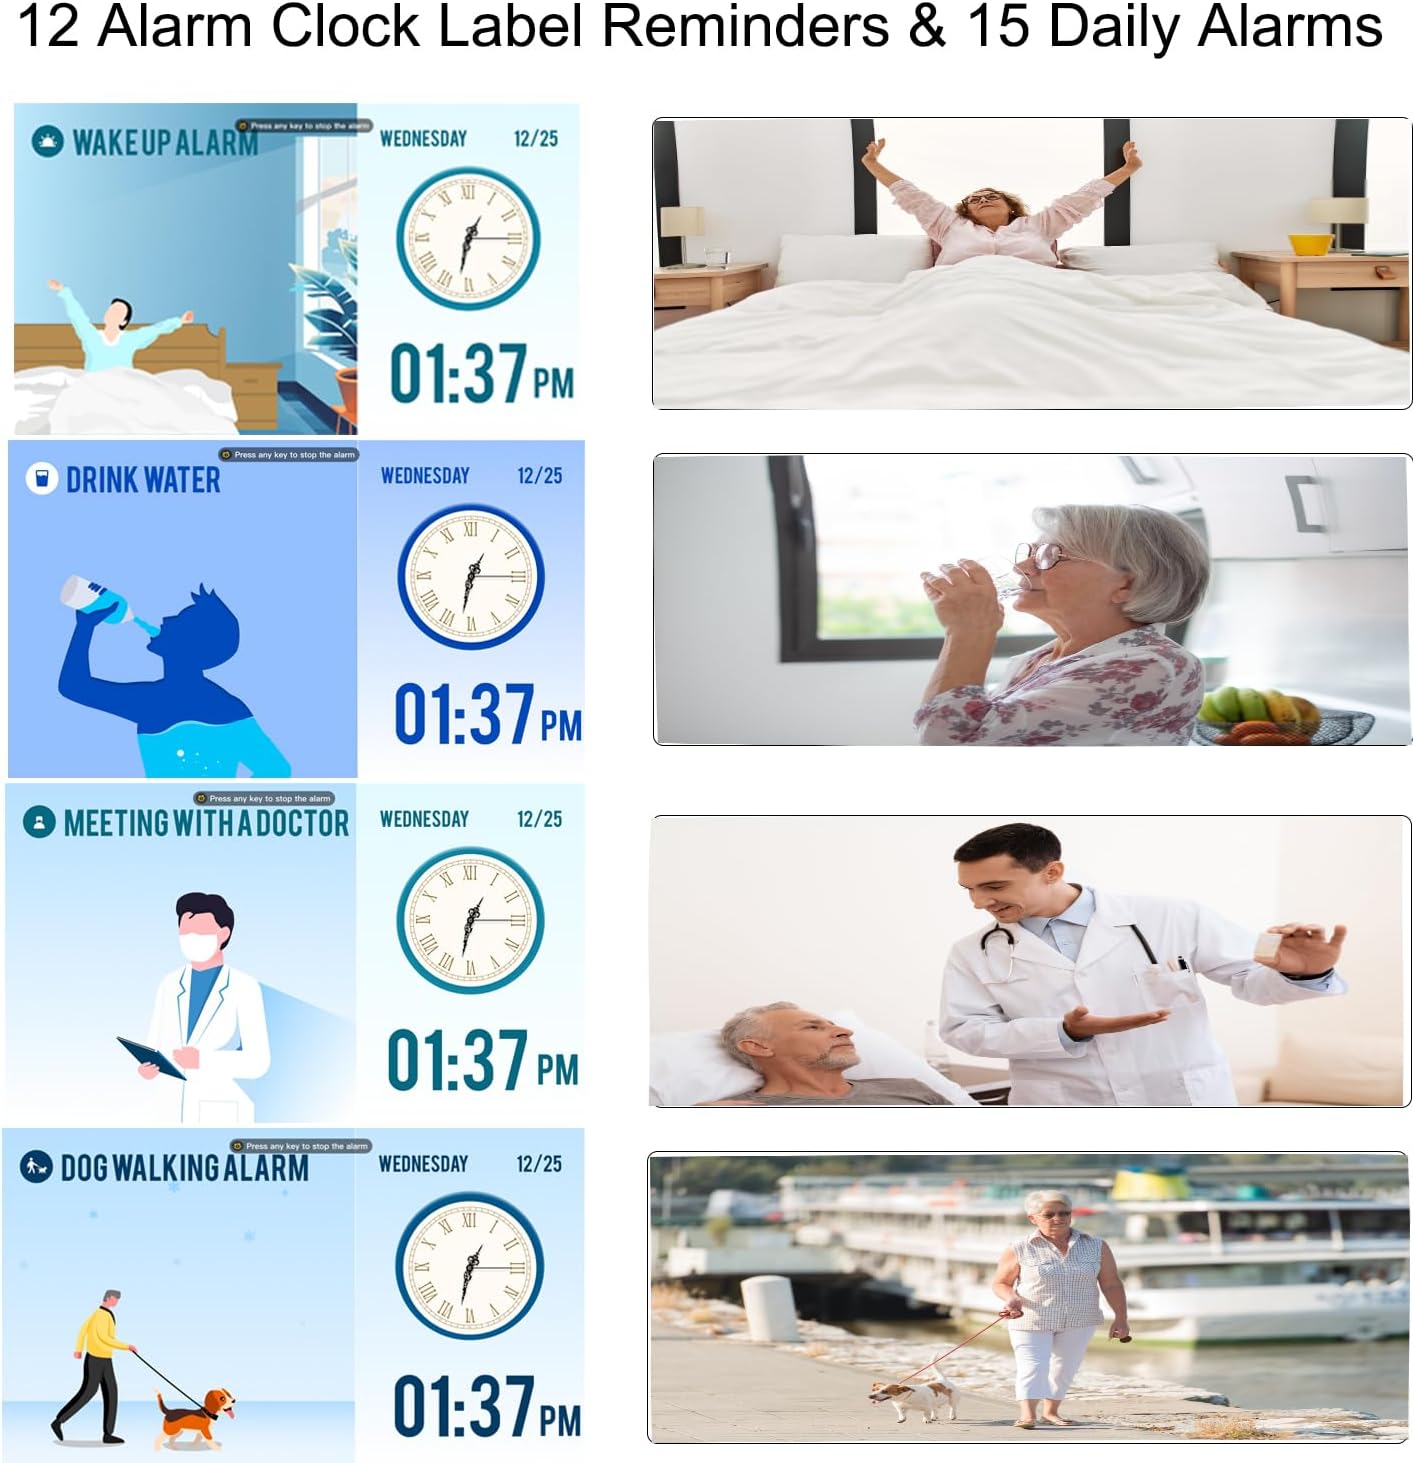
The clock supports up to 15 daily alarms and 15 medication reminders, each with customizable labels and frequencies.
- Impostazione di un allarme:
- From the main menu, select "Alarm" or "Take Medicine".
- Choose an alarm slot (e.g., Alarm 1, Medication 1).
- Set the desired time (hour and minute).
- Select the frequency: Daily, Weekdays (Mon-Fri), Weekends (Sat-Sun), or Specific Dates.
- Choose an alarm label from the 12 available options (e.g., Wake Up, Drink Water, Meeting with Doctor, Dog Walking). These labels are displayed with vivid color images for easy comprehension.
- Select an alarm sound.
- Premere OK per salvare.
- Promemoria sui farmaci: Specifically designed for morning, afternoon, and evening medication alerts.

4. Ora legale (DST)
The clock supports automatic adjustment for Daylight Saving Time. Ensure this feature is enabled in the "Date & Time" settings for accurate time display.

5. Using as a Digital Photo Frame
The clock can function as a high-resolution digital photo and video frame. Insert a USB flash drive (not included) into the USB port on the side of the clock. Navigate to the "Photo Frame" option in the menu to play your media.

Manutenzione
- Pulizia: Use a soft, dry cloth to clean the screen and body of the clock. Do not use liquid cleaners or abrasive materials.
- Posizionamento: Place the clock on a stable, flat surface or mount it securely on a wall. Avoid direct sunlight, high temperatures, or humid environments.
- Energia: Always use the provided power adapter. Disconnect power during thunderstorms or when not in use for extended periods.

Risoluzione dei problemi
| Problema | Possibile causa | Soluzione |
|---|---|---|
| L'orologio non si accende. | Nessuna connessione di alimentazione. | Ensure the power adapter is securely connected to the clock and a working electrical outlet. |
| Il display è troppo scuro o troppo luminoso. | Brightness settings are incorrect or auto-dimming is active. | Adjust manual brightness in settings or check auto-dimming schedule and brightness level. |
| Gli allarmi non suonano. | Alarm is disabled, volume is too low, or incorrect time/frequency set. | Verify alarm settings, ensure volume is audible, and check alarm time/frequency. |
| L'ora è errata dopo lo spegnimentotage. | Backup battery may be depleted or not functioning. | The clock has a backup system for settings. If time is incorrect, manually reset the time and date. |
| Impossibile riprodurre foto/video. | USB drive not inserted correctly or unsupported file formato. | Ensure USB drive is fully inserted. Check that media files are in supported formats (e.g., JPEG for photos, common video formats). |
Specifiche
| Caratteristica | Dettaglio |
|---|---|
| Marca | LEMNOI |
| Numero di modello | SG9 |
| Tipo di visualizzazione | Digitale |
| Dimensioni dello schermo | 7 pollici |
| Risoluzione | 1024 x 600 pixel |
| Dimensioni del prodotto (L x A) | Dimensioni: 19 cm x 16 cm |
| Peso dell'articolo | 290 grammi |
| Materiale | Acrilonitrile Butadiene Stirene (ABS) |
| Fonte di alimentazione | Cavo elettrico |
| Caratteristiche speciali | Auto-dimmable, Adjustable Brightness (5 levels), Temperature Indicator, 6 Display Modes, 15 Daily Alarms, 15 Medication Reminders, 12 Alarm Labels, Digital Photo Frame Function, Daylight Saving Time Auto-Adjust, Multi-language Support |
| Tipo di montaggio | Da tavolo |
| Required Battery (Backup) | 1 CR123A (not included for primary operation) |
Garanzia e supporto
For warranty information or technical support, please refer to the contact details provided on the product packaging or the official LEMNOI websito. Conservare la ricevuta d'acquisto come prova d'acquisto per eventuali reclami in garanzia.