1. Importanti istruzioni di sicurezza
Leggere attentamente tutte le istruzioni prima di utilizzare questo apparecchio. Il mancato rispetto di queste istruzioni può causare scosse elettriche, incendi o gravi lesioni personali.
- Non toccare le superfici calde. Utilizzare maniglie o manopole.
- Per proteggersi dalle scosse elettriche, non immergere il cavo, le spine o l'apparecchio in acqua o altri liquidi.
- È necessaria un'attenta supervisione quando un elettrodomestico viene utilizzato da bambini o nelle loro vicinanze.
- Scollegare dalla presa quando non in uso e prima di pulire. Lasciare raffreddare prima di mettere o togliere parti.
- Non utilizzare alcun apparecchio con un cavo o una spina danneggiati oppure dopo che l'apparecchio stesso non funziona correttamente o è stato danneggiato in qualsiasi modo.
- L'uso di accessori non consigliati dal produttore dell'apparecchio può causare lesioni.
- Non utilizzare all'aperto.
- Non lasciare che il cavo penda dal bordo del tavolo o del bancone o che tocchi superfici calde.
- Non posizionare sopra o vicino a un fornello a gas o elettrico caldo, oppure in un forno caldo.
- Prestare la massima attenzione quando si sposta un apparecchio contenente olio bollente o altri liquidi bollenti.
- Collegare sempre prima la spina all'apparecchio, quindi collegare il cavo alla presa a muro. Per scollegarlo, posizionare un qualsiasi interruttore su "off", quindi rimuovere la spina dalla presa a muro.
- Non utilizzare l'apparecchio per scopi diversi da quelli previsti.
- Alimenti di grandi dimensioni o utensili in metallo non devono essere inseriti in un tostapane in quanto potrebbero creare un incendio o rischio di scossa elettrica.
- Può verificarsi un incendio se il forno è coperto o viene a contatto con materiale infiammabile, comprese tende, tendaggi, pareti e simili, durante il funzionamento.
- Quando il forno non è in uso, non collocare nel forno materiali diversi dagli accessori consigliati dal produttore.
- Non mettere nel forno nessuno dei seguenti materiali: carta, cartone, plastica o materiali simili.
- Non coprire il vassoio raccogli briciole o qualsiasi parte del forno con un foglio di metallo. Ciò causerà il surriscaldamento del forno.
2. Prodotto finitoview
This 22L tabletop electric mini oven is designed for household baking and toasting. It features adjustable temperature control, a 120-minute timer, and a three-layer baking position for versatile cooking.

Figura 1: Fronte view of the 22L Tabletop Electric Mini Oven with food cooking inside.

Figure 2: Dimensions of the oven: 421mm (width), 252mm (depth), 273mm (height).
3. Impostazione
3.1 Disimballaggio
- Carefully remove the oven and all packaging materials from the box.
- Remove any protective films or stickers from the oven surfaces.
- Verificare eventuali danni durante il trasporto. In caso di danni, non utilizzare il prodotto e contattare l'assistenza clienti.
3.2 Posizionamento
- Posizionare il forno su una superficie stabile, piana e resistente al calore.
- Assicurarsi che ci sia una ventilazione adeguata attorno al forno (almeno 10 cm di spazio libero su tutti i lati).
- Non posizionare il forno vicino a materiali infiammabili come tende o pareti.
- Assicurarsi che il cavo di alimentazione non sia ostruito o schiacciato.
3.3 Prima del primo utilizzo
- Wash the baking tray, wire rack, and crumb tray in warm, soapy water. Rinse and dry thoroughly.
- Pulire l'interno e l'esterno del forno con adamp stoffa.
- To eliminate any manufacturing odors, operate the oven empty for approximately 15 minutes at 200°C (400°F). Ensure the area is well-ventilated during this process.
4. Istruzioni per l'uso
4.1 controlli oltreview
The oven features three mechanical control knobs:
- Manopola superiore: Temperature Control (0-250°C)
- Manopola centrale: Function Selector (Controls upper/lower heating elements)
- Manopola inferiore: Timer (0-120 minuti)

Figure 3: Temperature control knob, adjustable from 70°C to 250°C.

Figure 4: Timer knob, adjustable from 0 to 120 minutes.
4.2 Preriscaldamento del forno
- Place the wire rack or baking tray in the desired position.
- Ruotare la manopola di controllo della temperatura fino alla temperatura desiderata.
- Turn the Timer knob to the desired preheating time (e.g., 10-15 minutes). The power indicator light will illuminate.
- Once the preheating time has elapsed, the oven is ready for use.
4.3 Baking and Roasting
This oven offers three-layer baking positions and independent temperature control for upper and lower heating tubes.

Figure 5: The 22L capacity oven features three distinct baking positions for versatile cooking.
- Preheat the oven as described above.
- Carefully place your food on the baking tray or wire rack into the desired baking position. Use oven mitts.
- Select the appropriate temperature using the Temperature Control knob (0-250°C).
- Use the Function Selector knob to choose between upper heating, lower heating, or simultaneous upper and lower heating, depending on your recipe's requirements. This allows for precise control over browning and cooking.
- Set the cooking time using the Timer knob (0-120 minutes). The oven will automatically shut off and ring a bell when the timer expires.
- Monitor food through the wide view finestra.

Figure 6: The wide viewing window allows for easy monitoring of food changes during cooking.
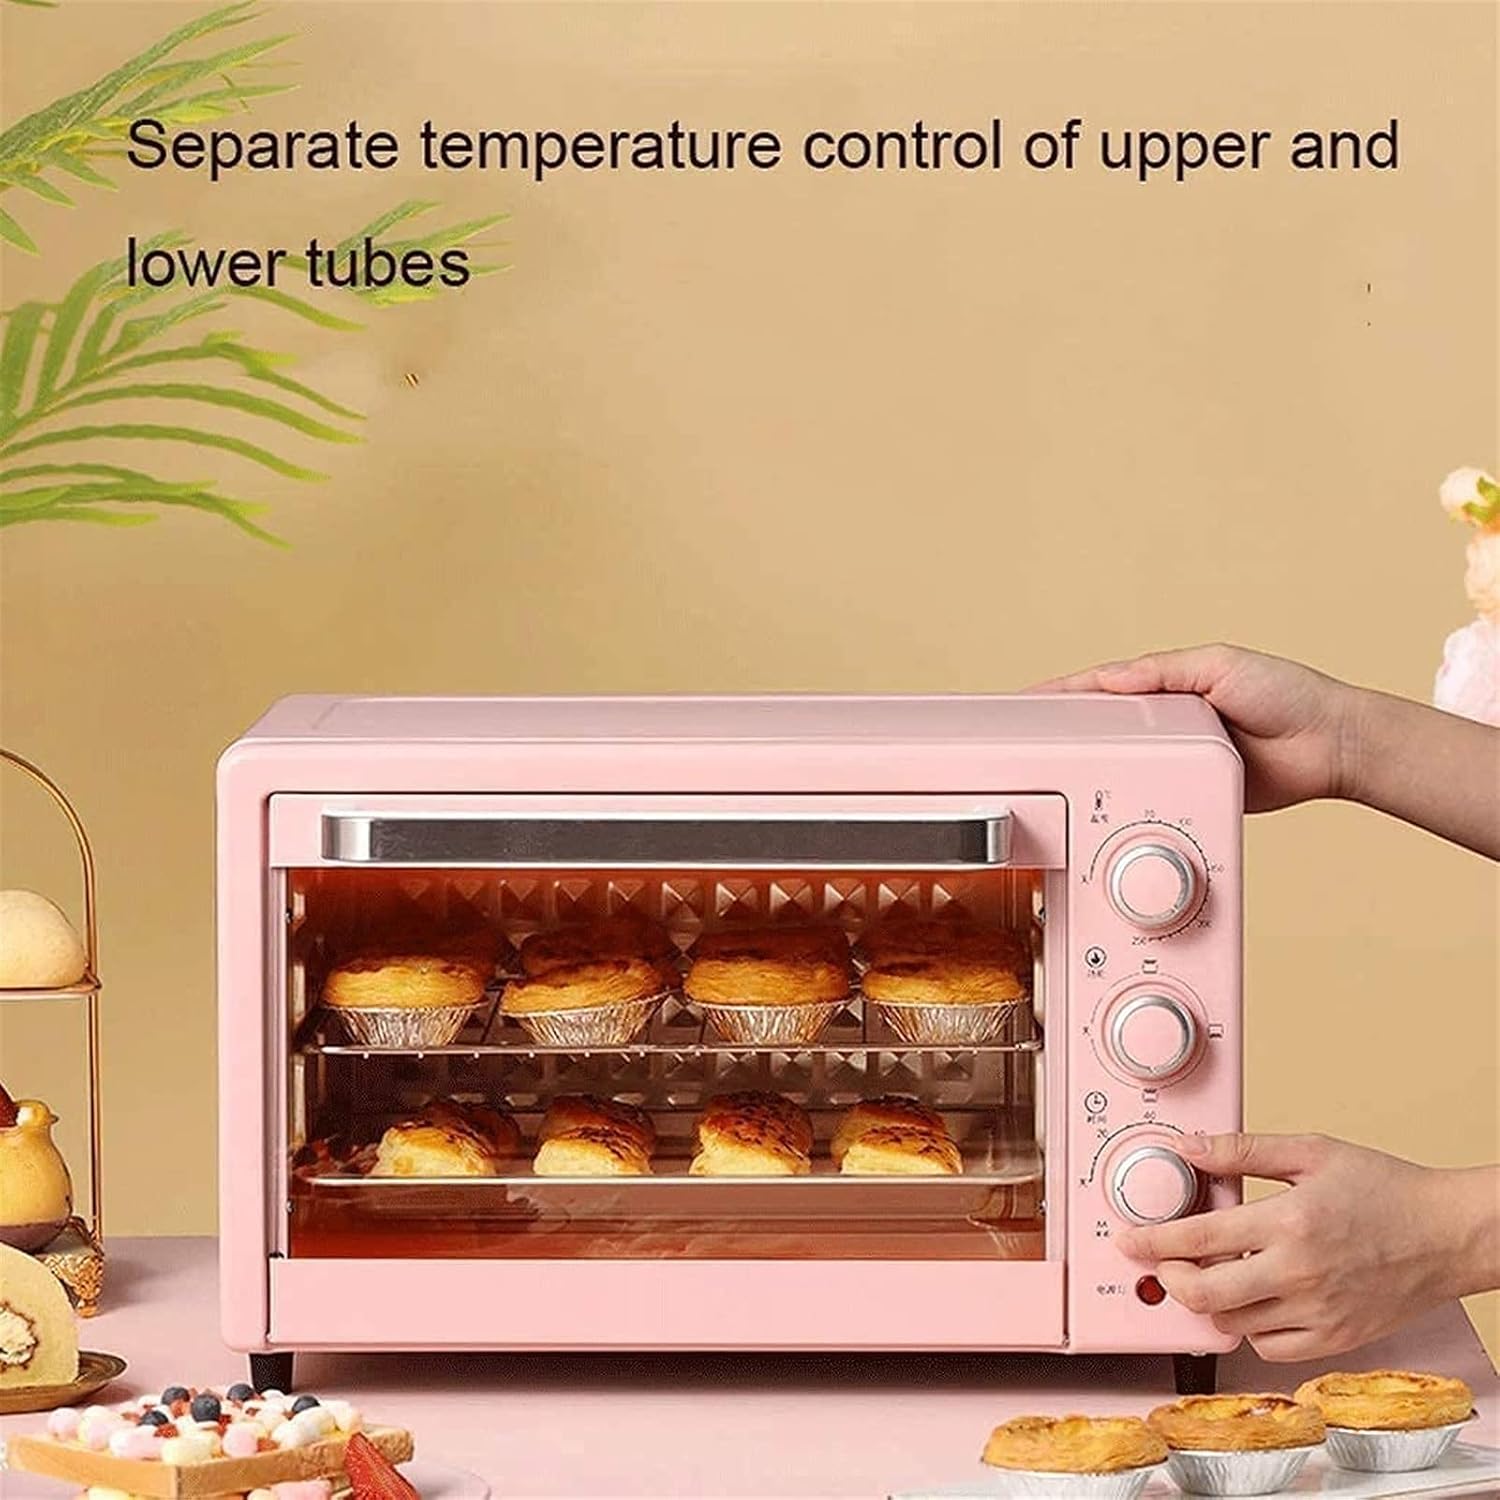
Figure 7: The oven features separate temperature control for upper and lower heating tubes, enabling precise cooking.
5. Manutenzione e pulizia
5.1 Pulizia generale
- Scollegare sempre il forno dalla presa di corrente e lasciarlo raffreddare completamente prima di pulirlo.
- Non immergere il corpo del forno, il cavo o la spina in acqua o altri liquidi.
- Pulisci l'esterno con un pannoamp panno e detersivo delicato. Non utilizzare detergenti abrasivi o spugne abrasive.
5.2 Cleaning Interior and Accessories
- Remove the baking tray, wire rack, and crumb tray. Wash them in warm, soapy water. For stubborn stains, soak them before cleaning.
- Le pareti interne possono essere pulite con un pannoamp cloth and mild detergent. Avoid touching the heating elements.
- Assicurarsi che tutti i componenti siano completamente asciutti prima di rimontare e riporre il forno.

Figure 8: The oven door features a three-layer safety explosion-proof glass for enhanced durability and safety, including a transparent layer, tempered glass layer, and oil-proof cleaning layer.
6. Risoluzione Dei Problemi
Se riscontri problemi con il tuo forno, consulta i seguenti problemi comuni e le relative soluzioni:
- Il forno non si accende:
- Assicurarsi che il cavo di alimentazione sia collegato saldamente a una presa elettrica funzionante.
- Check if the timer knob is set to a cooking duration. The oven will not operate if the timer is at "OFF" or "0".
- Verificare che l'interruttore automatico non sia scattato.
- Il cibo non cuoce in modo uniforme:
- Ensure the oven is preheated to the correct temperature.
- Check that the correct heating function (upper, lower, or both) is selected for your recipe.
- Rotate food halfway through cooking for more even results.
- Ensure there is adequate space around the food for heat circulation.
- Fumo o odore insolito durante il primo utilizzo:
- This is normal during the initial use as manufacturing oils burn off. Ensure good ventilation. If it persists after the first few uses, discontinue use and contact support.
7. Specifiche
| Caratteristica | Specificazione |
|---|---|
| Modello | Mini Forno 22L |
| Capacità | 22 litri |
| Volume nominaletage | 110V-240V/50Hz |
| Potenza nominale | 1300W |
| Intervallo di temperatura | 0-250°C (Controllable) |
| Timer per la cottura | 0-120 Minutes with Bell Ring and Auto Shut Off |
| Heating Tube Material | Stainless Steel (4 tubes) |
| Materiale di rivestimento | Lamiera zincata |
| Metodo di controllo | Manopole meccaniche |
| Dimensioni (L×P×A) | 421 mm × 252 mm × 273 mm |
| Stile della porta | Porta a discesa |
8. Garanzia e supporto
8.1 Garanzia limitata
This product comes with a limited warranty against defects in materials and workmanship. Please refer to the warranty card included with your purchase or contact the retailer for specific warranty terms and conditions. Keep your proof of purchase for warranty claims.
8.2 Assistenza clienti
For technical assistance, troubleshooting, or parts replacement, please contact the retailer where you purchased the product. If purchased directly from the manufacturer, refer to the contact information provided in your packaging or on their official websito.