1. Introduzione
This manual provides essential information for the safe and effective operation of your GOXAWEE 3-in-1 Portable Inverter Welder, model MIG-250. This versatile machine supports MMA (Manual Metal Arc), MIG (Gas Metal Arc), and LIFT TIG (Tungsten Inert Gas) welding processes, making it suitable for various metal materials including copper, iron sheets, steel pipes, galvanized pipes, and stainless steel.
The welder is designed for both professional and home use, accommodating welding rods from 1.6 mm to 3.2 mm.
2. Precauzioni di sicurezza
WARNING: Welding can be dangerous. Always follow safety guidelines to prevent injury or damage.
- Always wear appropriate Personal Protective Equipment (PPE) when operating the welding machine. This includes a welding helmet with a suitable shade lens, welding gloves, protective clothing, and safety shoes.
- Assicurarsi che l'area di saldatura sia ben ventilata per evitare di inalare i fumi.
- To ensure product longevity and prevent overheating, allow the machine to rest for 10-15 minutes after 20-30 minutes of continuous operation. Regularly check the machine's performance.
- Non utilizzare la saldatrice in damp o in condizioni di bagnato.
- Tenere i bambini e il personale non autorizzato lontano dall'area di saldatura.
- Assicurare la corretta messa a terra della saldatrice.
3. Prodotto finitoview e componenti
3.1 Caratteristiche principali
- Three-in-One Welding Modes: Supports MMA, MIG (Gasless Flux-cored), and LIFT TIG welding.
- Synergic and Manual Control: MIG mode offers automatic wire feed speed and voltage adjustment based on wire diameter, alongside manual control for experienced users.
- Pannello di controllo intuitivo: Features a clear digital current display and voltage adjustment knob for simple operation.
- Tecnologia avanzata dell'inverter IGBT: Provides stable output current, smooth welding arc, and protection against overload or short circuit.
- Dissipazione efficiente del calore: Equipped with a high-power cooling fan and built-in protection against overcurrent, overvoltage, e surriscaldamento.
- Design portatile: Weighs approximately 4.6 kg (10 lbs) with a compact body and carrying handle for easy transport.
3.2 Componenti inclusi
The following items are included with your GOXAWEE MIG-250 Welder:
- 1 x MIG Welding Machine (MIG-250)
- 1 x 175mm MIG Welding Torch
- 1 x 164mm Electrode Holder (MMA Clamp)
- 1 x 118mm Earth Clamp
- 1 x Pair of Welding Gloves
- 1 x 0.8mm / 0.5kg Flux-cored Welding Wire
- 1 maschera per saldatura
- 1 x Welding Mask Lens
- 2 x Brushes (e.g., wire brush, chipping hammer)
- 5 x Conductive Nozzles (3 x 0.8mm, 2 x 1.0mm)
- 5 x Electrodes (various sizes)
Note: A TIG argon arc welding torch is required for LIFT TIG welding and is not included in this package. It must be purchased separately.

Image 1: GOXAWEE MIG-250 Welder showing overall dimensions and a visual representation of the included accessories such as the MIG torch, earth clamp, electrode holder, welding wire, gloves, mask, and various nozzles and electrodes.
4. Specifiche
| Produttore | GOXAWEE |
| Modello | MIG-250 |
| Fonte di alimentazione | Elettrico |
| Ingresso volumetage | 110V |
| Intervallo di corrente in ingresso | 20A - 250A |
| Capacità di ingresso nominale | 6.6 KVA |
| Welding Methods | MIG (Flux-cored), LIFT TIG, MMA (ARC) |
| Diametro del filo di saldatura applicabile | 0.8 mm - 1.0 mm (MIG) |
| Dimensioni dell'elettrodo applicabili | 1.6 mm - 3.2 mm (MMA) |
| Maximum Welding Thickness | 6 millimetri |
| Dimensioni del prodotto (L x P x A) | Dimensioni: 36 cm x 16 cm x 18.5 cm |
| Peso del prodotto | 4.6 kg (circa 10 libbre) |
| Batterie richieste | NO |
5. Impostazione
Before beginning any welding operation, ensure the machine is placed on a stable, level surface in a well-ventilated area, away from flammable materials.
5.1 Ispezione iniziale
- Disimballare tutti i componenti e verificarli nell'elenco "Componenti inclusi".
- Inspect the welder and all accessories for any signs of damage during shipping. Do not use if damaged.
- Ensure the power cord and plug are intact.
5.2 Connecting the Earth Clamp
Collegare la terra clamp cable to the appropriate terminal on the front panel of the welder. Securely attach the earth clamp to the workpiece or welding table, ensuring good electrical contact. The workpiece must be clean and free of rust, paint, or grease.
5.3 Collegamento di alimentazione
Plug the welder's power cord into a grounded 110V power outlet. Ensure the power supply meets the welder's requirements (110V, 20A-250A capacity).
5.4 Wire Feed Mechanism (MIG Mode)

Image 2: Internal structure of the welder illustrating the wire feed mechanism, including the spool lock, spring, spool, and spool spacer, designed for easy adjustment of wire feeding speed.
- Open the side panel of the welder to access the wire feed compartment.
- Place the 0.8mm / 0.5kg flux-cored welding wire spool onto the spool holder. Ensure it is seated correctly and secured with the spool lock and spacer.
- Far passare il filo di saldatura attraverso il tubo guida e nel meccanismo del rullo di azionamento.
- Close the drive roller tension arm and adjust the tension according to the wire diameter. The tension should be firm enough to feed the wire without slipping, but not so tight as to deform the wire.
- Connect the MIG welding torch to the appropriate connector on the front panel.
- With the welder powered on (but not in welding mode), press the wire feed button on the control panel or torch to feed the wire through the MIG torch liner and out of the nozzle. Trim any excess wire.
6. Istruzioni per l'uso

Image 3: Visual representation of the three welding modes: MMA (stick welding), MIG Gasless (flux-cored welding), and LIFT TIG, demonstrating the versatility of the GOXAWEE MIG-250 welder.
6.1 Pannello di controllo Sopraview
The front panel features a digital display for current, a voltage adjustment knob, and mode selection switches. Familiarize yourself with these controls before operation.

Image 4: The GOXAWEE MIG-250 welder's control panel with digital display and adjustment knobs, highlighting features like IGBT technology, high-speed cooling fan, and various protections.
6.2 Saldatura MMA (ARCO)
- Collegare il portaelettrodo al terminale positivo (+) e al morsetto di terraamp to the negative (-) terminal (or vice-versa, depending on electrode type).
- Selezionare la modalità MMA sul pannello di controllo.
- Insert an appropriate electrode (1.6mm - 3.2mm) into the electrode holder.
- Regolare la corrente di saldatura (Amperage) using the control knob based on the electrode type and thickness of the material.
- Strike an arc by lightly touching and quickly lifting the electrode from the workpiece. Maintain a consistent arc length and travel speed.
6.3 MIG (Flux-cored) Welding

Immagine 5: Un example of MIG Fluxcore welding in progress, suitable for automotive bodywork and general fabrication, demonstrating the machine's capability for spot welding.
- Ensure the flux-cored wire is correctly loaded as per Section 5.4.
- Connect the MIG torch to the appropriate terminal and the earth clamp al pezzo.
- Select MIG mode on the control panel.
- Choose between Synergic Control (automatic adjustment of wire feed speed and voltage based on wire diameter) or Manual Control (adjust current and voltage independently).
- Regola la corrente e il voltage settings according to the material thickness and wire type.
- Press the trigger on the MIG torch to start welding. Maintain a consistent torch angle and travel speed.
6.4 Saldatura TIG LIFT
Note: A separate TIG torch and argon gas cylinder are required for LIFT TIG welding.
- Collegare la torcia TIG al terminale negativo (-) e al morsetto di terraamp al terminale positivo (+).
- Connect the argon gas hose from the regulator to the TIG torch.
- Select LIFT TIG mode on the control panel.
- Regolare la corrente di saldatura (Amperage) for the material being welded.
- Initiate the arc by gently touching the tungsten electrode to the workpiece and then lifting it slightly. The arc will start without high-frequency interference.
- Mantenere una lunghezza dell'arco corta e alimentare manualmente la bacchetta di riempimento, se necessario.
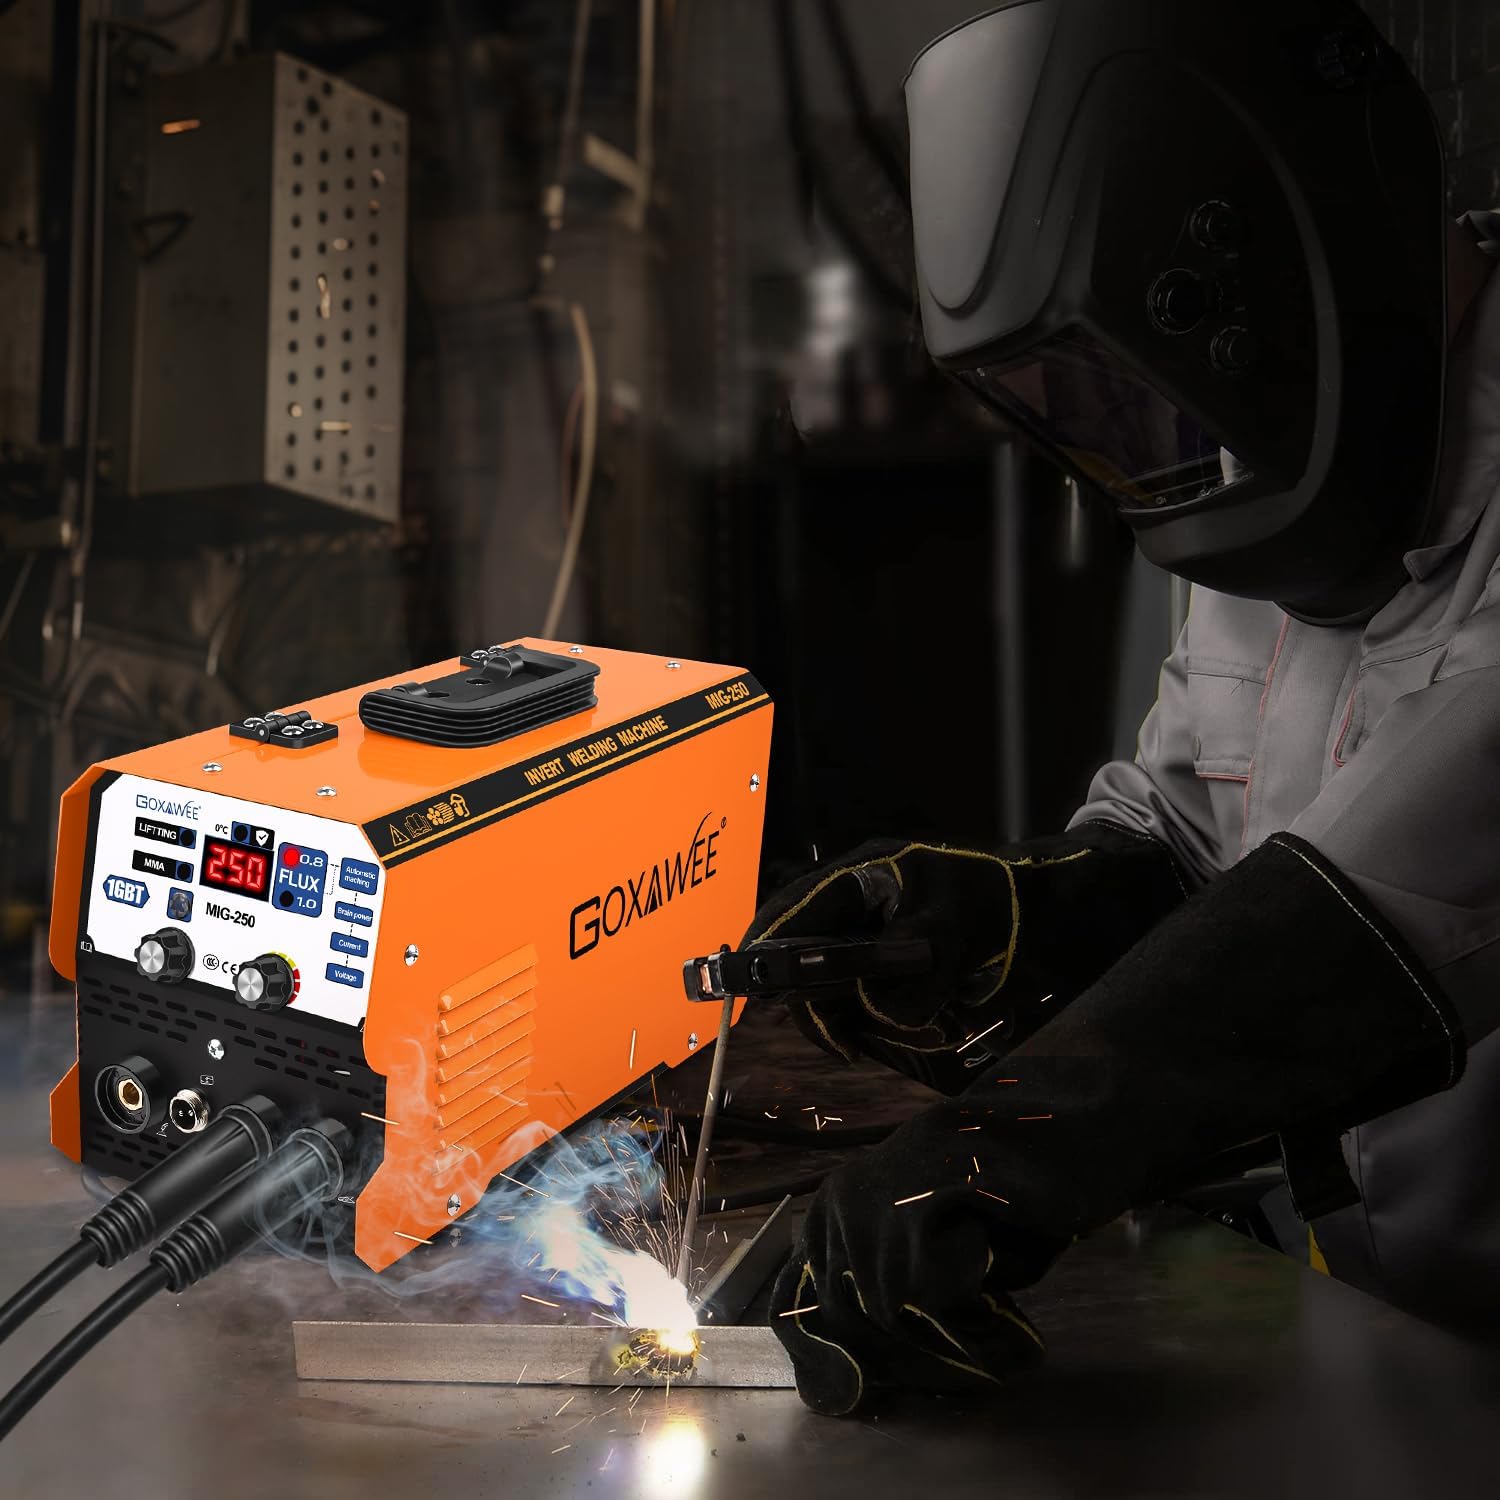
Image 6: A welder using the GOXAWEE MIG-250 machine, demonstrating its application in a typical welding environment.
7. Manutenzione
Una manutenzione regolare garantisce la longevità e le prestazioni ottimali della vostra saldatrice.
- Pulizia: Periodically clean the exterior of the machine with a dry, soft cloth. Use compressed air to blow out dust and debris from the cooling vents. Ensure the machine is unplugged before cleaning.
- Ispezione di torcia e cavi: Regularly inspect the welding torch, electrode holder, earth clamp, and all cables for wear, cuts, or damage. Replace damaged components immediately.
- Wire Feed Mechanism (MIG): Clean the drive rollers and wire guide tubes to prevent wire feeding issues. Check the tension of the drive rollers.
- Ugello e punta di contatto (MIG): Clean or replace the MIG nozzle and contact tip as needed to ensure proper wire feeding and gas flow (if using gas).
- Portaelettrodo (MMA): Ensure the electrode holder jaws are clean and provide good electrical contact.
- Magazzinaggio: Quando non viene utilizzata, conservare la saldatrice in un ambiente asciutto e pulito.
8. Risoluzione Dei Problemi
Questa sezione affronta i problemi più comuni che potresti riscontrare. Per problemi non elencati qui, contatta l'assistenza clienti.
| Problema | Possibile causa | Soluzione |
|---|---|---|
| La saldatrice non si accende. | No power supply; faulty power cord/plug; internal fuse blown. | Check power outlet and circuit breaker. Inspect power cord. Contact customer support if fuse is suspected. |
| No arc in MMA/TIG mode. | Poor earth connection; incorrect current setting; faulty electrode/tungsten. | Garantire terra clamp has good contact. Adjust current. Replace electrode/tungsten. |
| Wire feeding issues in MIG mode. | Incorrect drive roller tension; clogged liner; wrong contact tip size; wire tangled. | Regolare la tensione del rullo di guida. Pulire o sostituire il rivestimento. Utilizzare la punta di contatto corretta. Districare la bobina di filo. |
| La macchina si surriscalda e si spegne. | Exceeded duty cycle; blocked cooling vents; prolonged continuous use. | Allow machine to cool down. Clear cooling vents. Adhere to recommended rest periods (10-15 min after 20-30 min use). |
| Scarsa qualità della saldatura (ad esempio, porosità, schizzi). | Impostazioni errate (corrente/volumetage/wire speed); dirty workpiece; improper technique. | Adjust settings. Clean workpiece thoroughly. Review tecnica di saldatura. |
9. Garanzia e supporto
If you have any questions or require assistance with your GOXAWEE MIG-250 Welder, please do not hesitate to contact our customer service team. We are committed to providing support and will respond to your inquiries within 24 hours to offer a solution.
Per i termini e le condizioni di garanzia specifici, fare riferimento alla documentazione di acquisto.
Informazioni sui contatti:
- (Specific contact details such as email or phone number would be listed here if available, but are not provided in the source data.)
- For general inquiries, please visit the official GOXAWEE store on Amazon: GOXAWEE Amazon Store