Introduzione
Thank you for choosing the ELYONA 2 Pack Hammered Pendant Lights. These industrial metal dome hanging lamps feature a unique hammered surface and solid wood accents, designed to enhance the aesthetic of various spaces such as kitchen islands, bars, farmhouses, dining rooms, bedrooms, and hallways. This manual provides detailed instructions for safe installation, operation, and maintenance to ensure optimal performance and longevity of your lighting fixtures.

Image: ELYONA 2 Pack Hammered Pendant Lights, showcasing la loro progettazione e applicazione.
Informazioni sulla sicurezza
Please read all instructions carefully before installation and retain this manual for future reference. Failure to follow these instructions may result in electric shock, fire, or other injuries.
- Always disconnect power at the main circuit breaker before installing, cleaning, or servicing the fixture.
- Tutti i collegamenti elettrici devono essere conformi ai codici locali, alle ordinanze e al Codice elettrico nazionale (NEC).
- In caso di dubbi sulla procedura di installazione, consultare un elettricista qualificato.
- Non superare il limite massimo di wattage specificato per la lampadina (40W).
- Assicurarsi che tutti i collegamenti siano sicuri e adeguatamente isolati.
- Do not install in wet locations. This fixture is designed for indoor use only.
- Handle the hammered metal shade with care to avoid scratches or damage.
Contenuto della confezione
Prima di iniziare l'installazione, verificare che tutti i componenti siano presenti e integri.
- Pendant Light Fixture (2 units)
- Mounting Hardware (including ceiling canopy, mounting plate, screws, wire nuts)
- Manuale di istruzioni
Configurazione e installazione
Lista di controllo pre-installazione
- Assicurarsi che l'alimentazione sia disattivata tramite l'interruttore automatico.
- Raccogli gli strumenti necessari: cacciavite, spelafili, nastro isolante, scala.
- Confirm the ceiling junction box is securely mounted and capable of supporting the fixture's weight.
Fasi di installazione
- Adjusting Cord Length:
The hanging height of the pendant light is adjustable up to a maximum of 57 inches. To adjust the cord length, loosen the flat plastic screw on the ceiling canopy. Pull the cord through the plastic component to achieve the desired length. Once adjusted, tighten the flat plastic screw to secure the cord. Ensure the cord is threaded properly through the plastic component to prevent slippage.
Video: Demonstrates how to adjust the length of the pendant light cord by loosening and tightening the flat plastic screw on the canopy.

Image: Product dimensions and adjustable hanging height details.
- Collegamenti elettrici:
Connect the fixture's wires to the corresponding wires in the junction box using wire nuts. Connect the black wire from the fixture to the black (live) wire from the junction box. Connect the white wire from the fixture to the white (neutral) wire from the junction box. Connect the bare copper ground wire from the fixture to the green or bare copper ground wire from the junction box. Ensure all connections are secure.
- Montaggio dell'apparecchio:
Attach the mounting plate to the junction box using the provided screws. Carefully tuck the wires into the junction box. Align the ceiling canopy with the mounting plate and secure it with the decorative nuts or screws. Ensure the fixture is firmly attached to the ceiling.
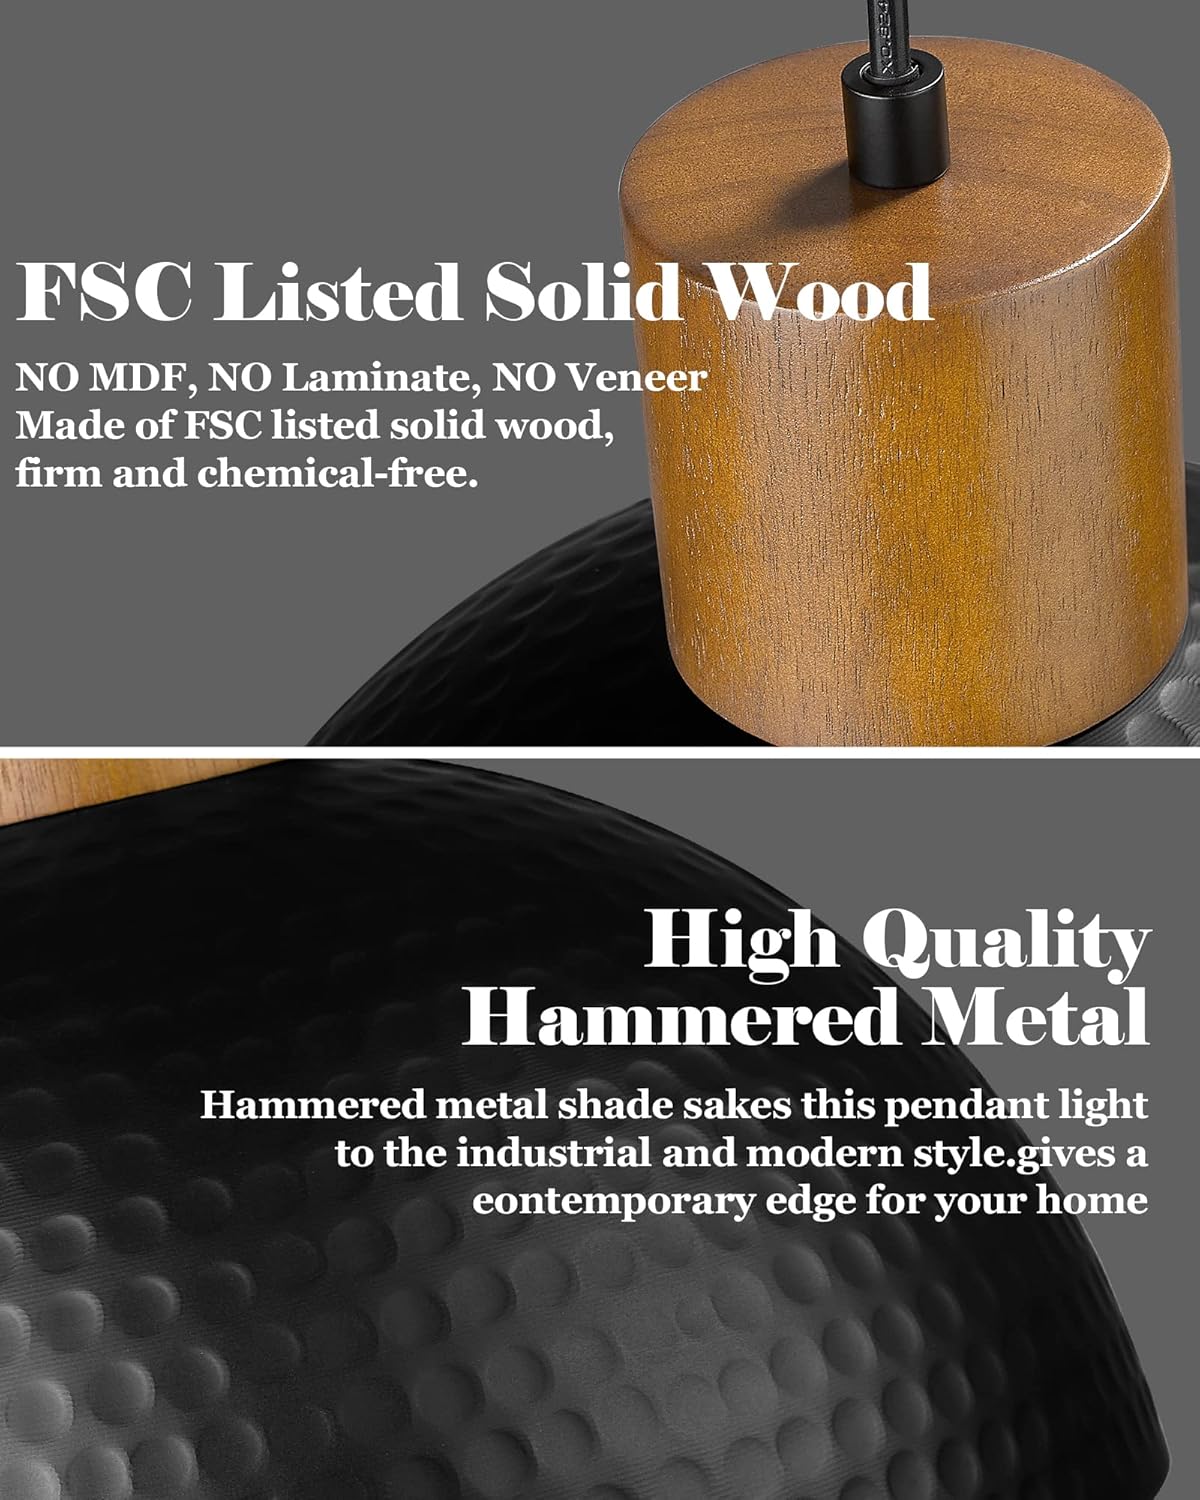
Image: Details of the FSC certified solid wood and hammered metal shade, key components of the fixture.
Istruzioni per l'uso
Once installed, restore power at the circuit breaker. The ELYONA pendant light supports any LED, CFL, Edison, or incandescent bulbs with an E26 base, up to 40W (bulbs not included). For dimming functionality, use a dimmable bulb in conjunction with a compatible dimmer switch (both sold separately).
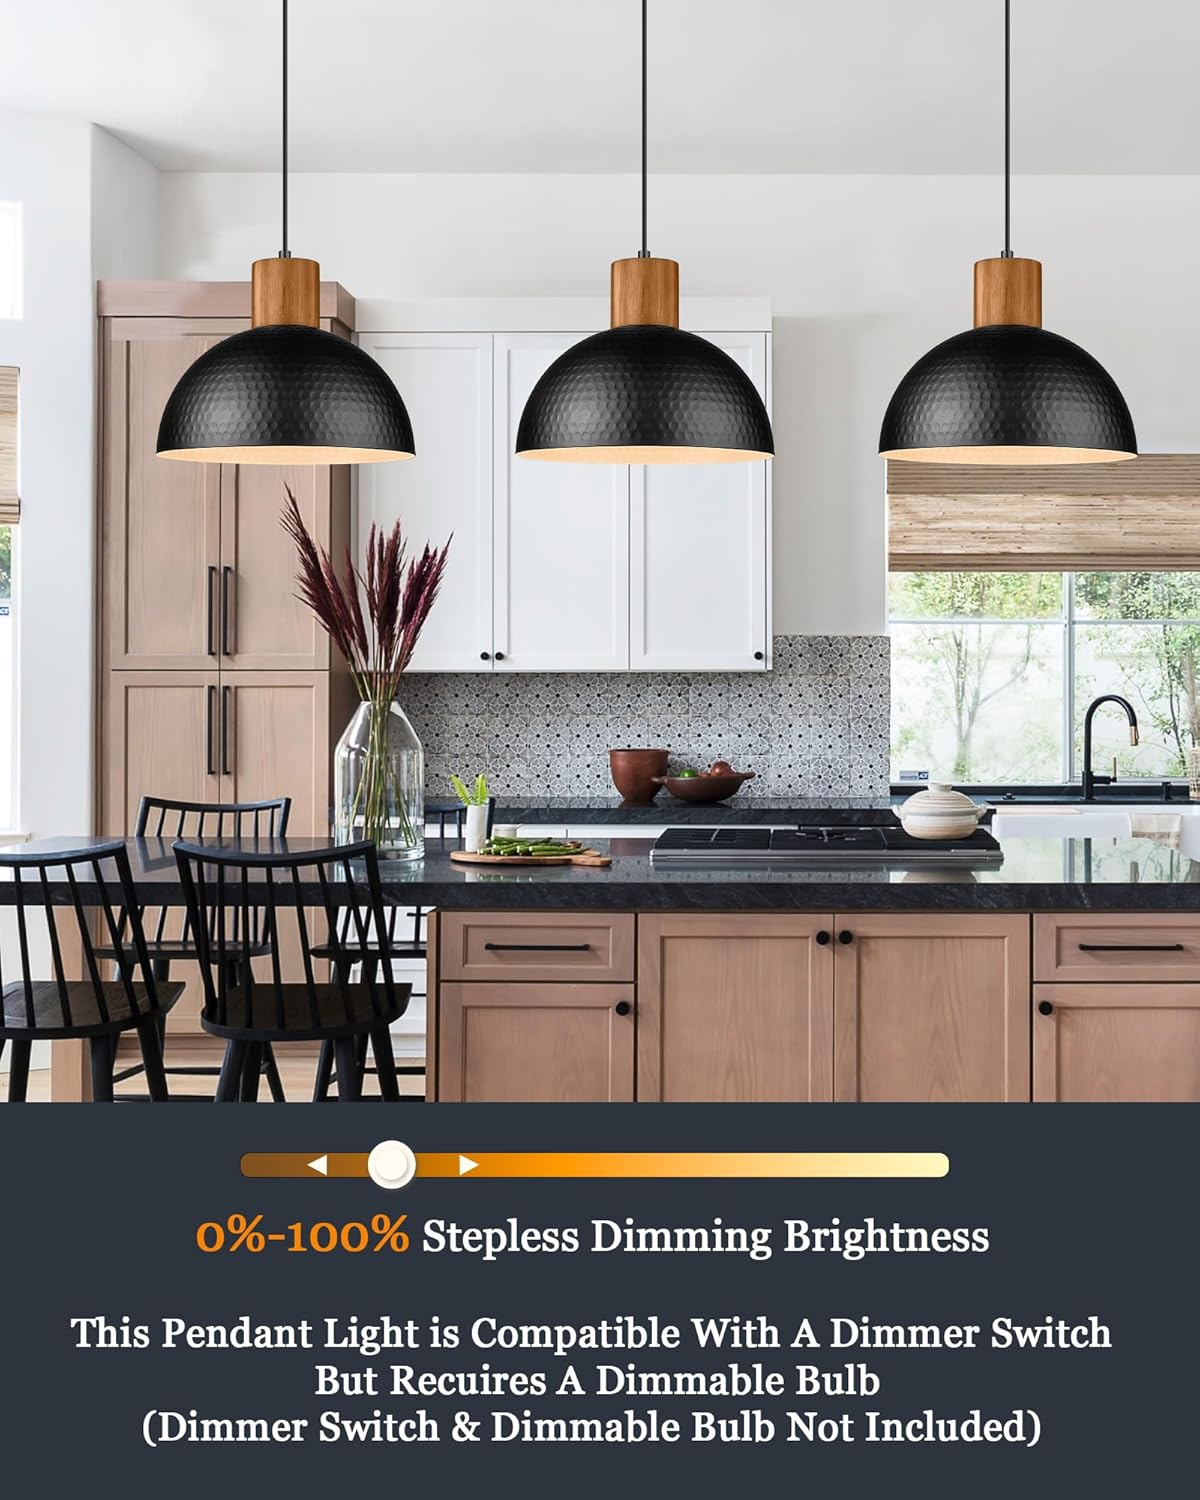
Image: Illustrates the dimmable feature of the pendant lights when used with compatible bulbs and dimmer switches.
Manutenzione
To maintain the appearance and longevity of your ELYONA pendant lights:
- Pulizia: Wipe the metal shade and wooden top with a soft, damp cloth. Dry immediately with a clean, dry cloth to prevent water spots.
- Manutenzione del legno: The solid wood component has been pre-coated with mineral oil. To enhance the textured wood grain and protect the wood, reapply mineral or olive oil 1-2 times every 3 months.
- Sostituzione della lampadina: Ensure power is off before replacing bulbs. Allow bulbs to cool completely before handling.
Risoluzione dei problemi
If you encounter any issues with your pendant light, refer to the following common problems and solutions:
| Problema | Possibile causa | Soluzione |
|---|---|---|
| La luce non si accende. | Nessuna alimentazione all'apparecchio; collegamento elettrico allentato; lampadina difettosa. | Controllare l'interruttore automatico. Assicurarsi che tutti i collegamenti dei cavi siano ben saldi. Sostituire la lampadina. |
| Sfarfallio di luce. | Loose bulb; Incompatible dimmer switch/bulb; Voltage fluttuazioni. | Tighten bulb. Ensure dimmer and bulb are compatible. Consult electrician if voltagI problemi persistono. |
| Fixture is unstable after installation. | Mounting plate not securely fastened; Canopy not tightened. | Ensure mounting plate is firmly attached to the junction box. Tighten canopy screws/nuts. |
Specifiche
| Caratteristica | Dettaglio |
|---|---|
| Marca | ELIONA |
| Numero di modello | UP0067-2B |
| Colore | Black - 2 Pack |
| Materiale | Handmade Hammered Black Metal, FSC Certification Rubber Wood |
| Stile | Modern, Industrial, Farmhouse, Rustic, Retro, Vintage |
| Dimensioni del prodotto | 11.8"L x 11.8"W x Max 57"H (Adjustable) |
| Base della lampadina | E26 |
| Max Wattage | 40 Watt |
| Dimmerabile | Yes (with compatible dimmer and dimmable bulb) |
| Uso interno/esterno | Al chiuso |
| Peso dell'articolo | 6.07 libbre (per 2 unità) |
Garanzia e supporto
ELYONA offers a One Year Warranty for this product to ensure a great shopping experience. If you have any questions, concerns, or require technical assistance, please contact us directly via the Amazon message box. For detailed installation instructions, you may also refer to the official Installation Manual PDF available Qui.