
Introduzione
This manual provides essential information for the safe and efficient operation, installation, and maintenance of your Cecotec Bolero Dresscode Serie 50 Inverter A 7 Kg integrated front-load washing machine. Please read these instructions carefully before using the appliance and retain them for future reference.
Istruzioni di sicurezza
Seguire sempre le precauzioni di sicurezza di base quando si utilizzano apparecchi elettrici per ridurre il rischio di incendi, scosse elettriche e lesioni personali. Questo apparecchio è destinato esclusivamente all'uso domestico.
- Assicurarsi che la potenza di alimentazione corrisponda a quella indicata sull'etichetta dell'apparecchio.
- Non utilizzare la lavatrice se il cavo di alimentazione o la spina sono danneggiati.
- Tenere i bambini e gli animali domestici lontani dall'apparecchio durante il funzionamento.
- Non aprire il contenitore del detersivo o lo sportello durante un ciclo di lavaggio, soprattutto quando il livello dell'acqua è alto o la temperatura è elevata.
- Scollegare l'apparecchio prima di pulirlo o di effettuare qualsiasi intervento di manutenzione.
- Non installare l'apparecchio in luoghi esposti alla luce solare diretta o a temperature estreme.
Configurazione e installazione
1. Disimballaggio e posizionamento
Carefully remove all packaging materials. Ensure all transit bolts are removed from the rear of the machine before use. Failure to do so can cause severe vibration and damage.
Place the washing machine on a firm, level surface. This integrated model is designed to fit within standard kitchen cabinetry.

Figura 1: Fronte view of the washing machine with approximate dimensions: Width 60cm, Depth 55cm, Height 82cm.

Figure 2: The washing machine seamlessly integrated into a kitchen environment, demonstrating its design for built-in installation.
2. Livellamento dell'apparecchio
Adjust the leveling feet at the bottom of the machine to ensure it is perfectly stable and level. A level appliance reduces noise and vibration during operation.
3. Collegamenti idrici e di scarico
- Collegare il tubo di alimentazione dell'acqua a un rubinetto dell'acqua fredda con filettatura da 3/4 di pollice. Assicurarsi che i collegamenti siano ben serrati per evitare perdite.
- Position the drain hose into a standpipe or over the edge of a sink, ensuring it is securely fastened to prevent dislodgement during draining.
4. Connessione elettrica
Collegare il cavo di alimentazione a una presa elettrica dotata di messa a terra. Non utilizzare prolunghe o adattatori.
Istruzioni per l'uso
1. Pannello di controllo finitoview
The control panel features a program selector dial, a digital display, and various function buttons for customizing your wash cycle.
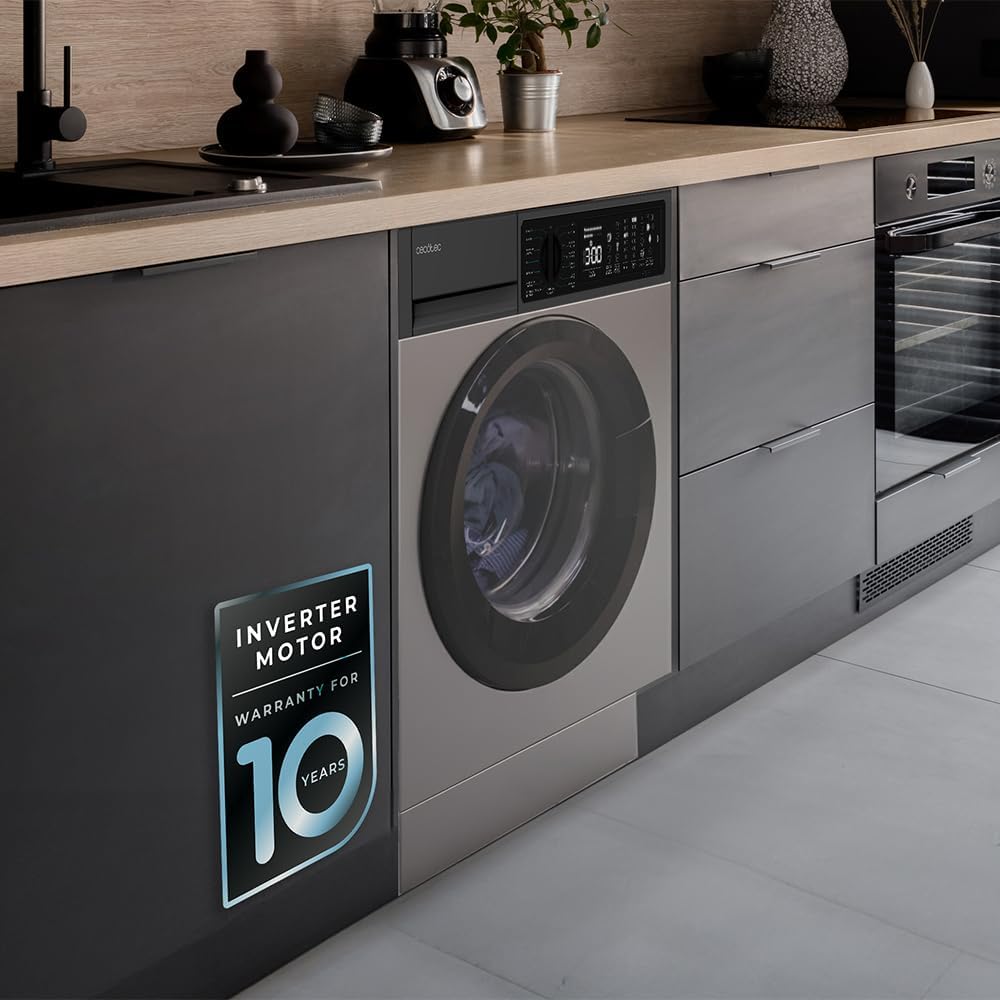
Figura 3: dettagliata view of the control panel, showing the digital display, program options, temperature settings, and spin speeds.

Figure 4: The program selector dial allows you to choose from various wash cycles, including Jeans, Eco 40-60, Cotton, and specialized programs.
2. Caricamento della biancheria
Open the washing machine door and load laundry, ensuring not to overload the drum. The maximum capacity for this model is 7 Kg. Distribute items evenly to prevent imbalance during spinning.

Figure 5: Prepare your laundry by sorting and placing it into the machine, ensuring the drum is not overfilled.
3. Aggiunta di detersivo e ammorbidente
Pull out the detergent dispenser drawer. Add the appropriate amount of detergent to the main wash compartment and softener to the designated compartment. Close the drawer gently.
4. Program Selection and Customization
Turn the program selector dial to choose one of the 15 available programs. Use the function buttons to adjust settings such as temperature, spin speed, and activate special features.
- Programmi disponibili: Jeans, Eco 40-60, Cotton, Cotton 20°C, Colors, Wool, Hand Wash, Spin/Drain, Anti-Allergy Care, Rinse, Express 15, Rapid 60', Dark/Wash, Mix, Sportswear.
- Controllo della temperatura: Seleziona tra 20°C, 30°C, 40°C, 60°C, 90°C.
- Velocità di rotazione: Choose from 400, 600, 800, 1000, 1200 rpm.
5. Funzioni speciali
- SteamMax: This program uses added steam to penetrate fabrics, sterilizing and eliminating odors.
- Stain Match Plus: Select the type of stain and its intensity level (up to 3 levels) for optimized stain removal.
- Cura delle allergie: Sterilizes laundry with steam at 99.9% before each wash, effective even in cold water, to remove germs and bacteria.
- Partenza ritardata: Program the machine to finish a cycle at a specific time, allowing you to plan your laundry around your schedule.
- Risciacquo supplementare: Adds an additional rinse cycle to ensure no detergent residue remains on clothes.
- Save+/Speed+: Options to either save energy (Save+) or reduce wash time (Speed+).

Figure 6: The Stain Match Plus feature targets specific stain types for effective cleaning.

Figure 7: The Allergy Care program ensures thorough sterilization, ideal for sensitive items like baby clothes.

Figure 8: Utilize Save+ for energy efficiency or Speed+ for quicker wash cycles, depending on your needs.
6. Starting and Ending a Cycle
Press the Start/Pause button to begin the selected wash cycle. The digital display will show the remaining time. Once the cycle is complete, the machine will signal, and the door will unlock. Remove your laundry promptly.

Figure 9: The SteamMax function in action, enveloping laundry in steam for deep cleaning and odor removal.
Manutenzione
1. Pulizia dell'esterno
Pulire le superfici esterne con un panno morbido, damp panno. Evitare detergenti abrasivi o solventi che potrebbero danneggiare la finitura.
2. Pulizia del distributore del detersivo
Rimuovere e pulire regolarmente il cassetto del detersivo per evitare l'accumulo di residui. Sciacquarlo sotto l'acqua corrente e asciugarlo prima di reinserirlo.
3. Pulizia del tamburo
Eseguire periodicamente un ciclo di lavaggio di manutenzione (ad esempio un lavaggio a caldo senza biancheria e con un agente decalcificante) per pulire il cestello e rimuovere eventuali odori o residui.

Figure 10: The textured stainless steel drum interior is designed for effective washing and should be cleaned regularly.
4. Pulizia del filtro di scarico
Locate the drain filter, usually at the bottom front of the machine. Open the cover, drain any residual water, and carefully remove and clean the filter of lint and debris. Reassemble securely.
Risoluzione dei problemi
Prima di contattare il servizio clienti, consultare la seguente tabella per i problemi più comuni e le relative soluzioni:
| Problema | Possibile causa | Soluzione |
|---|---|---|
| La macchina non si avvia | Nessuna alimentazione; sportello non chiuso; programma non selezionato. | Controllare il collegamento elettrico; Assicurarsi che lo sportello sia chiuso; Selezionare un programma e premere Avvio. |
| L'acqua non si riempie | Rubinetto dell'acqua chiuso; Tubo di alimentazione piegato; Pressione dell'acqua troppo bassa. | Aprire il rubinetto dell'acqua; Raddrizzare il tubo; Controllare la pressione dell'acqua domestica. |
| L'acqua non scarica | Tubo di scarico piegato o bloccato; filtro di scarico intasato. | Controllare e pulire il tubo di scarico; pulire il filtro di scarico. |
| Vibrazioni/rumore eccessivi | Bulloni di trasporto non rimossi; Macchina non livellata; Carico non uniforme. | Rimuovere i bulloni di trasporto; Regolare i piedini di livellamento; Ridistribuire il bucato nel cestello. |
| Residui di detersivo sui vestiti | Too much detergent; Detergent dispenser clogged; Insufficient rinse. | Reduce detergent amount; Clean dispenser; Select Extra Rinse option. |
Specifiche
| Marca | Cecotec |
| Nome del modello | Bolero Dresscode 750 Bi Inverter Steel A |
| Numero di modello | 00129 |
| Tipo | Integrated Front-Load Washing Machine |
| Capacità | 7 Kg |
| Massima velocità di rotazione | 1200 giri al minuto |
| Classe energetica | A |
| Numero di programmi | 15 |
| Caratteristiche speciali | Inverter Motor, SteamMax, Stain Match Plus, Allergy Care, Delay Start, Extra Rinse, Auto Dose, High Efficiency, Temperature Control |
| Dimensioni (L x P x A) | 60 cm x 55 cm x 82 cm (approximate, based on product image) |
| Materiale | Stainless Steel (drum interior), Steel (exterior finish) |
| Livello di rumore | 74 dB (from energy label) |
| Consumo energetico | 47 kWh / 100 cycles (from energy label) |
| Consumo di acqua | 48 L / 100 cycles (from energy label) |

Figure 11: EU Energy Label for the Cecotec Bolero Dresscode Serie 50 Inverter A 7 Kg washing machine, indicating its energy efficiency and consumption details. For more details, visit the official EU EPREL database: https://eprel.ec.europa.eu/qr/2041690
Informazioni sulla garanzia
Questo prodotto è dotato di uno standard Garanzia di 3 anno. The Inverter Motor specifically benefits from an extended Garanzia di 10 anno, reflecting its durability and advanced technology.

Figure 12: The Inverter Motor is highlighted with a 10-year warranty, ensuring long-term performance and reliability.
Please retain your proof of purchase for warranty claims. The warranty covers manufacturing defects under normal household use.
Assistenza clienti
For further assistance, technical support, or warranty inquiries, please contact Cecotec customer service. You can find contact information on the official Cecotec websito o tramite il tuo rivenditore.
If purchased via Amazon, you may also contact the seller directly: Negozio ufficiale Cecotec