1. Introduzione
This manual provides essential information for the safe and efficient operation of your TechniSat DIGITRADIO 370 IR. Please read these instructions carefully before using the device and retain them for future reference.
2. Istruzioni di sicurezza
- Non esporre il dispositivo alla pioggia o all'umidità per evitare incendi o scosse elettriche.
- Non ostruire le aperture di ventilazione. Assicurarsi che vi sia spazio sufficiente attorno al dispositivo per un corretto flusso d'aria.
- Utilizzare solo l'alimentatore fornito con il dispositivo.
- Evitare di posizionare il dispositivo vicino a fonti di calore come termosifoni, bocchette di riscaldamento, stufe o altri apparecchi (inclusi amplificatori) che producono calore.
- Proteggere il cavo di alimentazione per evitare che venga calpestato o schiacciato, in particolare in corrispondenza delle spine, delle prese di corrente e del punto in cui esce dall'apparecchio.
- Scollegare l'apparecchio durante i temporali o quando non viene utilizzato per lunghi periodi di tempo.
- Affidare tutti gli interventi di assistenza a personale di assistenza qualificato. L'assistenza è richiesta quando l'apparecchio è stato danneggiato in qualsiasi modo, ad esempio se il cavo di alimentazione o la spina sono danneggiati, se è stato versato del liquido o sono caduti degli oggetti nell'apparecchio, se l'apparecchio è stato esposto a pioggia o umidità, se non funziona normalmente o se è caduto.
3. Contenuto della confezione
Verificare che tutti gli articoli siano presenti nel pacco:
- TechniSat DIGITRADIO 370 IR (Black)
- Telecomando
- Adattatore di alimentazione
- Manuale dell'utente (questo documento)
4. Controlli e collegamenti

Figura 4.1: Pannello frontale sopraview
The image above displays the front panel of the DIGITRADIO 370 IR, featuring the central display, volume and tuning/OK rotary knobs, and various control buttons such as Power, Mode, Preset, Scan, and Back.
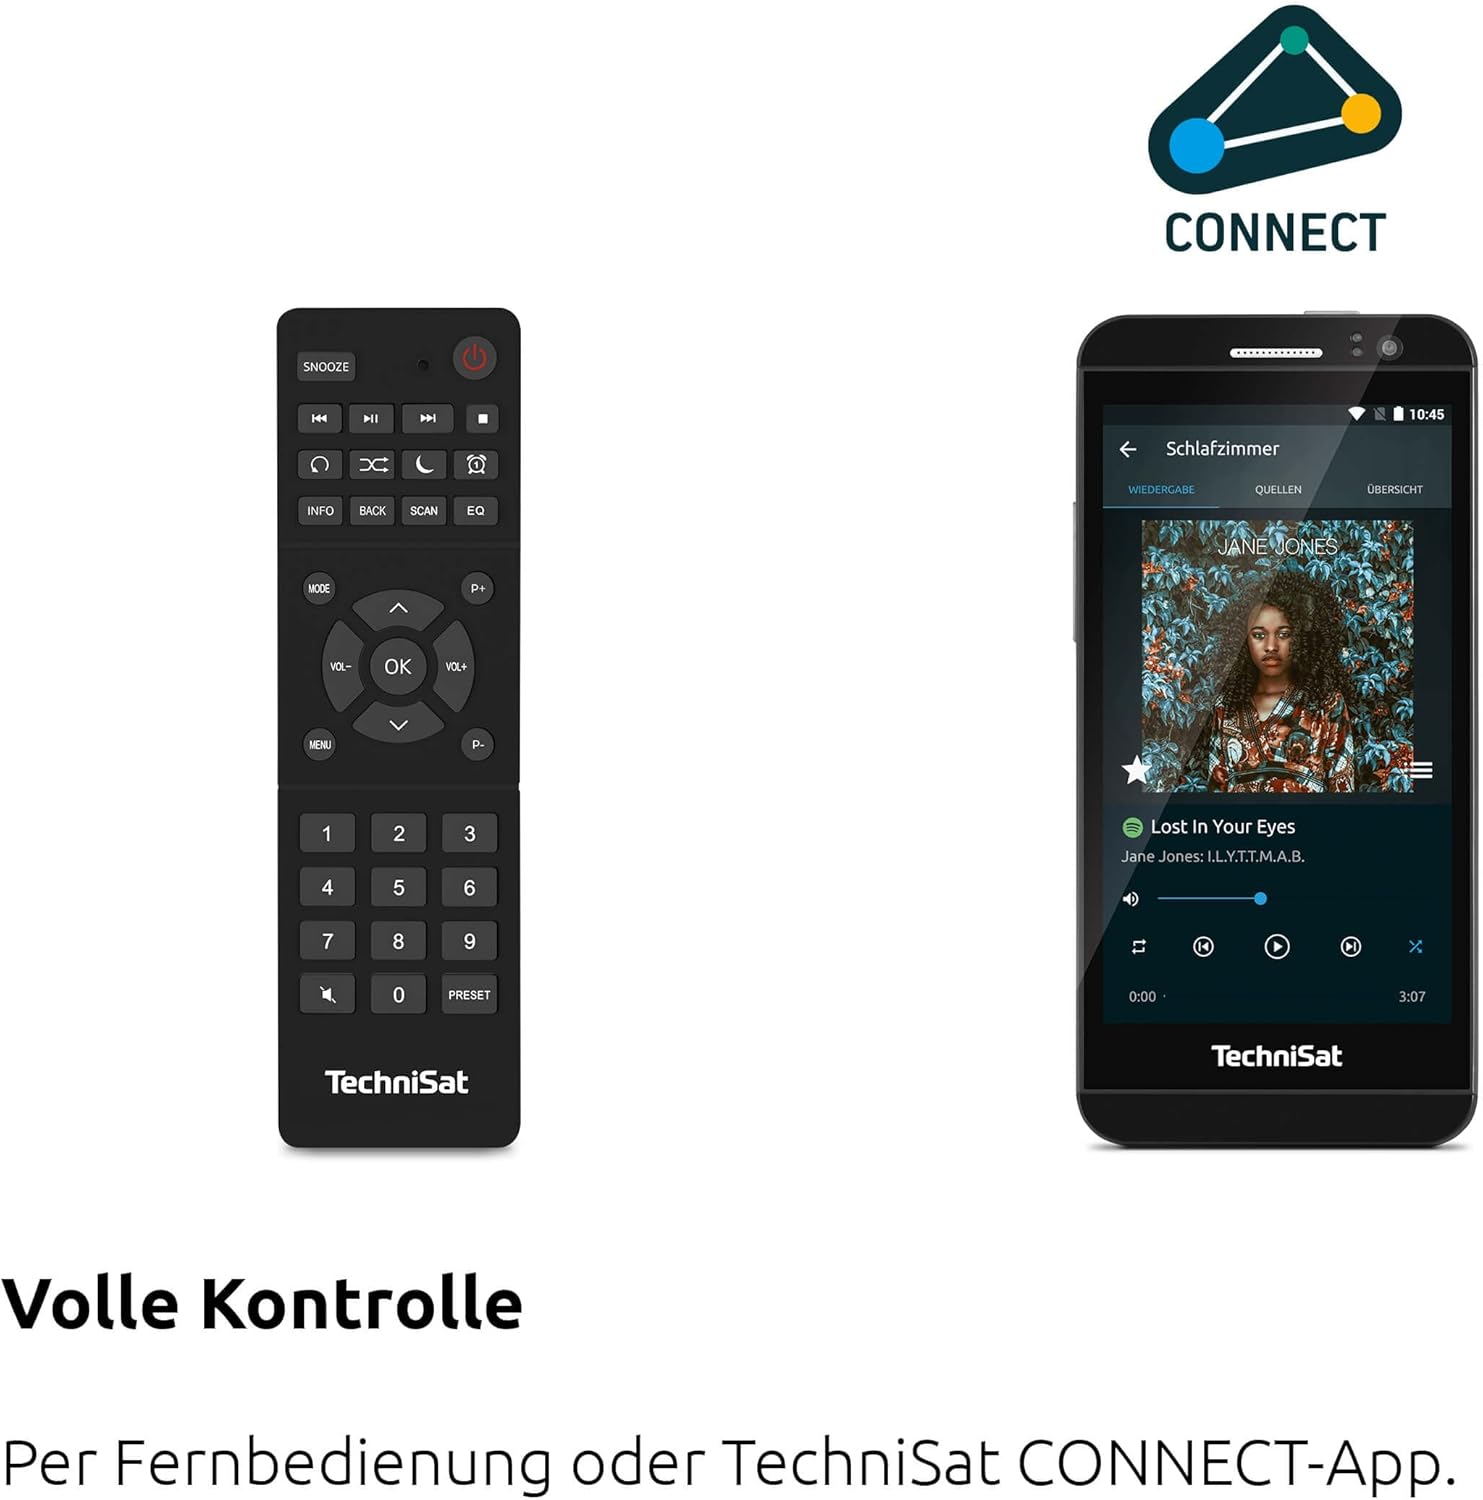
Figure 4.2: Remote Control and App Interface
This image shows the included remote control with buttons for power, snooze, mode, info, scan, EQ, preset numbers, volume, and navigation. It also illustrates the TechniSat CONNECT app interface on a smartphone, providing an alternative control method.
Controlli del pannello frontale:
- Pulsante di accensione: Accende/spegne il dispositivo.
- Pulsante Modalità: Switches between DAB+, FM, Internet Radio, Bluetooth, AUX, and USB modes.
- Pulsante di preselezione: Accede alle stazioni radio preimpostate.
- Manopola del volume: Regola il livello di uscita audio.
- Manopola di sintonizzazione/OK: Consente di navigare nei menu e di confermare le selezioni.
- Pulsante di scansione: Avvia la scansione delle stazioni in modalità radio.
- Pulsante Indietro: Ritorna al menu o alla schermata precedente.
- Display: 2.4-inch TFT color display for information and menu navigation.
Connessioni pannello posteriore:
- Potenza in ingresso: Collegare l'adattatore di alimentazione in dotazione.
- INGRESSO AUX: Jack da 3.5 mm per il collegamento di dispositivi audio esterni.
- Jack per cuffie: Jack da 3.5 mm per l'ascolto privato.
- Porta USB: For MP3 playback from USB drives and charging external devices.
5. Impostazione
5.1 Accensione iniziale
- Place the DIGITRADIO 370 IR on a stable, flat surface.
- Estendi l'antenna telescopica per una ricezione DAB+ e FM ottimale.
- Connect the power adapter to the DC IN port on the rear of the radio and then to a wall outlet.
- Premere il pulsante di accensione sul pannello frontale o sul telecomando per accendere il dispositivo.
- Seguire le istruzioni visualizzate sullo schermo per la configurazione iniziale, inclusa la selezione della lingua e la configurazione di rete.
5.2 Configurazione di rete (WLAN)
To access Internet Radio and app control, the device must be connected to a Wi-Fi network.
- Navigate to the 'Settings' menu using the Tuning/OK knob.
- Selezionare "Rete" e poi "Configurazione Wi-Fi".
- The radio will scan for available networks. Select your desired network from the list.
- Enter the Wi-Fi password using the on-screen keyboard and the Tuning/OK knob.
- Confirm the connection. Once connected, the Wi-Fi icon will appear on the display.
6. Istruzioni per l'uso

Figure 6.1: Radio Diversity
This image highlights the multiple radio reception options available: DAB+ Digital Radio, Internet Radio via WLAN, and UKW/FM analog radio.
Radio DAB+ 6.1
- Press the 'Mode' button until 'DAB+' is selected.
- The radio will automatically scan for available DAB+ stations during the first use. To initiate a scan manually, press the 'Scan' button.
- Use the Tuning/OK knob to scroll through the list of available stations. Press the knob to select a station.
- To save a station as a preset, press and hold the 'Preset' button, then select a preset number and confirm.
6.2 Radio FM
- Press the 'Mode' button until 'FM' is selected.
- Press the 'Scan' button to automatically search for and store FM stations.
- Alternatively, use the Tuning/OK knob to manually tune to a frequency.
- To save a station as a preset, press and hold the 'Preset' button, then select a preset number and confirm.
6.3 Radio Internet
Assicurarsi che la radio sia connessa a una rete Wi-Fi (vedere Sezione 5.2).
- Premere il pulsante 'Mode' fino a selezionare 'Internet Radio'.
- È possibile sfogliare le stazioni in base alla posizione, al genere o cercare stazioni specifiche.
- Use the Tuning/OK knob to navigate and select stations.
- To save a station as a preset, press and hold the 'Preset' button, then select a preset number and confirm.
6.4 Streaming audio Bluetooth

Figura 6.2: Streaming audio Bluetooth
This image demonstrates a smartphone wirelessly streaming music to the radio via Bluetooth, indicating the device's capability for wireless music enjoyment.
- Press the 'Mode' button until 'Bluetooth' is selected. The radio will enter pairing mode.
- Sul tuo smartphone o altro dispositivo Bluetooth, attiva il Bluetooth e cerca i dispositivi disponibili.
- Select 'DIGITRADIO 370 IR' from the list to pair.
- Una volta effettuato l'abbinamento, puoi riprodurre l'audio dal tuo dispositivo tramite la radio.
6.5 Riproduzione e ricarica USB

Figure 6.3: USB Playback and Charging Function
This image illustrates the dual functionality of the USB port: connecting USB storage devices for MP3 playback and using the port to charge compatible devices like smartphones.
- Inserire un'unità flash USB contenente MP3 filenella porta USB sul retro della radio.
- Premere il pulsante 'Mode' fino a selezionare 'USB'.
- Use the Tuning/OK knob to navigate through folders and select tracks for playback.
- The USB port can also be used to charge compatible smartphones and other devices. Connect your device's charging cable to the USB port.
6.6 Ricarica wireless

Figure 6.4: Wireless Charging Function
This image shows a hand placing a smartphone on the top surface of the radio, demonstrating the wireless charging capability for compatible smartphones.
The DIGITRADIO 370 IR features a wireless charging surface on its top panel.
- Ensure your smartphone or device supports Qi wireless charging.
- Place your compatible device centrally on the designated wireless charging area on top of the radio.
- The device should indicate that charging has begun.
6.7 Alarm Clock, Sleep Timer, and Snooze
The radio includes an alarm clock, sleep timer, and snooze function.
- Sveglia: Set up to two independent alarms with customizable sources (buzzer, DAB+, FM, Internet Radio) and volume. Access via the 'Settings' menu.
- Sveglia: Allows the radio to turn off automatically after a set period (e.g., 15, 30, 60 minutes). Access via the 'Settings' menu.
- Posticipa: When an alarm sounds, press the 'Snooze' button on the remote control to temporarily pause the alarm.
6.8 App Control (UNDOK App)
The DIGITRADIO 370 IR can be controlled via the UNDOK app on your smartphone or tablet.
- Scarica l'app 'UNDOK' dall'app store del tuo dispositivo.
- Assicurati che lo smartphone/tablet e la radio siano connessi alla stessa rete Wi-Fi.
- Open the UNDOK app; it should automatically detect your DIGITRADIO 370 IR.
- You can now control all major functions of the radio, including mode selection, station tuning, volume, and presets, directly from the app.
7. Manutenzione
7.1 Pulizia
- Prima di pulirlo, scollegare sempre il dispositivo dalla presa di corrente.
- Utilizzare un panno morbido e asciutto per pulire le superfici esterne.
- Do not use liquid cleaners, aerosol cleaners, or strong chemical solvents, as these may damage the finish.
7.2 Conservazione
If storing the device for an extended period, unplug it from the power source and store it in a cool, dry place, away from direct sunlight and extreme temperatures.
8. Risoluzione Dei Problemi
| Problema | Possibile causa | Soluzione |
|---|---|---|
| Nessun potere | Cavo di alimentazione non collegato; presa di corrente difettosa | Controllare il collegamento del cavo di alimentazione; provare una presa di corrente diversa. |
| Nessun suono | Volume troppo basso; Muto attivato; Sorgente selezionata non corretta | Increase volume; Check if mute is active; Select the correct input source (DAB+, FM, Internet, Bluetooth, USB, AUX). |
| Scarsa ricezione radio (DAB+/FM) | Antenna not extended; Weak signal; Interference | Fully extend the telescopic antenna; Reposition the radio; Avoid placing near other electronic devices. |
| La radio Internet non funziona | No Wi-Fi connection; Incorrect Wi-Fi password; Router issue | Check Wi-Fi connection in settings; Re-enter Wi-Fi password; Restart your Wi-Fi router. |
| Associazione Bluetooth non riuscita | Radio not in pairing mode; Device too far; Bluetooth off on source device | Ensure radio is in Bluetooth mode; Move devices closer; Enable Bluetooth on your source device. |
| Ricarica wireless non funzionante | Device not Qi-compatible; Device not placed correctly; Phone case too thick | Verify device supports Qi charging; Adjust device position on charging pad; Remove thick phone cases. |
9. Specifiche
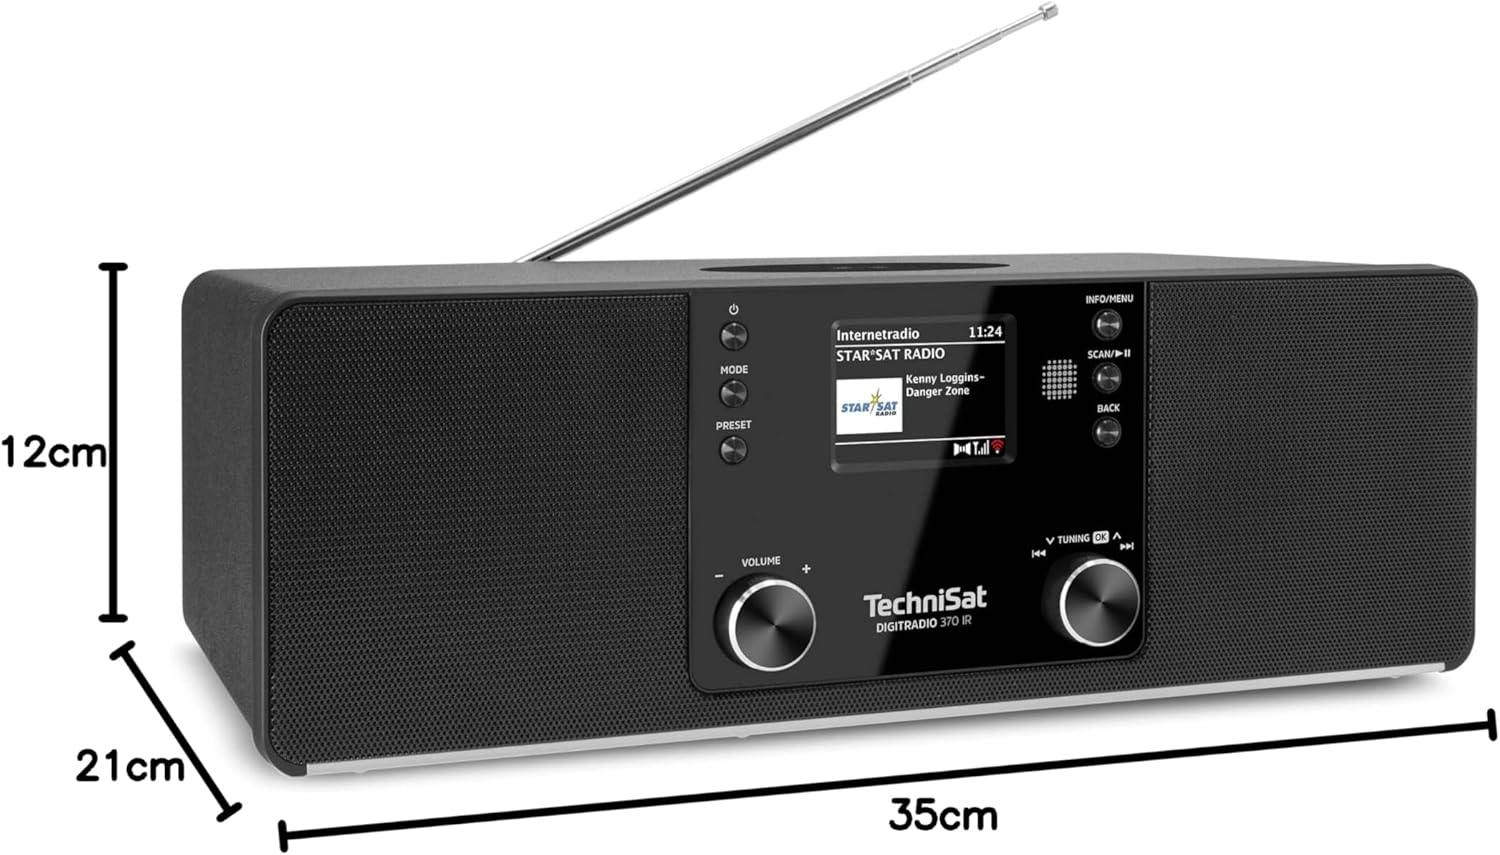
Figura 9.1: Dimensioni del prodotto
This image provides a visual representation of the radio's dimensions: 35 cm (length), 12 cm (height), and 21 cm (depth).
| Caratteristica | Dettaglio |
|---|---|
| Numero di modello | 0000/3971 |
| Marca | Tecnico Sat |
| Bande radio supportate | DAB+, FM, radio Internet |
| Tecnologia di connettività | Bluetooth, USB, Wireless-Charging, WLAN (2.4 GHz & 5 GHz) |
| Caratteristiche speciali | Wireless Charging, Bluetooth Audio Streaming, USB Playback & Charging, Alarm Clock, Sleep Timer, Snooze, App Control (UNDOK) |
| Modalità di uscita audio | Stereo |
| Potenza di uscita dell'altoparlante | 2 x 5 Watts RMS (10 Watts total) |
| Tipo di visualizzazione | LCD a colori TFT da 2.4 pollici |
| Fonte di alimentazione | Electric Cord (230 Volts, 60 Hz) |
| Dimensioni (L x P x A) | Dimensioni: 35 x 21 x 12 cm |
| Peso | 2.7 chilogrammi |
| Materiale dell'alloggiamento | Legna |
| Dispositivi compatibili | Smartphone, MP3 player, tablet, laptop, headphones |
| Interfacce | 3.5 mm Audio (AUX-IN), USB 2.0, 3.5 mm Headphone |
10. Garanzia e supporto
10.1 Informazioni sulla garanzia
This product comes with a 2-year warranty (Gewährleistung) from the date of purchase. Please retain your proof of purchase for any warranty claims. The warranty covers manufacturing defects and malfunctions under normal use. It does not cover damage caused by misuse, accidents, unauthorized modifications, or normal wear and tear.
10.2 Assistenza clienti
For technical assistance, troubleshooting beyond this manual, or warranty inquiries, please contact TechniSat customer support. Refer to the TechniSat official websito per i dettagli di contatto specifici della tua regione.
Risorse online: Visita il sito ufficiale TechniSat websito per manuali aggiornati, FAQ e informazioni di supporto.