Introduzione
The Keychron Q2 is a fully customizable wired mechanical keyboard featuring a compact 65% layout. Constructed with a solid full aluminum frame, the Q2 is designed for easy assembly and offers a premium typing experience. It supports full QMK and VIA programming for extensive customization and features hot-swappable switches for personalized tactile feedback.

Image: The Keychron Q2 Wired Custom Mechanical Keyboard, showcasing its compact 65% layout and blue color scheme.
Guida all'installazione
1. Contenuto della confezione
Prima di iniziare, assicurarsi che tutti i componenti siano presenti:
- Keychron Q2 Keyboard Kit (Aluminum Case, PCB, Steel Plate, Sound Absorbing Foam, Case Foam, Gaskets)
- Cavo USB da tipo C a tipo C
- Adattatore USB da tipo A a tipo C
- Estrattore per interruttori
- Estrattore per tasti
- Cacciavite
- Chiave esagonale
- Stabilizers (4 sets)
Note: All tools are typically located at the bottom of the packaging.

Image: Diagram illustrating the contents of the Keychron Q2 package, including the keyboard, cables, and tools.
2. Collegamento della tastiera
- Locate the USB Type-C port on the back of the Keychron Q2 keyboard.
- Connect one end of the provided USB Type-C to Type-C cable to the keyboard.
- Connect the other end of the cable to your computer's USB Type-C port. If your computer only has USB Type-A ports, use the included USB Type-A to Type-C adapter.
- Ensure the operating system switch (located on the back edge of the keyboard) is set to the correct position for your system (Mac or Windows).
- La tastiera verrà riconosciuta automaticamente dal sistema operativo.

Immagine: un primo piano view of the Keychron Q2 keyboard with a USB-C cable connected, showing the Mac/Win switch.
Istruzioni per l'uso
1. Personalizzazione QMK/VIA
The Keychron Q2 supports full QMK and VIA programming, allowing you to remap keys, create macros, and customize lighting effects. To use VIA software:
- Scarica il software VIA dal sito ufficiale Keychron webposto (keychron.com/pages/qmk-via).
- Connect your Q2 keyboard to your computer via the USB cable.
- Launch the VIA software. The software should automatically detect your Q2 keyboard. If not, you may need to import the Q2 keymap JSON file, also available on the Keychron websito.
- Use the graphical interface to drag and drop functions, assign macros, and configure lighting for each key. Changes are applied in real-time.

Image: Screenshot of the VIA software interface, demonstrating how to remap keys on the Keychron Q2 keyboard.
2. Switch sostituibili a caldo
The Q2's PCB supports both 3-pin and 5-pin MX style mechanical switches, allowing for easy switch replacement without soldering.
- Utilizzando l'estrattore per tasti in dotazione, rimuovere con cautela il tasto dall'interruttore che si desidera sostituire.
- Use the provided switch puller to gently grip the top and bottom clips of the switch. Pull the switch straight up to remove it from the PCB.
- Allineare i pin del nuovo interruttore con i fori sul PCB. Assicurarsi che i pin siano dritti per evitare piegature.
- Premere saldamente il nuovo interruttore in posizione finché non scatta.
- Riposizionare il tasto.

Immagine: un primo piano view of the Keychron Q2's PCB with several switches removed, demonstrating the hot-swappable feature.
3. Keycaps and RGB Lighting
The Q2 comes with premium non-shine-through PBT keycaps, known for their durability and oil resistance. The keyboard features south-facing RGB LEDs, designed to provide better illumination of the backlight from the typist's perspective.
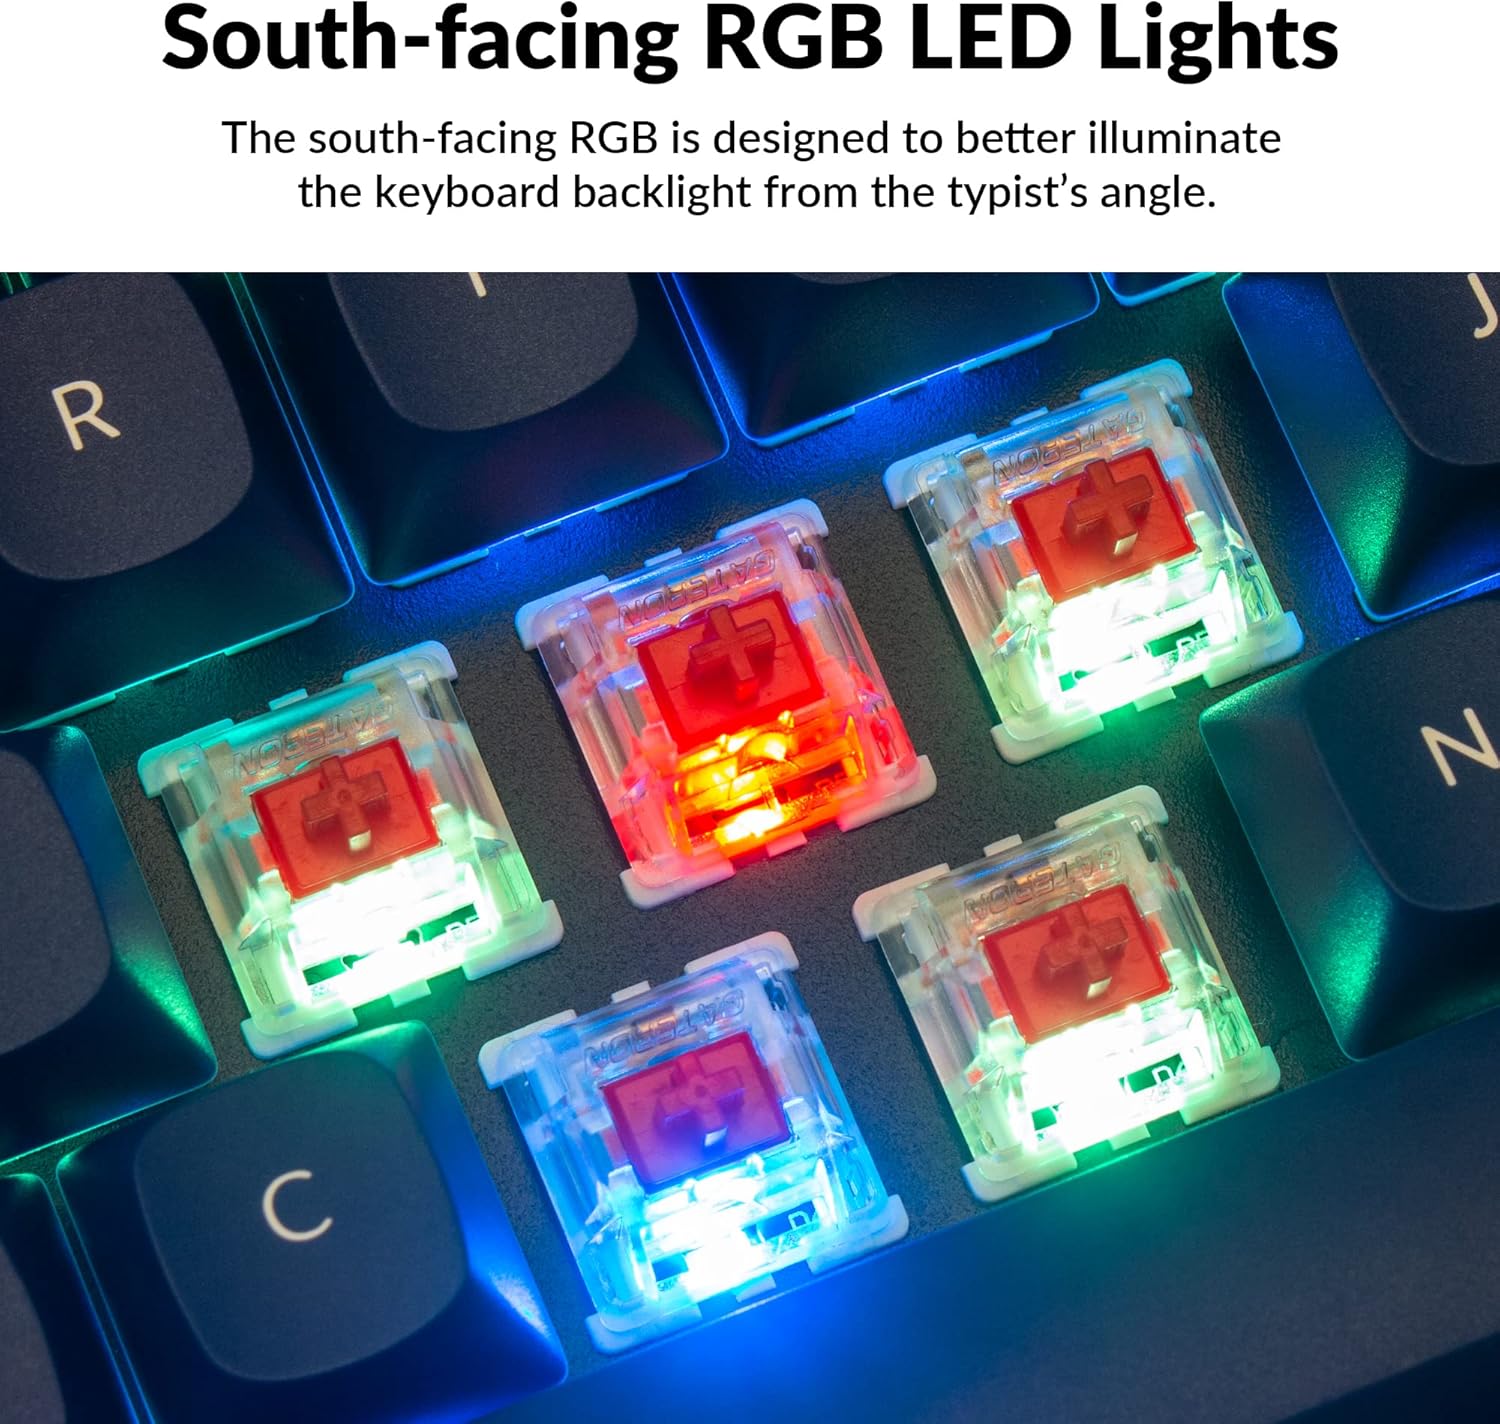
Immagine: Un dettaglio view of the Keychron Q2's double-shot PBT keycaps, highlighting their texture and legends.

Image: A close-up of the Keychron Q2's south-facing RGB LEDs illuminating the switches from below.
Manutenzione
1. Pulizia della tastiera
Una pulizia regolare aiuta a mantenere le prestazioni e l'aspetto della tastiera.
- Rimozione della polvere: Utilizzare una bomboletta di aria compressa per soffiare via polvere e detriti dagli spazi tra i tasti.
- Pulizia dei tasti: For deeper cleaning, remove the keycaps using the provided keycap puller. Wash them with mild soap and water, then ensure they are completely dry before reattaching.
- Pulizia della cassa: Pulisci la custodia in alluminio con un panno morbido eamp panno. Evitare prodotti chimici aggressivi che potrebbero danneggiare la finitura.
2. Switch and Stabilizer Maintenance
The hot-swappable design allows for easy maintenance of switches and stabilizers.
- Sostituzione dell'interruttore: If a switch becomes faulty, replace it using the hot-swapping procedure described in the Operating Instructions.
- Lubrificazione dello stabilizzatore: For optimal performance and reduced wobbliness on larger keys (space bar, shift, enter), the PCB-mounted screw-in stabilizers can be lubricated. This typically involves disassembling the keyboard to access the stabilizers.

Image: An exploded diagram of the Keychron Q2, showing its various components like keycaps, switches, top case, gaskets, plate, PCB, sound absorbing foam, case foam, bottom case, and silicone gaskets, illustrating ease of disassembly.
Risoluzione dei problemi
Problemi comuni e soluzioni:
- La tastiera non risponde:
- Assicurarsi che il cavo USB sia collegato saldamente sia alla tastiera che al computer.
- Verify the Mac/Windows switch on the back of the keyboard is set to the correct operating system.
- Try connecting the keyboard to a different USB port or a different computer to rule out port issues.
- Riavvia il computer.
- Tasti specifici non funzionanti:
- Remove the keycap and switch for the non-functional key. Inspect the switch pins for bends or damage. Straighten bent pins carefully or replace the switch if damaged.
- Assicurarsi che l'interruttore sia completamente inserito nel PCB.
- Check VIA software to ensure the key has not been accidentally remapped or disabled.
- Problemi di illuminazione RGB:
- Assicurarsi che la tastiera sia collegata correttamente.
- Use the VIA software to check and adjust lighting settings.
- Perform a factory reset if lighting issues persist (refer to Keychron's official support for specific reset procedures).
- Keyboard Disconnecting Randomly:
- Prova un cavo USB diverso.
- Ensure the USB port on your computer is stable and providing sufficient power.
- Aggiorna i driver USB del tuo computer.
If you encounter issues not covered here, please refer to the official Keychron support resources.
Specifiche
| Caratteristica | Dettaglio |
|---|---|
| Marca | Chiave di cronaca |
| Nome del modello | Q2 |
| Numero di modello | Q2-J1 |
| Disposizione della tastiera | 65% (68 Keys), QWERTY |
| Tecnologia di connettività | Cablato (USB-A, USB-C) |
| Dispositivi compatibili | PC (Linux, MacOS, Windows) |
| Tipo di interruttore | Gateron G Pro Red (Linear), Hot-swappable |
| Retroilluminazione | RGB (esposto a sud) |
| Materiale | Full Aluminum Frame, PBT Keycaps |
| Dimensioni del prodotto | 12.89 cm L x 4.76 cm P x 1.33 cm A |
| Caratteristiche speciali | QMK/VIA Programmable, Double Gasket Design |
Informazioni sulla garanzia
Keychron products typically come with a standard manufacturer's warranty. For detailed information regarding the warranty period, coverage, and terms and conditions for your Keychron Q2 keyboard, please refer to the official Keychron websito o la scheda di garanzia inclusa con il prodotto. Conservare la prova d'acquisto per eventuali reclami in garanzia.
Supporto e risorse
For further assistance, software downloads (VIA), firmware updates, and frequently asked questions, please visit the official Keychron support page:
- Keychron Ufficiale Websito: www.keychron.com
- QMK/VIA Software & Firmware: www.keychron.com/pages/qmk-via
- Negozio Keychron: Visita lo Store Keychron su Amazon
You can also find community forums and additional user guides online for advanced customization and troubleshooting tips.