1. Introduzione
Thank you for choosing the PARKSIDE Cordless Paint Spray Gun PFSA 20-Li A1 20 V. This manual provides important information on the safe operation, setup, maintenance, and troubleshooting of your new tool. Please read this manual thoroughly before first use and keep it for future reference. This paint spray gun is designed for uniform application of paint on both smooth and structured surfaces.

Image 1.1: The PARKSIDE PFSA 20-Li A1 Cordless Paint Spray Gun, showing the main unit, accessories, and storage case.
2. Avvertenze di sicurezza
Always observe basic safety precautions when using electrical tools to reduce the risk of fire, electric shock, and personal injury. This section outlines critical safety information specific to the PARKSIDE Cordless Paint Spray Gun.
Linee guida generali sulla sicurezza:
- Dispositivi di protezione individuale (DPI): Always use appropriate personal protective equipment (PPE) such as gloves, safety glasses, and a respirator when operating the spray gun and working with potentially harmful substances.
- Ventilazione: Use the spray gun in a well-ventilated area to prevent the accumulation of hazardous fumes.
- Evita il contatto: Avoid contact with eyes and skin when handling paint or other spraying materials. In case of contact, rinse immediately with plenty of water and seek medical attention if irritation persists.
- Materiali infiammabili: Non spruzzare liquidi infiammabili vicino a fiamme libere, fiamme pilota o altre fonti di accensione. Assicurarsi che l'area di lavoro sia priva di scintille.
- Bambini e astanti: Keep children and bystanders away while operating the spray gun.
3. Componenti e accessori del prodotto
The PARKSIDE PFSA 20-Li A1 Cordless Paint Spray Gun comes with the following standard accessories:
- 1 x Paint Spray Gun Unit (Battery and charger sold separately)
- 1 x 1000 ml Paint Pot
- 2 x Nozzles (Ø 1.8 mm and Ø 2.6 mm)
- 1 x Viscosity Measuring Cup
- 1 x Spazzola per la pulizia
- 1 x Ago di pulizia
- 1 x Filtro
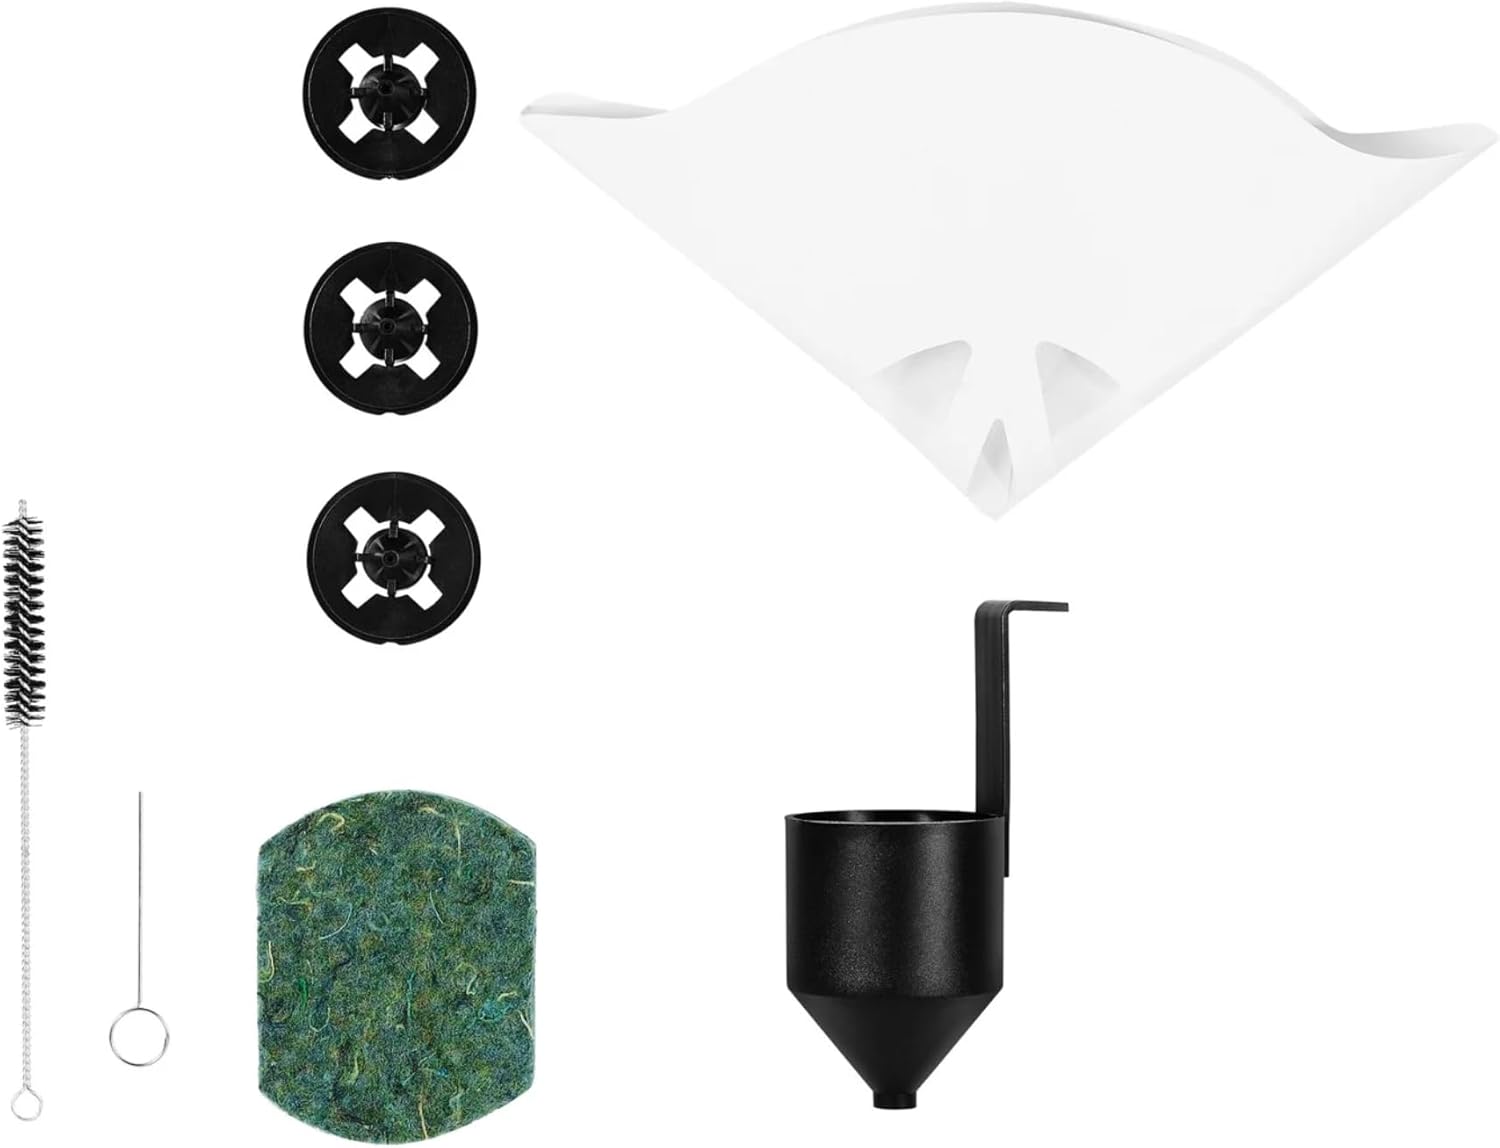
Immagine 3.1: Dettagliata view of the included accessories: nozzles, filter, cleaning brush, cleaning needle, and viscosity measuring cup.
Nota: The PARKSIDE PFSA 20-Li A1 is part of the PARKSIDE X 20 V Team series. The battery and charger are not included with this product and must be purchased separately.
4. Impostazione e preparazione
4.1 Attaching the Paint Pot
- Ensure the spray gun is disconnected from any power source (if using a corded model) or that the battery is removed.
- Align the paint pot with the base of the spray gun and twist clockwise until securely fastened.
4.2 Selecting and Attaching the Nozzle
Choose the appropriate nozzle (1.8 mm or 2.6 mm) based on the viscosity of your paint and the desired spray pattern. The 1.8 mm nozzle is generally for thinner materials, while the 2.6 mm nozzle is for thicker paints.
- Unscrew the front cap of the spray gun.
- Insert the chosen nozzle.
- Securely screw the front cap back on.
4.3 Preparazione della vernice e viscosità
The spray gun is suitable for paints, varnishes, and glazes with a viscosity of up to 70 DIN-sec. Always refer to the paint manufacturer's instructions for thinning recommendations.
- Mescolare bene la vernice.
- Use the included viscosity measuring cup to check the paint's viscosity. Fill the cup and time how long it takes for the liquid to completely drain. Adjust with appropriate thinner if necessary, until it falls within the recommended range (up to 70 DIN-sec).
- Pour the prepared paint into the 1000 ml paint pot.
4.4 Inserimento della batteria
If using a PARKSIDE X 20 V Team battery (sold separately), insert it into the battery slot at the base of the spray gun until it clicks into place.

Image 4.1: The PARKSIDE PFSA 20-Li A1 Cordless Paint Spray Gun, ready for use with a battery attached.
5. Istruzioni per l'uso
5.1 Regolazione dei modelli di spruzzo
The spray gun offers three adjustable spray patterns, independent of the nozzle size:
- omnidirezionale: For general spraying and small areas.
- Horizontal Flat Jet: Ideal for vertical surfaces, providing a wide horizontal spray.
- Vertical Flat Jet: Ideal for horizontal surfaces, providing a wide vertical spray.
To change the spray pattern, rotate the air cap to align the desired pattern with the nozzle.
5.2 Tecnica di spruzzatura
- Tenere la pistola a spruzzo a una distanza costante (in genere 15-30 cm) dalla superficie.
- Muovere la pistola a spruzzo con movimenti fluidi e uniformi, sovrapponendo leggermente ogni passaggio per garantire una copertura uniforme.
- Rilasciare il grilletto alla fine di ogni passata per evitare l'accumulo di vernice.
- Practice on a scrap piece of material to get a feel for the spray pattern and flow before working on your main project.

Image 5.1: Demonstrating the use of the spray gun for painting a radiator, highlighting its versatility for structured surfaces.
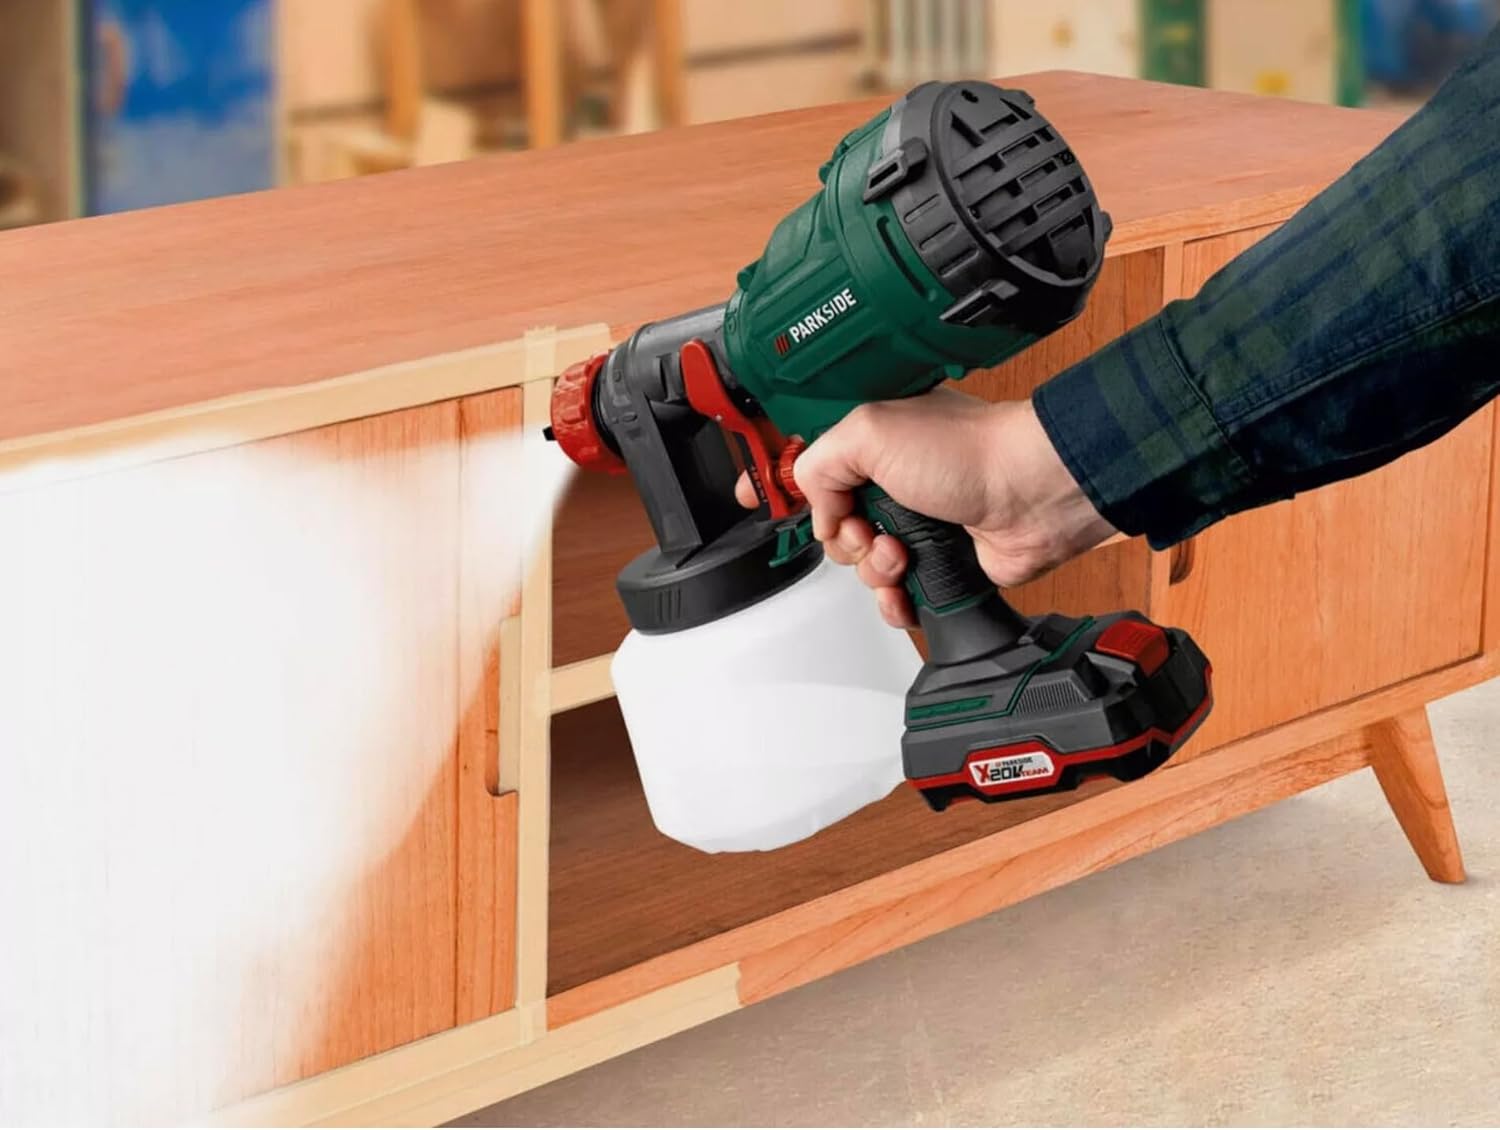
Image 5.2: The spray gun being used to apply paint to wooden furniture, showcasing its suitability for smooth surfaces.
6. Pulizia e manutenzione
Proper cleaning after each use is crucial for the longevity and optimal performance of your paint spray gun.
6.1 Pulizia immediata dopo l'uso
- Remove the battery from the spray gun.
- Empty any remaining paint from the paint pot back into its original container.
- Pour a small amount of appropriate cleaning solution (water for water-based paints, mineral spirits for oil-based paints) into the paint pot.
- Reattach the pot and spray the cleaning solution through the gun until it runs clear.
- Smontare il contenitore della vernice, l'ugello e il tappo dell'aria.
- Use the included cleaning brush and cleaning needle to thoroughly clean all components, especially the nozzle and fluid passages.
- Rinse all parts with clean water (if using water-based paints) or appropriate solvent.
- Pulire l'esterno della pistola a spruzzo con un pannoamp cloth. Do not immerse the main unit in liquid.
- Lasciare asciugare completamente tutti i componenti prima di rimontarli o riporli.
6.2 Conservazione
Store the clean and dry paint spray gun and its accessories in a cool, dry place, away from direct sunlight and extreme temperatures. The included carrying case provides excellent protection for storage and transport.

Image 6.1: The durable carrying case for safe storage and transport of the paint spray gun and its accessories.
7. Risoluzione Dei Problemi
This section addresses common issues you might encounter with your paint spray gun.
| Problema | Possibile causa | Soluzione |
|---|---|---|
| Nessuno spruzzo o spruzzo debole | Nozzle clogged; Paint too thick; Air cap blocked; Paint pot empty. | Clean nozzle and air cap; Thin paint to correct viscosity; Refill paint pot. |
| Modello di spruzzo non uniforme | Ugello parzialmente ostruito; impostazione errata del getto d'acqua; movimento irregolare. | Clean nozzle thoroughly; Adjust air cap for desired pattern; Maintain consistent distance and speed. |
| Vernice che gocciola o schizza | Paint too thin; Nozzle loose; Damaged seal. | Thicken paint slightly; Tighten nozzle; Check and replace seals if damaged. |
| Il motore funziona ma non spruzza vernice | Suction tube blocked; Paint pot not sealed correctly. | Clean suction tube; Ensure paint pot is securely attached and sealed. |
8. Specifiche tecniche
| Caratteristica | Specificazione |
|---|---|
| Nome del modello | PFSA 20-Li A1 |
| Fonte di alimentazione | Cordless (Requires PARKSIDE X 20 V Team Battery, sold separately) |
| Materiale | Acciaio inossidabile (componenti) |
| Paint Pot Volume | 1000 millilitri |
| Dimensioni degli ugelli | Ø1.8 mm, Ø2.6 mm |
| Max. Viscosità | 70 DIN-sec |
| Dimensioni del pacco | Dimensioni: 61.9 x 43.6 x 18.9 cm |
| Peso dell'articolo | 4.09 chilogrammi |
9. Informazioni sulla garanzia
PARKSIDE products are manufactured with care and undergo strict quality controls. This product is covered by a standard manufacturer's warranty against defects in materials and workmanship from the date of purchase. Please retain your proof of purchase for any warranty claims. The warranty does not cover damage caused by improper use, unauthorized repairs, or normal wear and tear. For specific warranty terms and conditions, please refer to the documentation provided with your product or contact PARKSIDE customer support.
10. Assistenza clienti
Should you have any questions about the operation, maintenance, or troubleshooting of your PARKSIDE Cordless Paint Spray Gun, please contact our customer support team. For the most up-to-date contact information, please visit the official PARKSIDE websito o fare riferimento ai recapiti indicati sulla confezione del prodotto.
Risorse online: Visit the official PARKSIDE website for FAQs, additional manuals, and product registration.
Hotline di assistenza: Please check your regional PARKSIDE website for local service numbers.