1. Introduzione
This manual provides detailed instructions for the proper installation, use, and maintenance of your lionto Balcony Safety Net. Designed to provide a secure environment for your cats on balconies, patios, or near windows, this transparent nylon net helps prevent falls and ensures your pet's safety. Please read all instructions carefully before installation and retain this manual for future reference.

Image 1.1: Cat observing through the installed safety net.

Image 1.2: Cat enjoying the view safely from a balcony.
2. Informazioni sulla sicurezza
Your safety and the safety of your pet are paramount. Please adhere to the following safety guidelines:
- This net is exclusively for securing pets. Do not use it as a climbing aid or safety net for children.
- Ensure the net is firmly tensioned and all fixing points are securely attached according to the instructions.
- Regularly check the item for damage. Do not continue to use if there is visible damage.
- Monitor the use of the net, especially with very active or heavy animals.
- Rischio di soffocamento: Non lasciare incustoditi in giro materiali di imballaggio e piccole parti.

Image 2.1: General safety warnings.
3. Contenuto della confezione
Prima di iniziare l'installazione, verificare che tutti i componenti siano presenti nella confezione:
- 1 x lionto Balcony Safety Net (transparent nylon)
- Fastening Rope
- Spine
- Screws (hook screws)
- Fascette per cavi
- Istruzioni di montaggio (questo manuale)
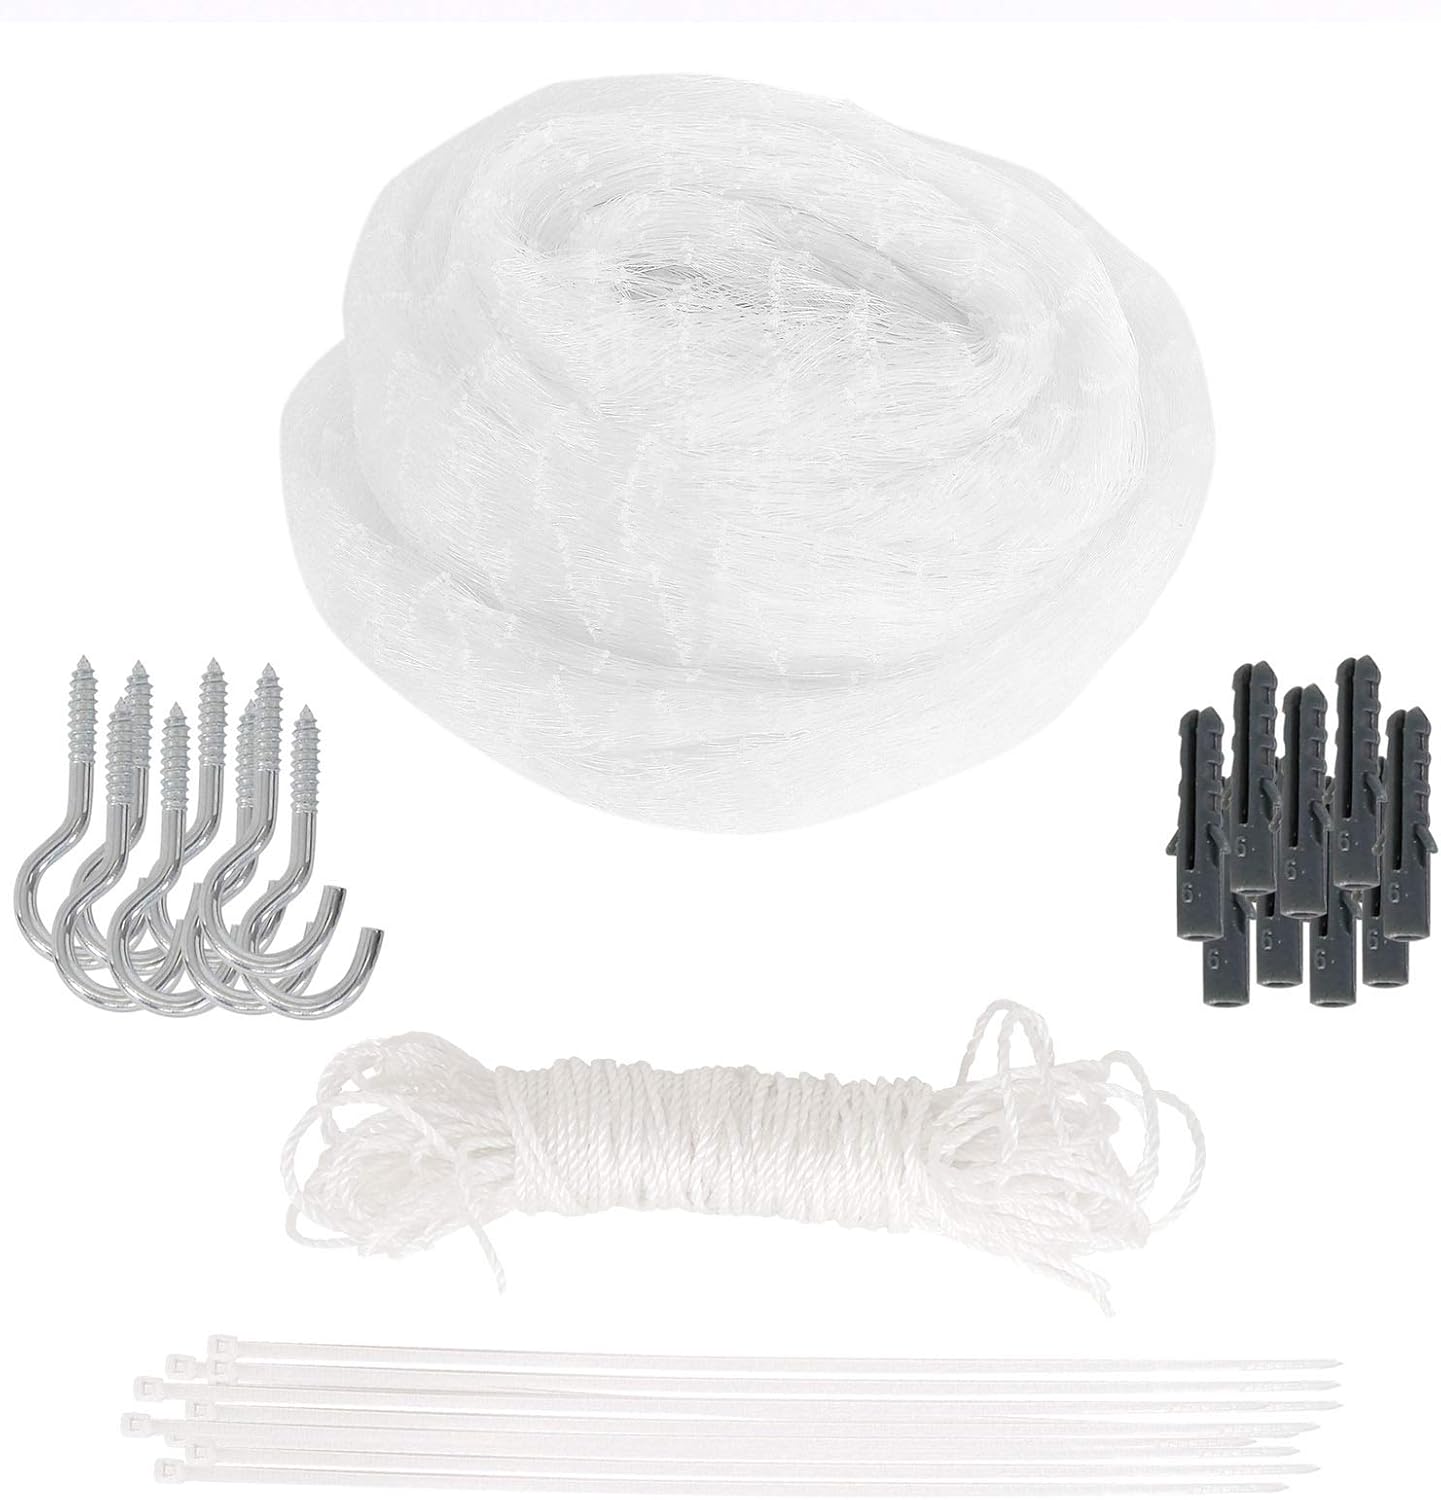
Image 3.1: Contents of the lionto Balcony Safety Net package.
4. Configurazione e installazione
The lionto Balcony Safety Net can be installed with or without drilling, depending on your specific needs and mounting surface. The net is designed to be cut to size for optimal adaptation.
4.1. Preparazione
- Misura l'area: Carefully measure the dimensions of the area where the net will be installed (balcony, window, patio).
- Cut the Net: If necessary, cut the net to the required size using scissors. Ensure you leave a slight excess for tensioning and securing.
- Raccogli strumenti: You may need a drill (if drilling), a measuring tape, and scissors.

Immagine 4.1: Es.ample net dimensions (3x4m) and rope length (15m).

Image 4.2: Detail of the net's mesh size (2.5cm x 2.5cm).
4.2. Fasi di installazione
- Secure the Corners: Begin by securing the four corners of the net to your chosen mounting points. Use the provided hook screws and plugs if drilling into a wall, or cable ties if attaching to railings or existing structures.
- Infilare la corda: Thread the fastening rope through the edges of the net. This rope will be used to tension the net and secure it to the mounting points. Ensure the rope is woven through multiple mesh squares for maximum strength.
- Attach to Mounting Points: Attach the rope to the remaining mounting points around the perimeter of the installation area. Use the hook screws, cable ties, or other suitable anchors.
- Tension the Net: Gradually pull the rope to tension the net evenly. The net should be taut and free of significant slack. Ensure all fixing points are secure and the net is stretched tightly.
- Fissaggio finale: Use the provided cable ties to further secure the net to the rope and any supporting structures, especially at intervals along the edges, to prevent gaps. Trim any excess net or rope if necessary.
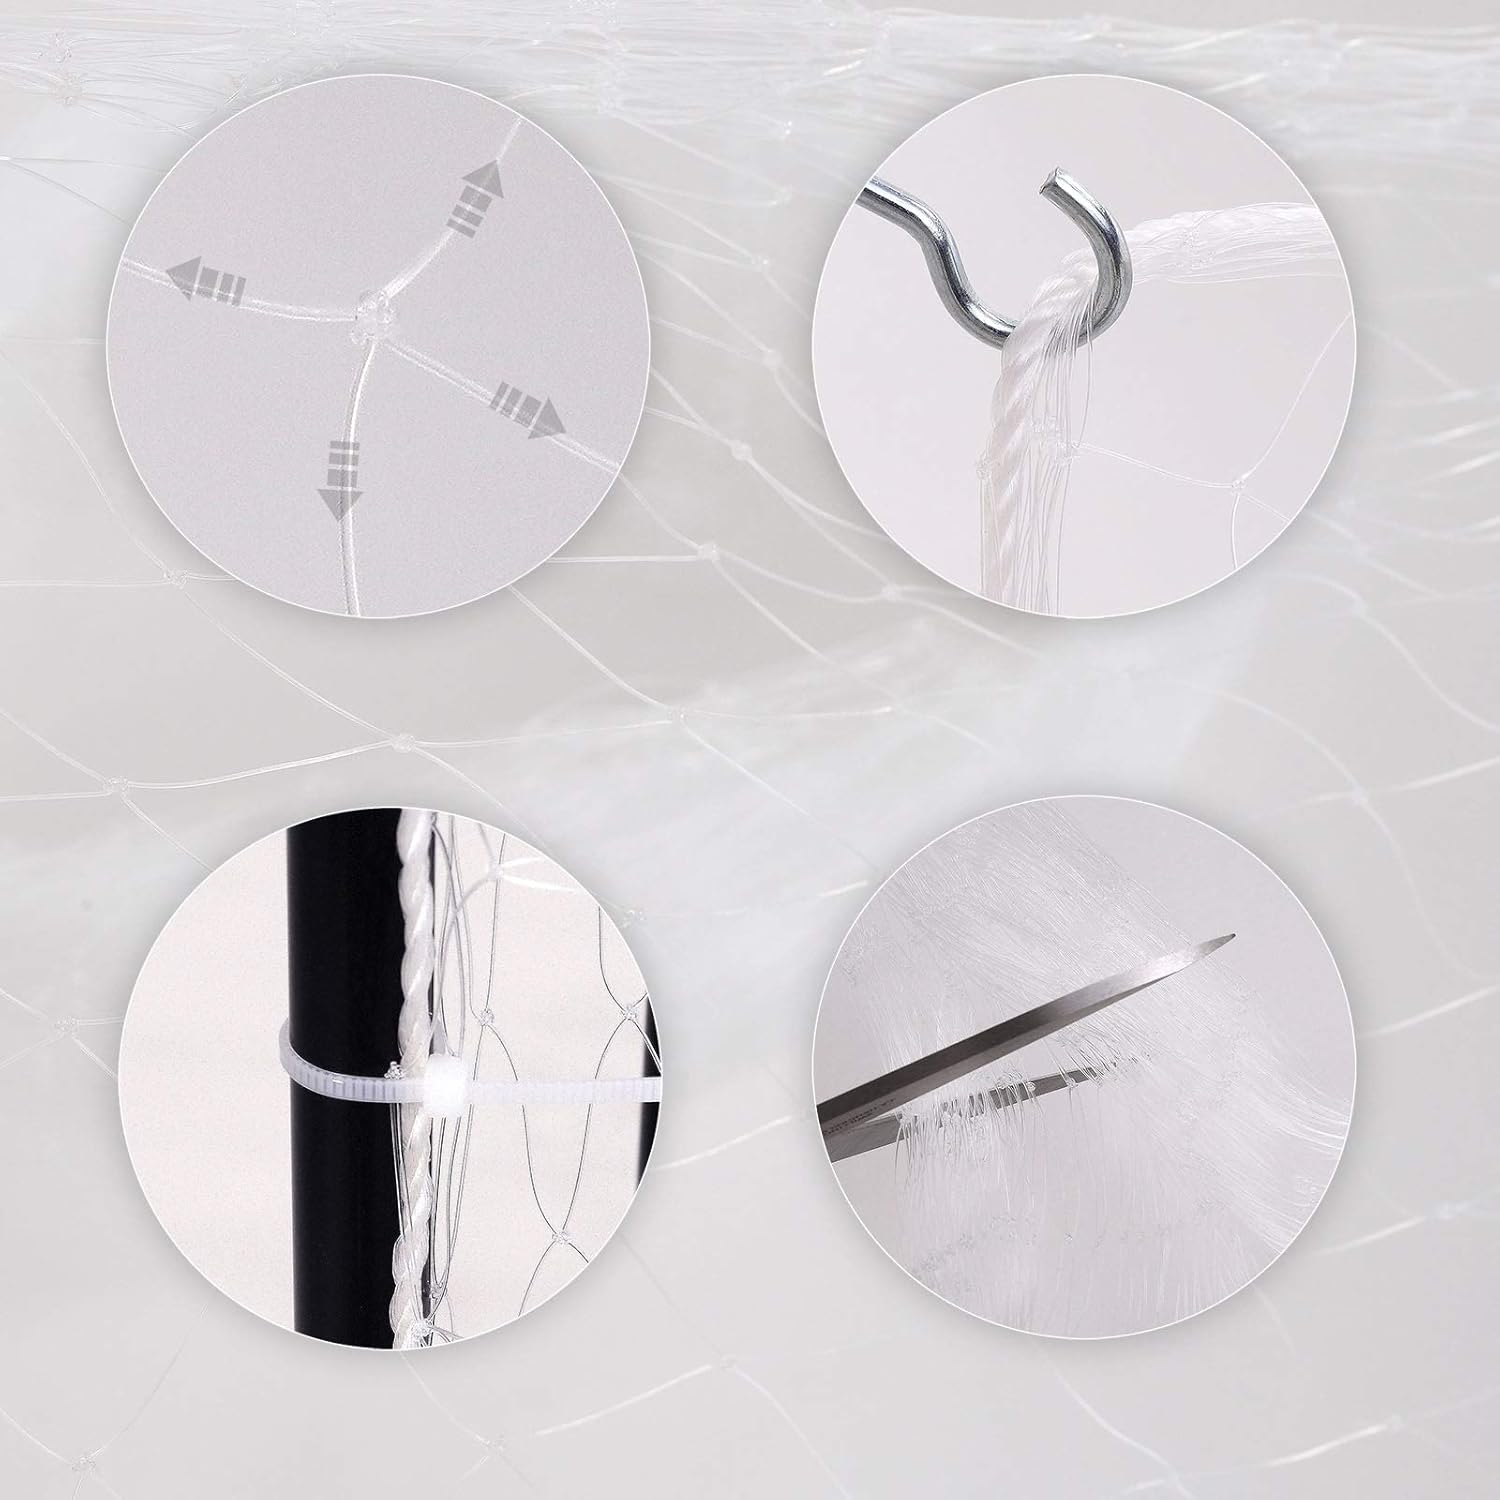
Immagine 4.3: Dettagliata views of net installation techniques.
5. Funzionamento e utilizzo
Once installed, the lionto Balcony Safety Net provides a secure barrier for your pets. Ensure the net remains properly tensioned and free of any gaps that a pet could exploit.
- Regularly inspect the net for any signs of loosening or damage.
- Do not place heavy objects against the net that could compromise its integrity.
- The transparent design allows for an unobstructed view while maintaining safety.

Image 5.1: Reminder to check net tension and fixing points.

Image 5.2: Net providing protection for pets in an outdoor setting.
6. Manutenzione
To ensure the longevity and continued effectiveness of your safety net, follow these maintenance guidelines:
- Ispezione regolare: Periodically check the entire net for any signs of wear, tears, fraying, or damage. Pay close attention to the edges and attachment points.
- Controllare la tensione: Ensure the net remains taut. Re-tension the fastening rope if any slack is observed.
- Pulizia: The net can be gently cleaned with a damp cloth and mild soap if it becomes dirty. Avoid harsh chemicals that could degrade the nylon material.
- Resistenza alle intemperie: The net is UV and weather resistant, but extreme weather conditions (e.g., heavy snow, strong winds) may require more frequent inspection.
- Sostituzione: If significant damage is found, replace the net immediately to ensure continued safety.

Image 6.1: Reminder to regularly check the net for damage.
7. Risoluzione Dei Problemi
If you encounter any issues with your lionto Balcony Safety Net, refer to the following common problems and solutions:
| Problema | Possibile causa | Soluzione |
|---|---|---|
| Net is sagging or loose. | Insufficient tension during installation; rope has stretched; attachment points are loose. | Re-tension the fastening rope. Check all attachment points and tighten screws or cable ties as needed. Ensure the rope is threaded securely. |
| Net has a tear or hole. | Wear and tear; pet chewing; accidental damage. | For minor damage, a strong, weather-resistant repair kit might be used, but for significant damage, replace the entire net immediately per garantire la sicurezza. |
| Net is difficult to install. | Complex balcony structure; incorrect measurements. | Review the installation steps. Consider seeking assistance for complex installations. Ensure accurate measurements before cutting. |
8. Specifiche
| Caratteristica | Dettaglio |
|---|---|
| Marca | leonessa |
| Numero di modello | CN00710 |
| Materiale | Nylon |
| Colore | Trasparente |
| Dimensione della maglia | Approximately 2.5 cm x 2.5 cm (1 x 1 inch) |
| Dimensions (S) | 3 x 4 metri (118.1 x 157.5 pollici) |
| Peso dell'articolo | 13.12 once |
| Caratteristiche | UV resistant, Weather resistant, Bite and tear resistant |
| Componenti inclusi | Cat safety net, fastening rope, plugs, screws, cable ties |
9. Garanzia e supporto
Specific warranty information for the lionto Balcony Safety Net is not provided in this manual. For details regarding warranty coverage, returns, or technical support, please refer to the product's original packaging or contact the retailer or manufacturer directly.
Manufacturer: dibea GmbH & Co. KG