
1. Prodotto finitoview
The Smart Sensor AR3126 is a high voltage insulation resistance tester, commonly referred to as a megohmmeter. This instrument is designed for measuring the insulation resistance of various electrical equipment, including generators, motors, power transformers, wiring, and other electrical appliances. It is an essential tool for routine maintenance procedures, helping to identify potential faults by monitoring changes in insulation resistance over time. Regular calibration is recommended to ensure the accuracy and reliability of the meter.
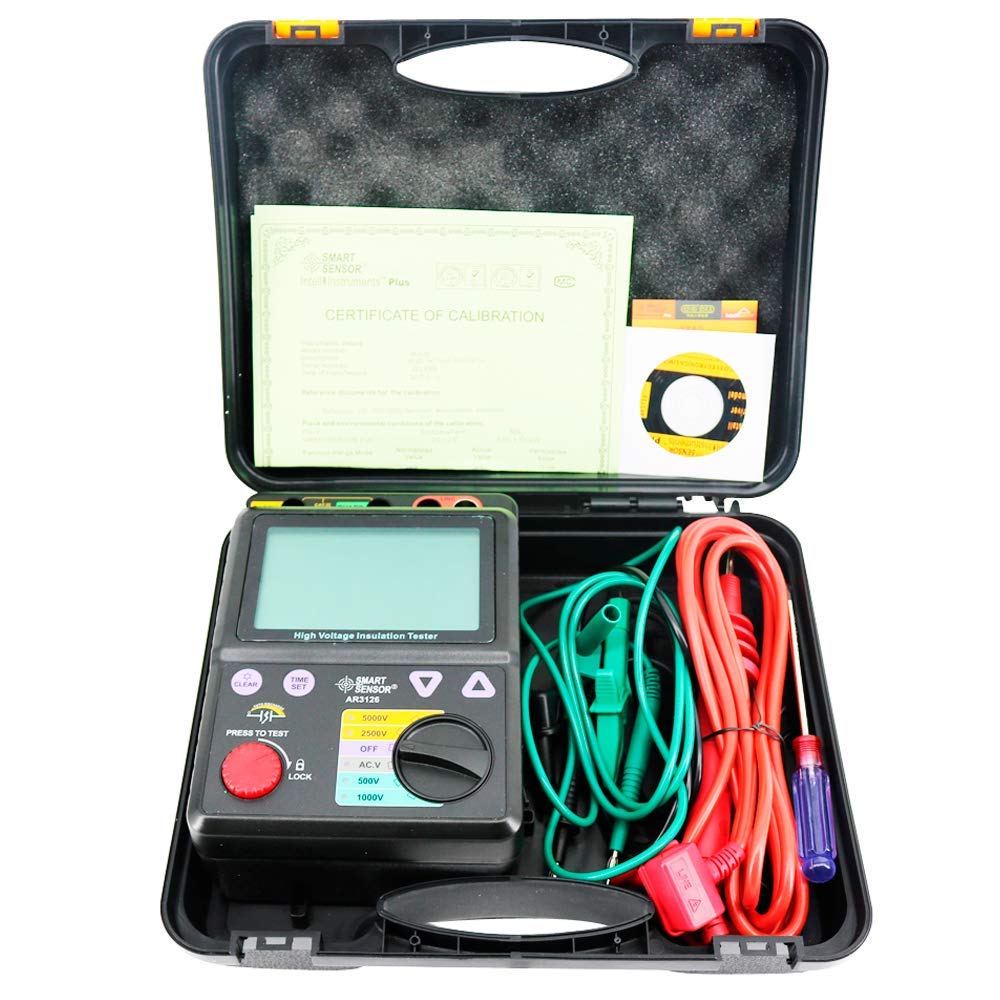
Figura 1: Fronte view of the AR3126 tester, displaying a high voltage insulation resistance measurement.
2. Informazioni sulla sicurezza
Before operating the AR3126, please read and understand all safety warnings and operating instructions. Failure to do so may result in serious injury or damage to the instrument. This device generates high voltage; always exercise extreme caution.
- Ensure the device is turned off and disconnected from any power source before performing any maintenance or battery replacement.
- Always use appropriate personal protective equipment (PPE) when working with high voltage.
- Non utilizzare il tester in condizioni di umidità o in presenza di gas o vapori esplosivi.
- Verify that test leads are in good condition, without any damage or exposed wiring.
- Never touch the test leads or the circuit under test during a measurement.
- Discharge the circuit completely after testing high voltage insulation resistance.
3. Impostazione e preparazione
3.1 Installazione della batteria
The AR3126 requires 8 C-type batteries for operation. To install or replace batteries:
- Ensure the tester is powered off.
- Individuare il vano batteria sul retro del dispositivo.
- Aprire il coperchio del vano batterie.
- Insert 8 C-type batteries, observing the correct polarity (+/-) as indicated inside the compartment.
- Chiudere saldamente il coperchio del vano batterie.

Figure 2: Open battery compartment for C-type battery installation.
3.2 Collegamento dei puntali di prova
Connect the provided test leads to the appropriate terminals on the top of the AR3126:
- Connect the green lead to the 'EARTH' terminal.
- Connect the black lead to the 'GUARD' terminal (if required for specific measurements).
- Connect the red lead to the 'LINE' terminal.

Figure 3: AR3126 tester with included test leads and accessories.
4. Istruzioni per l'uso
4.1 Accensione/Spegnimento
To power on the device, rotate the rotary switch from the 'OFF' position to any desired test voltage (e.g., 500V, 1000V, 2500V, 5000V) or 'AC.V' for voltage measurement. To power off, rotate the switch back to 'OFF'.
4.2 Selezione del volume di provatage
The AR3126 offers multiple rated test voltages: 500V, 1000V, 2500V, and 5000V. Select the appropriate voltage for your application using the rotary switch on the front panel.
4.3 Esecuzione di un test di resistenza di isolamento
- Assicurarsi che il circuito sottoposto a test sia disattivato e isolato in modo sicuro.
- Connect the test leads to the circuit: 'LINE' to the conductor, 'EARTH' to the ground or protective earth. Use 'GUARD' if a guard ring measurement is required to eliminate surface leakage currents.
- Selezionare il volume di prova desideratotage utilizzando il commutatore rotante.
- Press and hold the red 'PRESS TO TEST' button. The display will show the insulation resistance value. For continuous testing, press the 'LOCK' button while holding 'PRESS TO TEST'.
- Osservare la lettura sul display digitale.
- Release the 'PRESS TO TEST' button to stop the test. The device will automatically discharge the circuit.
4.4 CC/CA Voltage Prova
Per misurare il volume DC o ACtage (range 30-600V), rotate the switch to the 'AC.V' position. Connect the test leads to the voltage source. The display will show the measured voltage.
5. Manutenzione
5.1 Pulizia
Pulire l'esterno dello strumento con un panno morbido, damp cloth. Do not use abrasive cleaners or solvents. Ensure the device is powered off and disconnected from any test leads before cleaning.
5.2 Sostituzione della batteria
Sostituire le batterie quando sul display compare l'indicatore di batteria scarica o quando il dispositivo non si accende. Fare riferimento alla Sezione 3.1 per le istruzioni di installazione delle batterie.
5.3 Conservazione
When not in use, store the AR3126 in a dry, cool environment, away from direct sunlight and extreme temperatures. If storing for extended periods, remove the batteries to prevent leakage.
5.4 Calibrazione
Regular calibration is necessary to maintain the accuracy of the AR3126. It is recommended to have the instrument calibrated by a qualified service center at least once a year, or as required by your quality assurance program.
6. Risoluzione Dei Problemi
- Il dispositivo non si accende: Controllare l'installazione delle batterie e assicurarsi che non siano scariche. Sostituirle se necessario.
- 'OL' (Overload) displayed during insulation test: This indicates that the measured resistance is higher than the maximum range of the selected voltage. This is often a normal reading for good insulation.
- Letture imprecise: Ensure test leads are properly connected and in good condition. Verify the circuit under test is clean and dry. Consider professional calibration if issues persist.
- No reading during test: Ensure the 'PRESS TO TEST' button is held down or 'LOCK' is engaged. Check for loose connections.
7. Specifiche
| Parametro | Valore |
|---|---|
| Volume nominaletage | 500V / 1000V / 2500V / 5000V |
| Testing Range (500V) | 0.0 ~ 999MΩ |
| Testing Range (1000V) | 0.0 ~ 1.99GΩ |
| Testing Range (2500V) | 0.0 ~ 99.9GΩ |
| Testing Range (5000V) | 0.0 ~ 1000GΩ |
| Precisione | ±2% lettura ±3 cifre |
| Volume CC/CAtage Prova | 30 ~ 600 V |
| Voltage Risoluzione | 1.0V |
| Protezione da sovraccarico | AC 1200V / 10 seconds |
| Resisti al Voltage | AC 8320V / 5 seconds |
| Insulated Impedance | 1000 MΩ |
| Corrente massima di cortocircuito | 1.4mA |
| Indice di polarizzazione (PI) | SÌ |
| Rapporto di assorbimento dielettrico (DAR) | SÌ |
| Fonte di alimentazione | 8 batterie di tipo C |
| Peso netto del prodotto | 1027g |
| Dimensioni del prodotto | 153 x 213 x 95 mm |
| Materiale | Plastica |
8. Informazioni sulla garanzia
Specific warranty details for the Smart Sensor AR3126 are not provided in this manual. Please refer to the warranty card included with your product or contact the seller/manufacturer directly for comprehensive warranty terms and conditions.
9. Supporto
For technical assistance, service, or further inquiries regarding the Smart Sensor AR3126, please contact your point of purchase or the Smart Sensor customer support. Contact information can typically be found on the product packaging or the manufacturer's official websito.